Add Custom Android Native View In React Native As a Component
A recent React Native project at the company came with an additional requirement of integrating a video player within the application.
There already are a lot of React Native video players available, but almost all of them come with inherent shortcomings. We could not find one with the perfect implementation of overlays and other customizations which were required in our project.
This led us to develop our own native component for use in the application.
This blog will help you understand how to integrate an Android native view, or a custom view, in a React Native application as a component.
Step-1: Create the view
The React Native application contains folders for the Android and iOS native codes. Open the Android code using Android Studio and create the custom view (video player) using the native code. In our project, we developed the custom video player using Exp-player for Android in the native Android code.
Step-2: Create custom ViewManager class
Native views are created and manipulated by extending ViewManager or more commonly SimpleViewManager. A SimpleViewManager is convenient in this case because it applies common properties such as background color, opacity, and Flexbox layout.
In this step, we write a class which inherits from SimpleViewManager. In this class, we select which Android view is going to be used in the React Native code.

Here SimpleViewManager<VideoView> is used to expose the Android native view to the React Native code.
Step-3: Implement createViewInstance method
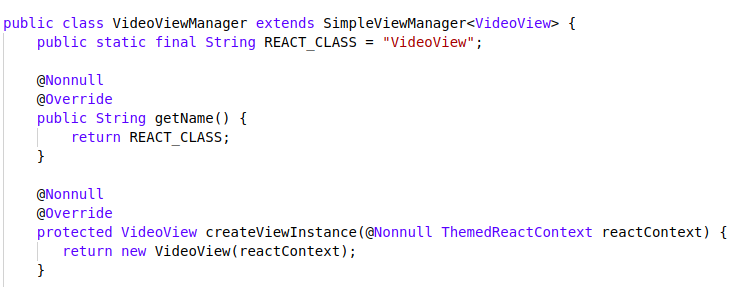
Name returned by the getName() method is used to reference the native view type from JavaScript.
Views are created in the createViewInstance method. The view should initialize itself in its default state and any properties will be set via a follow-up call to update the view.
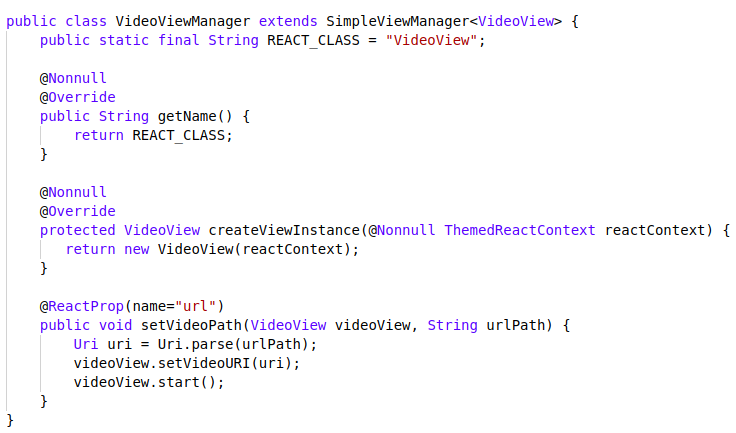
Step-4: Expose view property setters using @ReactProp (or @ReactPropGroup) annotation
If we want to send some data from the React Native code to our component using props, we have to define a method in our component to accept it. For example, we defined setVideoPath in our component class.
Step-5: Create a packaging module
Since we are all set with the VideoViewManager class, now we have to register this manager class to be called from the React Native module using a Packaging module.
For this, we write a class that implements the ReactPackage interface. In the createViewManager() method, we instantiate the ViewManager class that we want to expose to the React Native code.

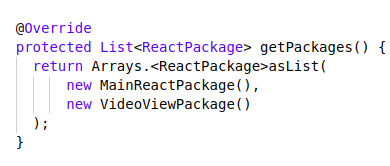
Step-6: Add the package module to the application class
In the application class of the React Native project, add the package module in the getPackage() method.
Step-7: Implement the javaScript module
The final step is to create a JavaScript module that defines the interface layer between Java and JavaScript for the users of the new view. To implement this, we create VideoView.js in the src folder as defined below.
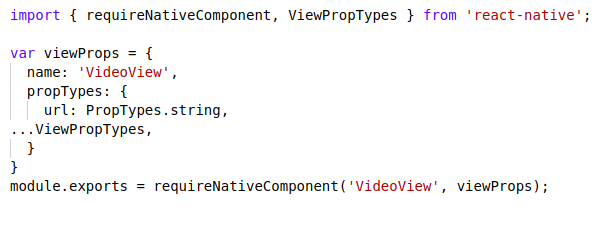
Here, the first parameter for requireNativeComponent is the same one which we have already defined in ViewManager and returns by the getName() method.
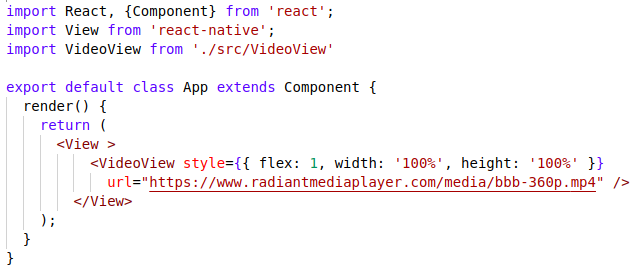
Step-8: Use the component
Finally, we are ready with the native component to use in our React Native code.
Thank you for reading the blog. I hope you enjoyed it and found this to be helpful. 🙂