
Setup AMAZON AURORA DB Cluster
AWS announced its new database service for customers called “Amazon Aurora” which I have been waiting for since a long time. It delivers up to 5X performance of MySQL with high availability in 3 different regions. As it is new to all of us, so today we will be having hands on experience on AURORA Cluster for MySQL.
I have segregated the whole section into three parts:-
1. Launch Aurora DB Cluster
2. Multi Availability Zone Setup
3. Failover Test
Before moving ahead first I want to introduce some of it’s features and limitation:-
a. Aurora DB cluster is only available in us-east-1, us-west-2 and eu-west-1 regions.
b. It supports up to 15 Aurora Replicas where RDS supports only 5 read replicas.
c. It supports the only InnoDB engine.
d. It supports only MySQL version 5.6.
e. Maximum storage size 64 TB.
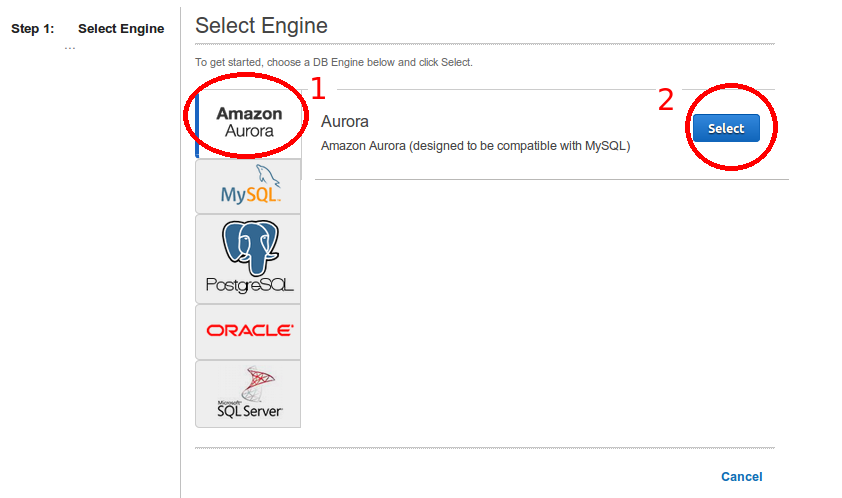
1. Launch Aurora DB Cluster-
To launch Aurora cluster login into your console and navigate to
AWS–> Services –> RDS –> Launch instance.
You can see “Amazon Aurora” right above Mysql and if it is not visible in your console, please ensure you are in the correct region.
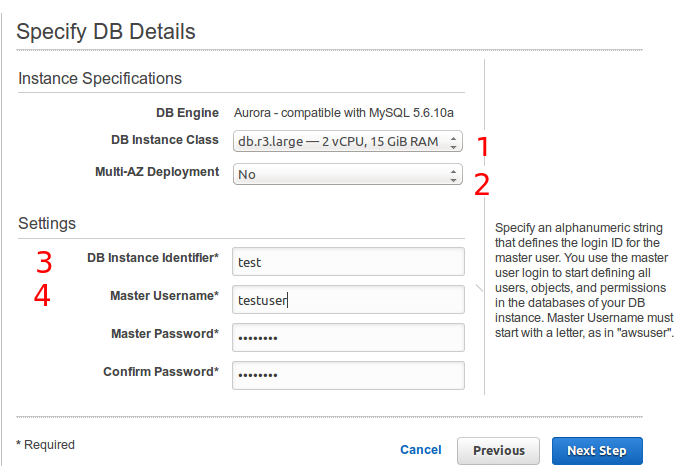
When we talk about its performance, Aurora use a separate process to store more used queries and this is called in-memory page cache.
In the case of db failure, it uses cache warming mechanism to preload commonly used queries in buffer pool from the in-memory page cache. This survivable feature needs more memory and I think that’s the reason it supports only memory intensive instances such as r3.large and of above configuration.
We are creating an instance in single AZ with the username “testuser”. We can’t use “mysql” as db user name as it is already reserved and if you do so it will give you an error message:- “Master Username mysql cannot be used as it is a reserved word used by the engine”.
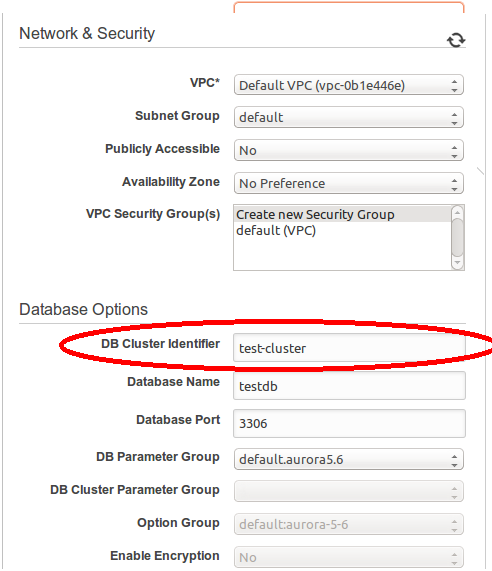
In next window fill, all required network and DB detail. You may get confused between “DB instance Identifier” and “DB Cluster Identifier”. To understand this, let’s consider we are running Aurora DB cluster with one primary instance to write queries and 4 replica instance to read queries. Each instance in the cluster has its own unique endpoint. When you connect with cluster endpoint, the traffic will be routed to your primary instance. In the case of failover, the cluster endpoint will refer to the new primary instance. In other words, you can say cluster endpoint will always refer to running instance. So to achieve high-availability we must use cluster endpoint.
Just below “Database options” select your backup and maintenance strategy. It always retains one copy of a database. As in RDS, we can set “Backup Retention Period” value to zero but in Aurora the minimum value is one.
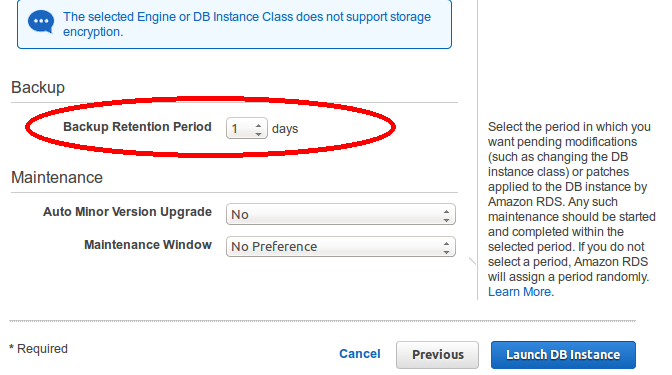
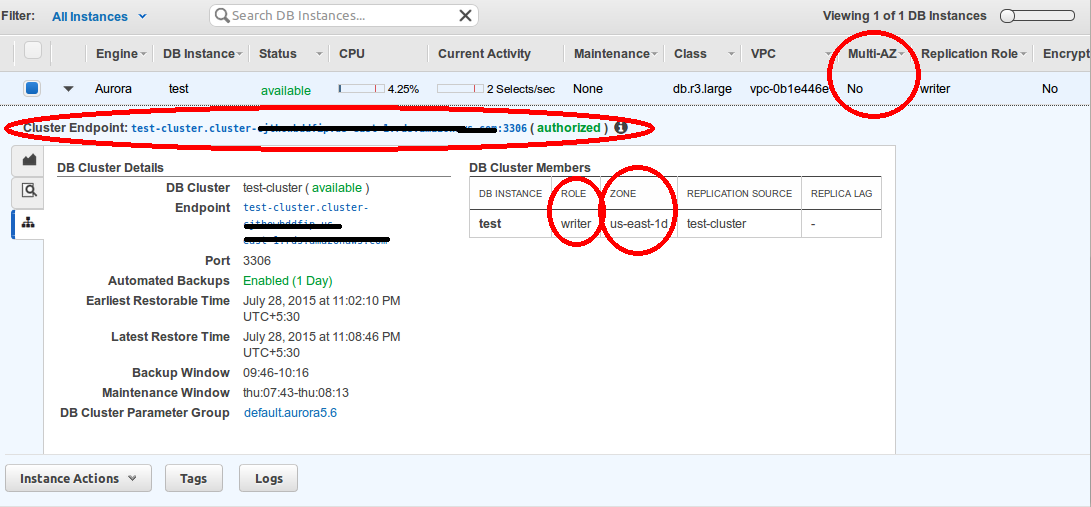
Click on Launch DB Instance and your DB cluster will be available after few minutes. As you can see it is a single AZ cluster and in DB cluster table we have only one instance with writer role running in the us-east-1d zone.
2. Multi Availability Zone Setup:-
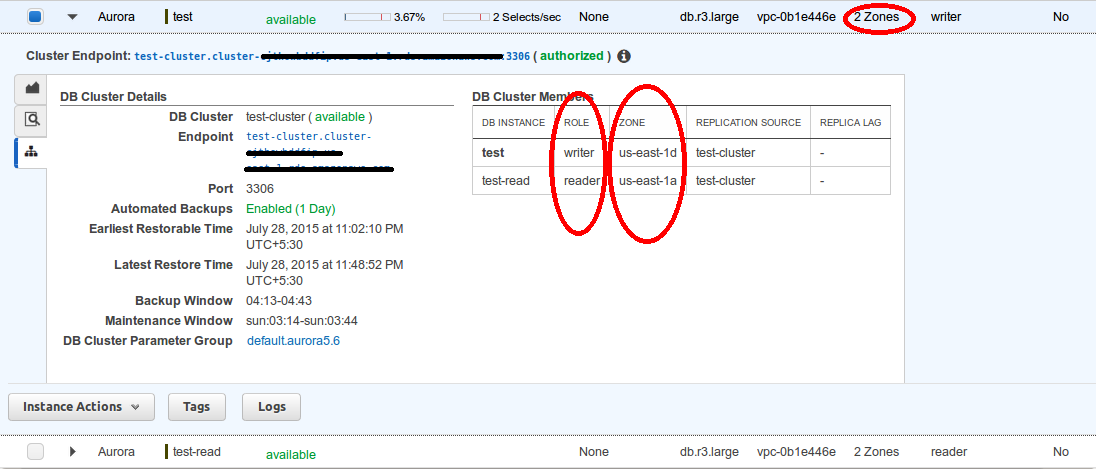
To convert existing environment into multi-availability zone, we need to add one more member in db cluster. We are going to create a replica node within the cluster. It is quite simple as we were doing in RDS, it’s a single click operation. So here we have read replica with name “test-read”, role “reader” and now our cluster is in multi-AZ.
3. Failover Test:-
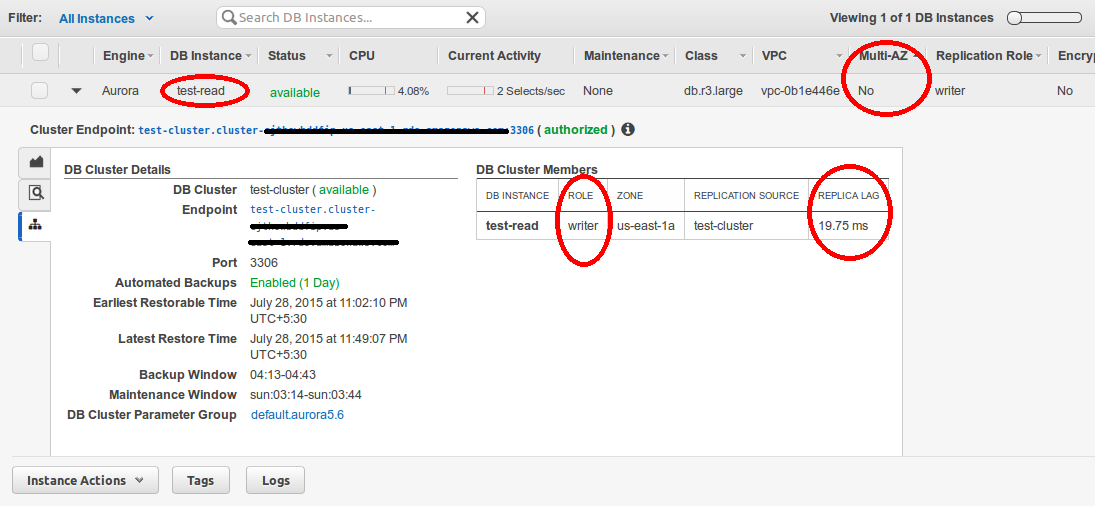
Last but not the least we are going to test failover scenario. I have deleted the primary instance to force failover.

It will take some time to finish the whole task. When we again check our cluster, we will notice our primary DB instance (test) no longer exist within the cluster. When we check the cluster member table, we will observe the reader replica is populated as primary instance as its role has changed to the writer. The replica lag is our down time which is in milliseconds and according to amazon average recovery time of failover is less than a minute.
If you noticed when we were launching Aurora cluster in Amazon Services there is no option to set storage size. The default minimum storage value is 10Gb and as our database size increases, the storage space will grow up automatically by 10GB up to 64TB. There would be no overhead in provisioning the storage in Aurora. I hope this post would help to gain a better understanding of Amazon Aurora.
Reference:
http://docs.aws.amazon.com/AmazonRDS/latest/UserGuide/CHAP_Aurora.html


I have follow the steps from your blog its works for me, can you please provide a step to create same instance using awscli, i tried using aws documentation but not working for me its giving me lots of errors for which i am not able to find the solution.
please share your commments.
Read this post to know how can you database size increases as GB OR MB to setup your internet connections properly.