It is painfully inefficient to check metrics across a large collection of AWS accounts (development, staging, uat, production, etc.). This is a major time waster, not just a small irritation. In addition to wasting valuable engineering time, you run a much higher risk of missing an alert that could result in a full-blown outage every time you jump consoles or set up a redundant alarm.
Use Case
This setup shines when you want one central monitoring account to see all CloudWatch metrics from your source accounts. From there you can:
- Build unified dashboards
- Set up centralized alarms and notifications (e.g., via SNS)
- Investigate issues without logging into every account
- Scale alerting for production environments
It’s especially useful for EC2, EKS, Lambda, or any service emitting CloudWatch metrics. Once linked, the monitoring account treats source metrics almost like native ones for graphing, alarming, and dashboards.
The feature relies on Observability Access Manager (OAM) and is Region-specific.
Prerequisites
- Admin-level access (or IAM policies for
oam:*actions for the POLP) in both accounts. - Same AWS Region for sink and links (repeat setup per Region).
- Source account IDs handy.
Setup Steps
Monitoring Account (Central Management Account)
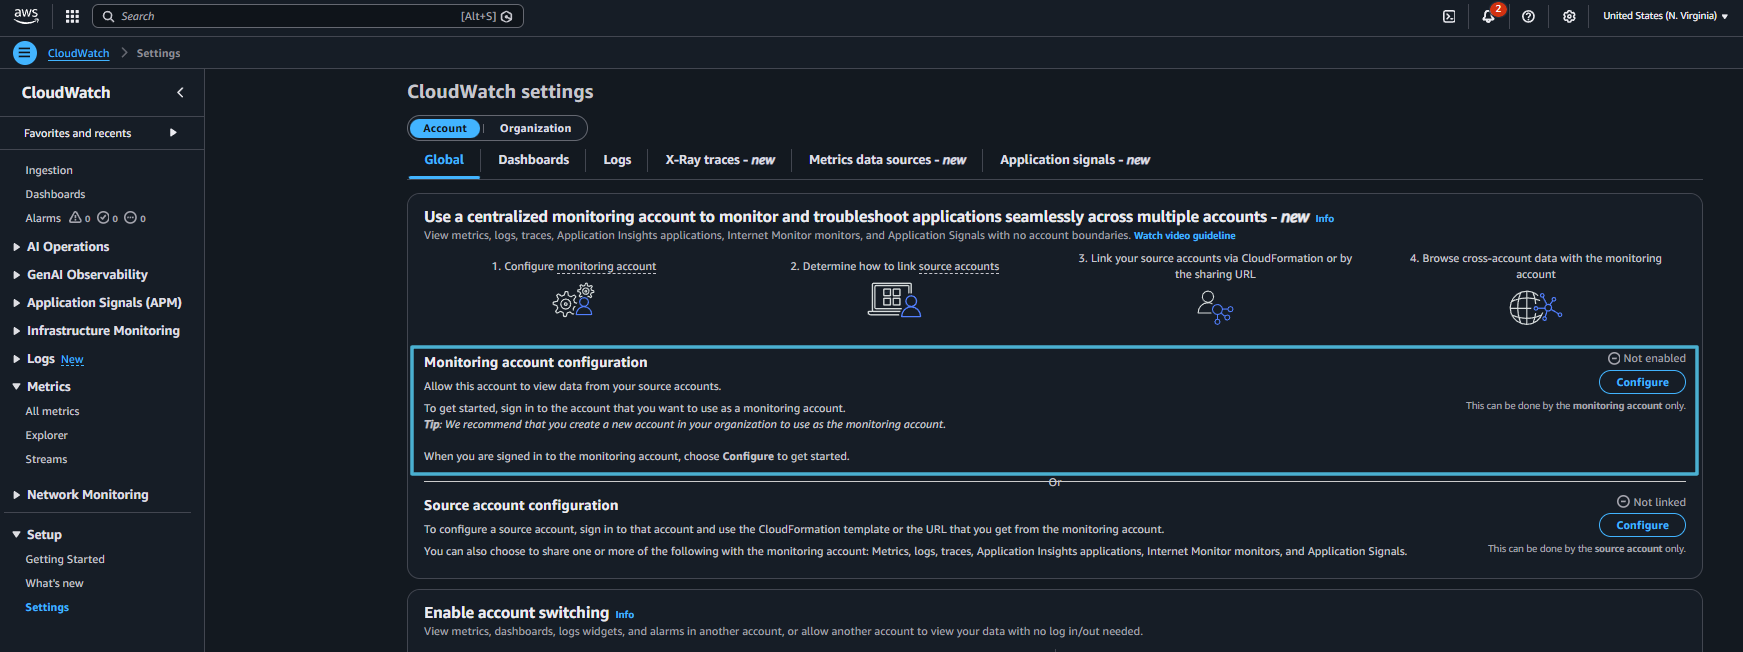
- Log in to the AWS Console with your central management account. Go to CloudWatch → Settings

CloudWatch Settings
- Under Monitoring account configuration, click Configure.
CW Monitoring Account Setup
- Select Metrics as the data type to make visible from source accounts. Enter the source account ID. For Account label, choose Account Name. Click Confirm. This creates the OAM sink.
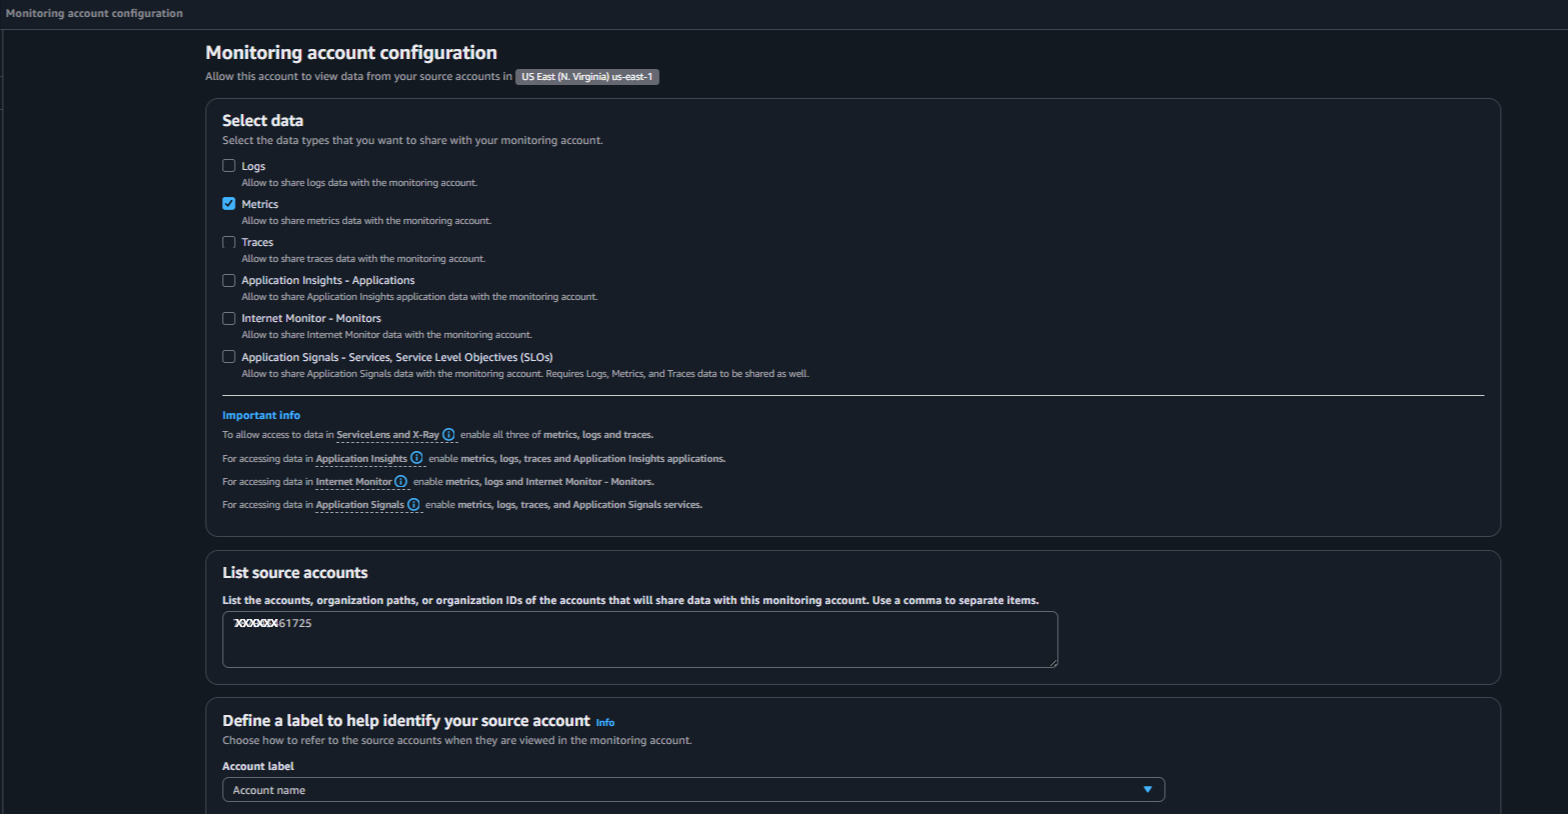
Configure OAM Sink
- The monitoring setup is done. Now copy the Sink ARN: Still in Settings → Monitoring account configuration → look under configuration details or Manage monitoring account section. Copy the full ARN.
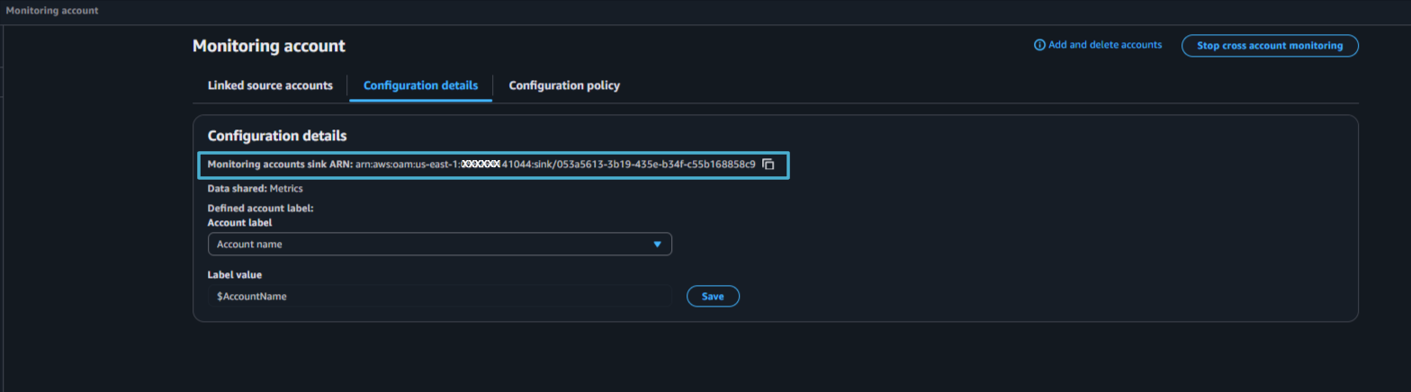
Sink ARN
Source Account
- Log in to the source account. Go to CloudWatch → Settings.
- Click Configure source account.
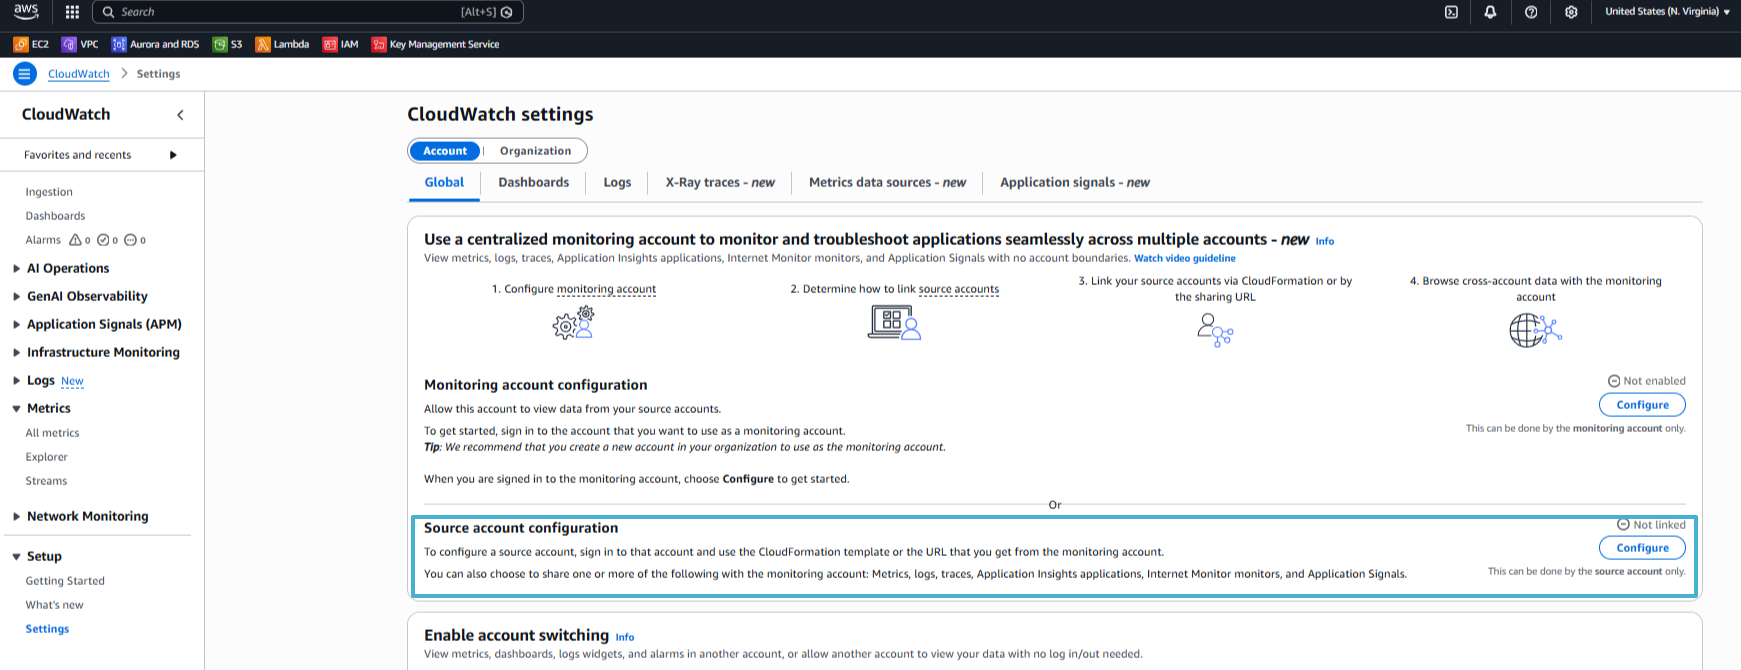
CW Source Account Config
- Select Metrics as the data type. Paste the Monitoring account Sink ARN from step 4. Set Account label to Account Name. Click Link and Confirm. This creates the OAM link from source → monitoring.
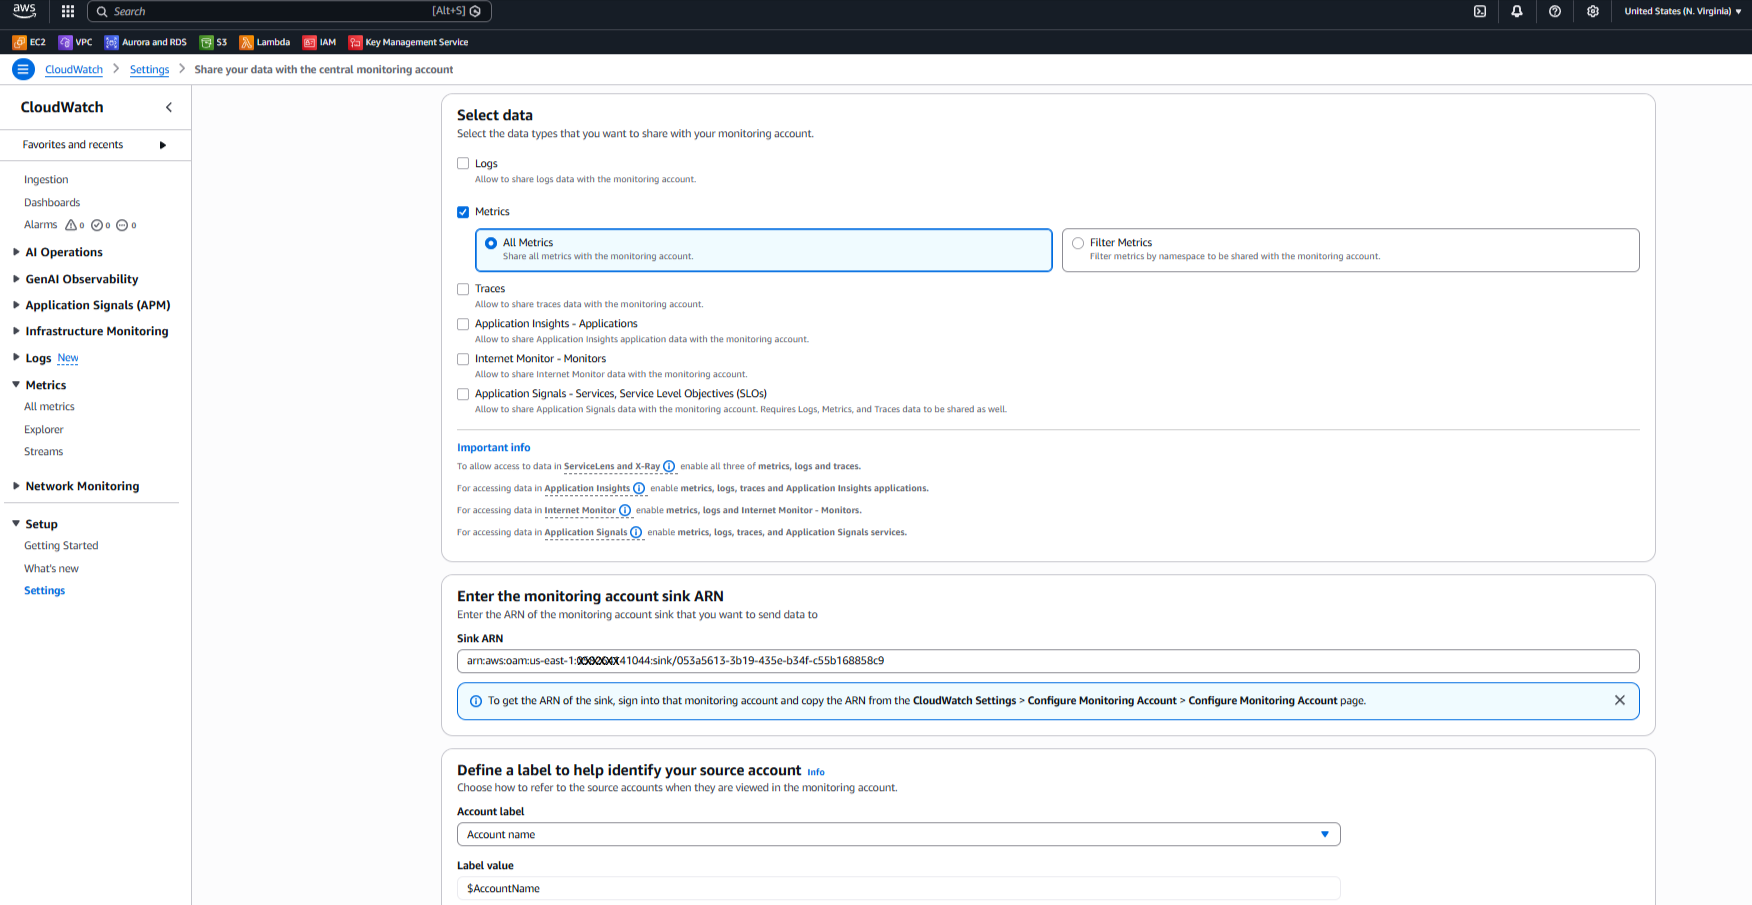
Setup OAM Link
- That’s it for configuration. Metrics can be visible in 10 – 15 minutes in the monitoring account.
Verification
- In the source account: Go to CloudWatch → Metrics → All metrics → AWS/EC2 (or Per-Instance Metrics). Confirm your EC2 metrics (CPUUtilization, NetworkIn, etc.) are emitting normally.
EC2 metrics – Source Account
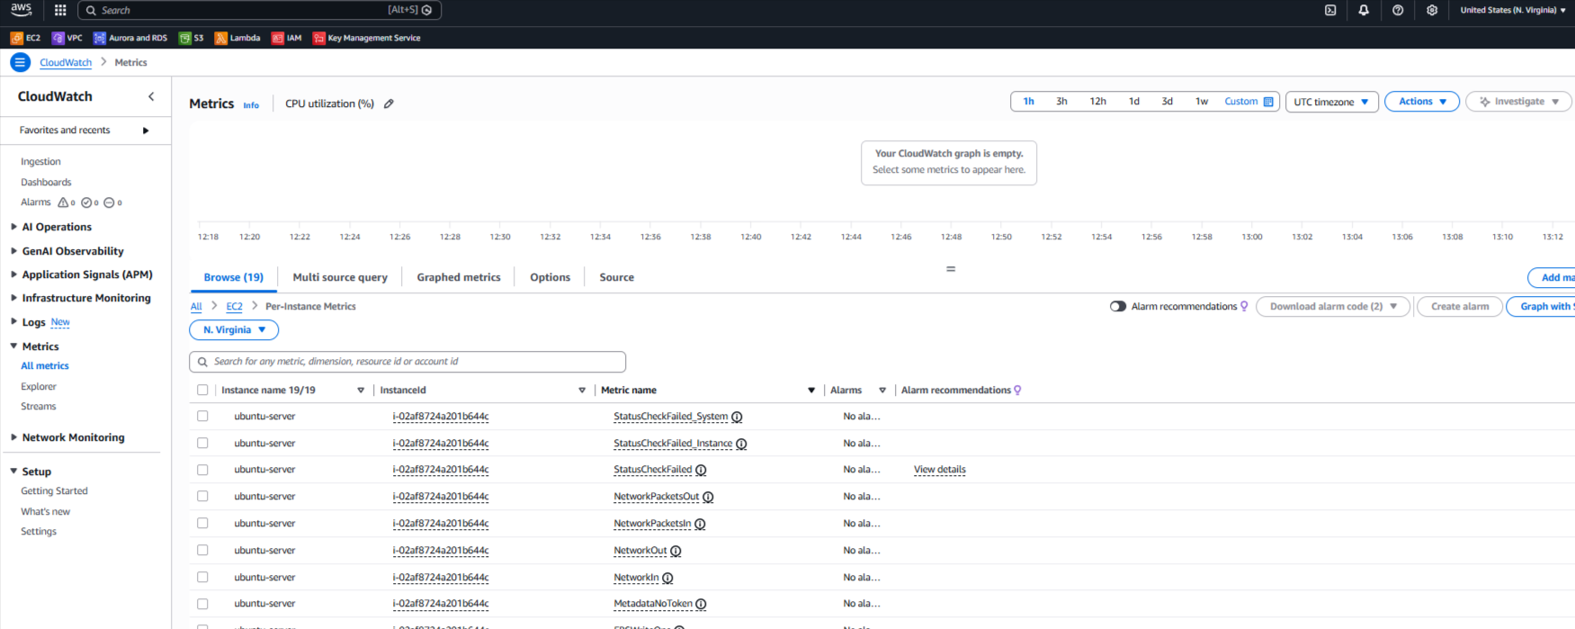
- In the monitoring account: Go to CloudWatch → Metrics → All metrics. Browse AWS/EC2 namespace. Metrics should appear with InstanceId dimensions. You can now create alarms, add to dashboards, or set up alerting – all centralized.

EC2 metrics – Monitoring Account
Adding More Source Accounts to an Existing Monitoring Account
If you already have the monitoring account configured:
- In monitoring account: CloudWatch → Settings → Configuration Policy (or Manage monitoring account policy).
- Edit policy. Update the Principal section to include additional account IDs:
"Principal": {"AWS": ["12121212121212", "12121212121212"]} - Save the updated policy.
- In each new source account: Repeat steps 5-7 (configure source, paste existing Sink ARN, set label).
Key Considerations
- Historical Data: You don’t begin at zero. After linking, all historical metrics kept in the source account are instantly accessible to the monitoring account.
- Region Specificity: OAM Sinks are Region-specific. If you have resources in us-east-1 and eu-west-1, you must repeat this setup for both Regions.
- No Extra Cost: CloudWatch cross-account observability for metrics and logs comes at no additional cost. You only pay for the underlying metrics and logs ingestion.
Conclusion
Once set up, this turns fragmented monitoring into a single pane of glass-perfect for faster troubleshooting and cleaner alerting. You no longer need to “context switch” between accounts to understand the health of your entire stack.
Automate Cross-Account Observability with AWS Organizations
If you are managing a large number of accounts, manually linking each one is inefficient. (For a detailed, organization-level guide on this automation, see our companion blog: ‘From Zero to Hundreds: Onboarding Your Entire AWS Fleet to Centralized CloudWatch in Under an Hour‘.)
- Automatic Onboarding: To have new accounts added automatically, designate your entire AWS Organization or certain Organisational Units (OUs) as the “Source.”
- CloudFormation StackSets: Deploy the OAM “Link” to all current and future accounts automatically using StackSets. New accounts gain instant visibility in your central monitoring hub without manual intervention.
- Centralized Governance: Manage permissions and ensure observability is never accidentally disabled by enforcing controls at scale using Service Control Policies (SCPs).