If you’ve ever had to jump between six different AWS accounts just to figure out why one Lambda function is behaving oddly – you already know the pain. Multi-account AWS environments are great for security and governance, but they can turn basic monitoring into a logistical nightmare.
The good news? AWS gives you everything you need to fix this – and once it’s set up, it practically runs itself. In this guide, I’ll walk you through how to centralize AWS CloudWatch cross-account monitoring using Observability Access Manager (OAM), AWS Organizations, and CloudFormation StackSets. We’re talking one dashboard, one alarm setup, one place to rule them all.
This builds directly on the concepts in our companion post, How to Centralize AWS Monitoring: A Guide to CloudWatch Cross-Account Metrics. If you’re starting from scratch, give that a read first – it’ll give you the foundation you need before diving into the automation we’re covering here.
Why Centralize CloudWatch Monitoring with AWS Organizations?
- A single pane of glass: EC2, Lambda, EKS, RDS – all your metrics in one place, searchable by account name or ID.
- Unified dashboards and alarms: Build cross-account dashboards and set up SNS notifications from one account, not twenty.
- Faster troubleshooting: Correlate issues across accounts without logging in and out repeatedly.
- Zero-effort scaling: New AWS accounts added to your organization automatically get linked – no manual setup required.
- No extra cost: You only pay for your normal CloudWatch usage. The cross-account observability layer itself doesn’t add to your bill.
- Instant historical data: Once a source account links, all its retained metric history becomes visible immediately in your monitoring account.
Important note: This is Region-specific (e.g., repeat for us-east-1, eu-west-1). OAM works best with AWS Organizations for automatic linking.
Prerequisites
- AWS Organizations enabled with member accounts
- Admin access in the management account (for StackSets)
- Delegated admin permissions if needed (often the management account handles this)
- Choose your central monitoring account (can be the management account or a dedicated one)
- Target Region ready (e.g., N. Virginia / us-east-1)
Step-by-Step Setup: Configure Centralized Monitoring
In the Monitoring Account
- Log in to the AWS Management Console and go to AWS Organizations and confirm your org is set up correctly.
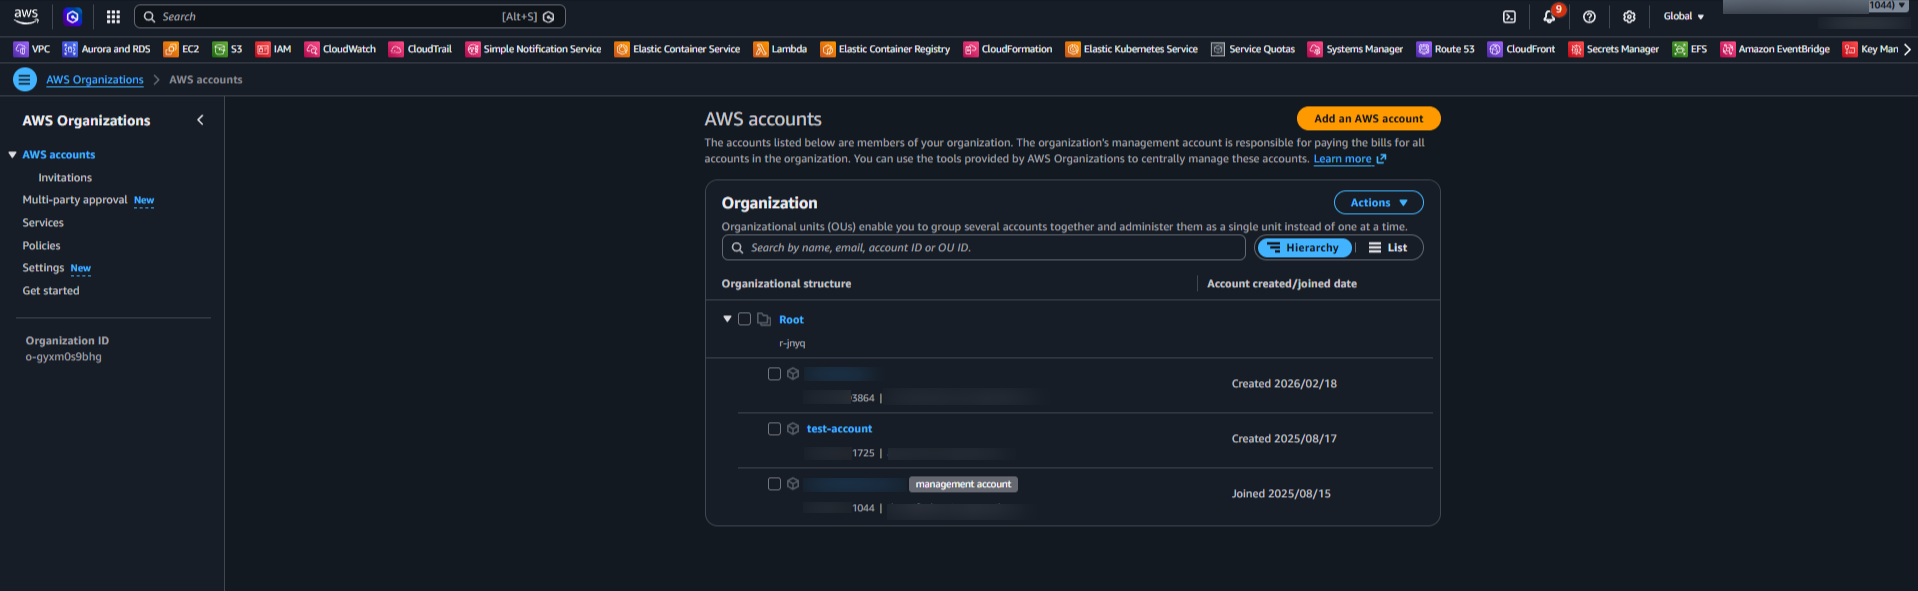
AWS Organizations
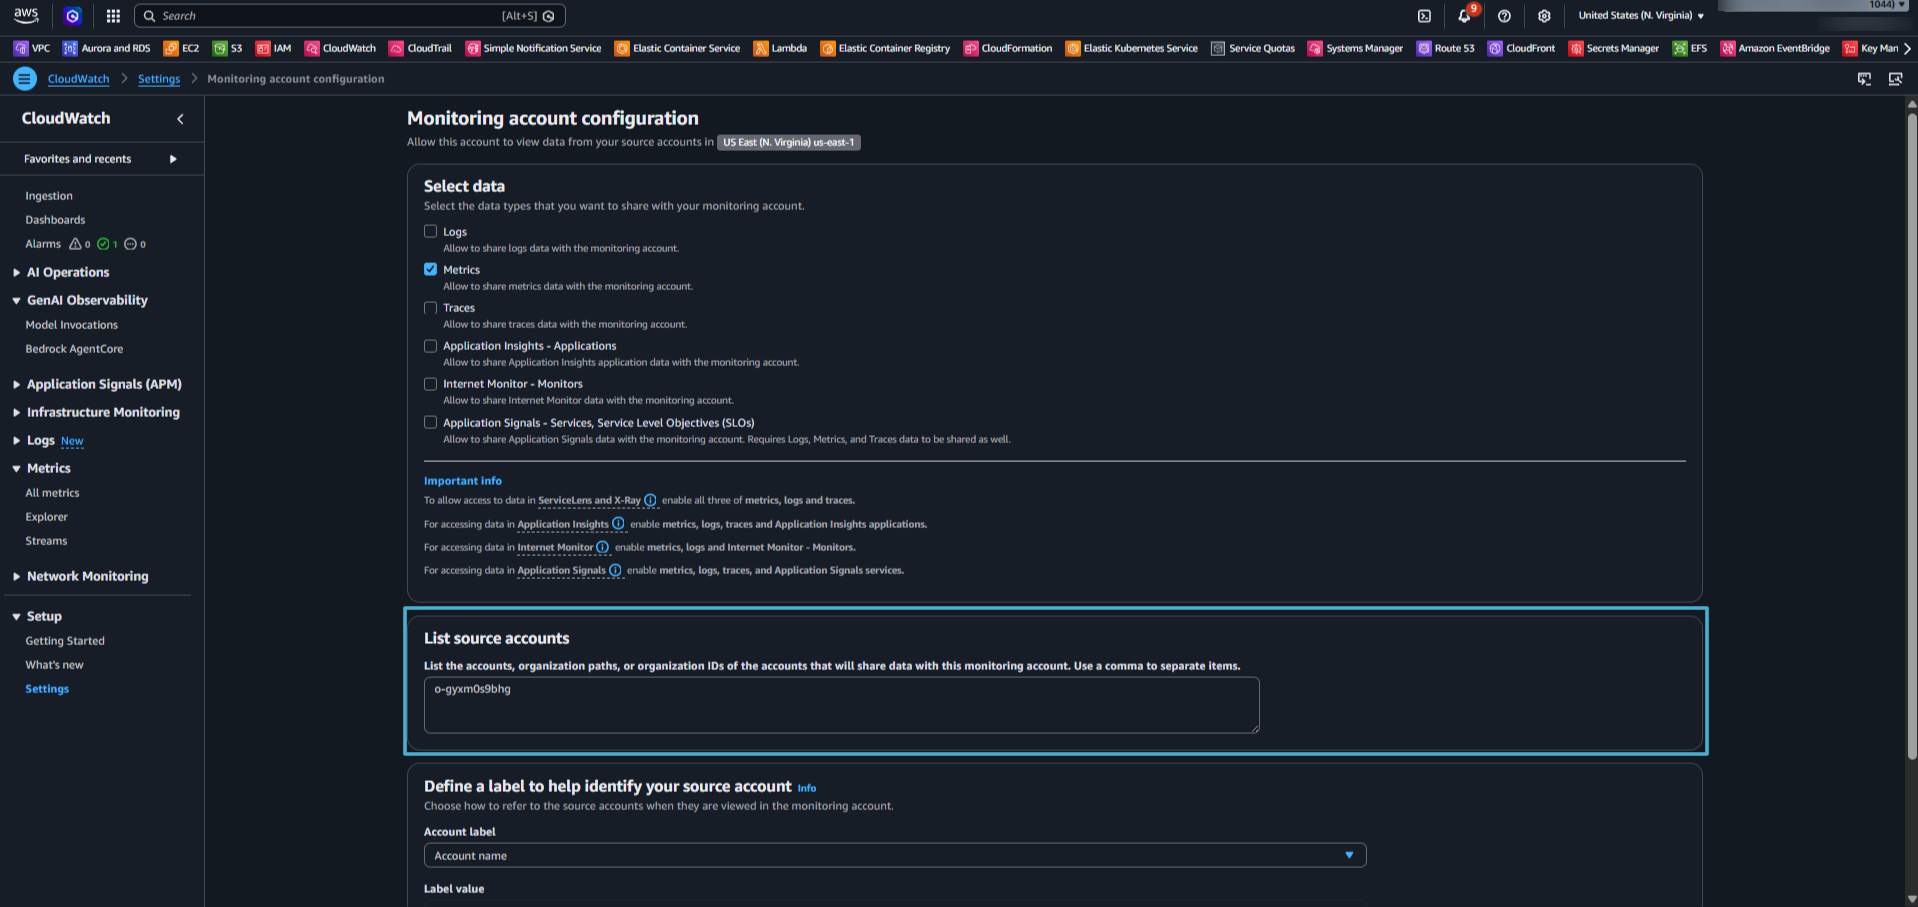
- Navigate to CloudWatch > Settings.
- Under Monitoring account configuration, click Configure.

Cloudwatch Settings
- Select Metrics (and Logs/Traces if you need those too). Enter your Organization ID or specific OU ID to scope the access. Set the Account label to “Account Name” – this makes it much easier to identify accounts when you’re browsing metrics later. Hit Confirm.
This action creates the OAM sink – the central collection point where metrics from all your source accounts will flow into.
Monitoring Account Configuration
- Go to Resources to link accounts (or similar section under configuration).
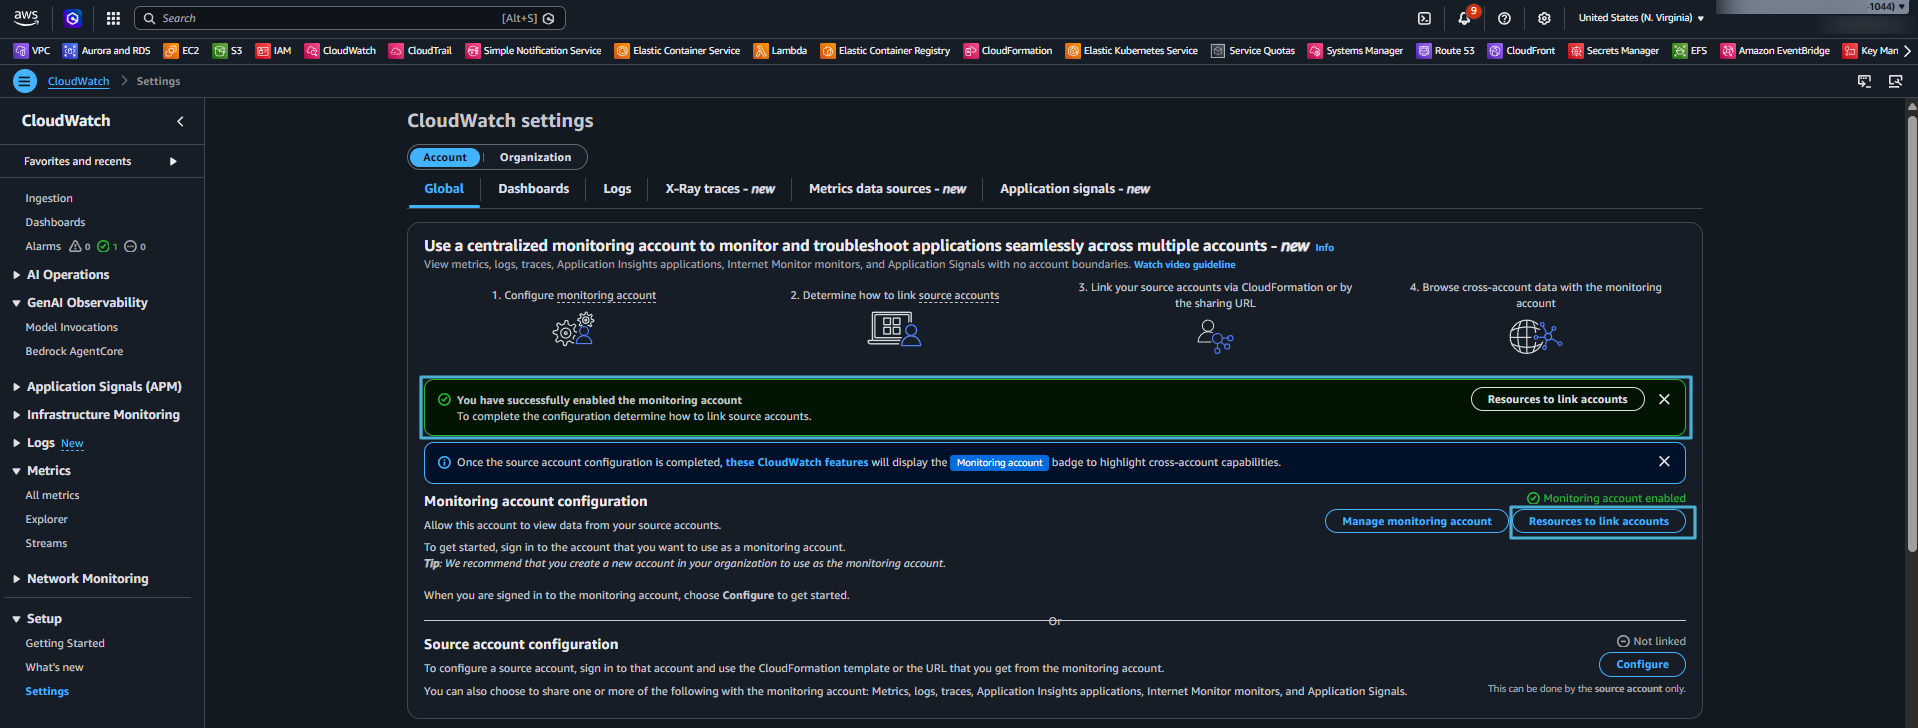
Monitoring Account Configuration
- Download the CloudFormation template provided by AWS. This template creates the necessary OAM links in source accounts.
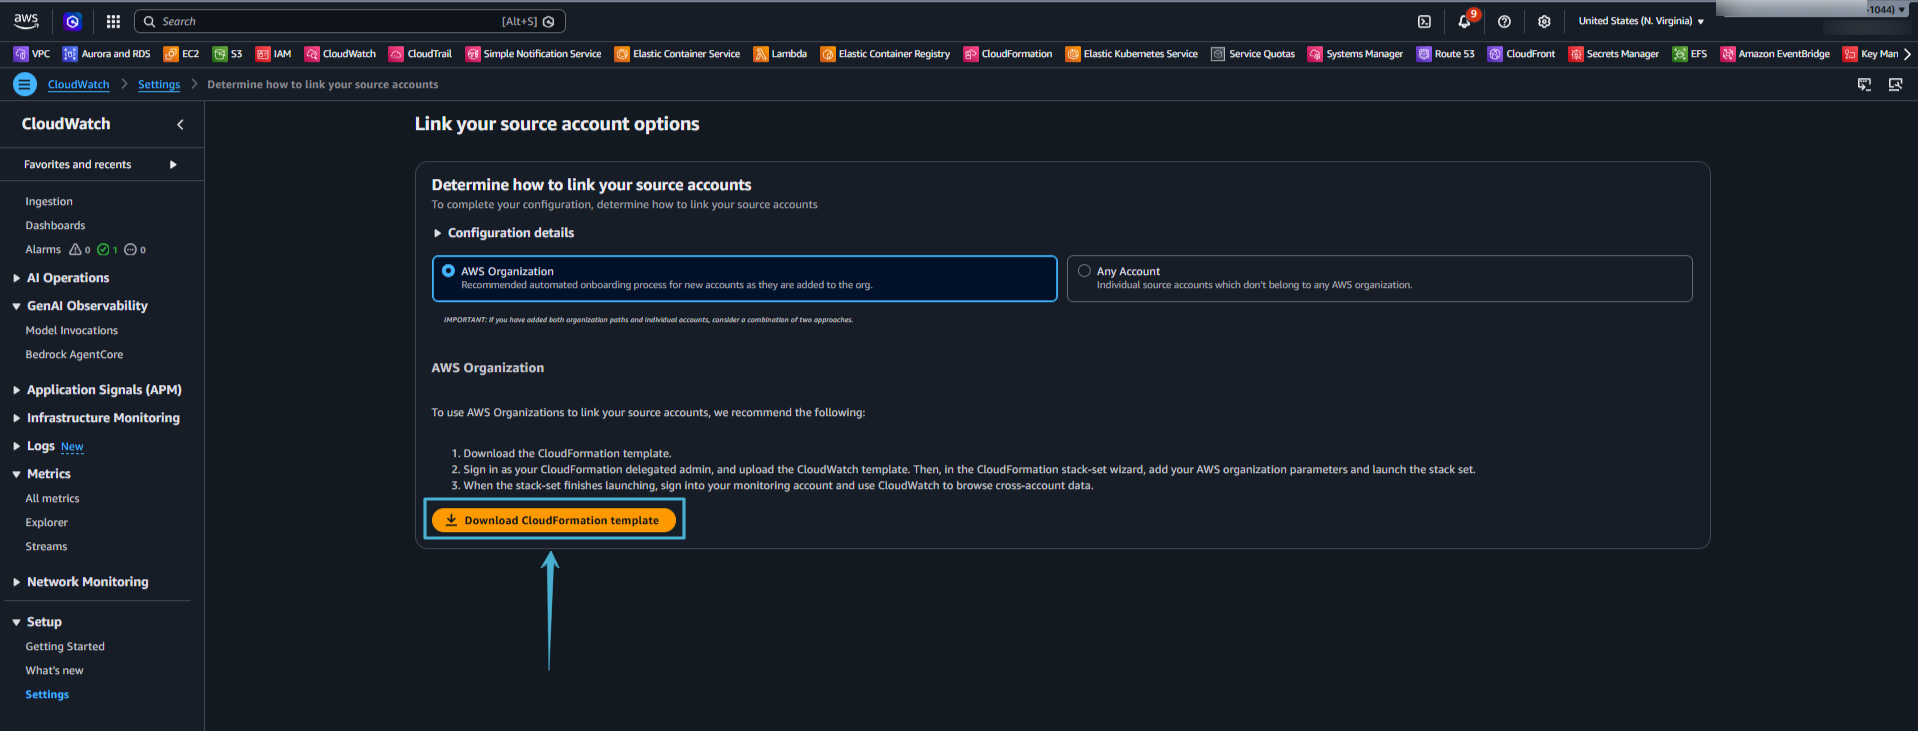
Source Account Cfn Template
Deploy StackSets for Automatic Onboarding
This is where the magic happens. Instead of manually setting up links in every account, you let CloudFormation do the heavy lifting.
- Still in the monitoring account (or management account with delegated CloudFormation access), go to CloudFormation > StackSets > Create StackSet.
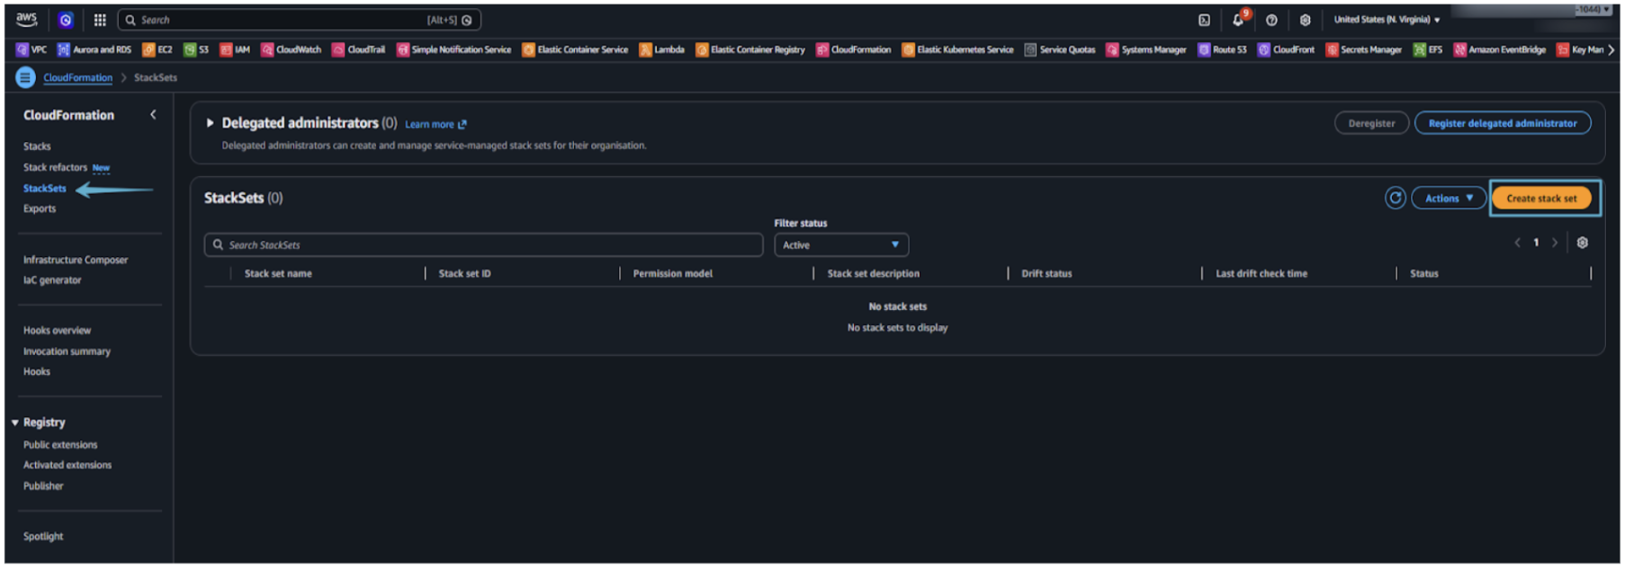
Cfn Stacksets
- Upload or select the template you downloaded in step 6.
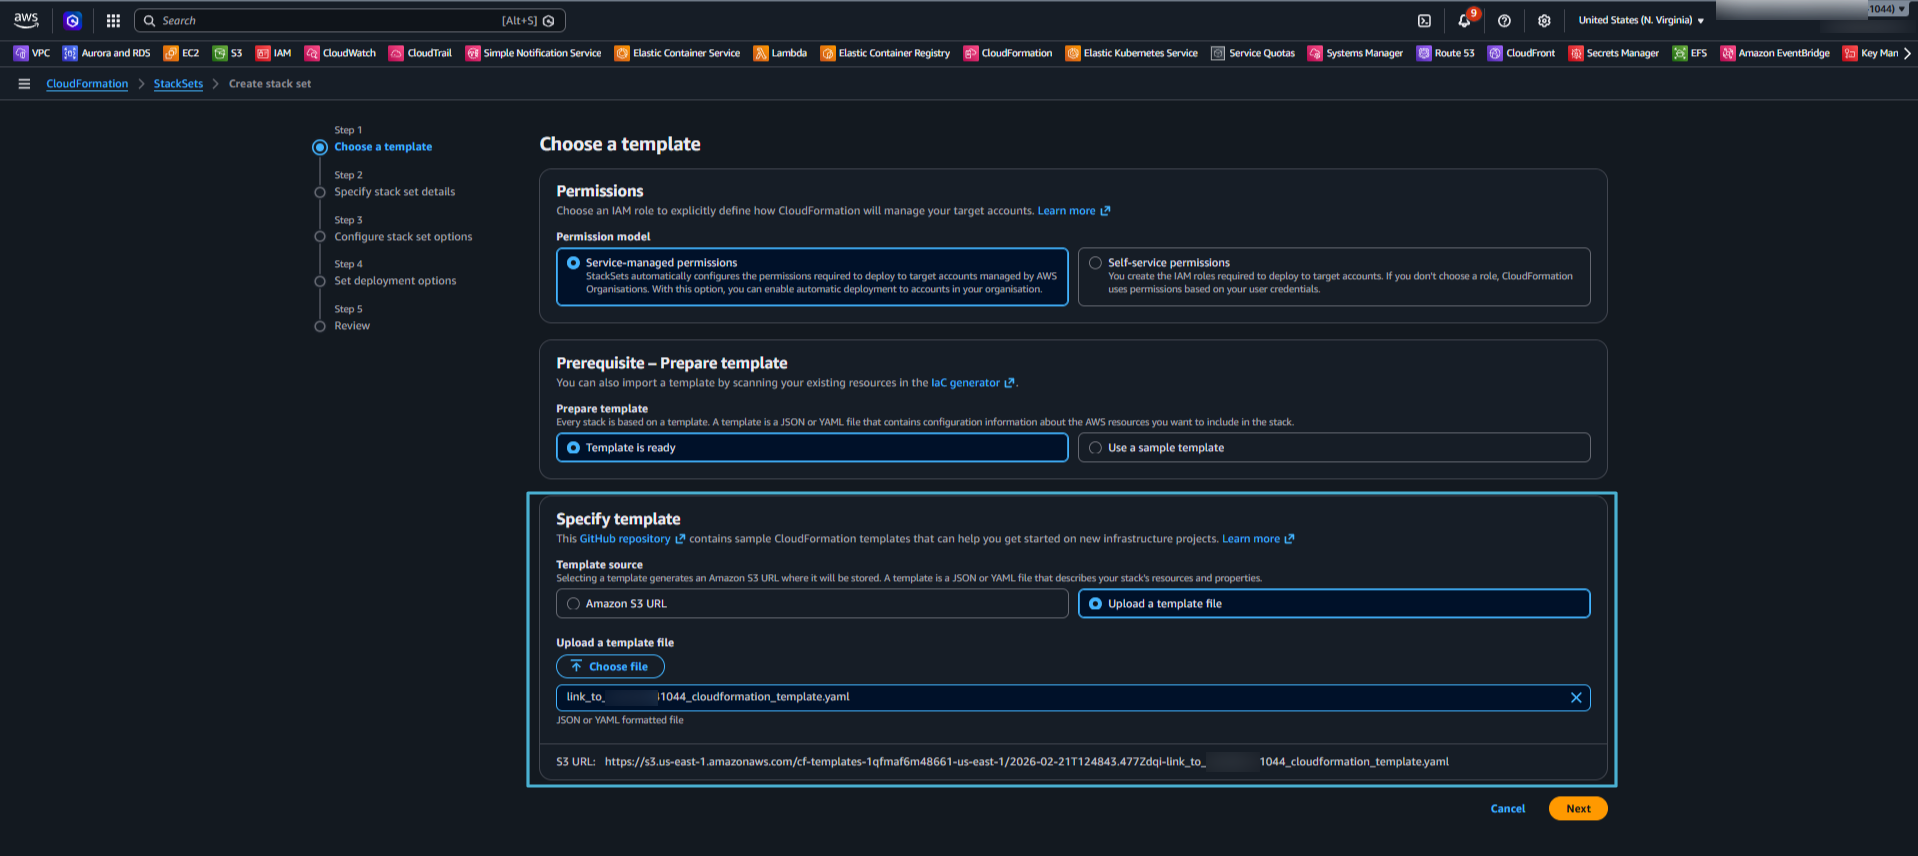
Upload Cfn Template
- Give your StackSet a clear, descriptive name – something like cw-cross-account-monitoring works well.
- Add tags. This step is easy to skip, but don’t. Tags let you apply SCPs (Service Control Policies) to prevent accidental deletion of these monitoring stacks – something you’ll thank yourself for later.
- Select only the region you’re configuring (e.g., us-east-1). This is important: deploying to multiple regions in a single StackSet can cause failures. Do one region at a time.
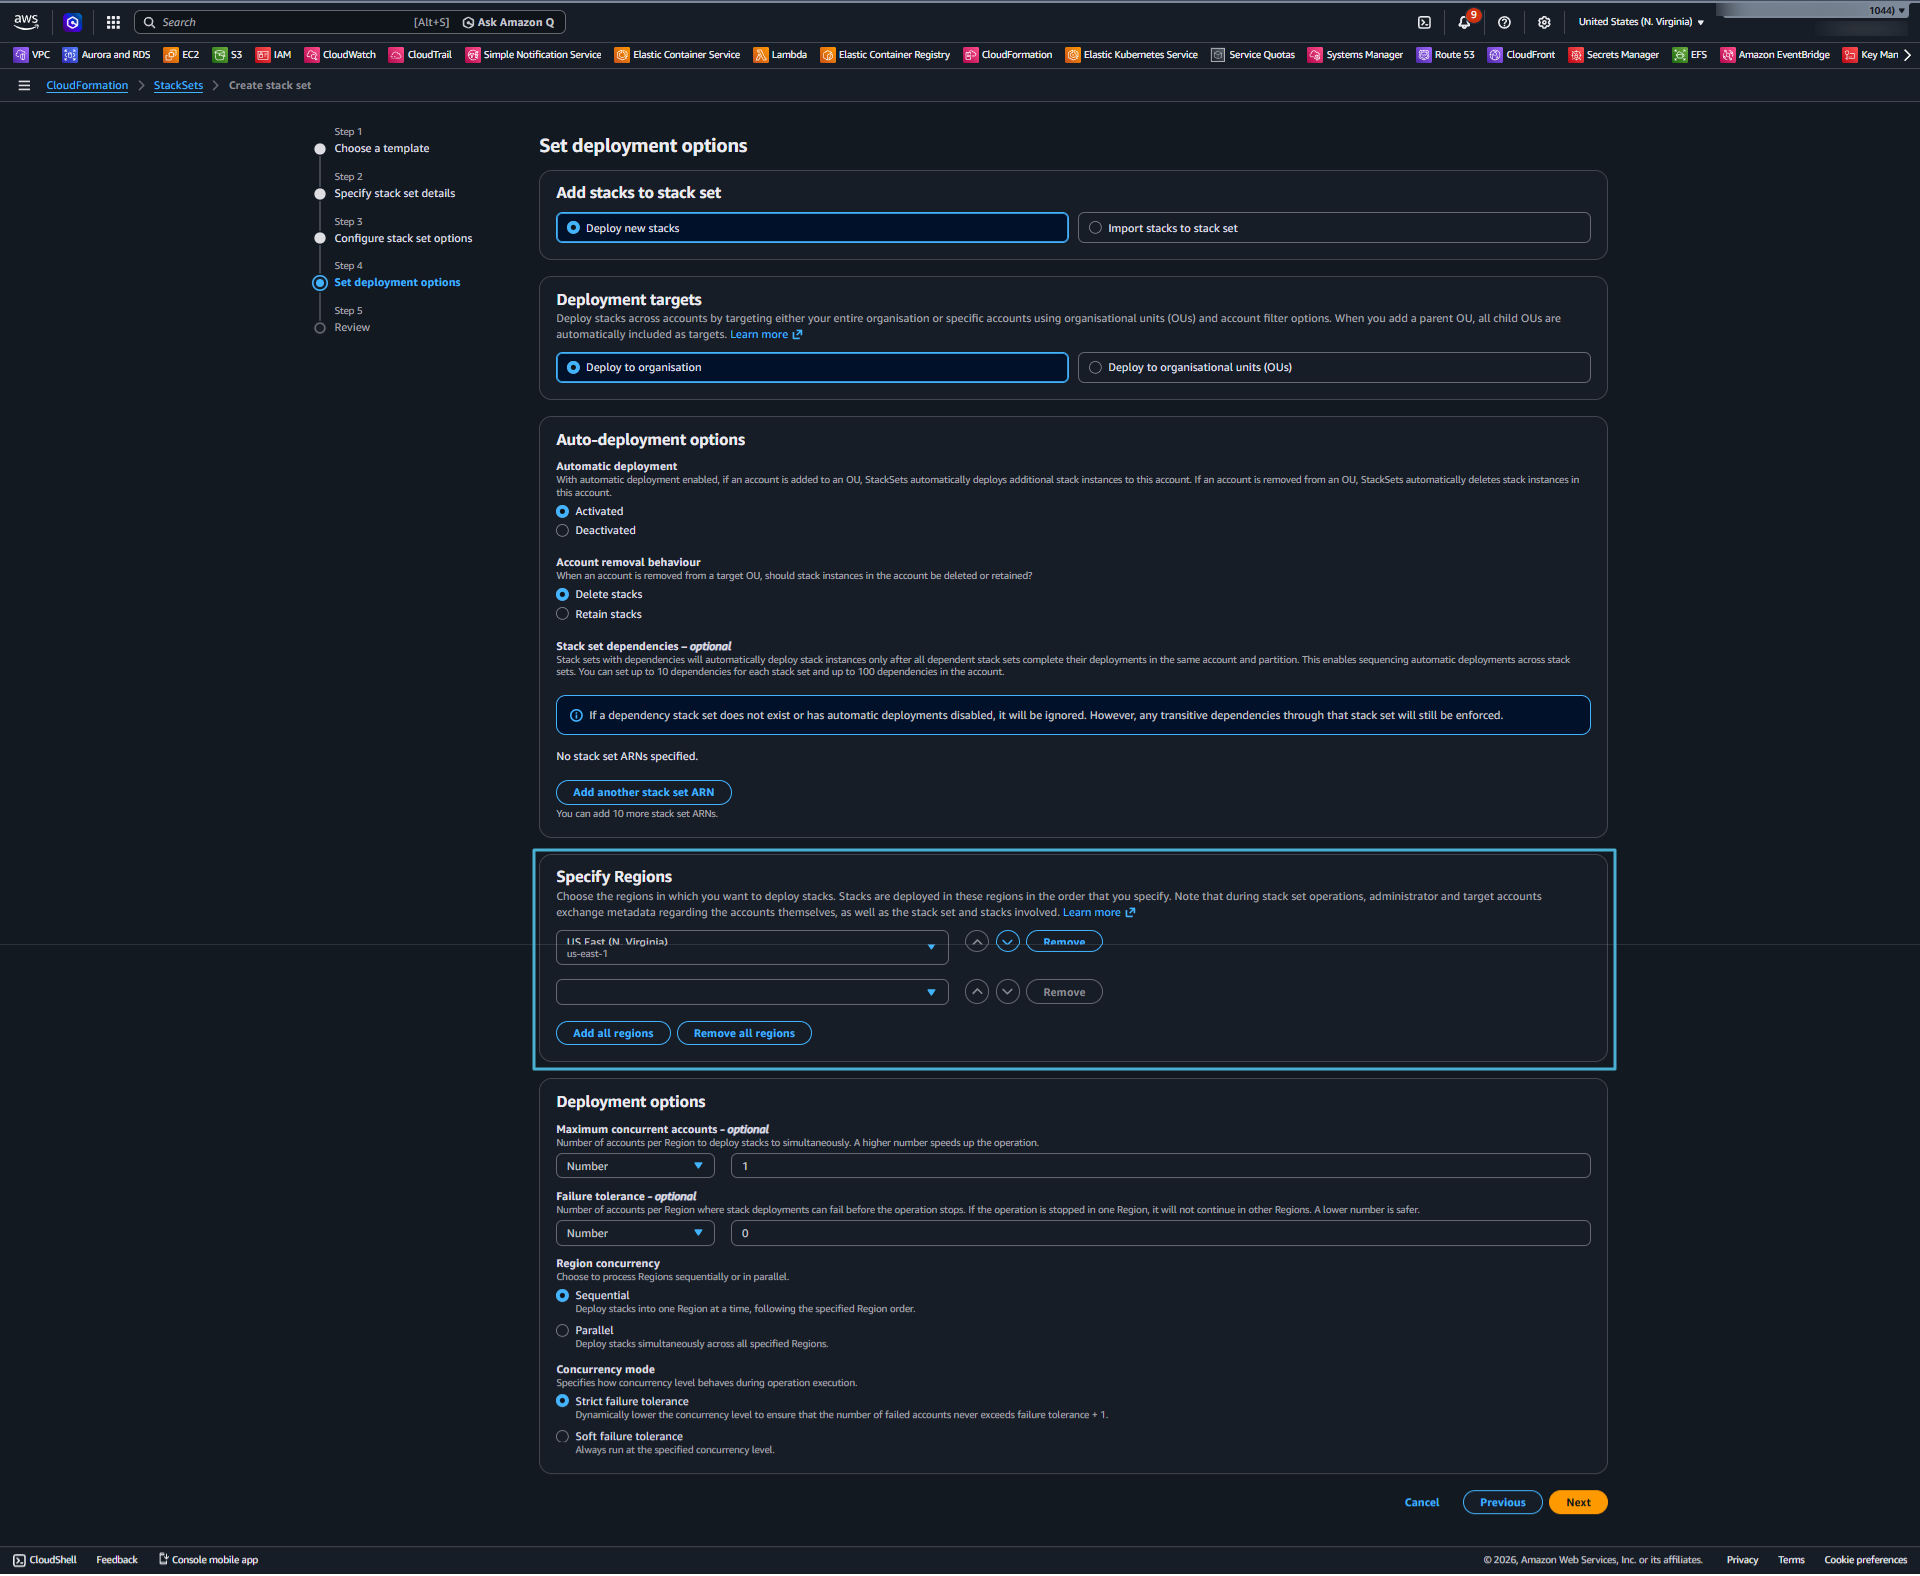
Set Cfn Deployment Options
- Choose your deployment targets: your entire Organization, specific OUs, or individual accounts.
- Configure permissions (service-managed permissions via AWS Organizations is the easiest option here).
- Review and create the StackSet. CloudFormation rolls the stack out to all targeted accounts automatically.
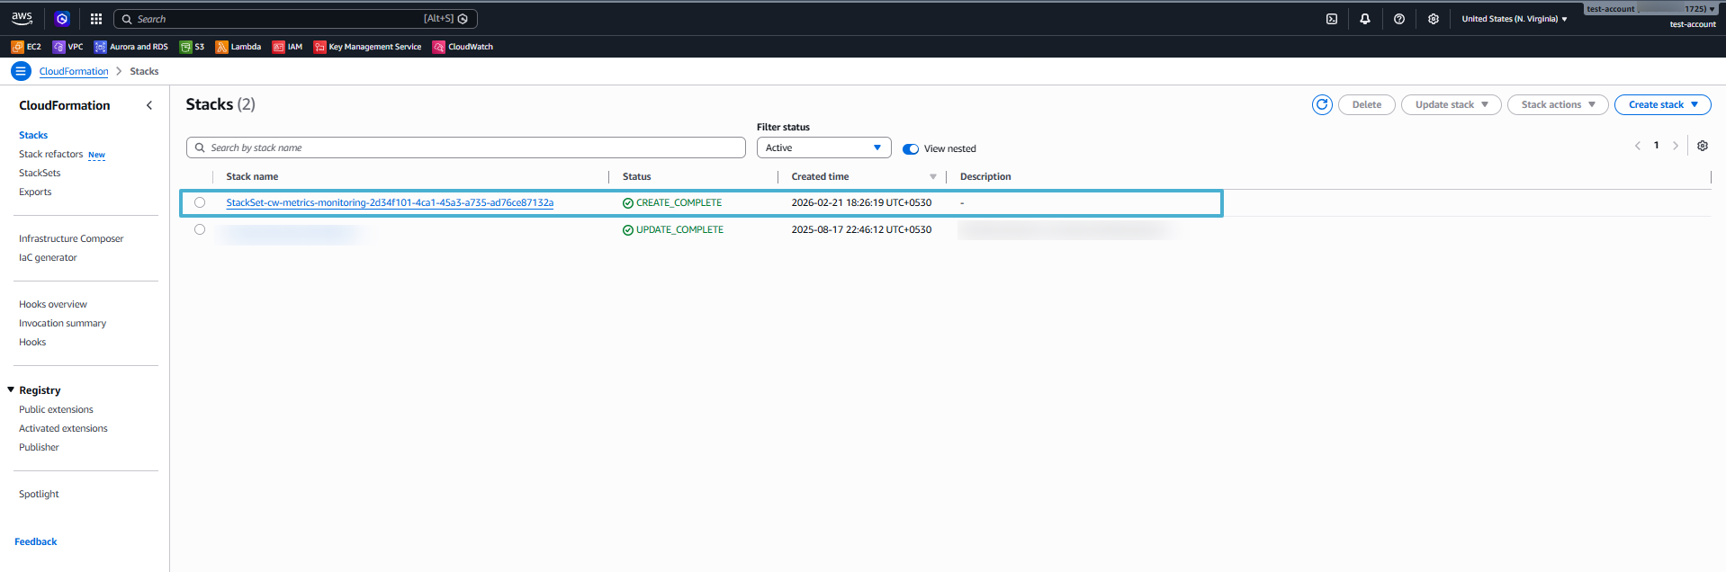
Once complete, you can check CloudFormation > Stack Instances to see the deployment status in each account. Green across the board is what you’re looking for.
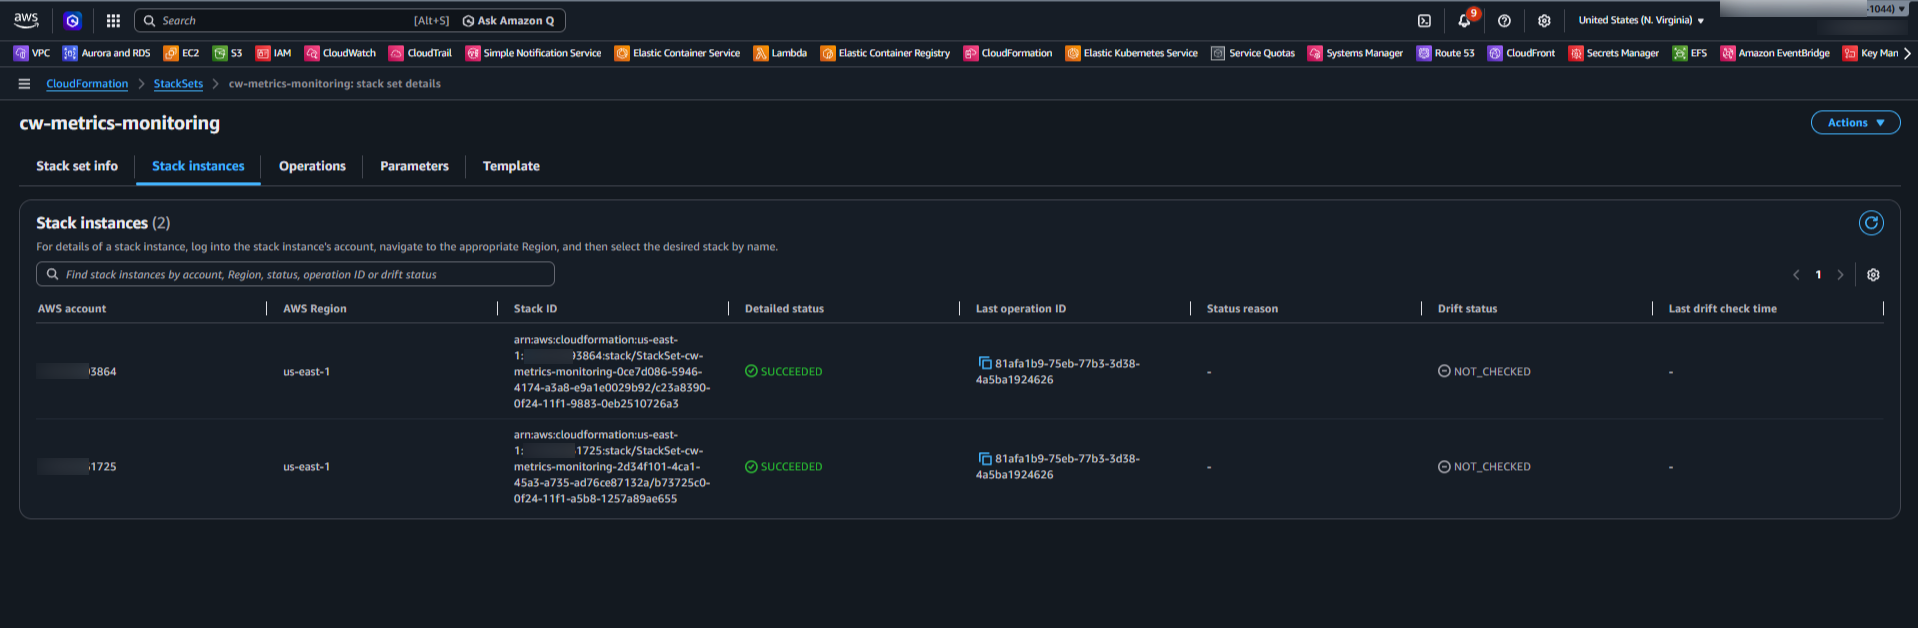
Cfn Stack Instances
Verification: Confirm It Works
In a Source Account (e.g., Account 1)
- Go to CloudFormation > Stacks. You should see the OAM link stack deployed automatically (from the central StackSet).
Cfn Stacks
- Navigate to CloudWatch > Metrics > All metrics > AWS/EC2 > Per-Instance Metrics. Confirm your EC2 metrics (CPUUtilization, NetworkIn, etc.) are emitting normally.

Instance Metrics in CW of Account1
In the Monitoring Account (Central Hub)
- Go to CloudWatch > Metrics > All metrics > AWS/EC2 > Per-Instance Metrics.
- Search by Account ID (e.g., ending in 1725) or Account Name label.
- You’ll see the same EC2 metrics from the source account(s) appearing here – cross-account visibility is live!
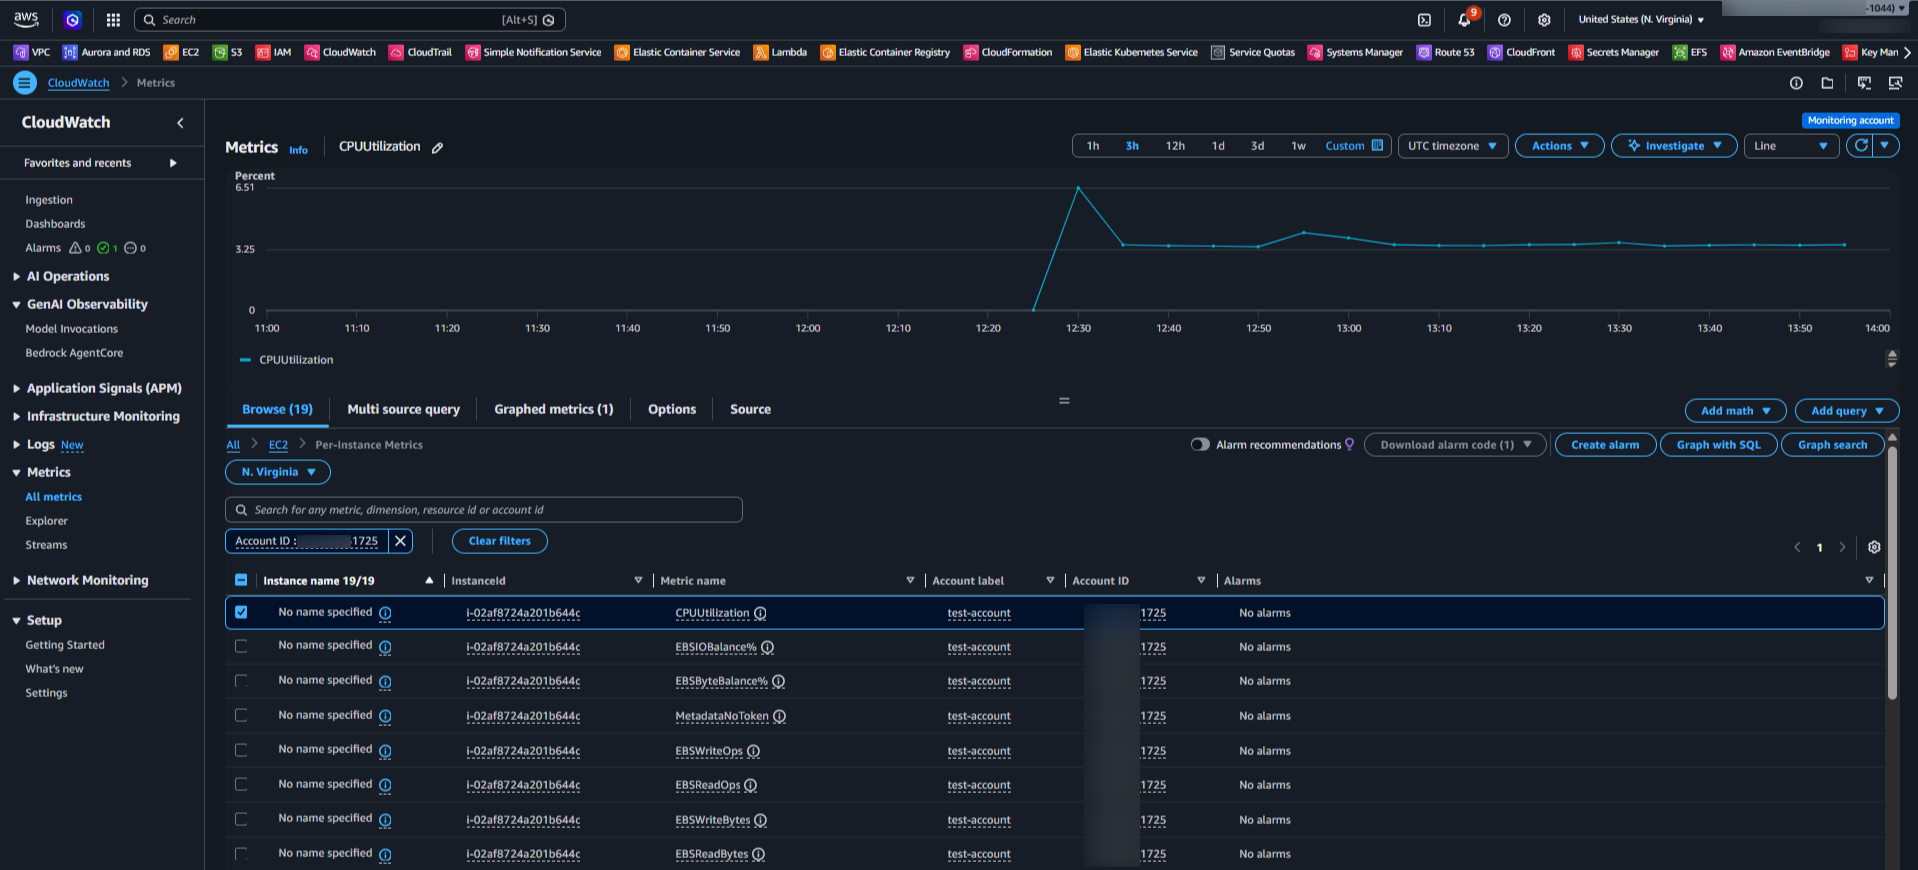
Instance Metrics in CW of Monitoring Account
Now you’re set: Create dashboards, alarms, and notifications centrally. One place for your entire fleet.
Key Benefits and Tips
- Automatic scaling: New accounts added to the Organization or OU get onboarded instantly via StackSets.
- Governance: Use tags + SCPs to protect monitoring resources (prevent accidental deletion).
- No manual links: Skip per-account setup for hundreds of accounts.
- Historical metrics: All retained data from source accounts becomes visible immediately.
- Multi-Region: Repeat the process per Region.
For even tighter control, delegate CloudFormation StackSets admin to your monitoring account.
Wrapping Up
Setting up centralized CloudWatch monitoring used to feel like a project that needed weeks of planning. With AWS Organizations, OAM, and CloudFormation StackSets, it’s genuinely achievable in under an hour – even for organizations running hundreds of accounts.
The payoff is significant: fewer missed alerts, faster incident response, cleaner dashboards, and an architecture that scales on its own. Once you’ve gone through the setup once, you’ll wonder how you managed without it.
Ready to get started? If you haven’t already, check out our foundational guide – How to Centralize AWS Monitoring: A Guide to CloudWatch Cross-Account Metrics – for the groundwork before applying the automation steps above.