Introduction
The future of UX design is not just “vibe coding.”
It’s a balanced workflow between AI-generated interaction, vector-based creativity, and human design intuition.
After months of working with Claude + the Figma MCP integration, the workflow has evolved into something far more practical than simple prompt-to-code generation. It now enables designers to:
- Generate interactive prototypes directly from Figma
- Turn static screens into testable experiences
- Create multiple design explorations instantly
- Iterate visually inside Figma
- Run ultra-fast AI-assisted design sprints
- Maintain design-system consistency
- Move from idea → prototype → validation in days instead of weeks
This blog breaks down the complete workflow step by step — from setup to advanced AI-assisted UX design processes.
Step 1: Setting Up Claude + Figma MCP
The setup process is now significantly easier than it was a few months ago.
Required Tools
- Claude Desktop
- A Claude Pro subscription
- Figma account
- Figma connector enabled
Installation Workflow
- Download Claude Desktop
Install Claude Desktop for:
- macOS
- Windows
Download Claude Desktop: https://code.claude.com/docs/en/desktop-quickstart
To use Figma MCP, you need at least a Claude Pro account. Because you need to use Claude Code, which is built into the Figma MCP.

Download Claude Desktop
2. Connect to Figma MCP
- Inside Claude desktop app, go to customize.

- Open Connectors, search for Figma, and click Connect.
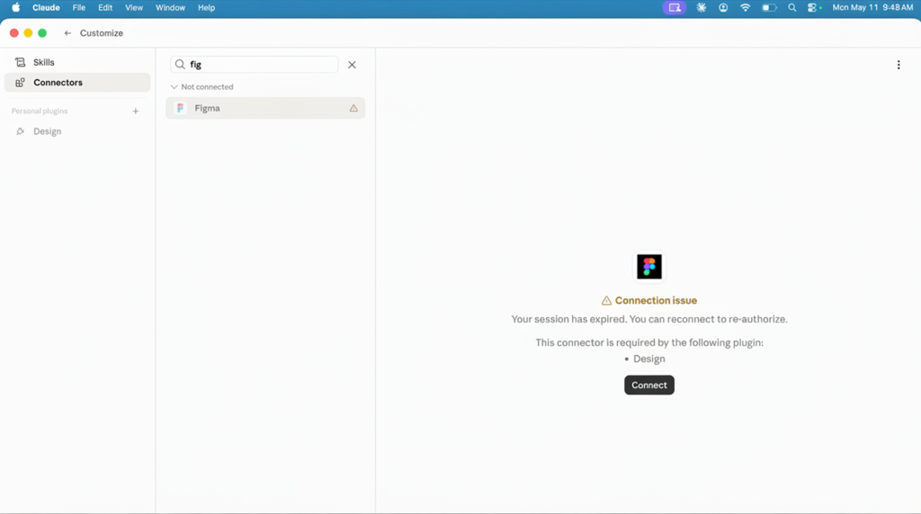
Connect Figma MCP
- Authorise Figma access by clicking on Agree and Allow Access.
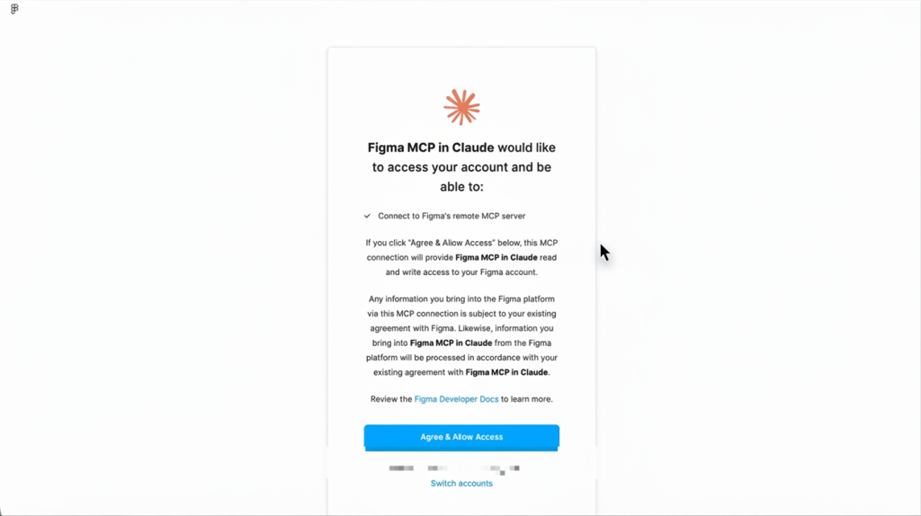
Authorise Figma access
- Inside Figma Connector, give Always Allow permission to Interactive tools, Read-only tools and Write/Delete tools.
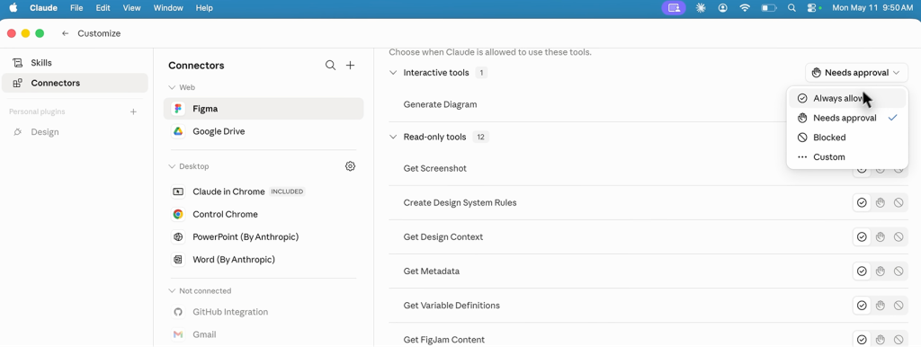
Permissions
This is all the setup that you have to do. Fortunately, they’ve updated it to become intuitive. You don’t need to download Cloud Code separately. All these things that we’ve had to do before are now resolved by simply downloading the Claude desktop and the Figma connector being added.In order for you to understand what we’re doing or the different workflows in the Figma MCP with cloud integration, you must know what the different Figma skills are that you have access to. I’m giving you a link below for the documentation from Figma Learn, where you can dig into each one of these skills and understand it deeper.
Figma Skills: https://help.figma.com/hc/en-us/articles/39166810751895-Figma-skills-for-MCP
Step 2: Converting Figma Designs into Interactive Prototypes
This is where the workflow becomes extremely powerful.
Imagine you already have a SaaS dashboard design in Figma. You want to test interactions without waiting for engineering support. Instead of manually building prototypes in Figma, Claude can generate an interactive HTML version directly from your design.
To show you this example, I’m using a SAS dashboard from the Figma community. Let’s say that this is your design.
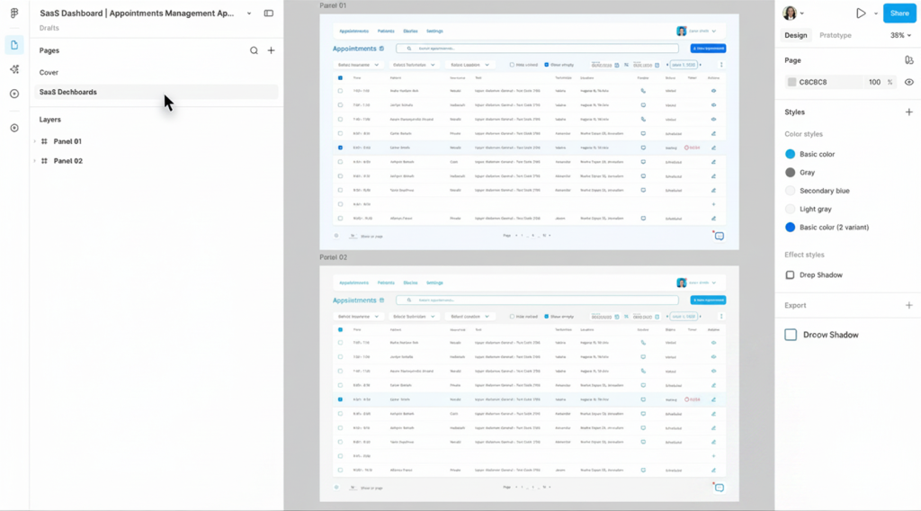
Figma design
To convert this Figma design to interactive HTML (front end) in such a way that, for example, if I double-click on one row of the table, it will open on the side a right-side panel. But I haven’t designed for that yet. And I want to try to do that with Claude. For the Figma implementation design, you at least need read access. If it’s your developer with a dev license, they will be able to perform the following tasks.
1. Convert Figma to Code using Figma MCP.
I am going to create the screen that we just saw in Figma using the Figma MCP. It is very immature and raw, with the same prompt but using only a screenshot. The level of accuracy will be different when you use all the context from the Figma MCP because a model context protocol means Claude can speak the language of your Figma file. It can read everything. It can read the tokens. that can understand the structure of the file, which will lead to better accuracy.
So I’m saying in the first prompt, I want you to see how simple and direct my prompt is. There is no please. There is no thank you. There is no, I’m thinking, can you do this for me? Just learn to be very direct in your prompts. And I know it takes practice, but an LLM, which is what Claude is, is a large language model. The more direct and specific you are with it, the better results that you will get. So I already know I wanted to implement this Figma design, and I want it to be an HTML interactive file because at the end of this chat, I want to be able to click on opening that HTML file and see it live. So let’s do this.
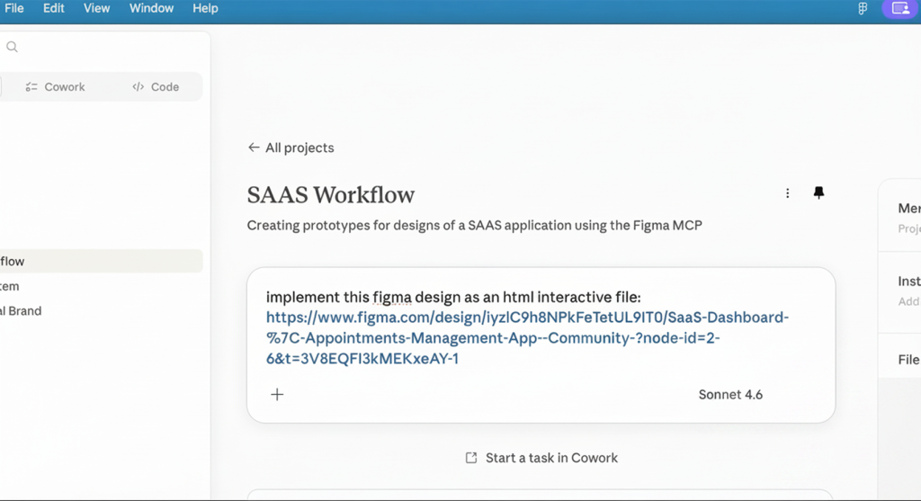
Figma to Code
Let’s look at the HTML version. If I were to inspect it, I would get my exact font family, the exact shapes and colours that were used. This version has used the icons that I provided in the Figma file, the same button, and the same style of navigation. So, it’s definitely much closer to what I have created in Figma. And it is completely interactive.
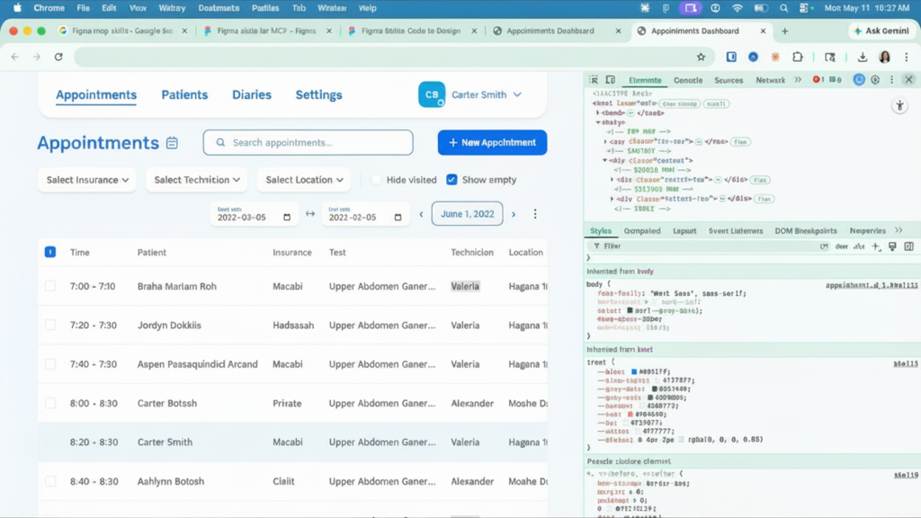
Code from Figma Design
Step 3: Adding Interactive Features with Prompts
This is where designers gain enormous speed.
Instead of manually designing new interaction flows, you can describe behaviour in natural language.
Example prompt:
“When a user clicks a row of information, create a right-side panel with detailed user information. Add actions for scheduling appointments and editing user info.”
Claude generated:
- Right-side drawer interaction
- Action controls
- Calendar UI
- Scheduling flow
- Notifications
- Editable forms
All from a very short prompt.
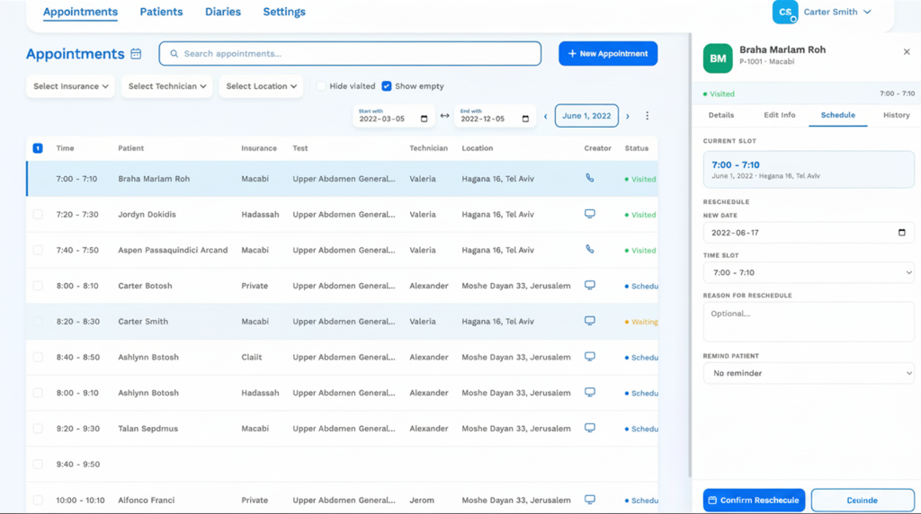
Feature added
Step 4: Connecting Your Design System
The real power appears when Claude is connected to your actual design system.
Instead of generating a generic UI, Claude can:
- Reuse components
- Apply correct tokens
- Follow spacing rules
- Match typography standards
- Maintain brand consistency
This turns AI-generated experiences into something production-aligned.
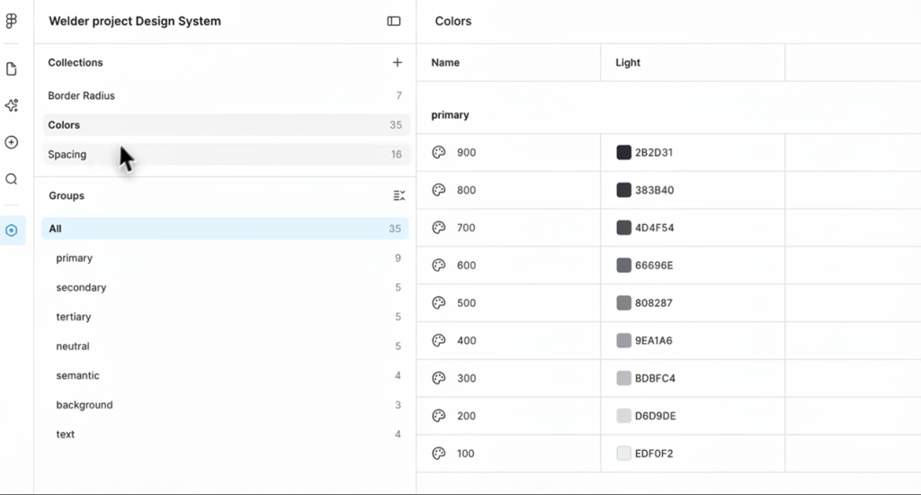
Design system
Step 5: Vibe to Vector — AI Inside Figma
Now we move into the second major workflow: Generating editable vector designs directly inside Figma. Instead of outputting HTML, Claude writes directly into the Figma canvas.
Example Workflow: Generating Signup Forms. Imagine your SaaS product needs:
- A new onboarding flow
- Contact forms
- Signup experiences
Instead of designing from scratch, Claude can generate multiple design directions instantly.
The Prompt Structure
A successful structure includes:
- The feature you want
- The Figma file link
- Your design system reference
- Instructions to use components/tokens/styles
Example: “Create three possible designs for contact forms using components and tokens from my design system.”
Important Setup Step
Your Figma file must:
- Be connected to the design system library
- Have the design system published
- Allow component access
Otherwise, Claude cannot properly reuse your design assets.
Watching AI Design Inside Figma
One of the most fascinating parts of the workflow is that you can literally watch Claude generate designs live inside your Figma canvas. It appears almost as if another collaborator is editing beside you.
The Generated Results
Claude created:
- Minimal single-column forms
- Dark-theme variations
- Multi-step onboarding flows
- All aligned to the design system.
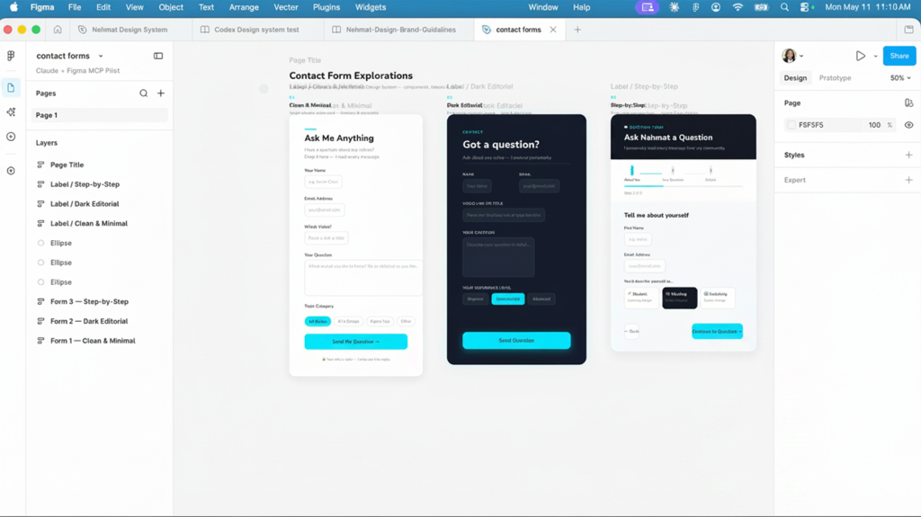
Claude to Figma design
Were they perfect? No. But they provided:
- Excellent starting points
- Multiple directions instantly
- Faster ideation
- Reduced blank-page anxiety
This is where AI becomes most useful for designers.
Final Thoughts
Claude + Figma MCP is not just another AI plugin. It represents a major shift in how UX teams can:
- Explore
- Prototype
- Validate
- Collaborate
- Iterate
The biggest lesson after months of usage is this: AI should amplify creativity — not replace it.
The most effective designers will likely be those who learn how to:
- Think strategically
- Use AI intentionally
- Maintain creative judgment
- Blend vector design with intelligent automation
And right now, that combination is incredibly powerful.