


Introduction
The first time I shipped a Node.js service to production, I ran docker images out of habit and stared at the number for a good ten seconds. The image was 1.1 GB, for an app whose actual code was only a few hundred kilobytes.
It still worked, so I let it slide. Then the deploys started getting slower, our registry storage bill crept up, and a security scan flagged a pile of build tools that had no business being in a running container. That 1.1 GB was the problem. A multi-stage Docker build is how we got it down to about 150 MB without changing a single line of application code.
Why Your Node.js Image Gets So Big
When you build a Node app inside Docker, you need a lot of stuff at build time:
- The full
node_modulesfolder, including dev dependencies like TypeScript, webpack, Babel, and testing libraries - Your raw source code
- Compilers and build tooling
But when the app is actually running, it needs almost none of that. It needs the compiled output and the production dependencies. That is it.
With a plain, single-stage Dockerfile, everything you pulled in to build the app stays inside the final image. All that tooling rides along to production as dead weight: bigger images, slower deploys, and a larger surface for something to go wrong.
What Is a Multi-Stage Docker Build?
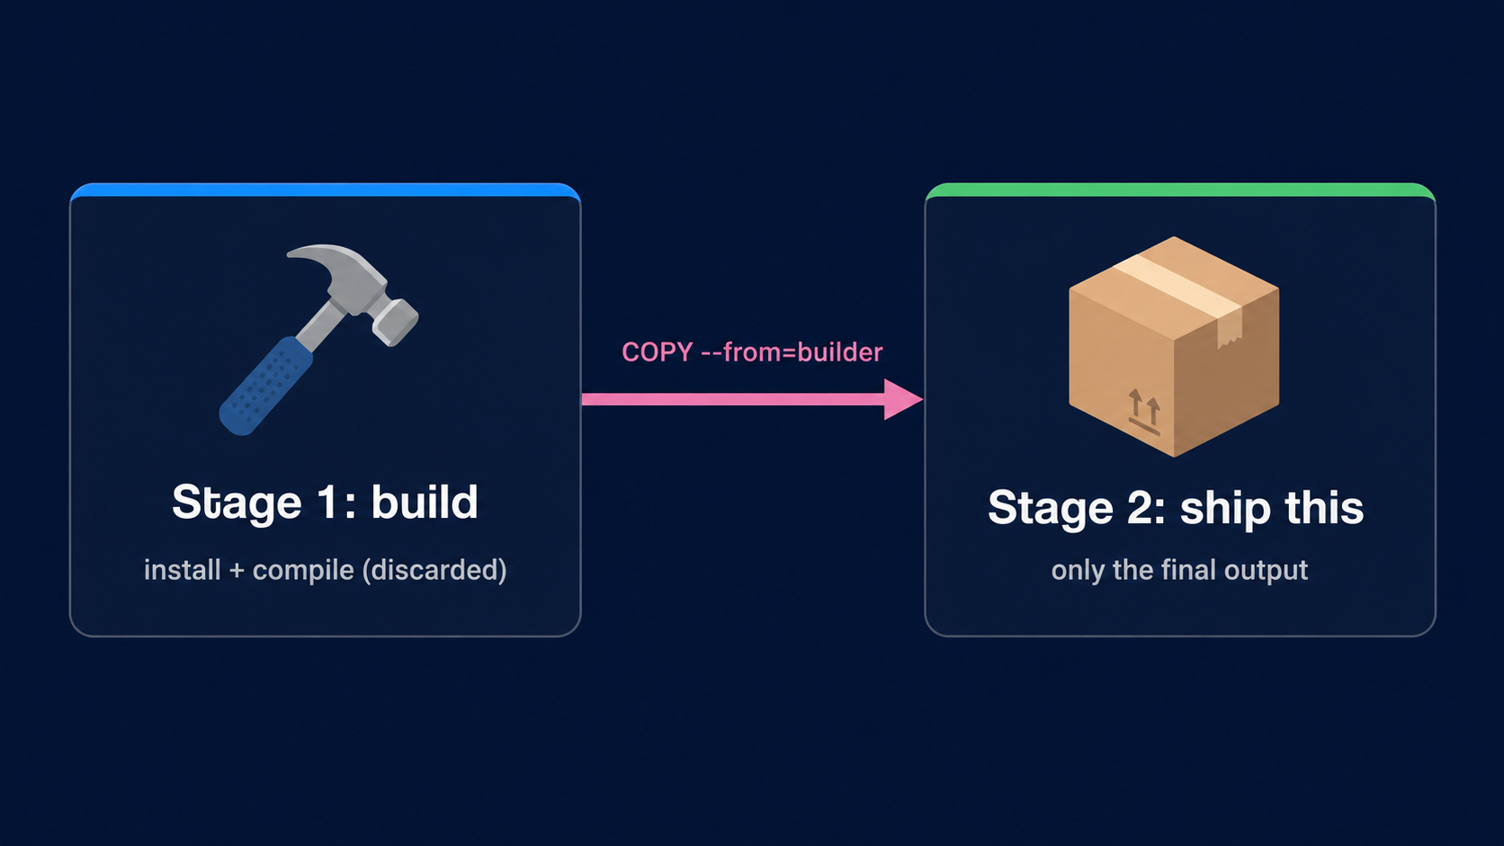
A multi-stage build lets you use more than one FROM statement in a single Dockerfile. Each FROM starts a fresh stage with its own base image. Do the heavy lifting in one stage, then copy just the finished output into a clean final stage and throw the rest away.
Think of it like a kitchen. Cooking needs pans, a board, and gas, and it leaves a pile of scraps. But you serve the customer the plate, not the whole kitchen. The build stage is the messy kitchen; the final stage is the plate.
The Single-Stage Dockerfile We Started With
This is roughly what our original file looked like:
FROM node:20
WORKDIR /app
COPY package*.json ./
RUN npm install
COPY . .
RUN npm run build
CMD ["node", "dist/index.js"]
It works, but the full node:20 base image, every dev dependency, and all the source code get baked into the image you ship. Nothing is thrown away.
Rewriting It as a Multi-Stage Build
Here is the same app, restructured into two stages:
# ---- Stage 1: build ----
FROM node:20 AS builder
WORKDIR /app
COPY package*.json ./
RUN npm install
COPY . .
RUN npm run build

# ---- Stage 2: runtime ----
FROM node:20-alpine
WORKDIR /app
ENV NODE_ENV=production
COPY package*.json ./
RUN npm install --omit=dev
COPY --from=builder /app/dist ./dist
CMD ["node", "dist/index.js"]
Two things changed. The first stage is named builder and does all the installing and compiling. The second stage starts from node:20-alpine, a much smaller base. It installs only production dependencies and pulls in the compiled dist folder from the first stage.
What That COPY --from Line Actually Does
COPY --from=builder /app/dist ./dist is the one line doing the real work here. It reaches back into the builder stage and copies out just the compiled output. Everything else from that stage (the dev dependencies, the source, the build tools) never makes it into the final image.
Docker only ships the last stage; earlier stages are just a source to copy from, then discarded. All that build-time weight never travels to production.
The Results: An 85% Smaller Docker Image
Same app, same behaviour, very different image. Running docker images after each build tells the whole story (trimmed to the columns that matter):
REPOSITORY  TAG           SIZE
my-api       single-stage   1.1GB
my-api       multi-stage    150MB
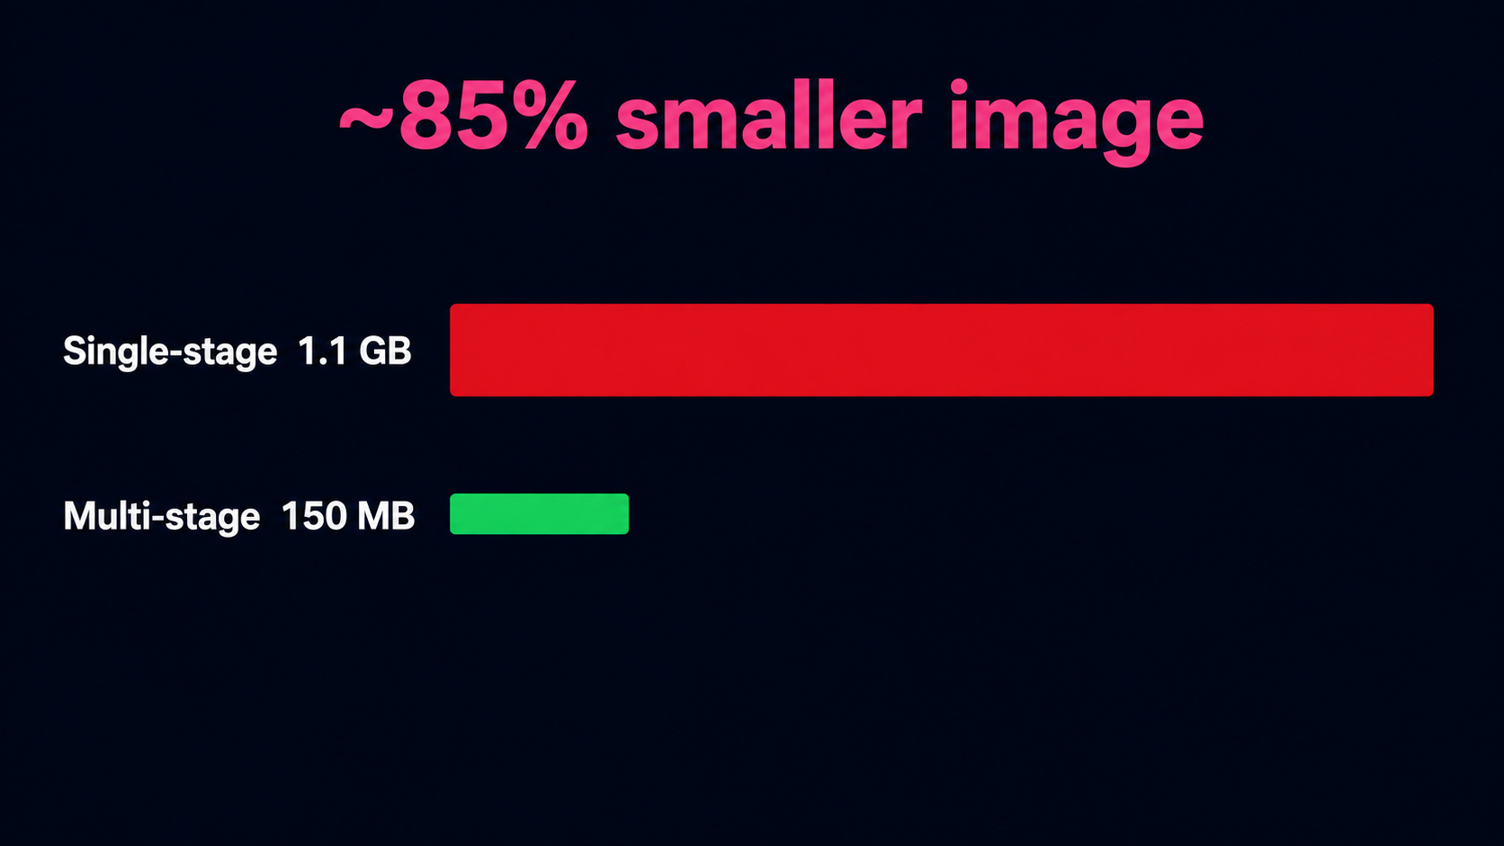
That is roughly an 85% cut. Your exact numbers depend on your app and base image, but the direction is always the same: smaller images push and pull faster, so deploys and autoscaling stop dragging. You also stop paying to store a gigabyte of build tools you never run, and your security scanner has less to complain about.
Do Not Forget a .dockerignore File
A multi-stage build only helps if you are not quietly copying junk into the build context in the first place. A .dockerignore file keeps local clutter out of every COPY:
node_modules
npm-debug.log
.git
.env
dist
Dockerfile
Without this, a COPY . . can drag in your local node_modules or a stray .env file, which slows the build and, in the case of secrets, creates a real security problem. Treat it like .gitignore for your image.
Common Mistakes to Avoid
A few of these bit us (or people whose PRs I have reviewed) more than once:
- Copying
node_modulesfrom the host. Let Docker install deps inside the image; host copies can pull in the wrong platform binaries and break at runtime. - Wrong layer order. A
COPY . .before installing means every code change busts that layer’s build cache and forces a full reinstall. Copypackage*.jsonand install first. - Leaving dev dependencies in the final stage. Use
npm install --omit=dev(ornpm ci --omit=dev, which needs a committedpackage-lock.json) in the runtime stage so testing and build-only packages never ship. - Forgetting to copy runtime assets. If your app needs more than the compiled code (templates, migrations, static files), remember to
COPY --from=builderthose too, or the container will start and then fall over.
When You Might Not Need This
Multi-stage builds are worth it for almost any real service, but they are not a law. A tiny script with no build step and a handful of dependencies is fine on a single well-trimmed stage. The moment you have a compile step, dev-only tooling, or an image you deploy often, though, the split pays for itself.
Conclusion
Multi-stage builds gave us a smaller, faster, safer image for the price of restructuring one file. No code changes, no new tools, no separate build scripts, just a clean separation between how the app is built and how it runs.
Pull up one of your own images, run docker images, and see the number. Then split the Dockerfile into a build stage and a runtime stage and measure the difference. For most Node images, it is the easiest win on the table.
Found this useful? Leave a comment with your before-and-after image sizes.