Docker machine is a new advancement of Docker team to manage docker servers. Using this tool, different docker server or hosts can be managed from a single workstation, be them in local LAN or on public or private cloud. Using docker-machine, we can provision docker instance at virtualbox, AWS, azure cloud, digital ocean, rackspace, openstack etc and even at our data center. Docker machine eliminates the need for installation and configuration of Docker at different nodes to start using docker containers. The project is still in its beta phase and this blog will try to have a close look into the project and explore some of its benefits that can be leveraged by AWS professionals.
Steps to setup Docker machine:
Download docker-machine from here as per your OS requirement and provision execute permissions on the downloaded file and move it to the location by default set in PATH environment using following command,
[js]mv ~/Downloads/docker-machine_linux-amd64 /usr/local/bin/docker-machine
chmod +x /usr/local/bin/docker-machine[/js]
To check, if it is working, run below command,
[js]docker-machine -v[/js]

To create a docker machine on AWS cloud, an AWS acount is needed. Generate access key and secret key against your AWS user.”docker-machine create” command is used to spin a new docker enabled EC2 instance that can be directly used to create docker containers. To add more to its benefits, this host and similar kind of other hosts from different sources (either cloud or virtual hypervisors) can be managed from a single workstation. Create AWS based docker machine using following command,
[js]docker-machine -D create –driver amazonec2 –amazonec2-access-key $AWS_ACCESS_KEY_ID –amazonec2-secret-key $AWS_SECRET_ACCESS_KEY –amazonec2-vpc-id vpc-b8601add –amazonec2-subnet-id subnet-8ef72da5 –amazonec2-zone c docker[/js]
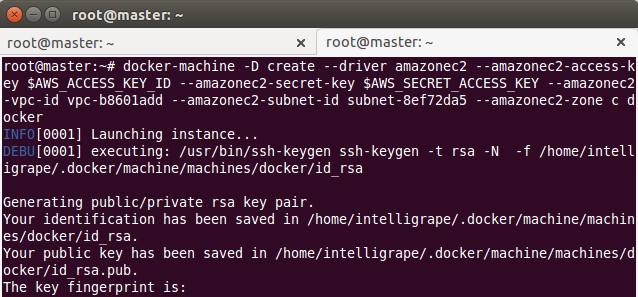
For the sake of simplicity, AWS access key and secret key are sourced in my linux environment, however, they can also be explicitly declared in the above command. Above command will launch a new pem key as well. It is suggested to keep checking the output and The output of the above command will look as shown below and will take sometime to spin a new EC2 instance. In the above command we have not declared any EC2 instance flavor (by default it launches a t2.micro instance) but that can also be declared using {–amazonec2-instance-type “t2.micro”} and similarly various other option can be obtained from below command,
[js]docker-machine -D create –driver amazonec2 –help | less[/js]
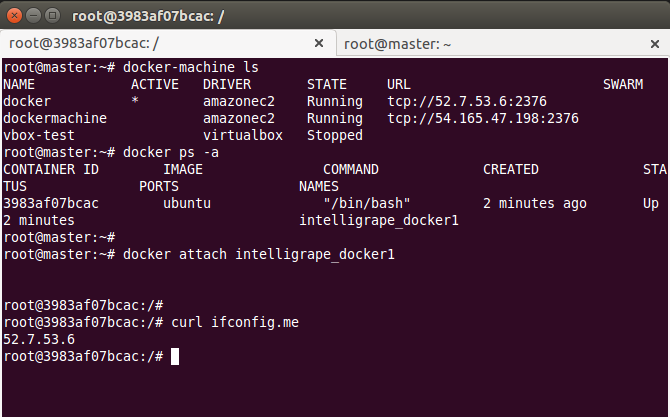
After launching of instance is successfully completed, check that you can see your new docker machine,
[js]docker-image ls[/js]
It shows the docker machine but it is not active yet. To activate new docker machine, execute below command so that workstation’s docker client will start pointing to your newly created docker machine,
[js] eval "$(docker-machine env docker)"[/js]

It will also show ‘*’ asterisk symbol in front of your docker machine representing its active state)
At this stage, if a new container is launched, it will be launched in your remote docker machine and not on your local workstation as shown in the snapshot below,
So this way we can work on any docker container available on any docker hosts using docker-machine from a single workstation. This functionality is portable i.e we can move this workstation functionality of management of docker machine to some other workstation as well. First of all, setup docker-machine tool as listed above, then there exist a folder with the name .docker inside default user’s home directory that holds all the information about certs, tokens and keys. just copy that and paste it to some other machine’s default user’s home directory and that’s it. Now, simply run “docker-machine ls” to check if all the docker hosts are visible or not.
Regards
Sharad Aggarwal