
Ansible – Configuration Management System
Purpose: We have seen various instances of manual configuration on multiple servers which are similar and repetitive. When it comes to automate such tasks an easy process comes in mind – Configuration Management. There are several such tools available for this purpose. Ansible is one such tool that can be used for configuration management tasks, continuous deployment tasks and more.
Scope: This blog covers basics of Ansible, Installation and platform(s) supported by it along with one use case.
What is Ansible
Ansible is a lightweight, open source configuration management system which has an Agentless architecture. It mean that the nodes do not require to install and run background daemons to connect with main control node. This type of architecture reduces the pressure on the network by preventing the nodes to poll control node.
Setup
For the demo I have launched three ubuntu AWS ec2 instances. One of them will be control node and other two will be managed nodes. We have to install ansible only on control node.
Installation steps
We can install ansible in two ways. Either, use apt/yum for a stable version or install from source to get development version of Ansible which has advantage of new features when they are implemented.
Run following commands to install ansible from source in control node
[js] apt-get install git
git clone git://github.com/ansible/ansible.git –recursive
cd ./ansible
source ./hacking/env-setup[/js]
Also install python modules(paramiko,PyYAML,Jinja2,httplib2) using pip command used by ansible
Supported platform
Control node–
1. Python 2.6 or higher
2. Windows -not supported
3. OS supported: Almost all Linux and Unix distributions
Managed Nodes–
1. Python 2.4 or later.
2. Windows nodes -from version 1.7
Configuring Inventory File -Default Location -‘/etc/ansible/hosts’
It is used to define which servers ansible will be managing. Since, we are running instances in same VPC it is advisable to use private ip’s.
We can also logically group our servers in inventory file as follows:
[webservers]
172.1.2.3
172.1.2.4
[dbservers]
172.1.2.5
We can all these grouped servers in our ansible playbook as hosts:webservers.
Ansible uses SSH keys for authentication between control node and managed nodes. Use ‘ssh-keygen’ to generate public key. Copy the public key generated in ‘/root/.ssh/id_rsa.pub’ to all managed nodes (location:/root/.ssh/authorized_keys) you want ansible to connect to.
Test the connection
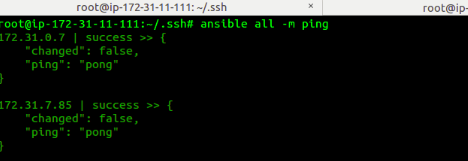
From the control machine we will try pinging all the hosts mentioned in /etc/ansible/hosts file
[js]ansible all -m ping[/js]
all – Use all defined servers from the inventory file
-m ping – Use the “ping” module, which simply runs the ping command and returns the results
Output:
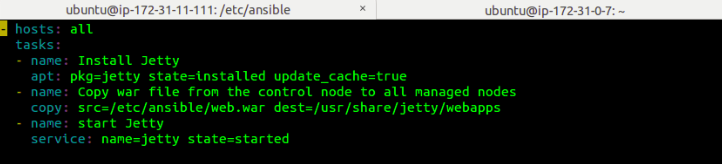
Writing Playbook
After configuring inventory file, we can run tasks against the hosts defined in inventory file. These tasks are defined in ansible playbooks which are plain english yaml scripts. By default, Ansible run all the tasks parrallelly in all the nodes. We can also configure serial execution of tasks.
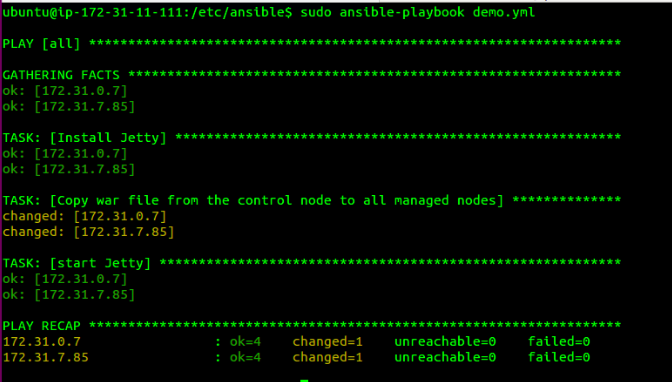
Output on running ansible playbook on control node
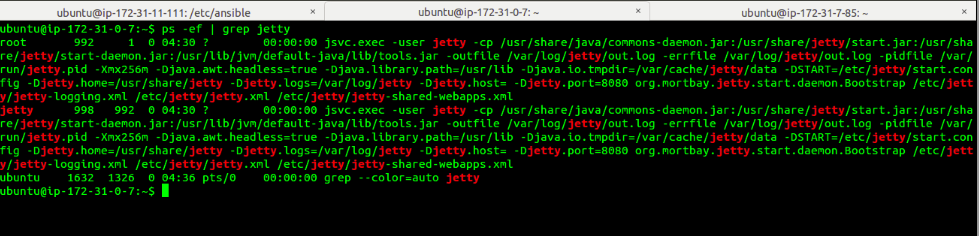
Login to hosts machines for verification
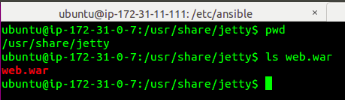
This approach can be used for Continous Deployment setup where the latest version of war can be pulled from a repository like nexus and can be copied to web servers like jetty.
Ansible also provides a dashboard(Ansible Tower) to manage hosts. It is free to use for up to 30 days beyond which license is required.


Ansible tower AWX is free open source. you can use it for unlimited period and many nodes. you can download it.
Hi,
when I am running the jetty installation yml. I am getting the following error-
root@ip-10-0-3-141:~/ansible-ws# ansible-playbook install_jetty.yml
PLAY [web] ***************************************************************************************************************************
TASK [Gathering Facts] ***************************************************************************************************************
ok: [10.0.3.198]
TASK [jetty install] *****************************************************************************************************************
fatal: [10.0.3.198]: FAILED! => {“changed”: false, “failed”: true, “msg”: “No package matching ‘jetty’ is available”}
to retry, use: –limit @/root/ansible-ws/install_jetty.retry
PLAY RECAP ***************************************************************************************************************************
10.0.3.198 : ok=1 changed=0 unreachable=0 failed=1
my playbook-
root@ip-10-0-3-141:~/ansible-ws# cat install_jetty.yml
—
– hosts: web
tasks:
– name: jetty install
apt: pkg=jetty state=installed update_cache=true
– name: copy war from control node to managed nodes
copy: src=/tmp/jenkins.war dest=/usr/share/jetty/webapps
– name: start jetty
service: name=jetty state=started
Pingback: Understanding playbooks in Ansible | TO THE NEW Blog