
Locust is open source and distributed load testing tool , intend to load test websites. A fundamental feature of locust is that you can describe all your test case in python code.
This lightweight, distributed and scalable framework helps us to find out how many concurrent users a system can handle by writing test case scenarios in Python code. It can be used for websites,web applications, and web-based services.
Why Locust?
Locust is completely event based and therefore it is possible to support thousands of users on a single machine. Usually, most load testing tools are thread based and benchmarking thousands of users using thread based tools is not feasible.
Our use case is to continuously generate load on web application and figure out how many concurrent users a system can handle.
In contrast to many other event-based applications, it does not use callbacks. Instead, it uses light-weight processes, through g-event. Each locust swarming our site is actually running inside its own process.The idea is a swarm of locusts (same machine) will access the website. The behaviour of each locust is defined by us and the swarming process is monitored from a WebUI in real time.
Installation
This has been tested on Ubuntu 14.04 machine but it also supported on windows and os x
Install pip
[js]sudo apt-get install python-pip[/js]
Install locust using pip
[js]pip install locustio[/js]
Or
[js]easy install locustio[/js]
Once installation is complete we can check available option by running this command on our shell
[js]locust –help[/js]
Note:Python version 2.6+ not compatible with 3.x
Quick start
To run a load test on websites we have to create python file which contains the taskset and locust class. At least one locust class should be there to properly run locust
Locust class represent one user which run taskSet assign to task_set attribute
Create file locustfile.py
[js]
from locust import HttpLocust, TaskSet, task
from requests.auth import HTTPBasicAuth
def http_basic_auth(self,uri)
self.client.post(uri,auth=HTTPBasicAuth("username", "Password"))
class UserDefinedTask(TaskSet):
def on_start(self):
""" call when locust start i.e before exection of tasks"""
@task(2)
def home(self):
self.client.get("/home.html/")
@task(1)
def about(self):
"""load testing on page containing http_basic_authentication"""
http_basic_auth(self,”/about/”)
class User(HttpLocust):
task_set = UserBehavior
min_wait=5000
max_wait=9000
[/js]
Here we defined UserDefinedTask as a tastkset class which contains the task to be performed.
Here we defined User as a locust class in which tastkset UserDefinedTask is pointed to task_set attribute.
@task takes an optional weight argument which can be used to specify the task execution ratio
Here task index is executed twice as task profile.
Locust classes and attributes
- Httplocust: Represents users,where we defined how long a simulated user should wait b/w executing tasks. It is an instance of httpsession and it is client attribute
- Taskset: define how number of locust tasks are gathered
- Min_wait: Minimum waiting time to execute each task defined in task_set attribute(default to 1000 milliseconds)
- Max_wait: Maximum waiting time to execute each task (default to 1000 milliseconds)
Run Locust
If file is locustfile.py and stored in the same directory
[js]locust –host=http://example.com[/js]
Otherwise
[js]Locust -f filepath ClassName –host=http://example.com[/js]
It runs on 8089 port
http://localhost:8089
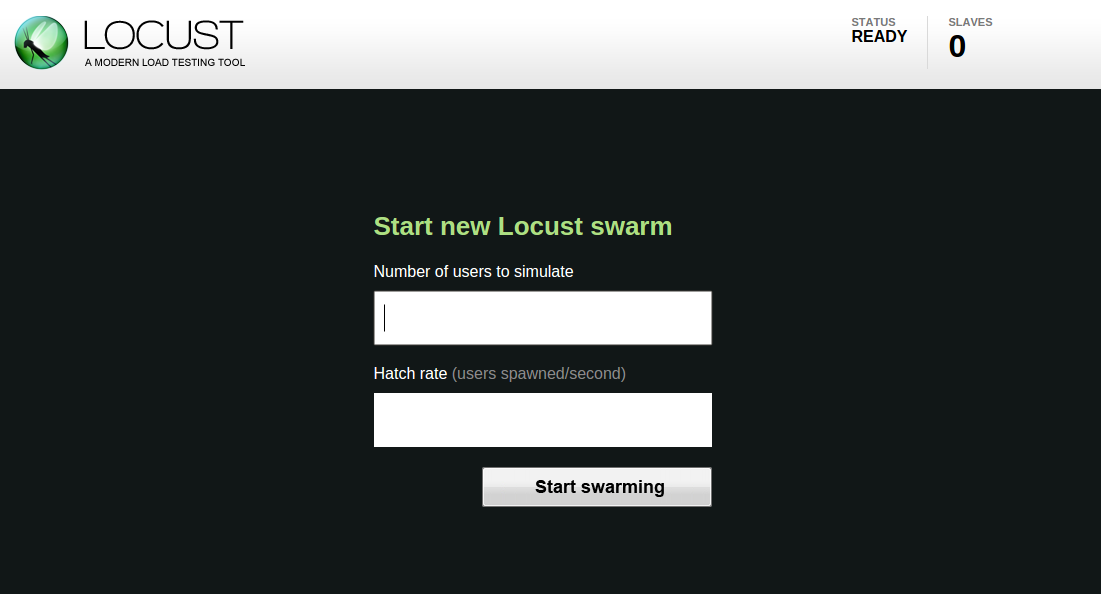
Once we’ve started Locust using one of the above command lines, we should open up a browser and point it to http://127.0.0.1:8089 (if we run locust locally). After that, we should be redirected to something like this. Then it will ask for no of users and hatch rate (rate per second in which clients are spawned)
After clicking on start swarming it will start load testing on our websites and statistics will be shown like this.
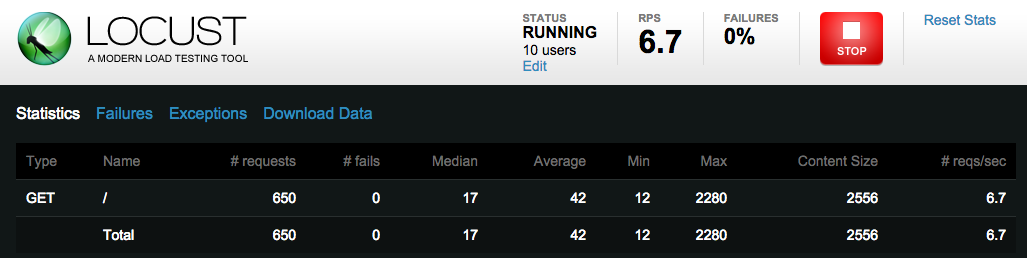
We can also check the logs in which load testing will start failing by clicking on Failures. We can also download our load testing result/data by clicking on download data.
For NON-UI mode (Monitoring through terminal)
[js]locust -f locustfile.py –host=http://hostname –no-web –clients=500 –hatch-rate=500 –num-request=15000[/js]
–client=Number of concurrent clients. Only used together with –no-web
–hatch-rate=The rate per second at which clients are spawned. Only with –no-web
–num-request=Number of requests to perform. Only used together with –no-web
If there is multiple locust class define in single file
Run
[js]Locust -f filename(fullpath) classname –host=http://hostname [/js]
let’s say, wWe have define two locust class CPU and memory which perform specific tasks
[js]
class CpuBehavior(TaskSet):
def on_start(self):
""" on_start is call before taskset execution i.e when locust is executed"""
@task(1)
def cpu(self):
self.client.get("/cpu.html/")
class Cpu(HttpLocust):
task_set = CpuBehavior
min_wait=5000
max_wait=9000
class MemoryBehavior(TaskSet):
def on_start(self):
""" on_start is call before taskset execution i.e when locust is executed"""
@task(1)
def mem(self):
self.client.get("/mem.html/")
class Memory(HttpLocust):
task_set = MemoryBehavior
min_wait=5000
[/js]
for Memory class
[shell]locust -f locustfile.py Memory –host=hostname ( running at default port 8089)[/shell]
for CPU class
[shell]locust -f locustfile.py Cpu –host=http://hostname -p 8090 ( running at port 8090)[/shell]
I hope this will help you in understanding what locust is. Locust supports running load tests distributed across multiple machines so it can also be used as master-slave. So, In my next blog, we will perform locust across multiple machines as a master-slave concept.
For Reference : http://locust.io/