
Database Migration using AWS Database Migration Service (DMS)
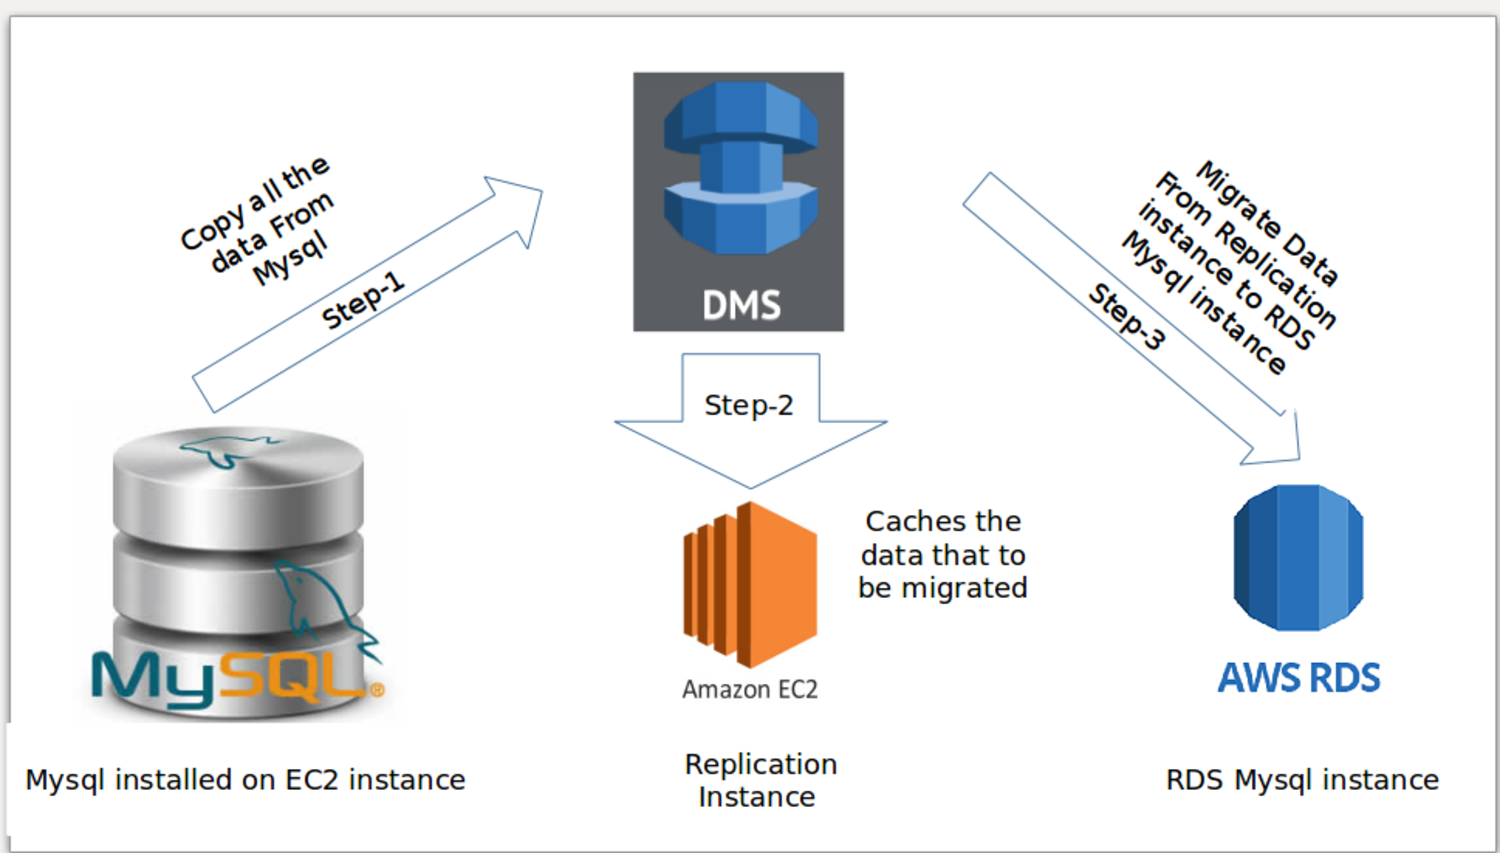
AWS DMS is a web service that is used to migrate the databases to and from an Amazon RDS DB instance, or a database on an Amazon EC2 instance, or on-premises. We can migrate data between homogenous or heterogeneous database engines. One of the two endpoints must always be in AWS. The source and target database may be in same VPC or in separate VPCs. We can use VPC peering when the source and destination instances are in different VPCs and public Internet or AWS direct connect can be used when one of the source and target database is on-premise.
Use Case
We have source database on AWS EC2 instance of database engine MySQL. We have to migrate the whole database to AWS RDS of database engine type MySQL to take advantage of operational efficiency and scaling with no downtime.
Migration Steps
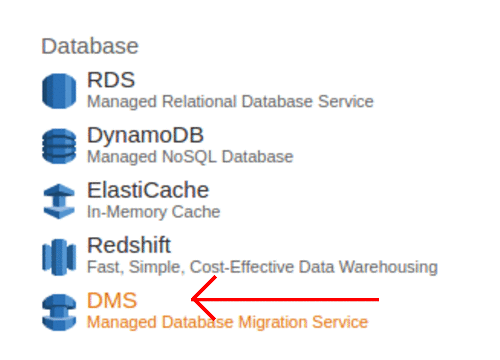
1. Login to your AWS console. From the Database category in the bottom left corner, choose “Database Migration Service“:
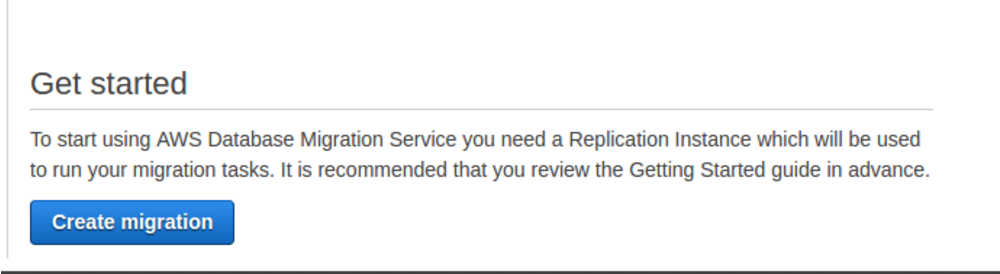
2. Click on Create Migration. It opens a new window and then click next at the bottom right corner:
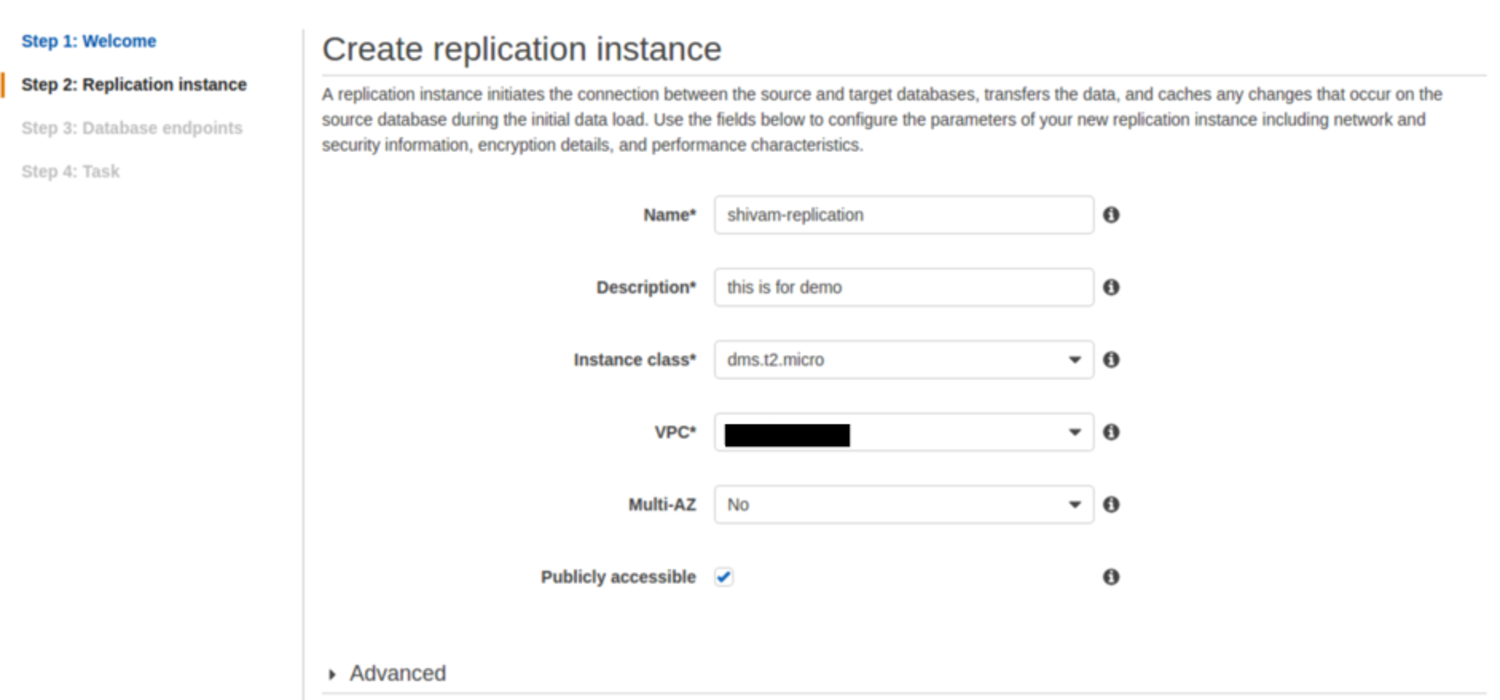
3. Create Replication instance and provide the necessary parameters to create replication instance. Replication instance initiates the connection between the source and target databases. It basically unloads data from the origin database and loads it into the destination database. AWS DMS can be used for a one-time migration process which is followed by an on-going replication between source and destination to support migration that entails minimal downtime. It also caches any changes that occur on the source database during the initial data load.
- First, you give the name of the instance and its description.The name should be unique for your account for the region you selected.
- We can choose the instance class from the drop down list based on our requirements.
- Select a VPC inside which the replication instance is to be launched.
- Choose the Multi-AZ option to create a standby replica of your replication instance in another Availability Zone for failover support.
- Check the Publicly accessible option if you want the replication instance to be accessible over the Internet.
- Click on Next button and then click on create button:
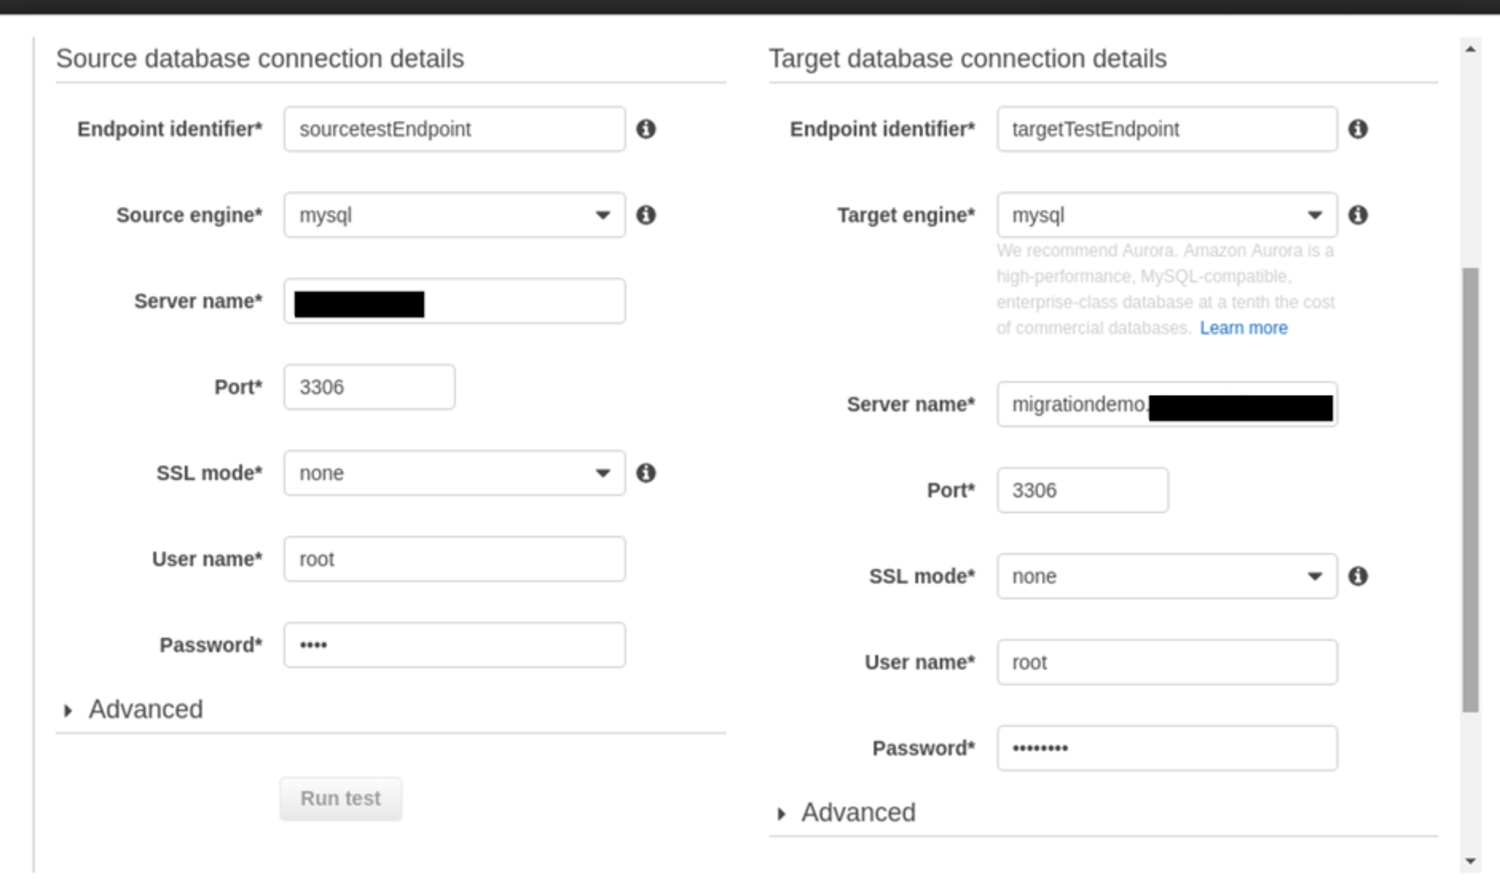
3. Create source and target database endpoints by giving the necessary parameters:
- For source database, give the endpoint identifier which is use to identify the endpoint. The given name should be unique for all replication instances.
- Choose the type of database engine and give the server name and the port number on which database operates.
- Choose an SSL mode if we want to enable encryption for this endpoint.
- Type the username and the password with the permissions required to allow database migration.
- Same steps are followed for the target database.
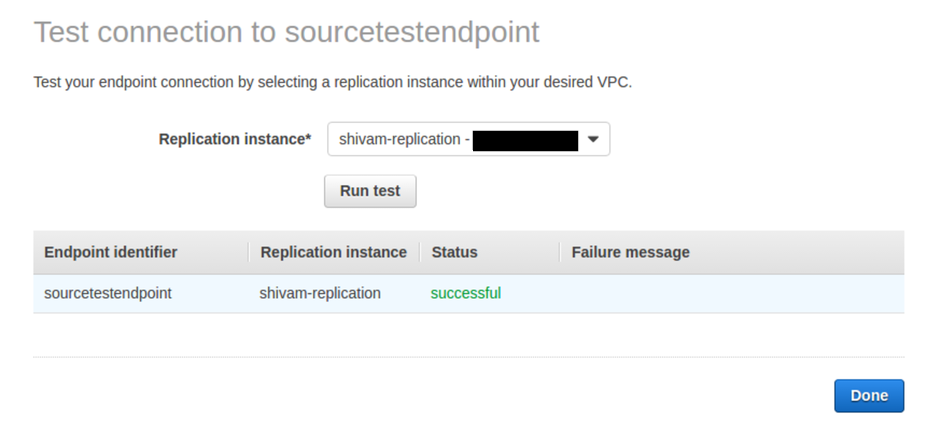
- Click on Run test to make sure that the endpoints are accessible from the replication instance:
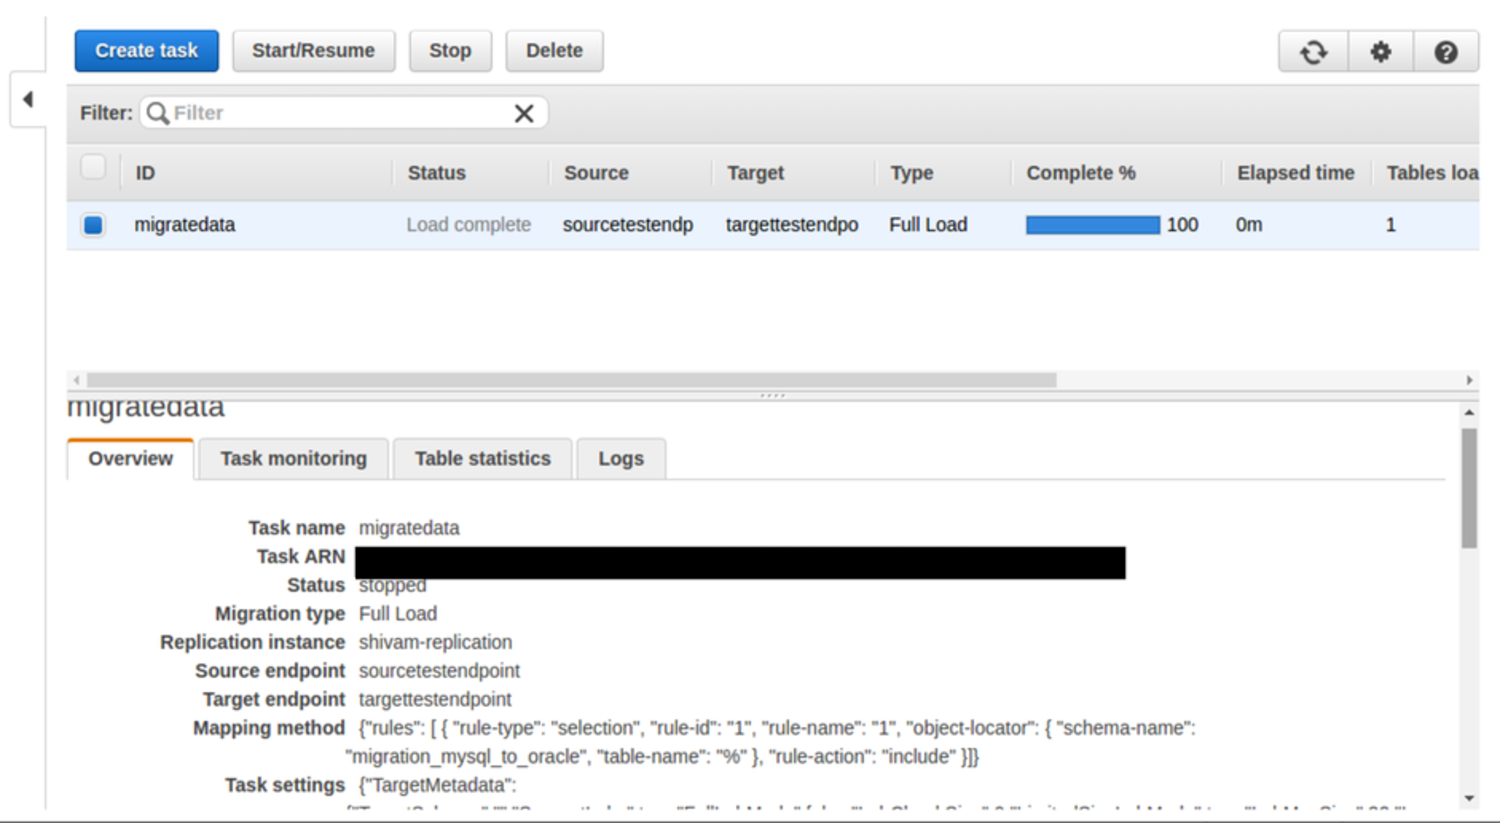
4. Create Task in which we specify the source, target database, and replication instance:
- From the drop down list choose the migration method we want to use. We can opt to have just the existing data migrated to the target database or have ongoing changes sent to the destination database in addition to the migrated data.
5. Start task.
6. We can watch for progress, and then inspect the Table statistics to see what happened:
Some points that need to be taken care of are:
1. Allow specific inbound and outbound rules in security groups that attached on your ec2 instance and RDS instance.
2. In /etc/mysql/my.cnf file bind address should be your server IP address.
3. Grant access to user to access the MySQL database (grant all on *.* to user_name@’%’ identified by ‘password’).
Hope this was useful to you for migrating your existing database along with database replication.


