Introduction to PolymerJS: Building Web Components
In the history of web development there have been many changes. Day by day new innovations were introduced in the market to make web more interative and meet user expectations. Javascript has evolve a lot due to these innovations but HTML hasn’t grown that much. So at the end of the day we end up in writting more and more javascript code to meet user expectations.
In the hussel of the new upcoming technologies Web Components were introduced in web standards to create our very own custom HTML elements which behaves just like any other basic HTML element sitting there on web. Web components covered very important aspect of programing and that is reusability ( i.e develop once and use anytime) and isolated scope that allows libraries to work without conflicting each other.
Web Component was the coolest solution to these problem but the only limitation is that they are not supported across all the browsers. Google being enthusiastic to use this bleeding edge technology started Polymer project and developed a polyfill webComponent-lite.js that provides support for webcomponents.
Polymer project was introduced with one thing in mind – making reusable components that just work out of the box without too much hassle. Polymer team has developed PolymerJS which use all core technologies of Web Component and allows us to create our custom component in very easy and cleaner way.
In this blog we will learn how to integrate Polymer in our application in very easy steps, making use of Polymer’s reusable components.
Adding Polymer as a dependency:
The easiest way to add Polymer to your project is through bower. If you have been using bower, then you can simply do :
[code language=”bash”]
mkdir my-polymer-project && cd $_
bower install Polymer/polymer
[/code]
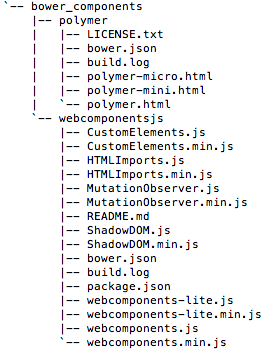
This will create a bower_components directory in the project folder with the Polymer dependency. Don’t worry about all the files that have been added. We’ll take a look at them at a later stage.
If you’re not comfortable with bower, you can directly download the zip file from https://www.polymer-project.org/ and extract the zip file in your project folder.
Web Components Polyfill
An important library that’s added as part of the Polymer package is a polyfill library named “webcomponents.js” in the above image. Polymer builds its entire framework on standards documented as part of the “Web Components” standards. However, since these standards are not supported across all browsers, Polymer uses this polyfill library to somewhat bridge the implementation gaps between browsers.
Using pre-built components
Let’s get started now! In order to get started quickly, the Polymer team has provided a vast range of reusable elements that we can use in creating our own webpage and apps. These elements are themselves built with the Polymer library and are available for use directly. The catalog of pre-built components is listed here.
To use any element from the collections mentioned, we can either install one element at a time or we can install the whole collection as well. For example if we have to use google-map component from Google Web Components suite, then install it using bower :
[code language=”bash”]
bower install GoogleWebComponents/google-web-components
[/code]
OR
[code language=”bash”]
bower install GoogleWebComponents/google-map
[/code]
Once all the dependencies are in place, we can simply use the element by importing the requisite HTML file of the component. Let’s quickly use the google-map element to render a Google map (surprise!).
[code language=”html”]
<html lang="en">
<head>
<meta charset="UTF-8">
<title>My Google Map</title>
<script src="bower_components/webcomponentsjs/webcomponents.min.js"></script>
<link rel="import" href="bower_components/google-map/google-map.html">
</head>
<body>
<style>
google-map {
height: 800px;
}
</style>
<google-map></google-map>
</body>
</html>
[/code]
And there you have it! Few lines of code and you have a full fledged working Google map on your page. You can also specify more options for the custom element. We can also add our own style classes on different properties of elements as we have done above in the code snippet.
This is a very basic example of how web components can make web development easier by taking out the pain involved in integration and conflicting dependencies. In the next blog, we’ll take a look at how we can build our own custom elements to build up a very basic webpage.