From the analytics point of view, tracking user behaviour helps you a lot in defining the design of your web pages and making better business decisions. Based on user interaction data, you can make apt refinements in your design and take smart business decisions.
Actually, the current web page layout you are viewing for this post has been drawn based on the user behaviour data from Google analytics.
An important element in tracking user behaviour is link click tracking. In terms of Google analytics, it is also known as user click tracking, click event tracking, on click event tracking and internal link click tracking.
Note: This post is not about external / outbound links click tracking.
You can track click events either by making changes in Google analytics tracking code or simply using Google tag manager. I prefer using Google tag manager as it replaces the hard-coded tags with dynamic tags that are easier to implement and update without any dependency on web developers.
This blog post is a step by step tutorial both for beginners and experts for setting up a click event tracking using Google tag manager version 2.
I am assuming that you have already set up your Google tag manager account.
Clicks Tracking on a link via Google Tag Manager (GTM)
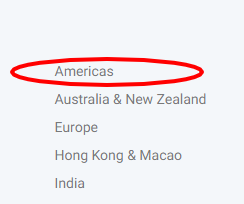
Following is an example of few links on a web page:
<a id=”Americas” href=”http://example.com/Americas” >Americas</a>
<a id=”AU-NZ” href=”http://example.com/AU-NZ” >Australia and New Zealand</a>
<a id=”Europe” href=”http://example.com/Europe” >Europe</a>
<a id=”HG-MC” href=”http://example.com/HG-MC” >Hong Kong & Macao</a>
<a id=”India” href=”http://example.com/India” >India</a>
Sample Link
Step 1: Login to Google Tag Manager (https://tagmanager.google.com/).
After login, you will get a screen similar to the following screenshot:
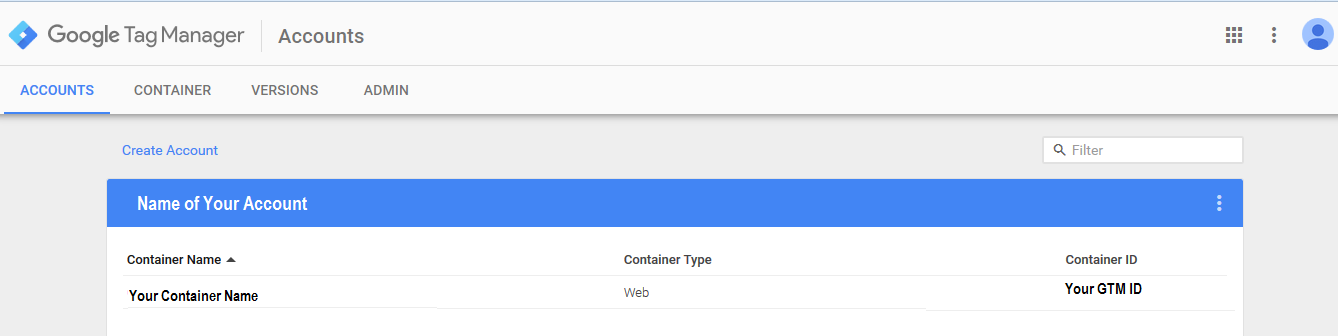
Step 2: In the top navigation, click on “Container”.
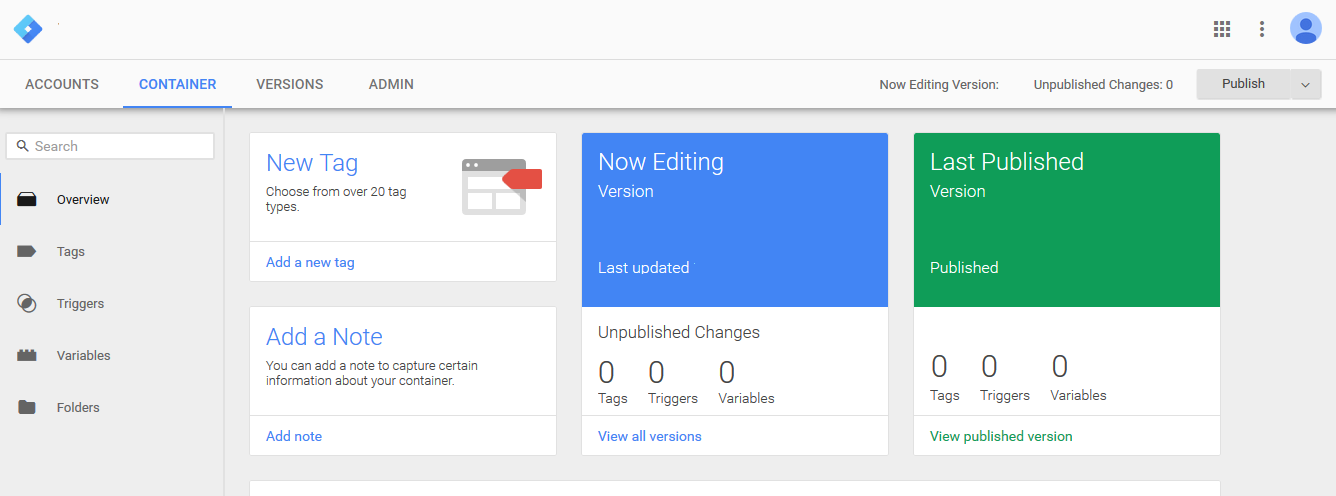
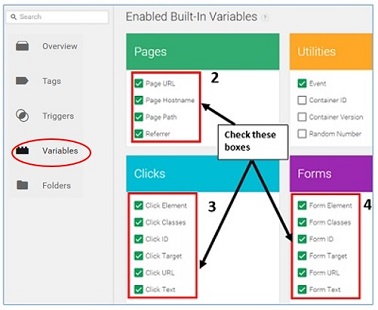
Step 3: Navigate to your Google tag manager (GTM) account, click on the “Variables” link in the left navigation and then enable all the ‘built-in variables’ of type: Pages, Clicks, and Forms.
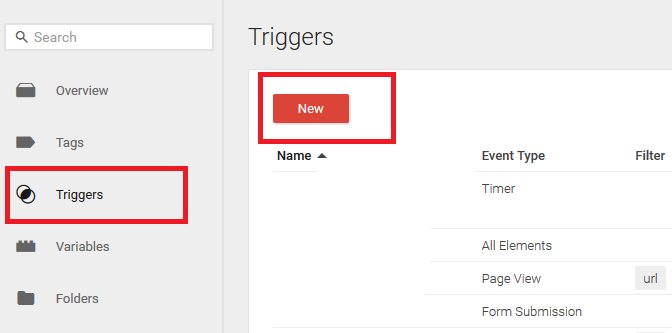
Step 4: Go to “Triggers” on left navigation in Google tag manager.
Step 5: Click on “New” to create a new trigger.
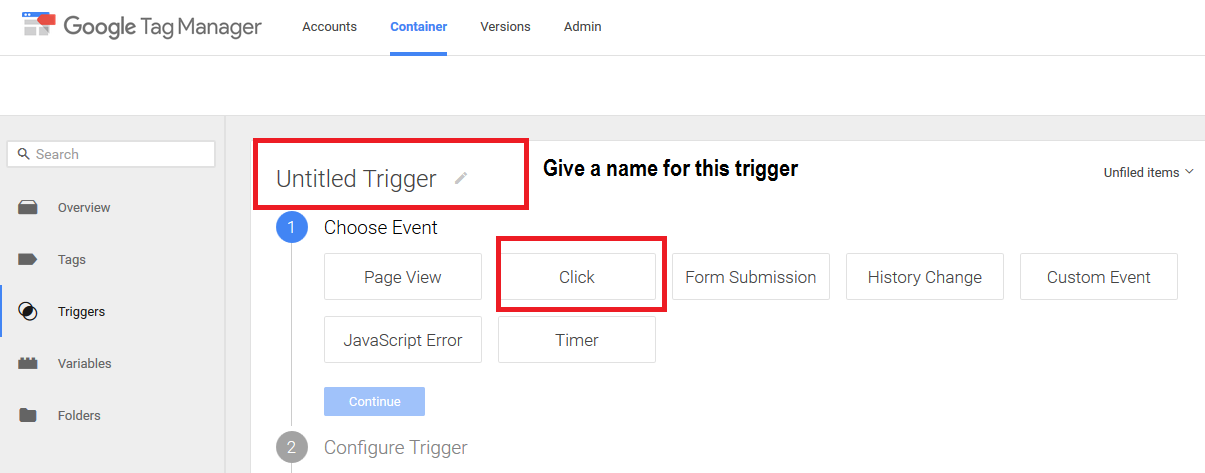
Step 6: Give a name to the trigger, say “Americas” (the same text as in the example above), then select “Click” and “Continue”.
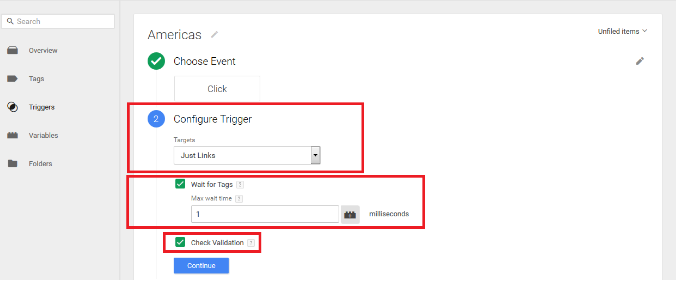
Step 7: Next, under “Configure Trigger” select “Just Links” from the dropdown. Next, check wait for tags and put a value of 1 under max wait time and check the checkbox of “Check Validation” and click on “Continue”.
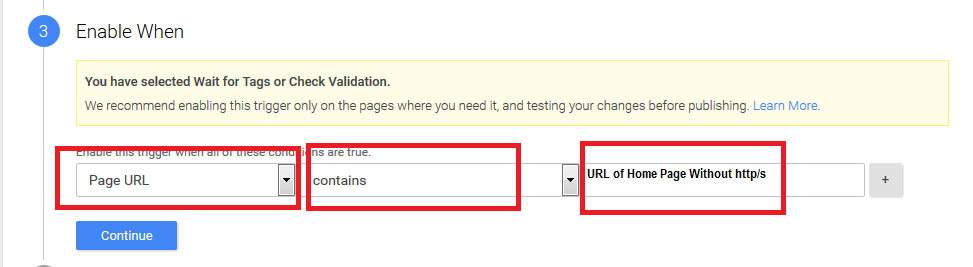
Step 8: Under Enable When, select “Page URL” from the first drop-down, “contains” from second drop down and write the URL of your website without http/s and www (example.com) in the textbox and click “Continue”.
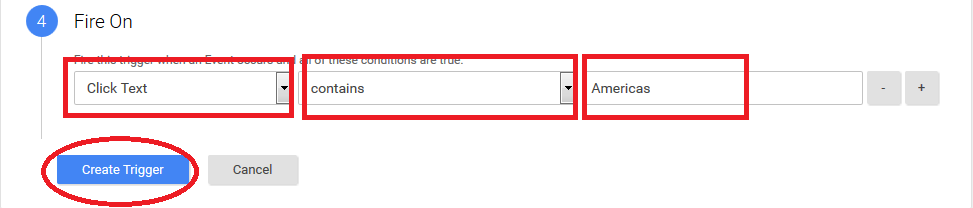
Step 9: Go to “Fire On” and select “Some clicks”.
Step 10: Define the trigger to “fire on” at what conditions. To track a click on “Americas” text link (anchor text), we have to select “Click Text”, append a condition “contains” and write the desired text “Americas”.
Step 11: Repeat the steps 8 to 11 to create triggers for each of the text (anchor text) to be tracked. So, total you need to create 5 triggers.
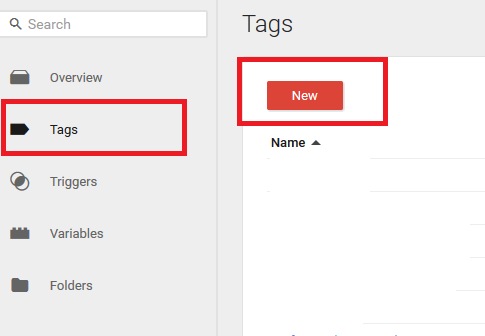
Step 12: Navigate to “Tags” on the left-hand navigation and click on “New”.
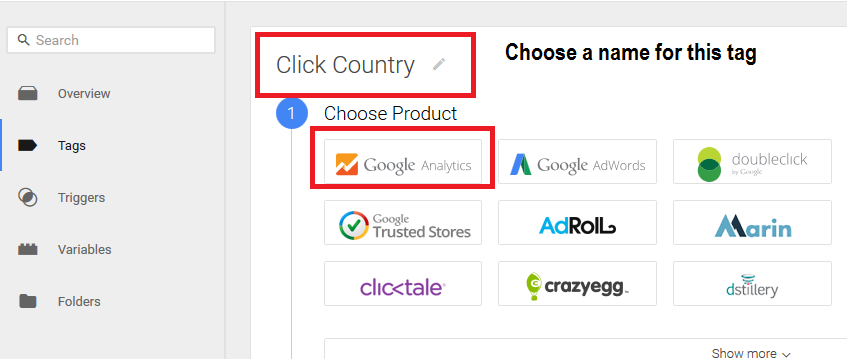
Step 13: Create a new tag with a name like “Click Country” while selecting Google Analytics as a product.
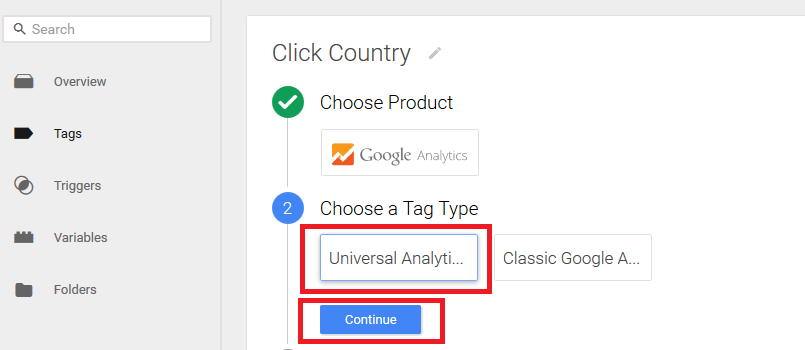
Step 14: Select “Universal Analytics” and then click on “Continue”.
Step 15: Next, configure the tag with following values:
Tracking ID – Place your Google Analytics Tracking ID
Track Type – Event
Category – {{Click Text}} | {{Page URL}}
Action – {{Page URL}}
Label – {{Click Text}}
Non-Interaction Hit – False
Click Text – It will display the anchor text being clicked.
Page URL – It will display the source page on which the link is present.
Having both click text and page URL will help in advanced filtering and using secondary dimensions.
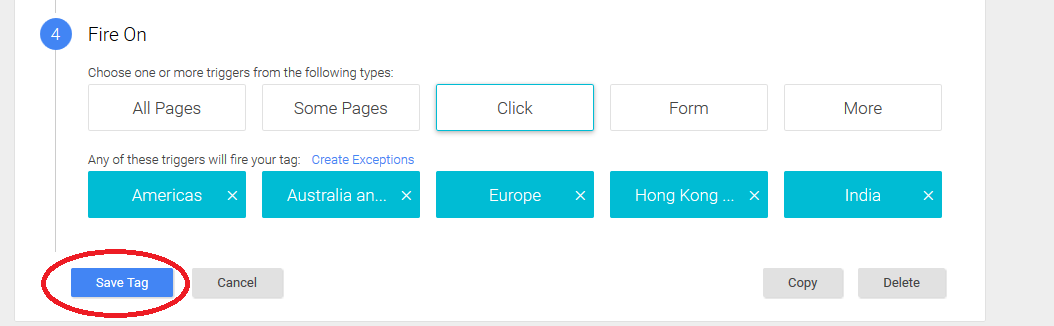
Step 16: Configure the “Fire ON” by selecting “More”.

Step 17: Select all the 5 triggers you have created earlier from the provided list.
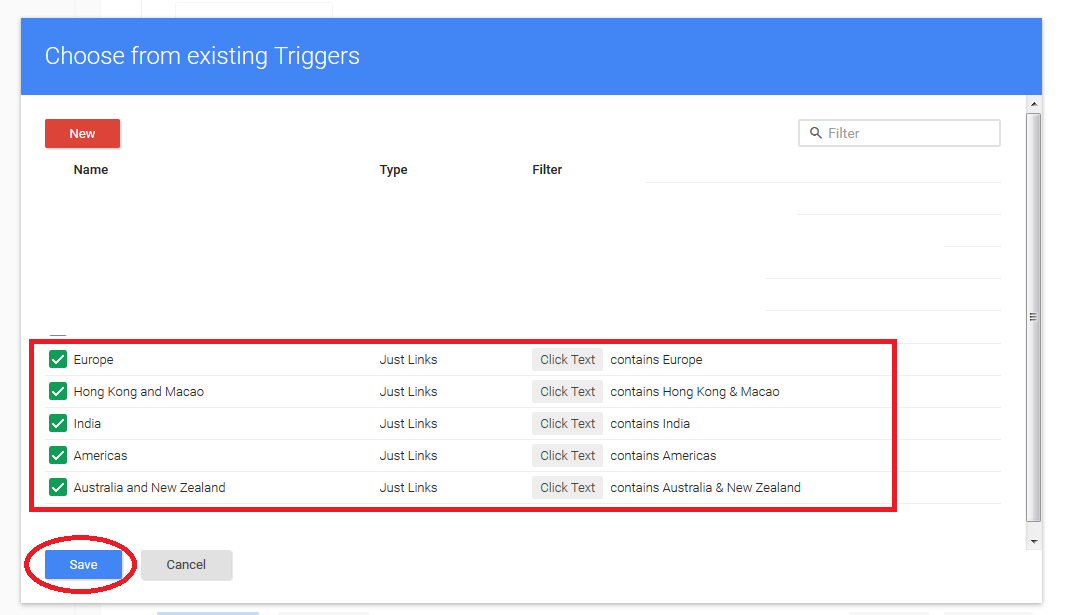
Step 18: Click on “Save” tag.
Now you are done with all the settings in Google tag manager.
How to check if the events creation is correct or not ?
One of the common search queries is “google analytics event tracking not working”.
So, after creating all the tags and triggers, we need to check if these are working fine or throwing an error. Here are a few steps to verify the click event tracking implementation:
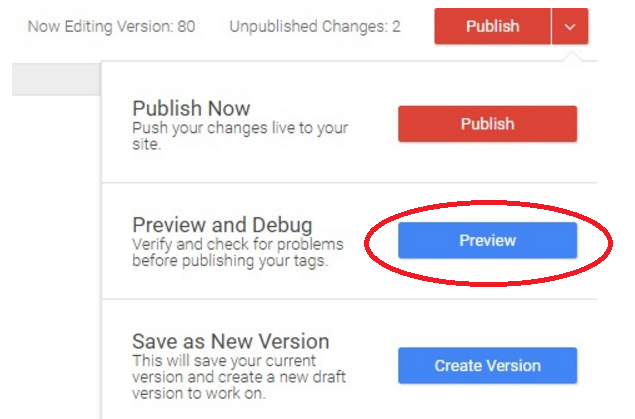
Step 1: Select debug mode in GTM.
Step 2: Open your website in a new tab in the same browser. You will find a section in the footer side, where you will get information about tags being fired or not on that page.
Step 3: Click on a targeted link say Americas, you will find a GTM tag fire on it (shown in the footer window).
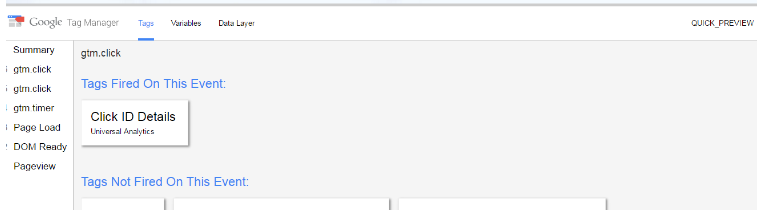
Step 4: If you get a message “Tag Fired on This Event”, it indicates that the event creation is successfully done.
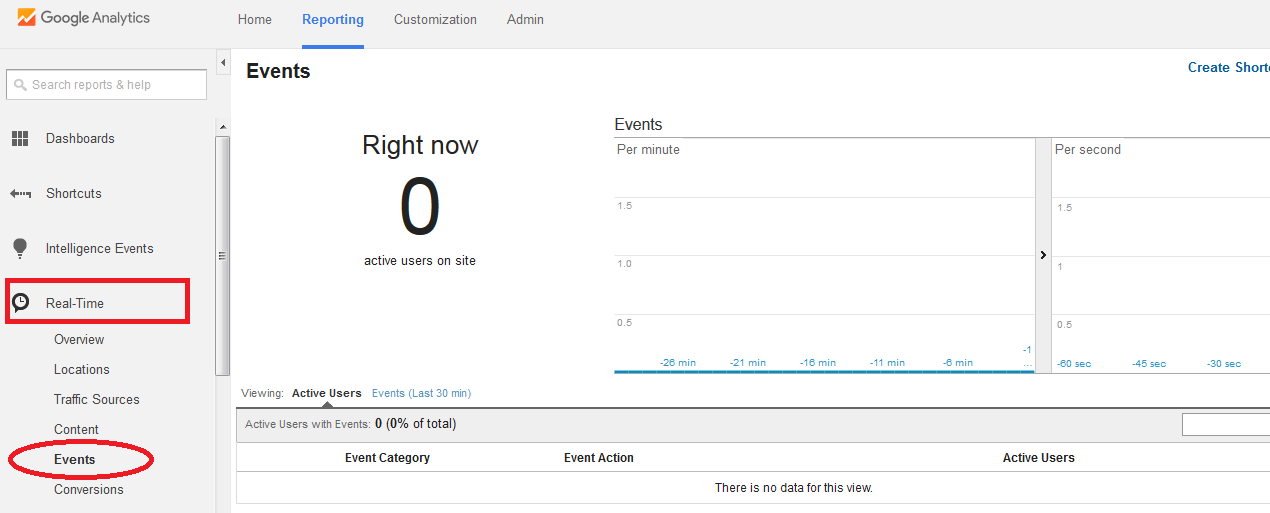
Step 5: Verify this click event in Google Analytics: To track this click event, go to Google analytics and check event in real time, you will find your click event in Google analytics.
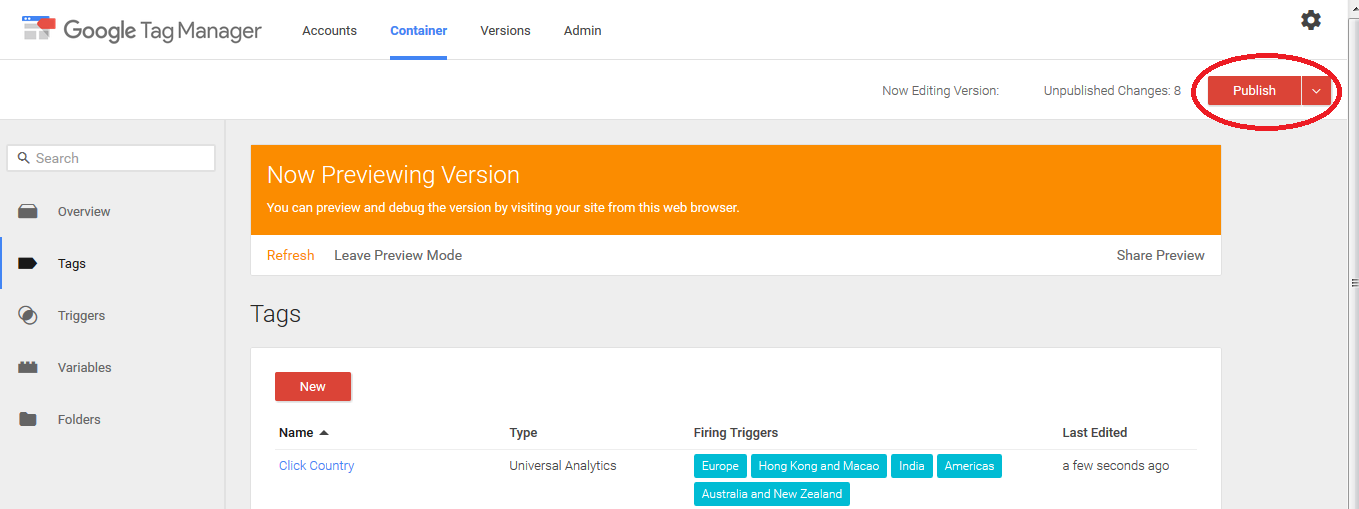
Step 6: If successful, click on publish on top right-hand side in Google tag manager.
This is how you will be able to track the clicks on the desired anchor texts using Google tag manager and Google analytics.
Stay tuned for my next post on implementing scroll depth using Google tag manager V2 and tracking it using Google analytics.
Let’s discuss your queries in the comments below.