Traditionally, building user authentication from scratch can be time-consuming and complex. This is where Amazon Cognito comes in, offering a hassle-free solution to manage user registration, login, and authorization in your apps.
In this tutorial, we’ll explore the powerful capabilities of AWS Cognito to create a robust authentication or login system for your applications. Additionally, we’ll cover the essential steps to route users between pages after successful authentication seamlessly.
Understanding AWS Cognito
AWS Cognito is a service that simplifies access control for your applications out of the box, saving you the hassle of building a backend and integrating it with a database. Specifically, we’ll utilize the user pool feature, which acts as a database storing user credentials such as username, email address, and password. AWS Cognito also provides a pre-built UI for login and registration, making the entire process convenient.
Here are the key features of Cognito User Pools:
- User Registration:
– Simplified user registration process with customizable sign-up pages.
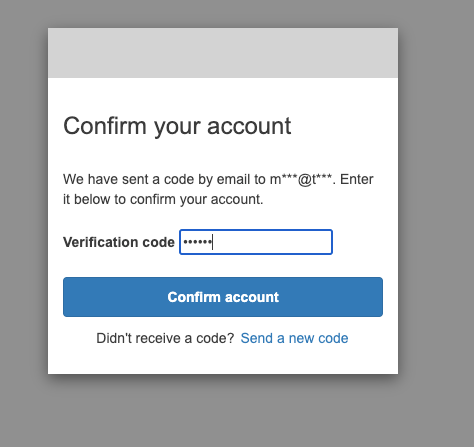
– Email verification for enhanced security. - Authentication Methods:
Support for various authentication methods, including:
– Email and password.
– Social sign-ins (e.g., Google, Facebook, Amazon).
– Multi-factor authentication (MFA) for an added layer of security. - Integration and Versatility:
– Seamless integration with web, mobile, and server-side applications.
– Versatility to support different use cases and application frameworks. - Security Measures:
– Token-based authentication to secure communication between the application and the user pool.
– Built-in protection against common security threats. - Scalability:
– Automatic scaling to handle a large number of users without manual intervention.
– Reliable performance even as the user base grows. - Developer-Friendly Tools:
– AWS Cognito provides a hosted UI that developers can leverage for user authentication, reducing the effort required for UI development.
Steps to Create AWS Cognito User Pool
1. Log in to the AWS Management Console and search for “Cognito” using the search bar. Then, open the Cognito service.
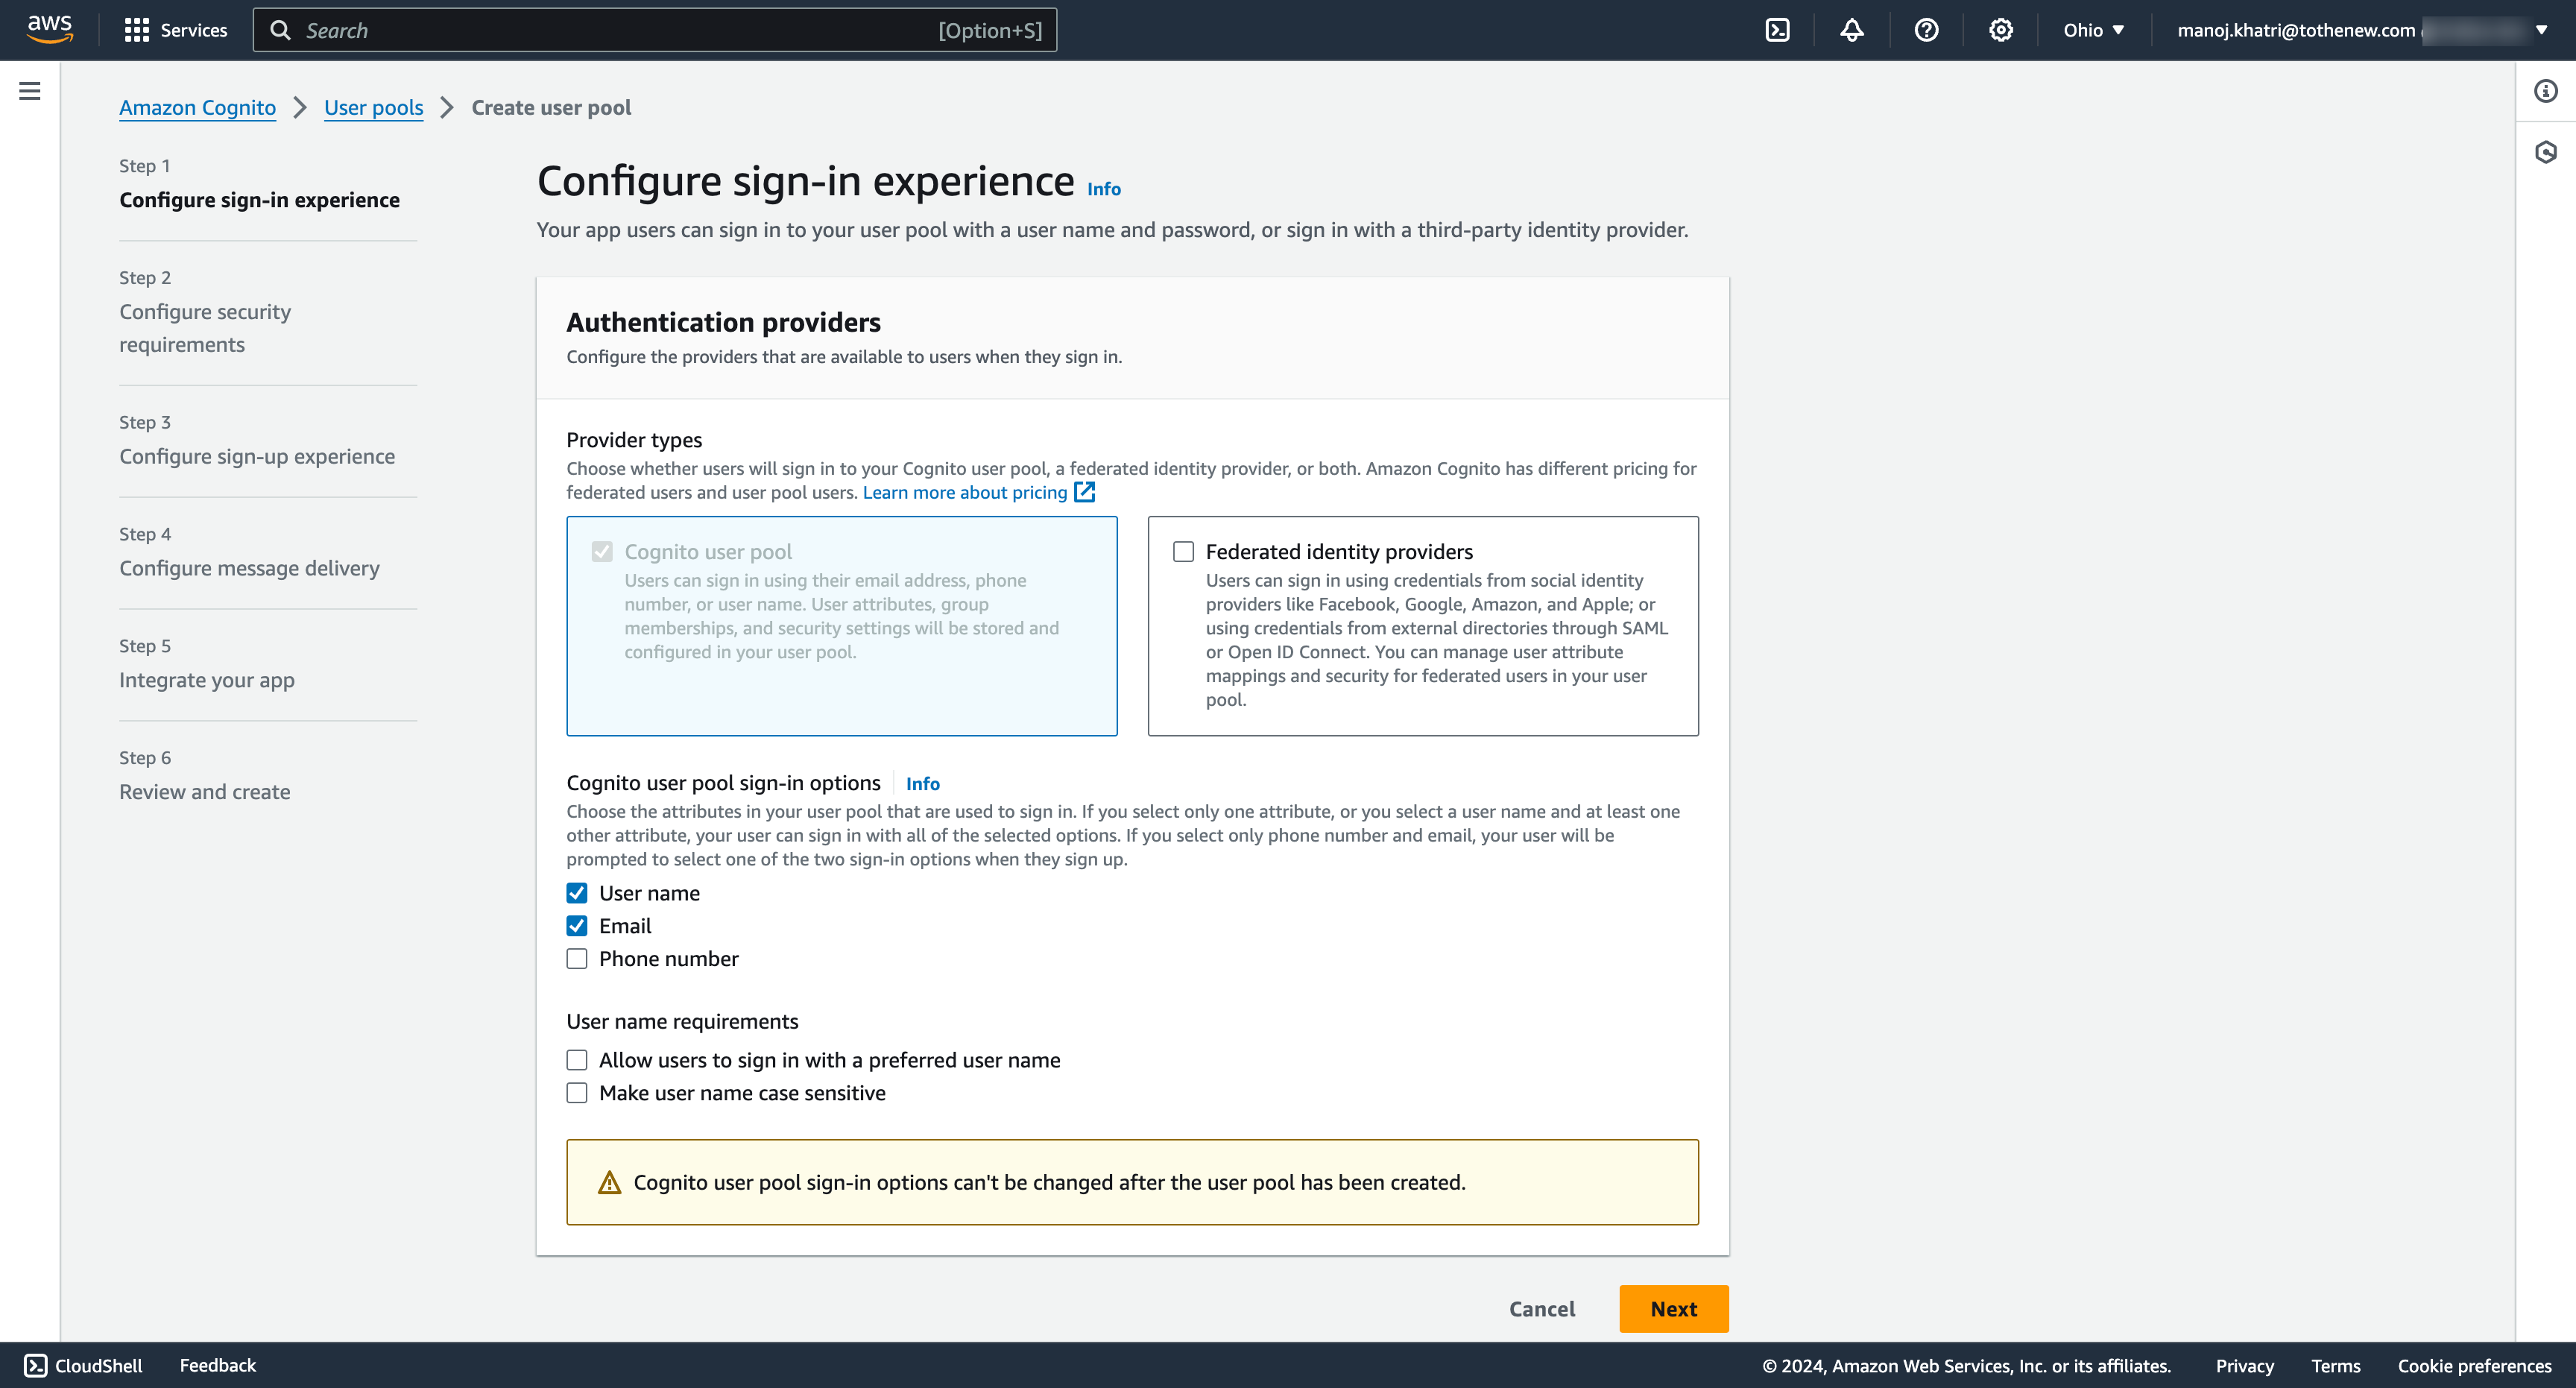
2. Click on the “Create User Pool” button. You will choose between two ways users can log in.
-
- Standard login( default)
- Users create an account with an email and password, managed by Cognito.
- Social login
- Users log in with existing accounts from platforms like Facebook or Google.
- Standard login( default)
3. Since we are implementing the login with email/username , we will be selecting the sign-in options with Username and Email.
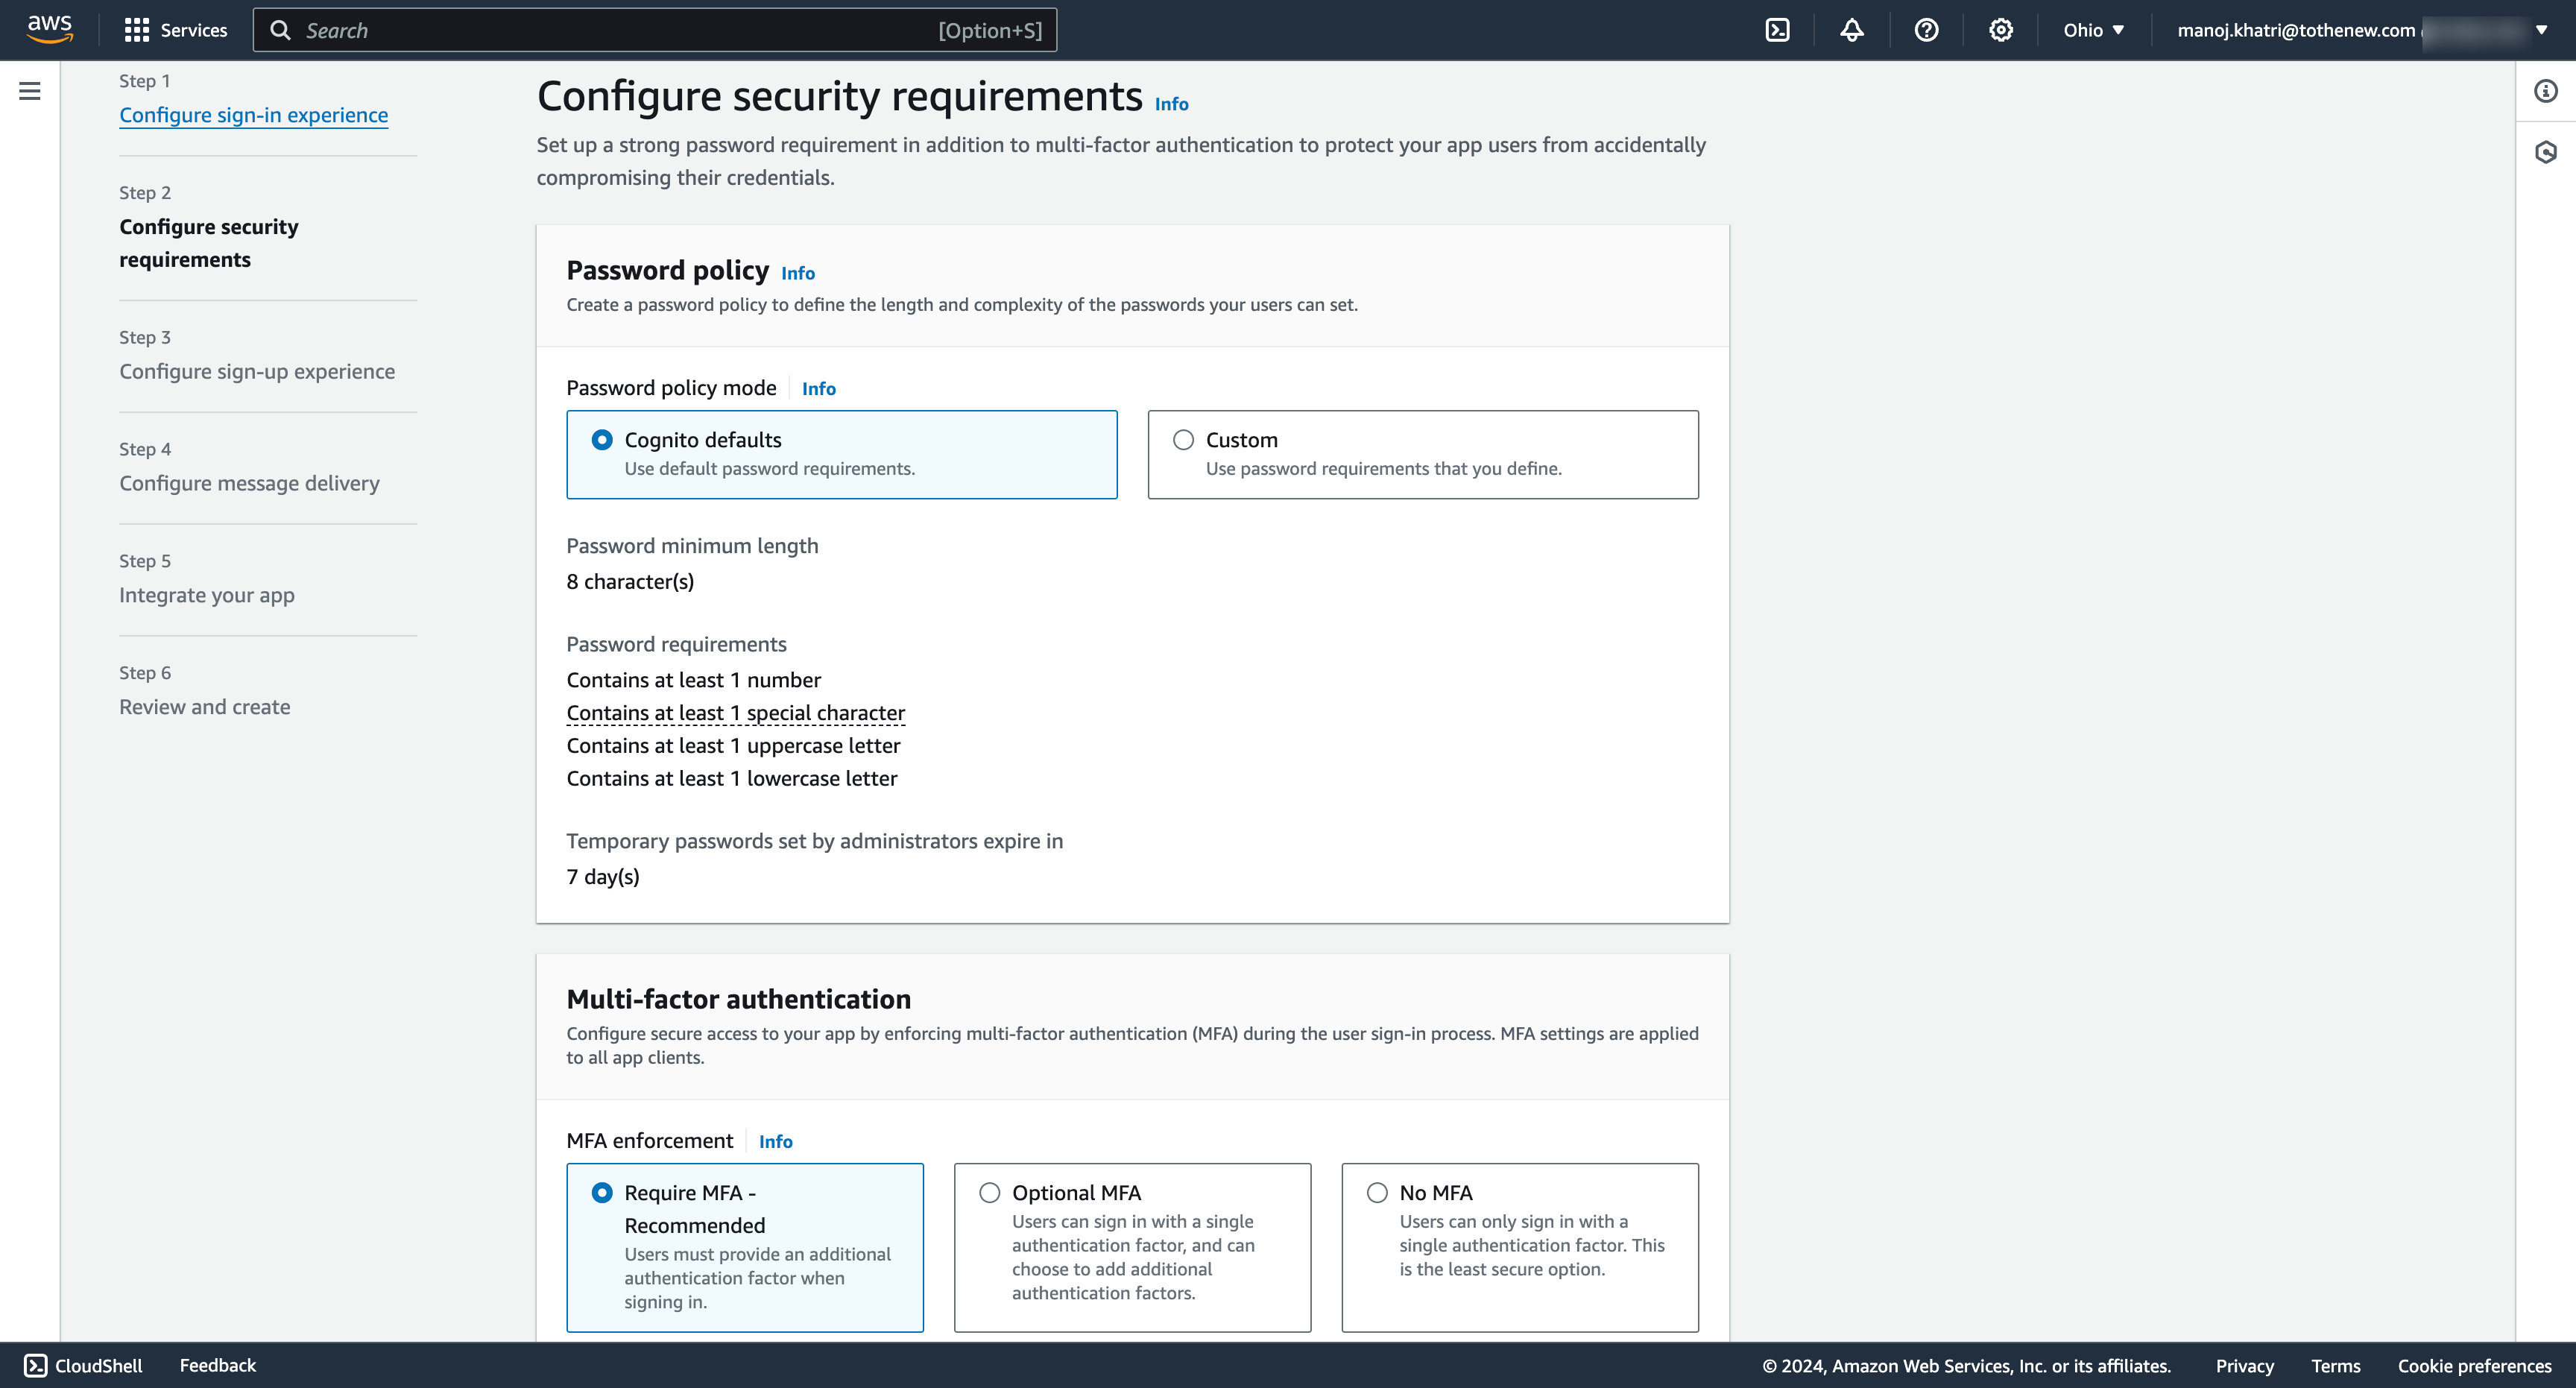
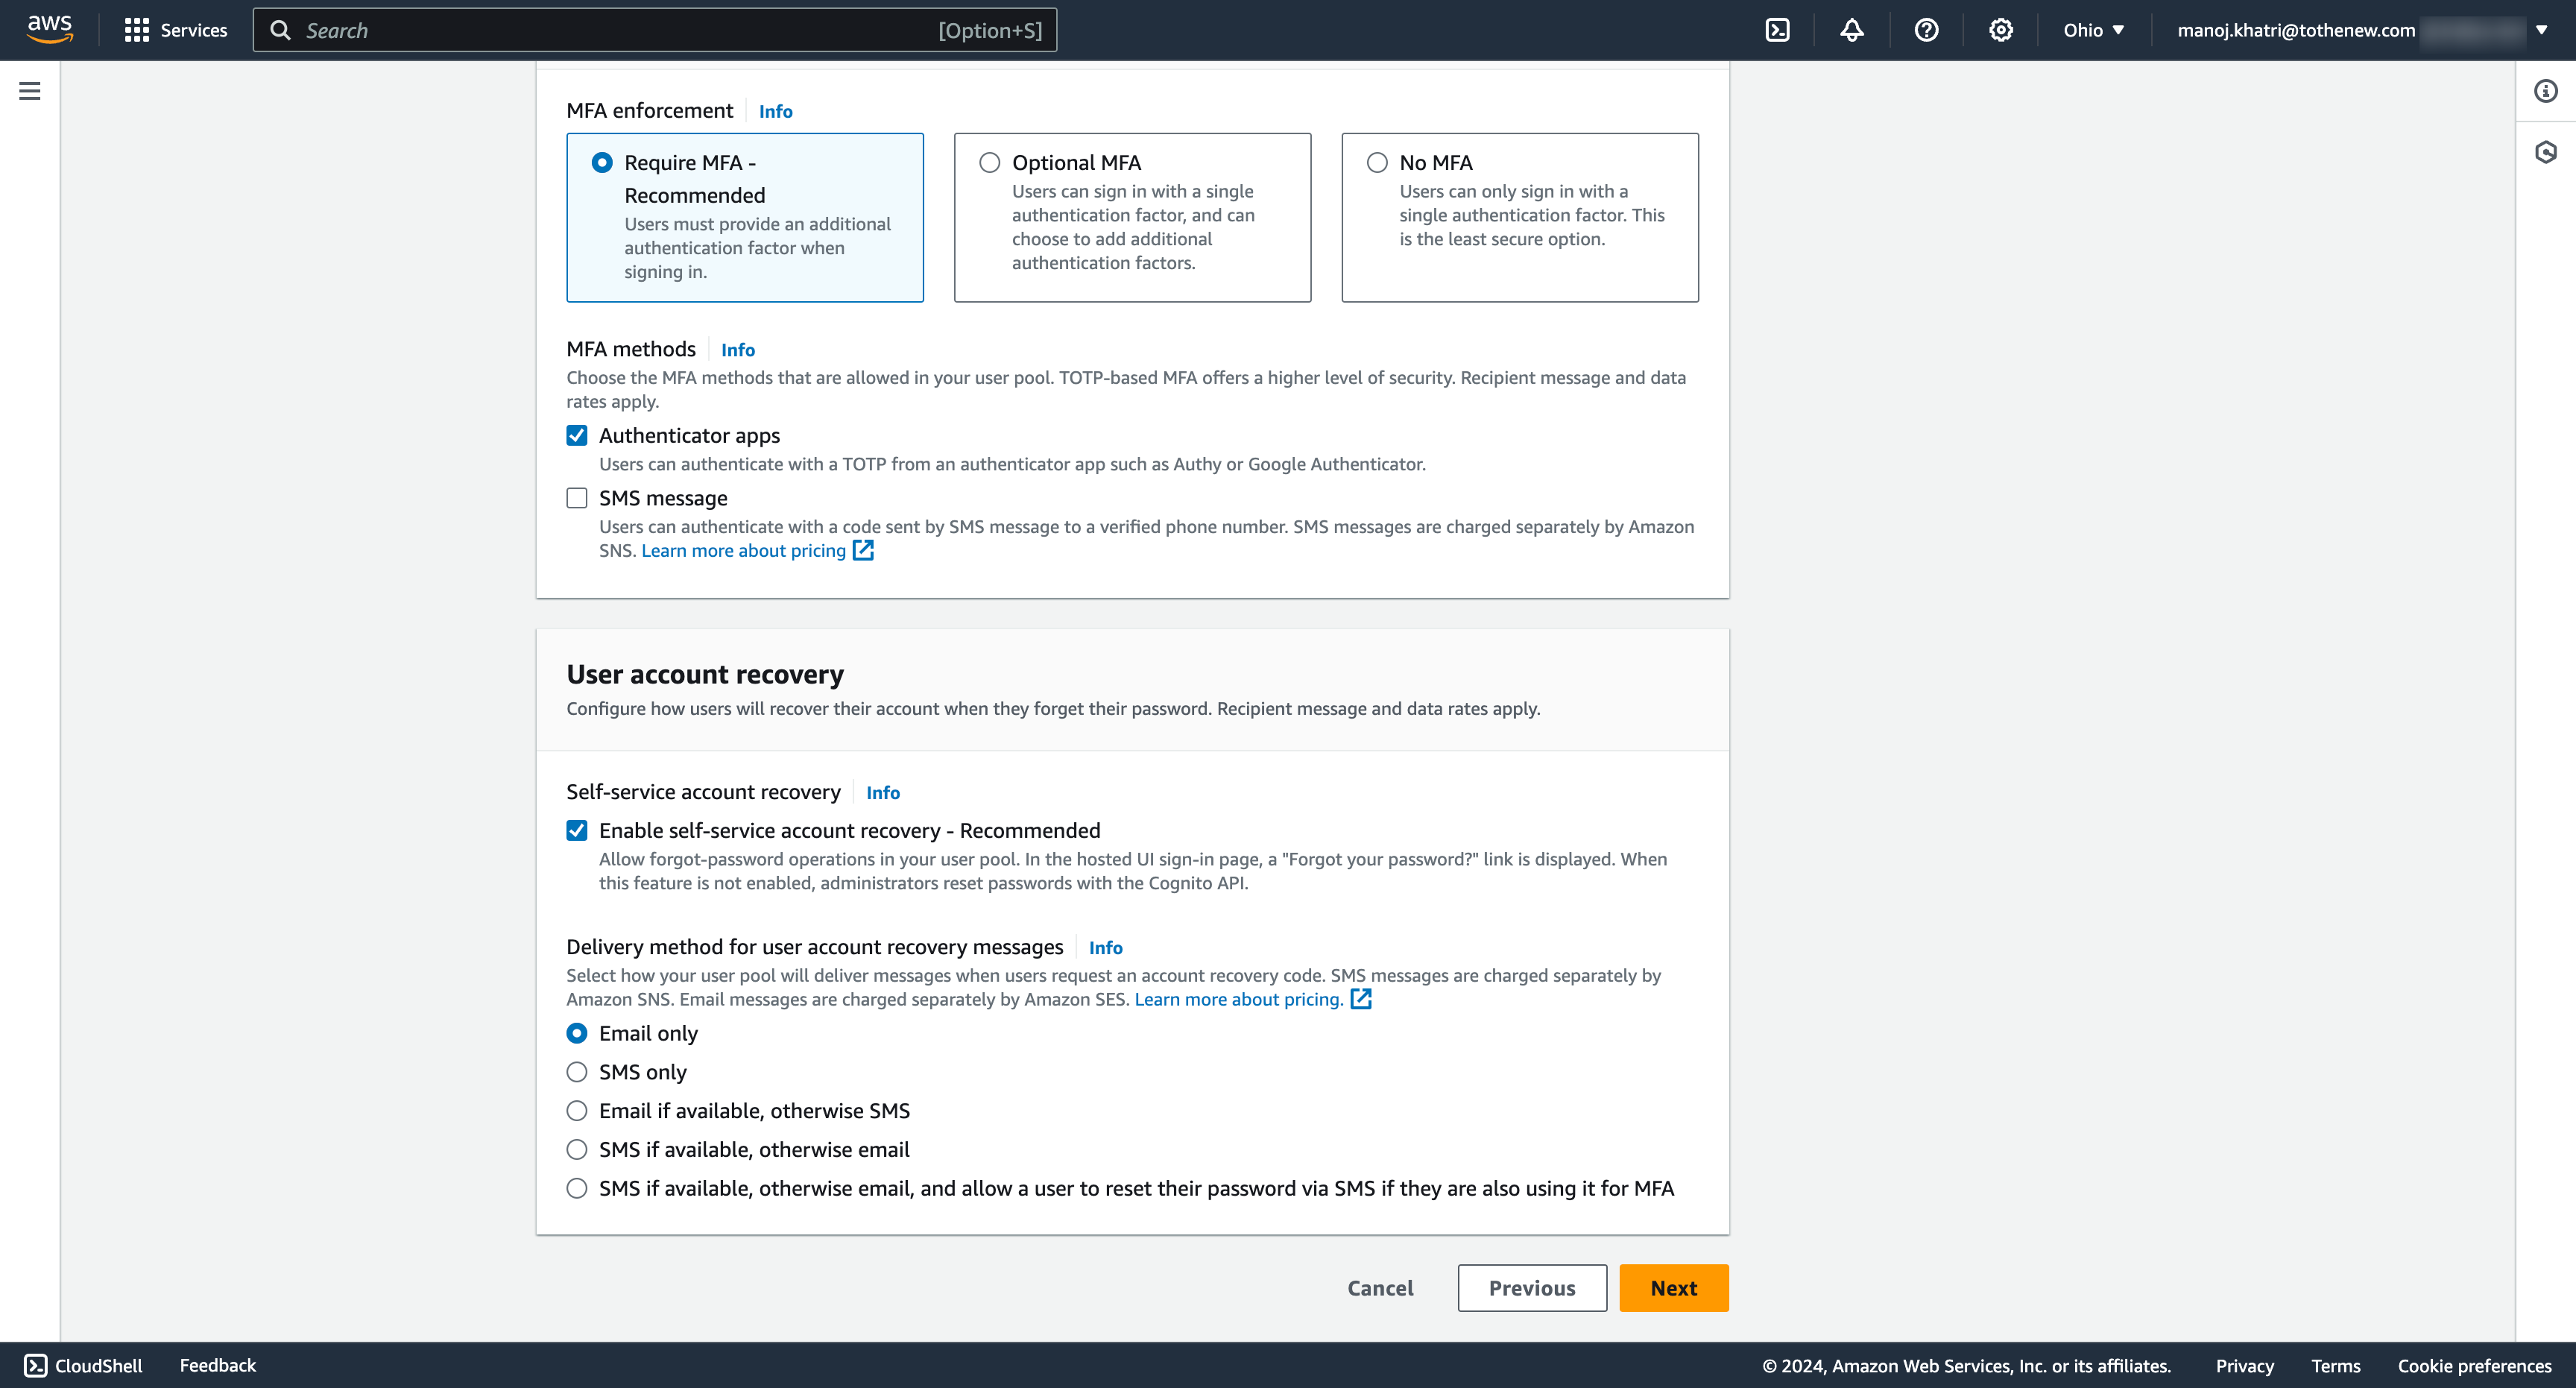
4. Configure security requirements
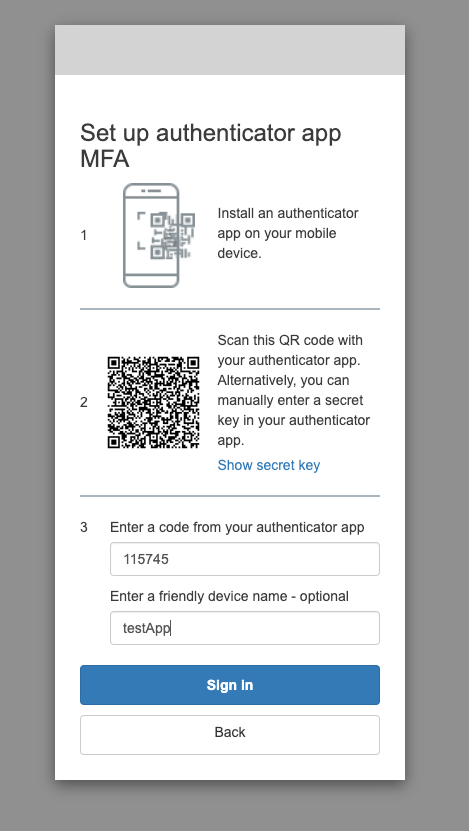
- Configure your desired settings, such as password policies, multi-factor authentication, MFA methods, and User account recovery. For the test app, we will be choosing MFA methods Authenticator apps.
- Regarding the User account recovery option, tick the recommended option for self-service account recovery and choose the option Email. You can choose any other options too.
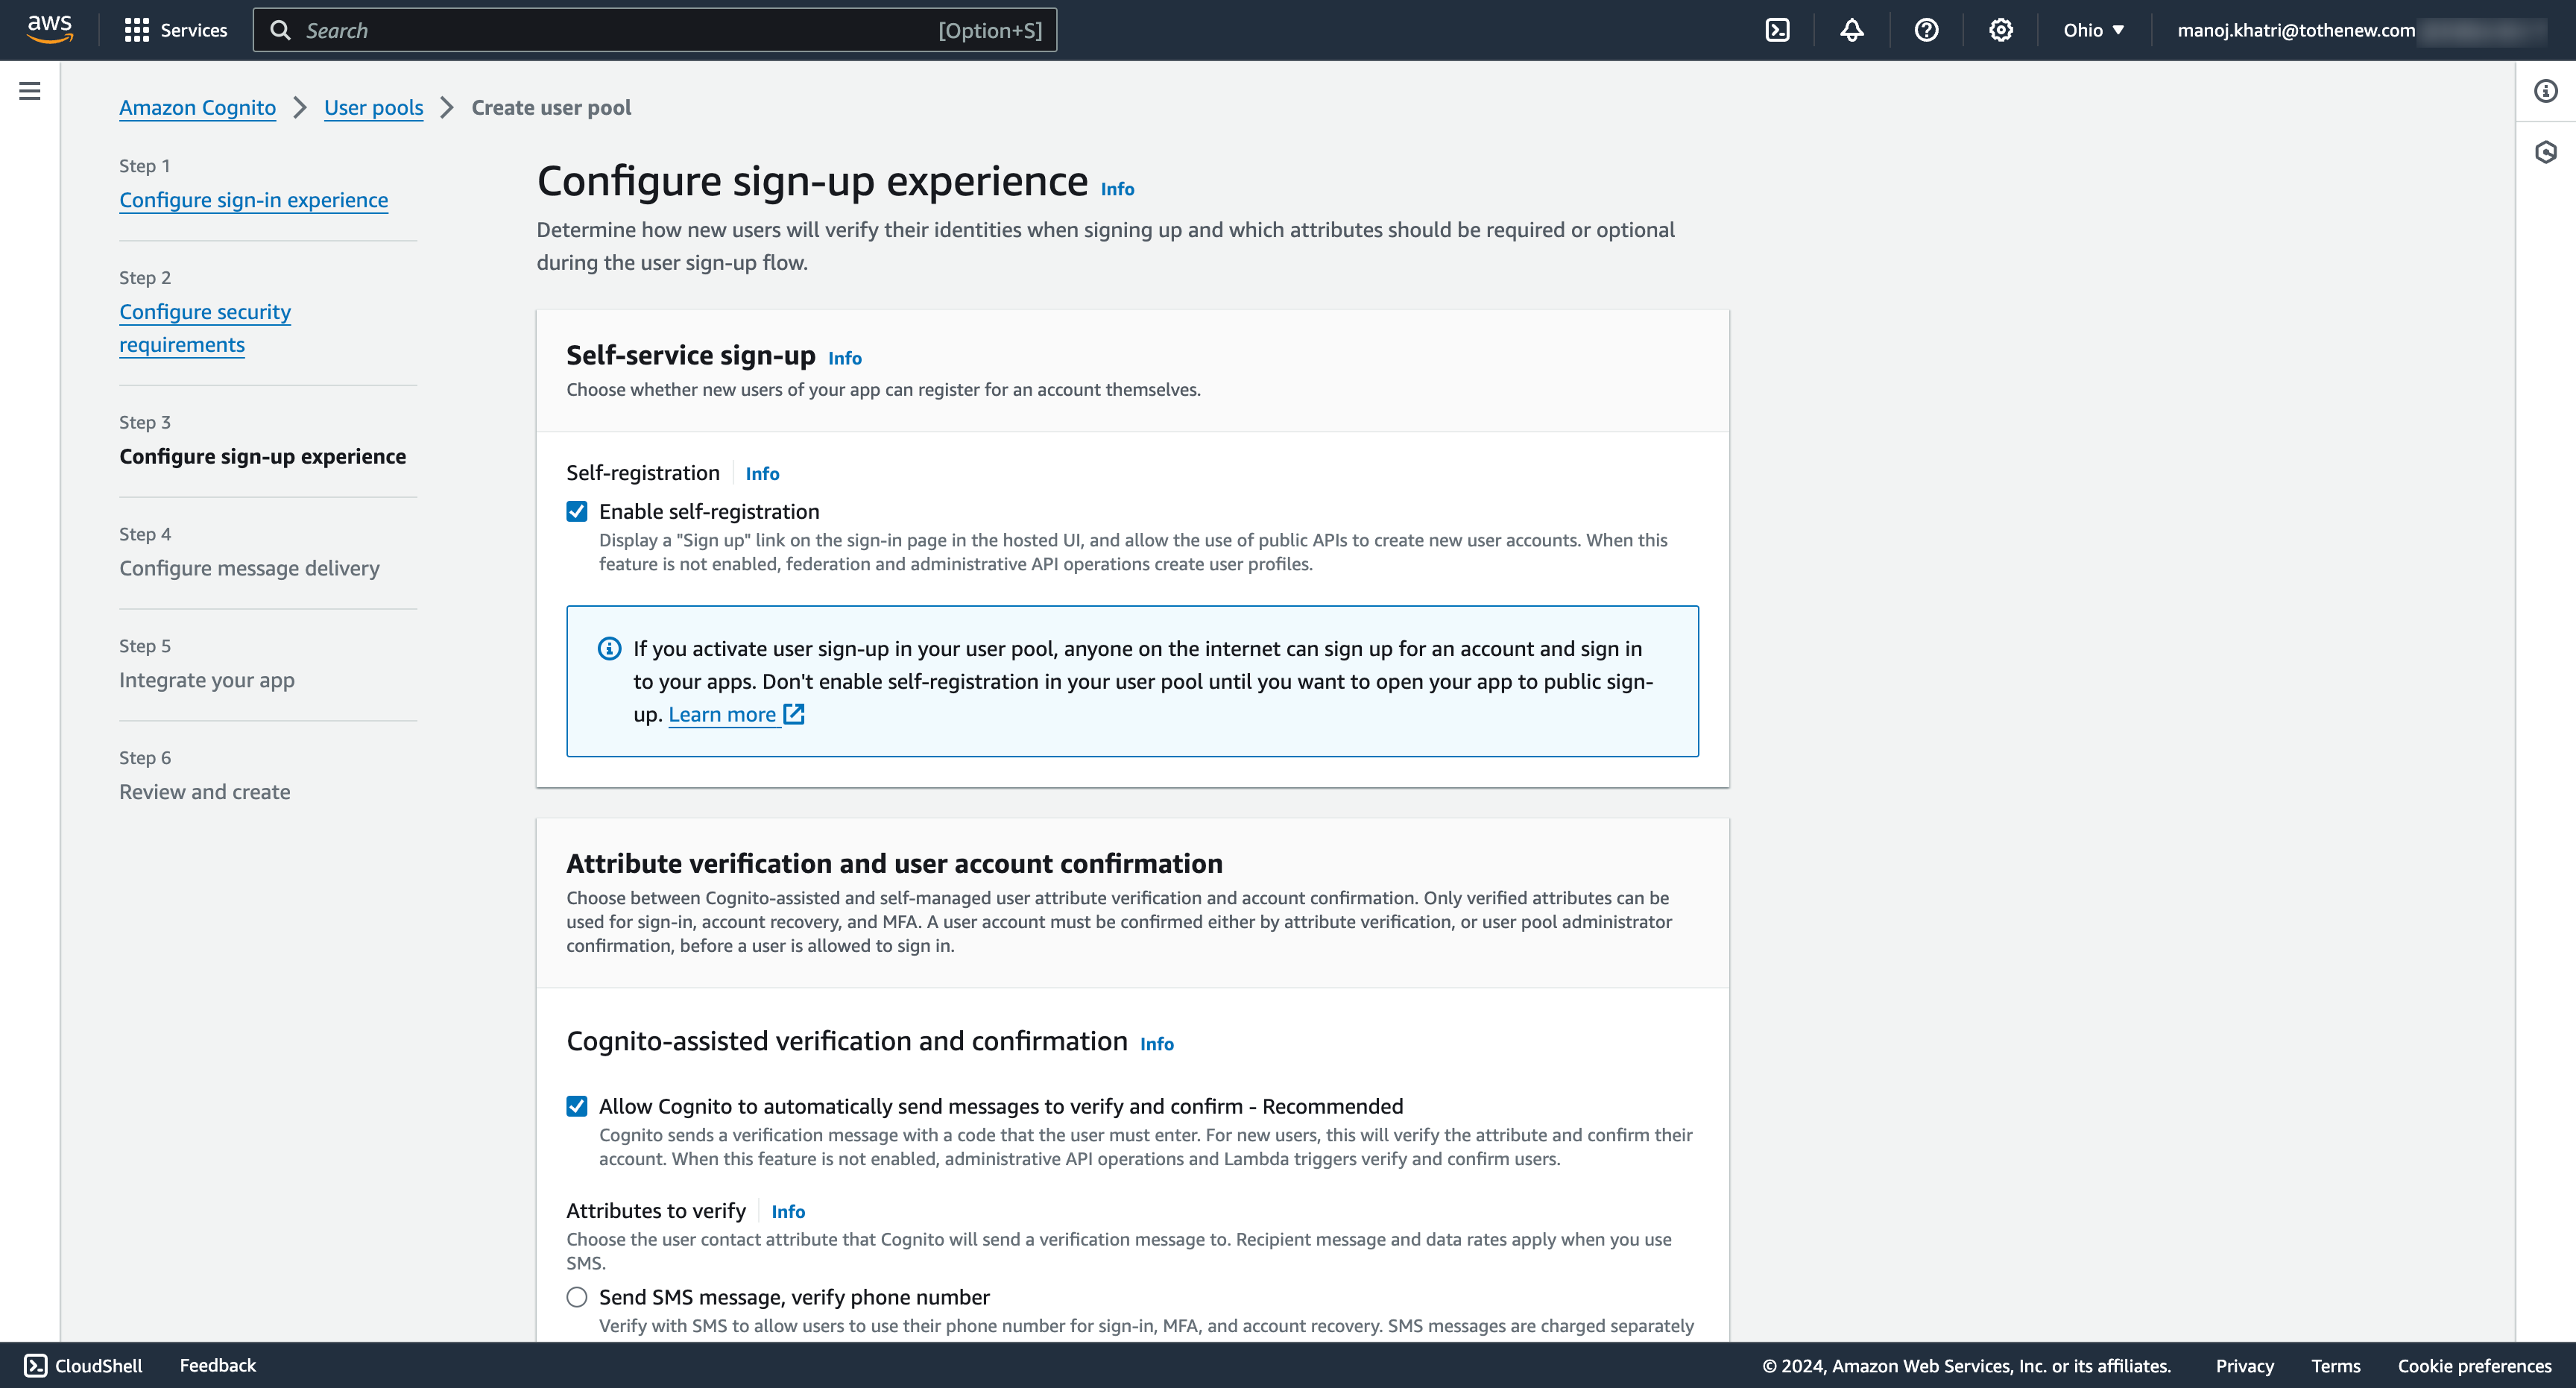
5. Configure sign-up experience
- Customize the sign-up process to suit your requirements by setting required attributes and custom attributes. These attributes will be displayed to the user on the sign-up page and stored in the Cognito user pool.
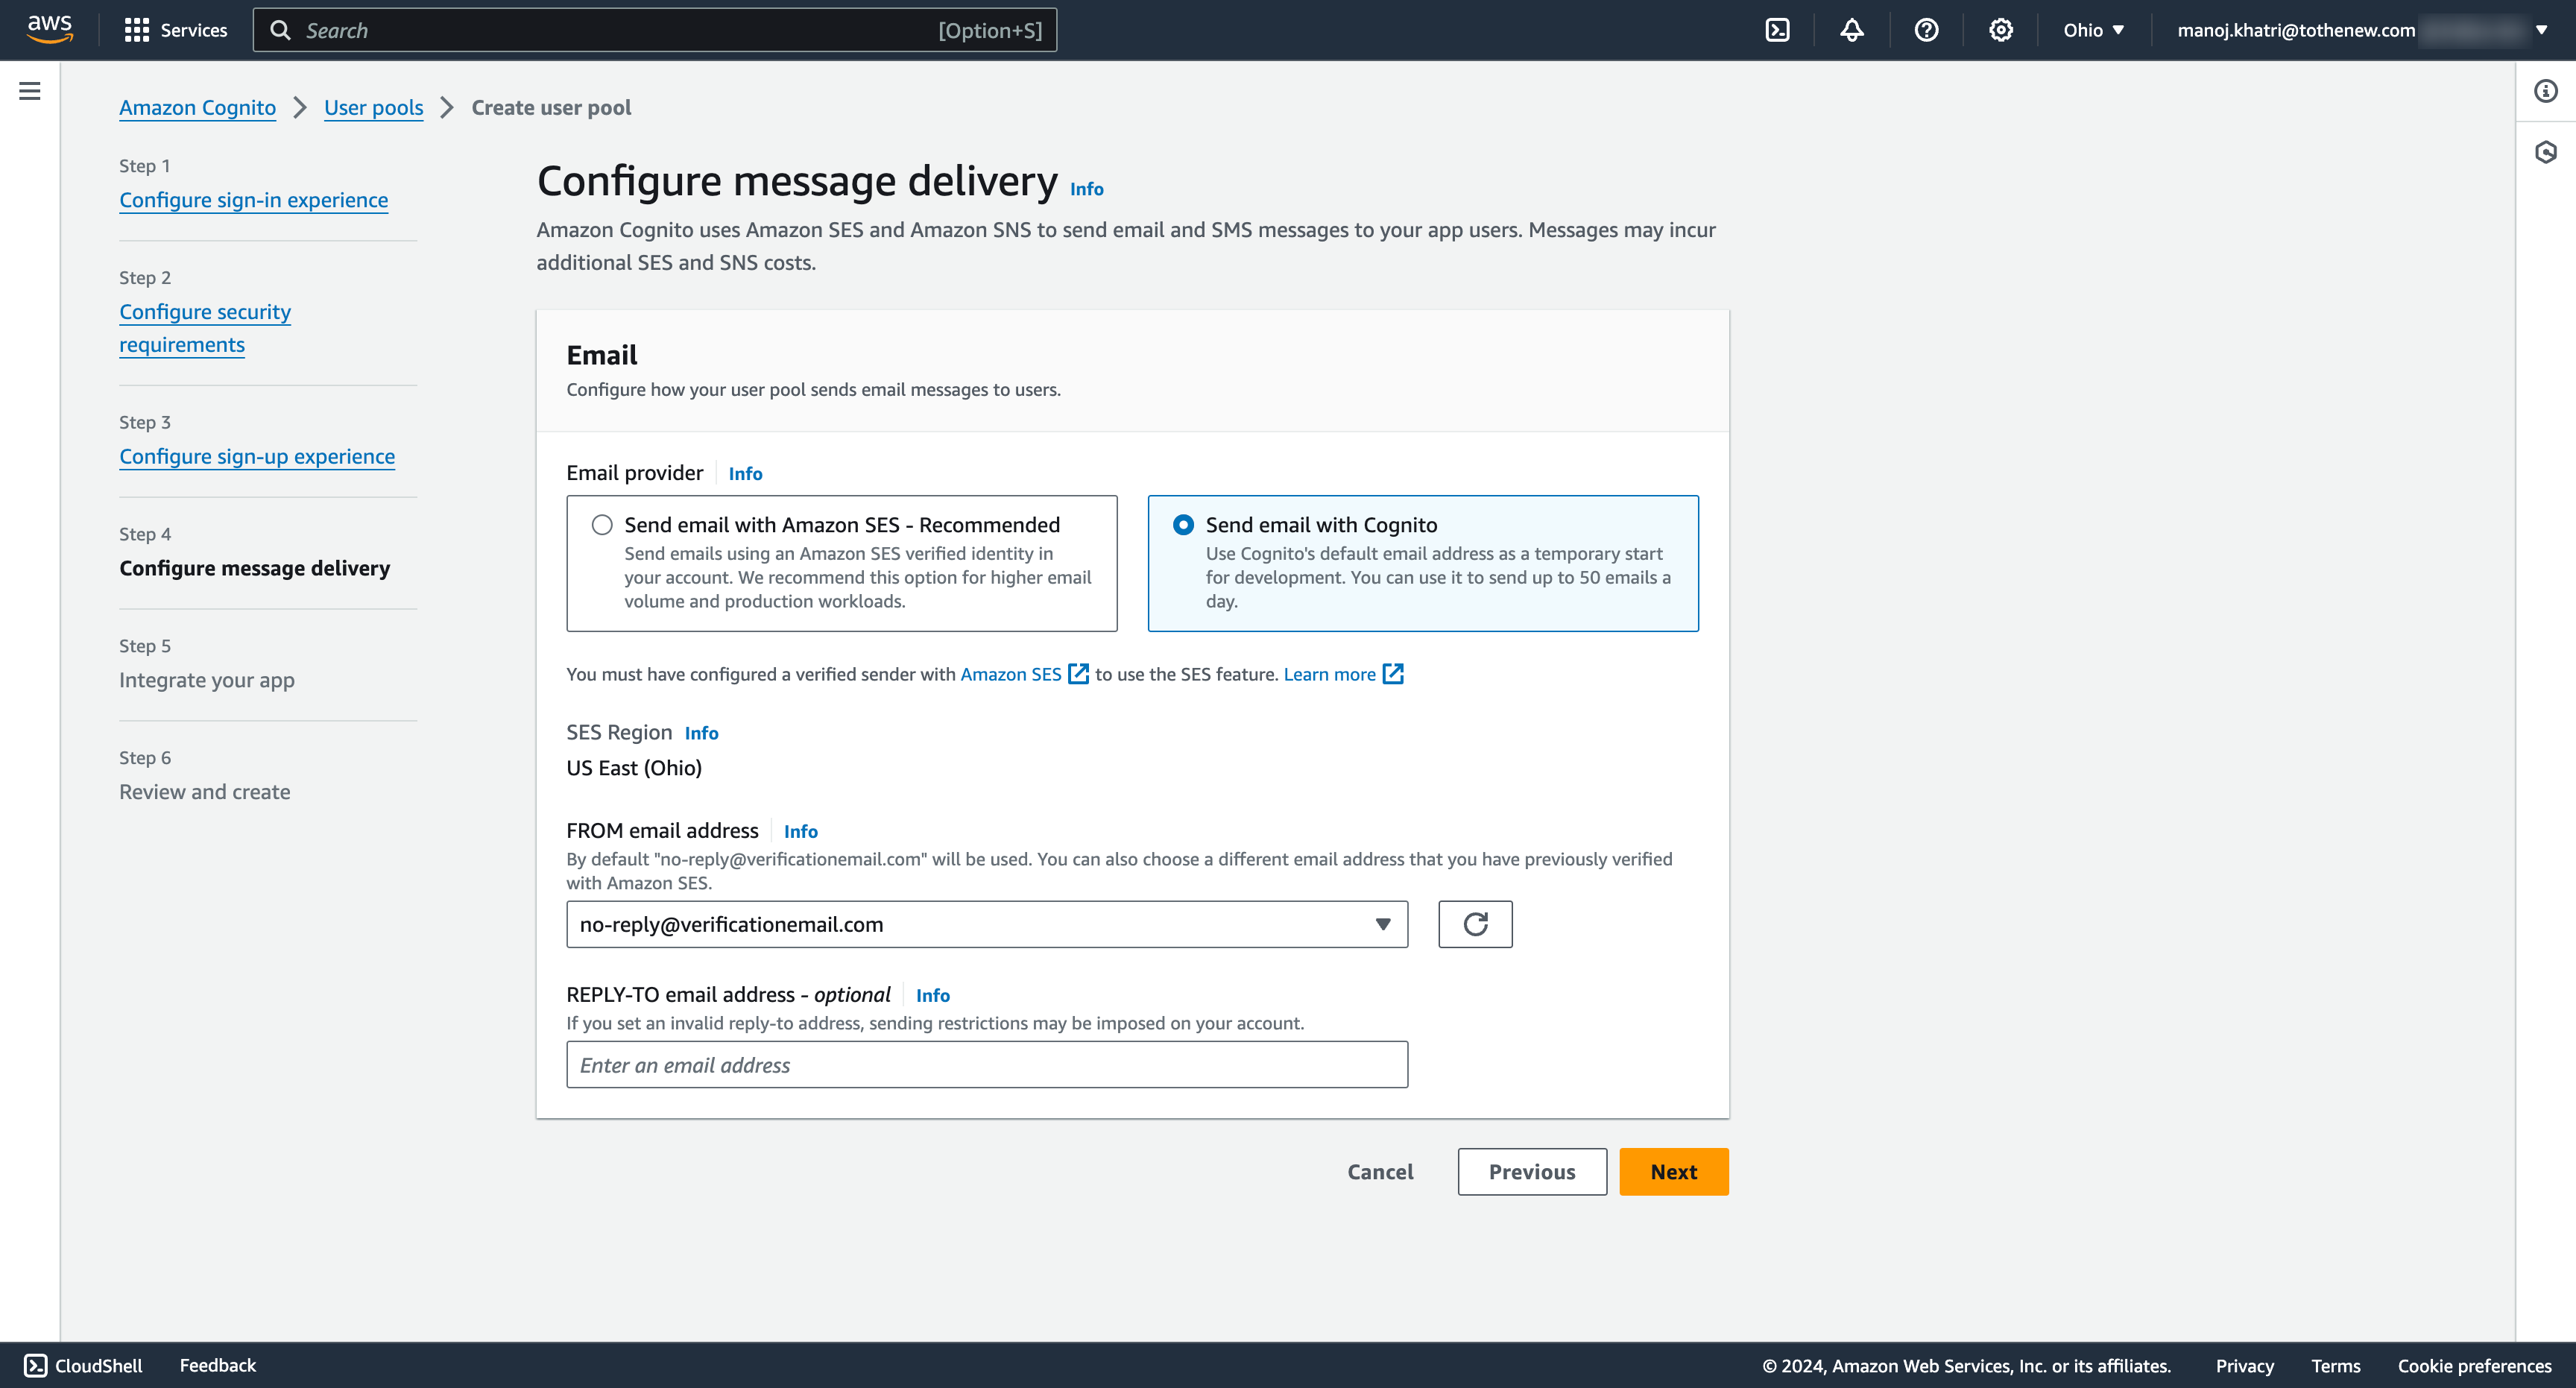
6. Configure message delivery
- Configure message delivery by selecting the option “Send email with Cognito,” which is recommended for the test application. For production, choose the option “Send email with Amazon SES.”
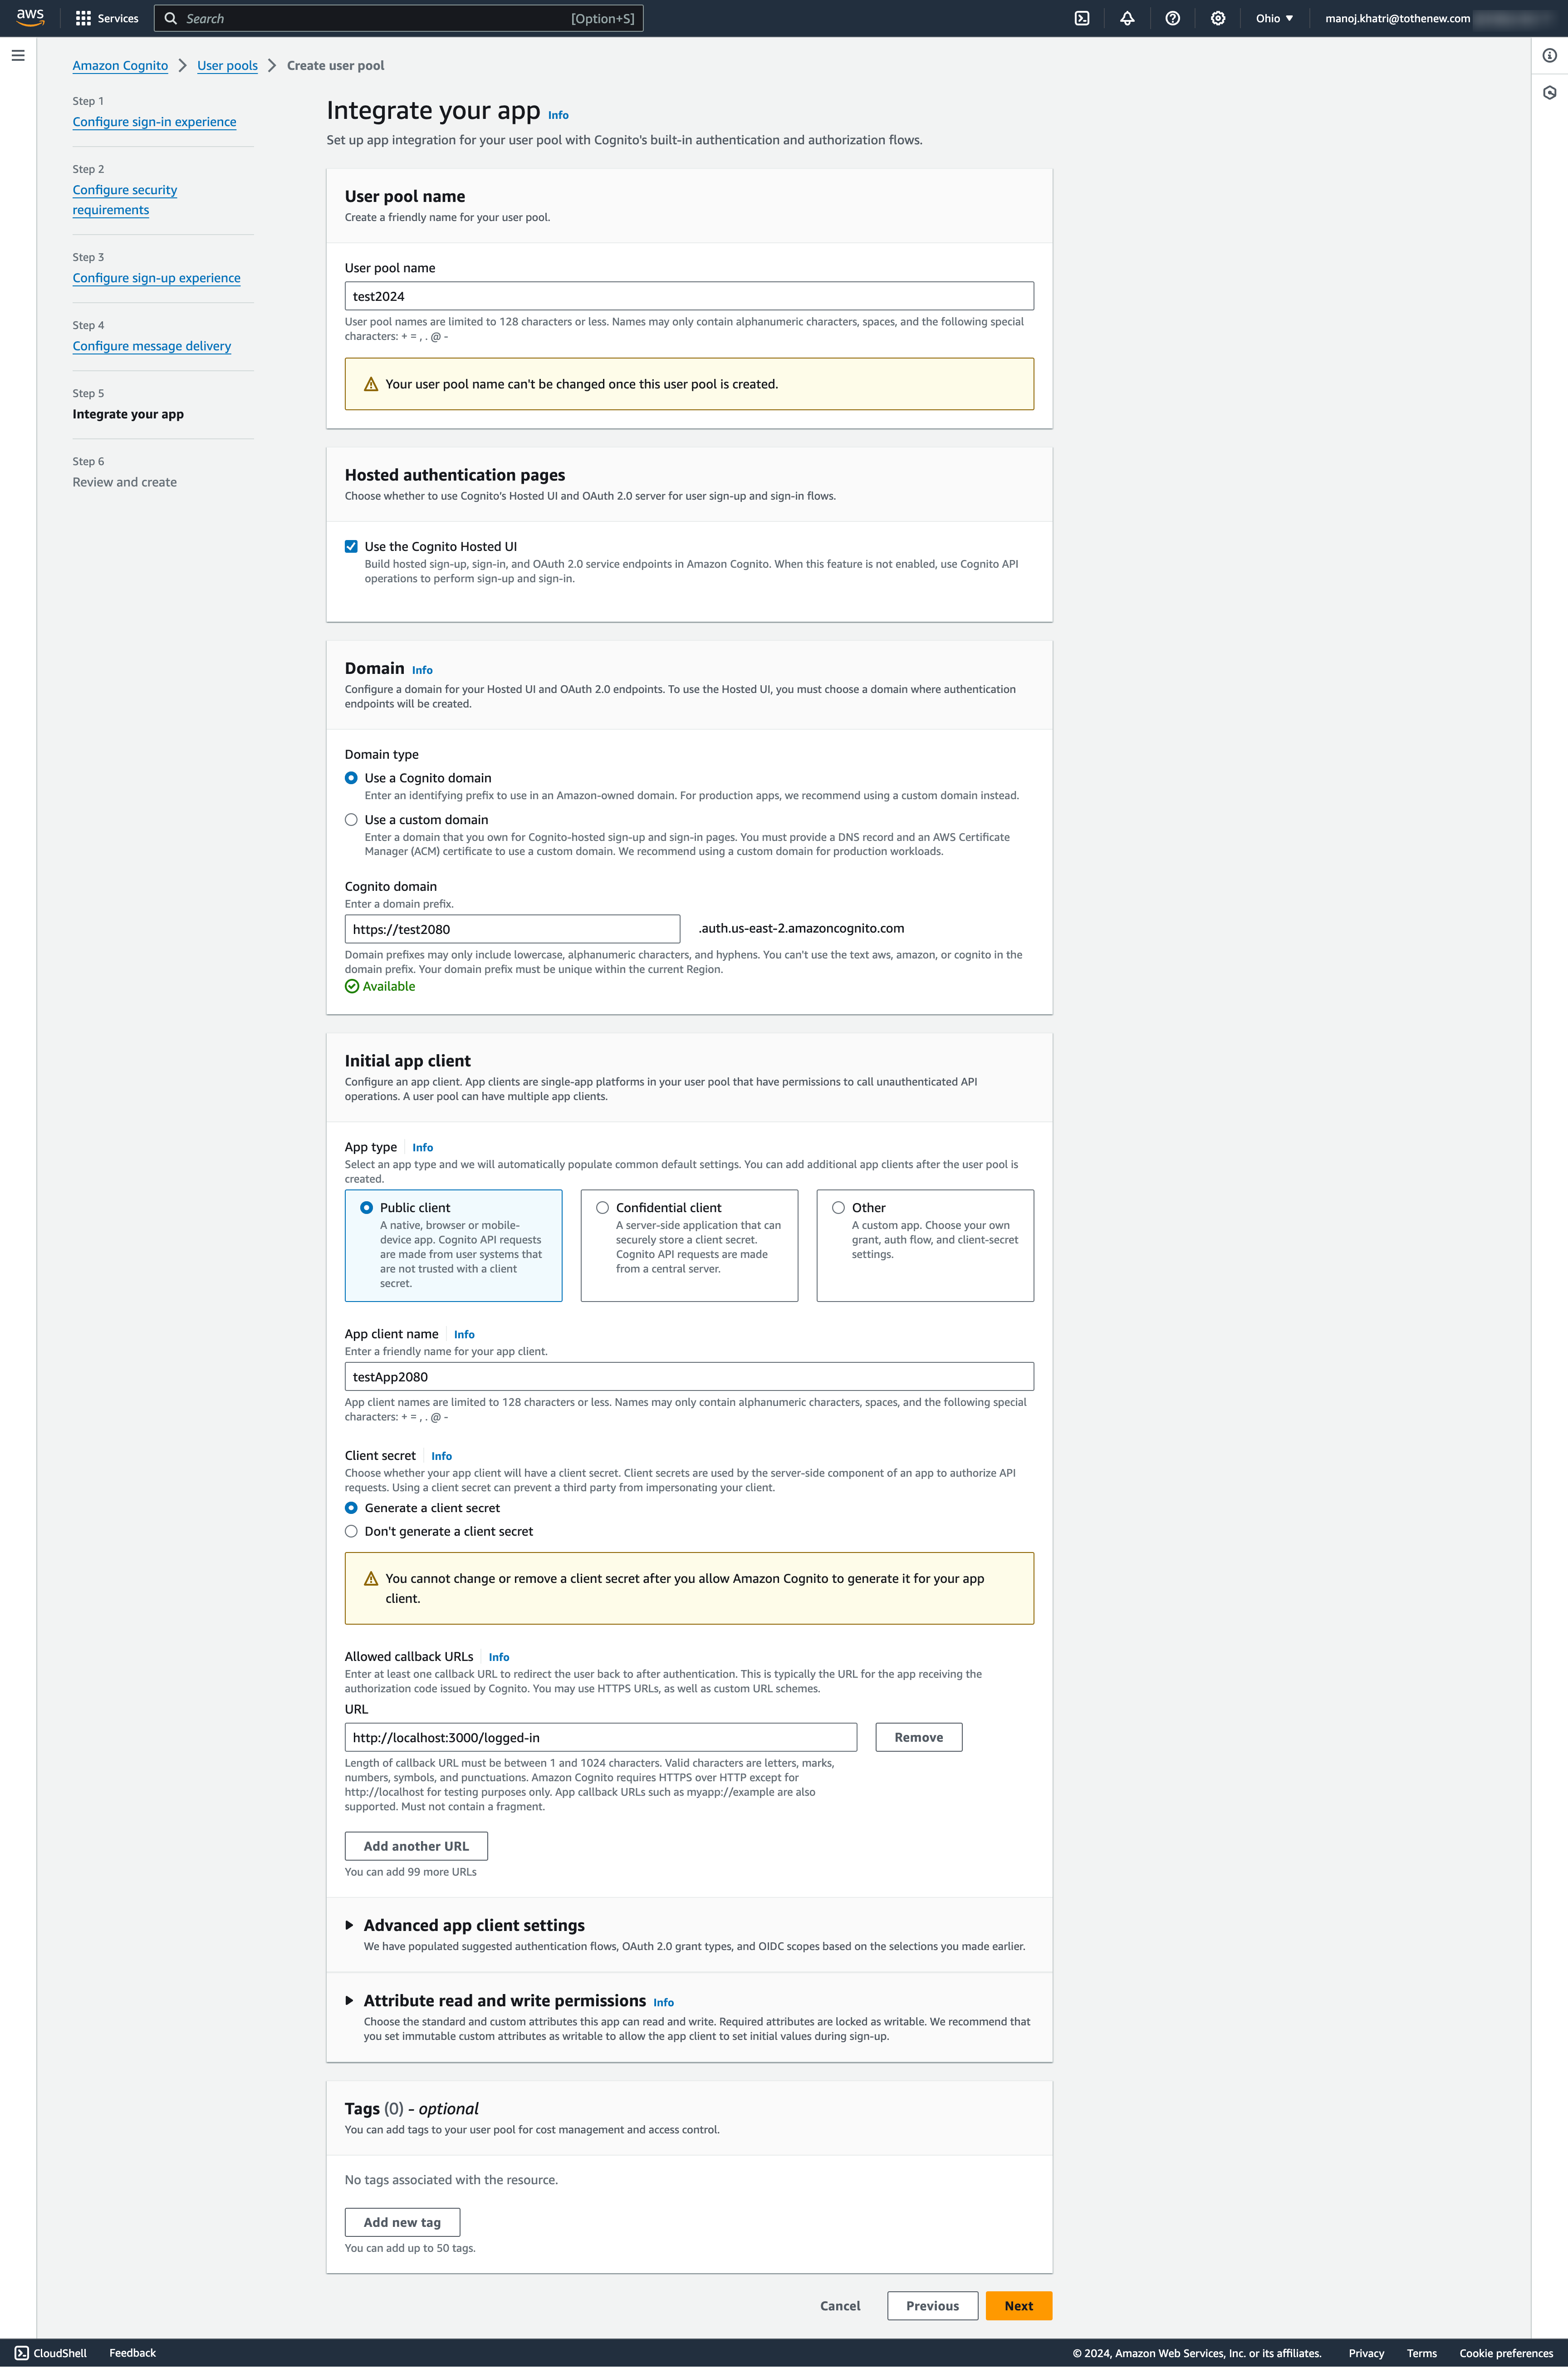
7. Integrate your app
- User pool name
- Provide a unique name for your User pool.
- Hosted authentication pages
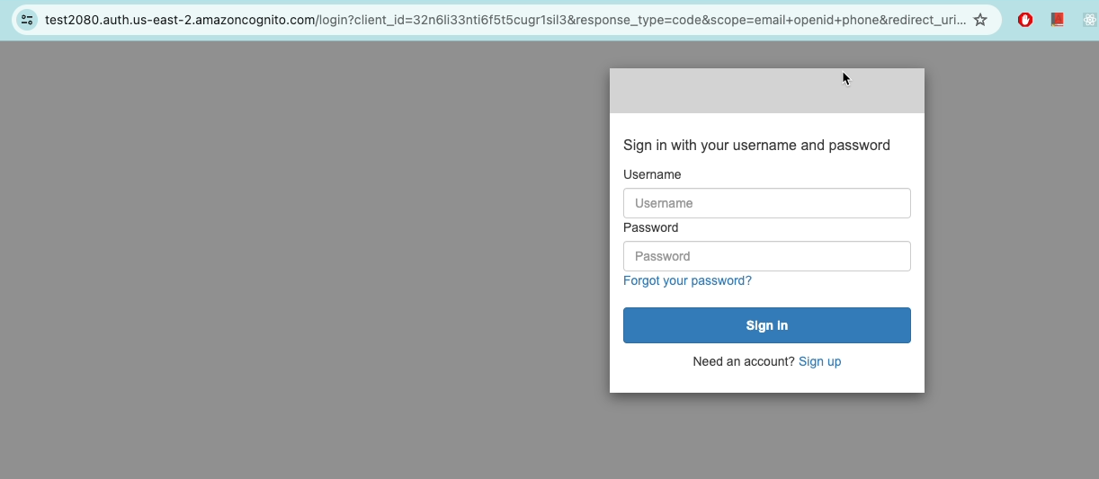
- We are using Cognito-hosted UI on our test application so we need to check the option “Use the Cognito Hosted UI”.
- Domain
- Choose the option “Use a Cognito domain” and provide the cognito domain, I am using the random domain name test2080. You can choose as you want.
- Initial app client
- Choose the option “Public client” for the App type since we are testing this in the browser.
- Enter a friendly name for your app client.
- Choose the option “Generate a client secret” since we will require it to authorize API requests.
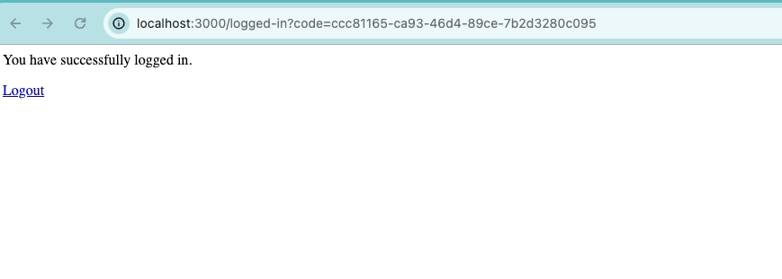
- Enter the callback URL as http://localhost:3000/logged-in. After Cognito authenticates the user, it will redirect them to this callback URL
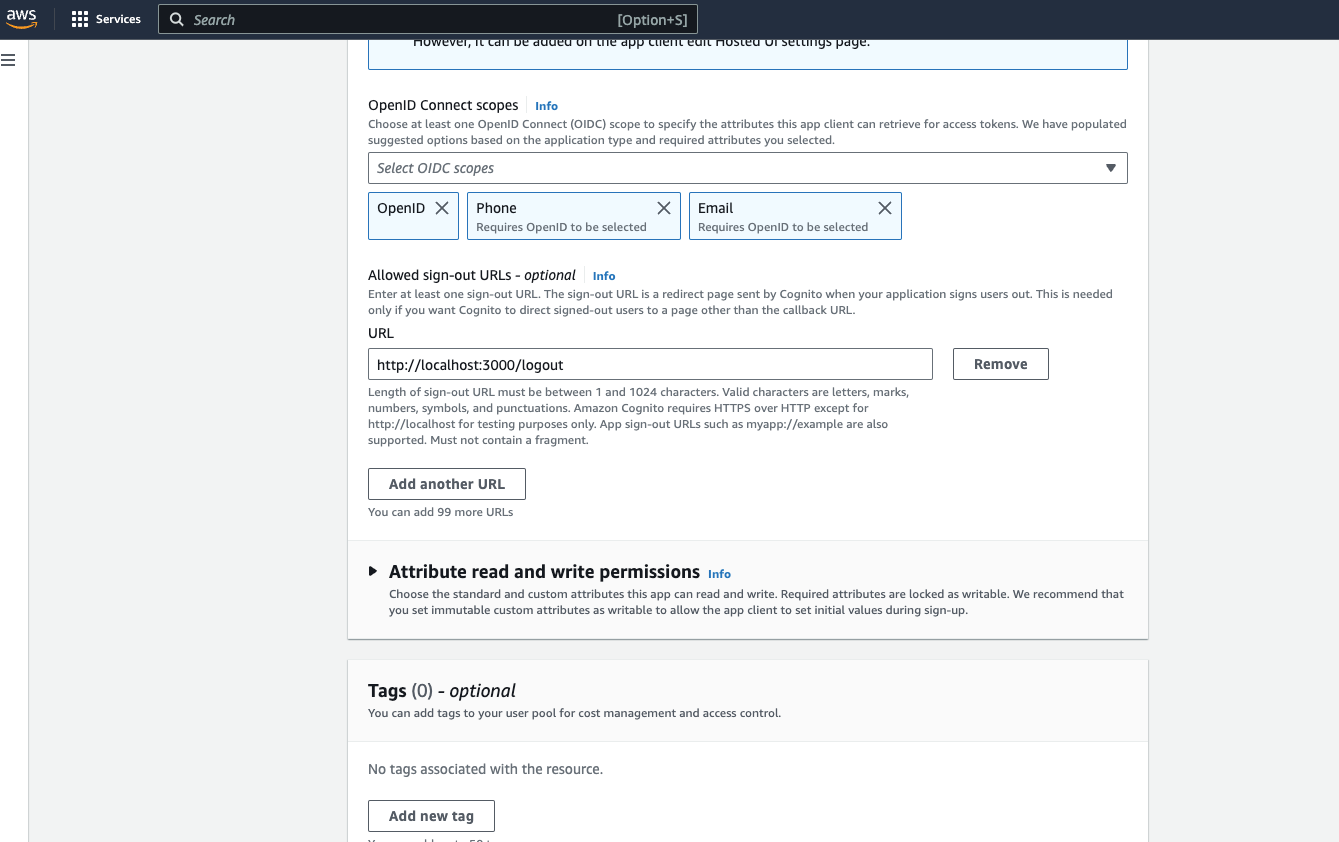
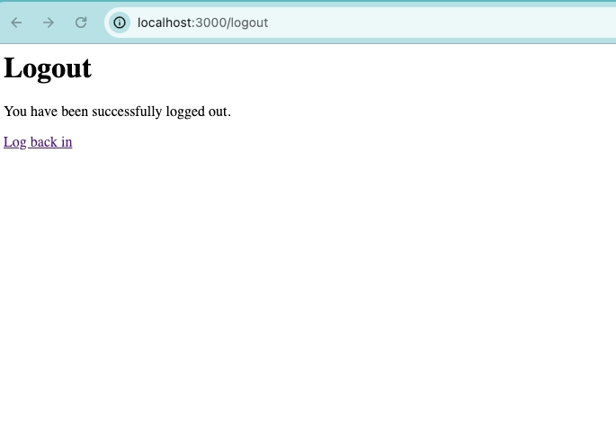
- Click on Advanced app client settings and add the signOut URL http://localhost:3000/logout. The sign-out URL is a redirect page sent by Cognito when your application signs users out. This is needed only if you want Cognito to direct signed-out users to a page other than the callback URL.
8. Review and Create
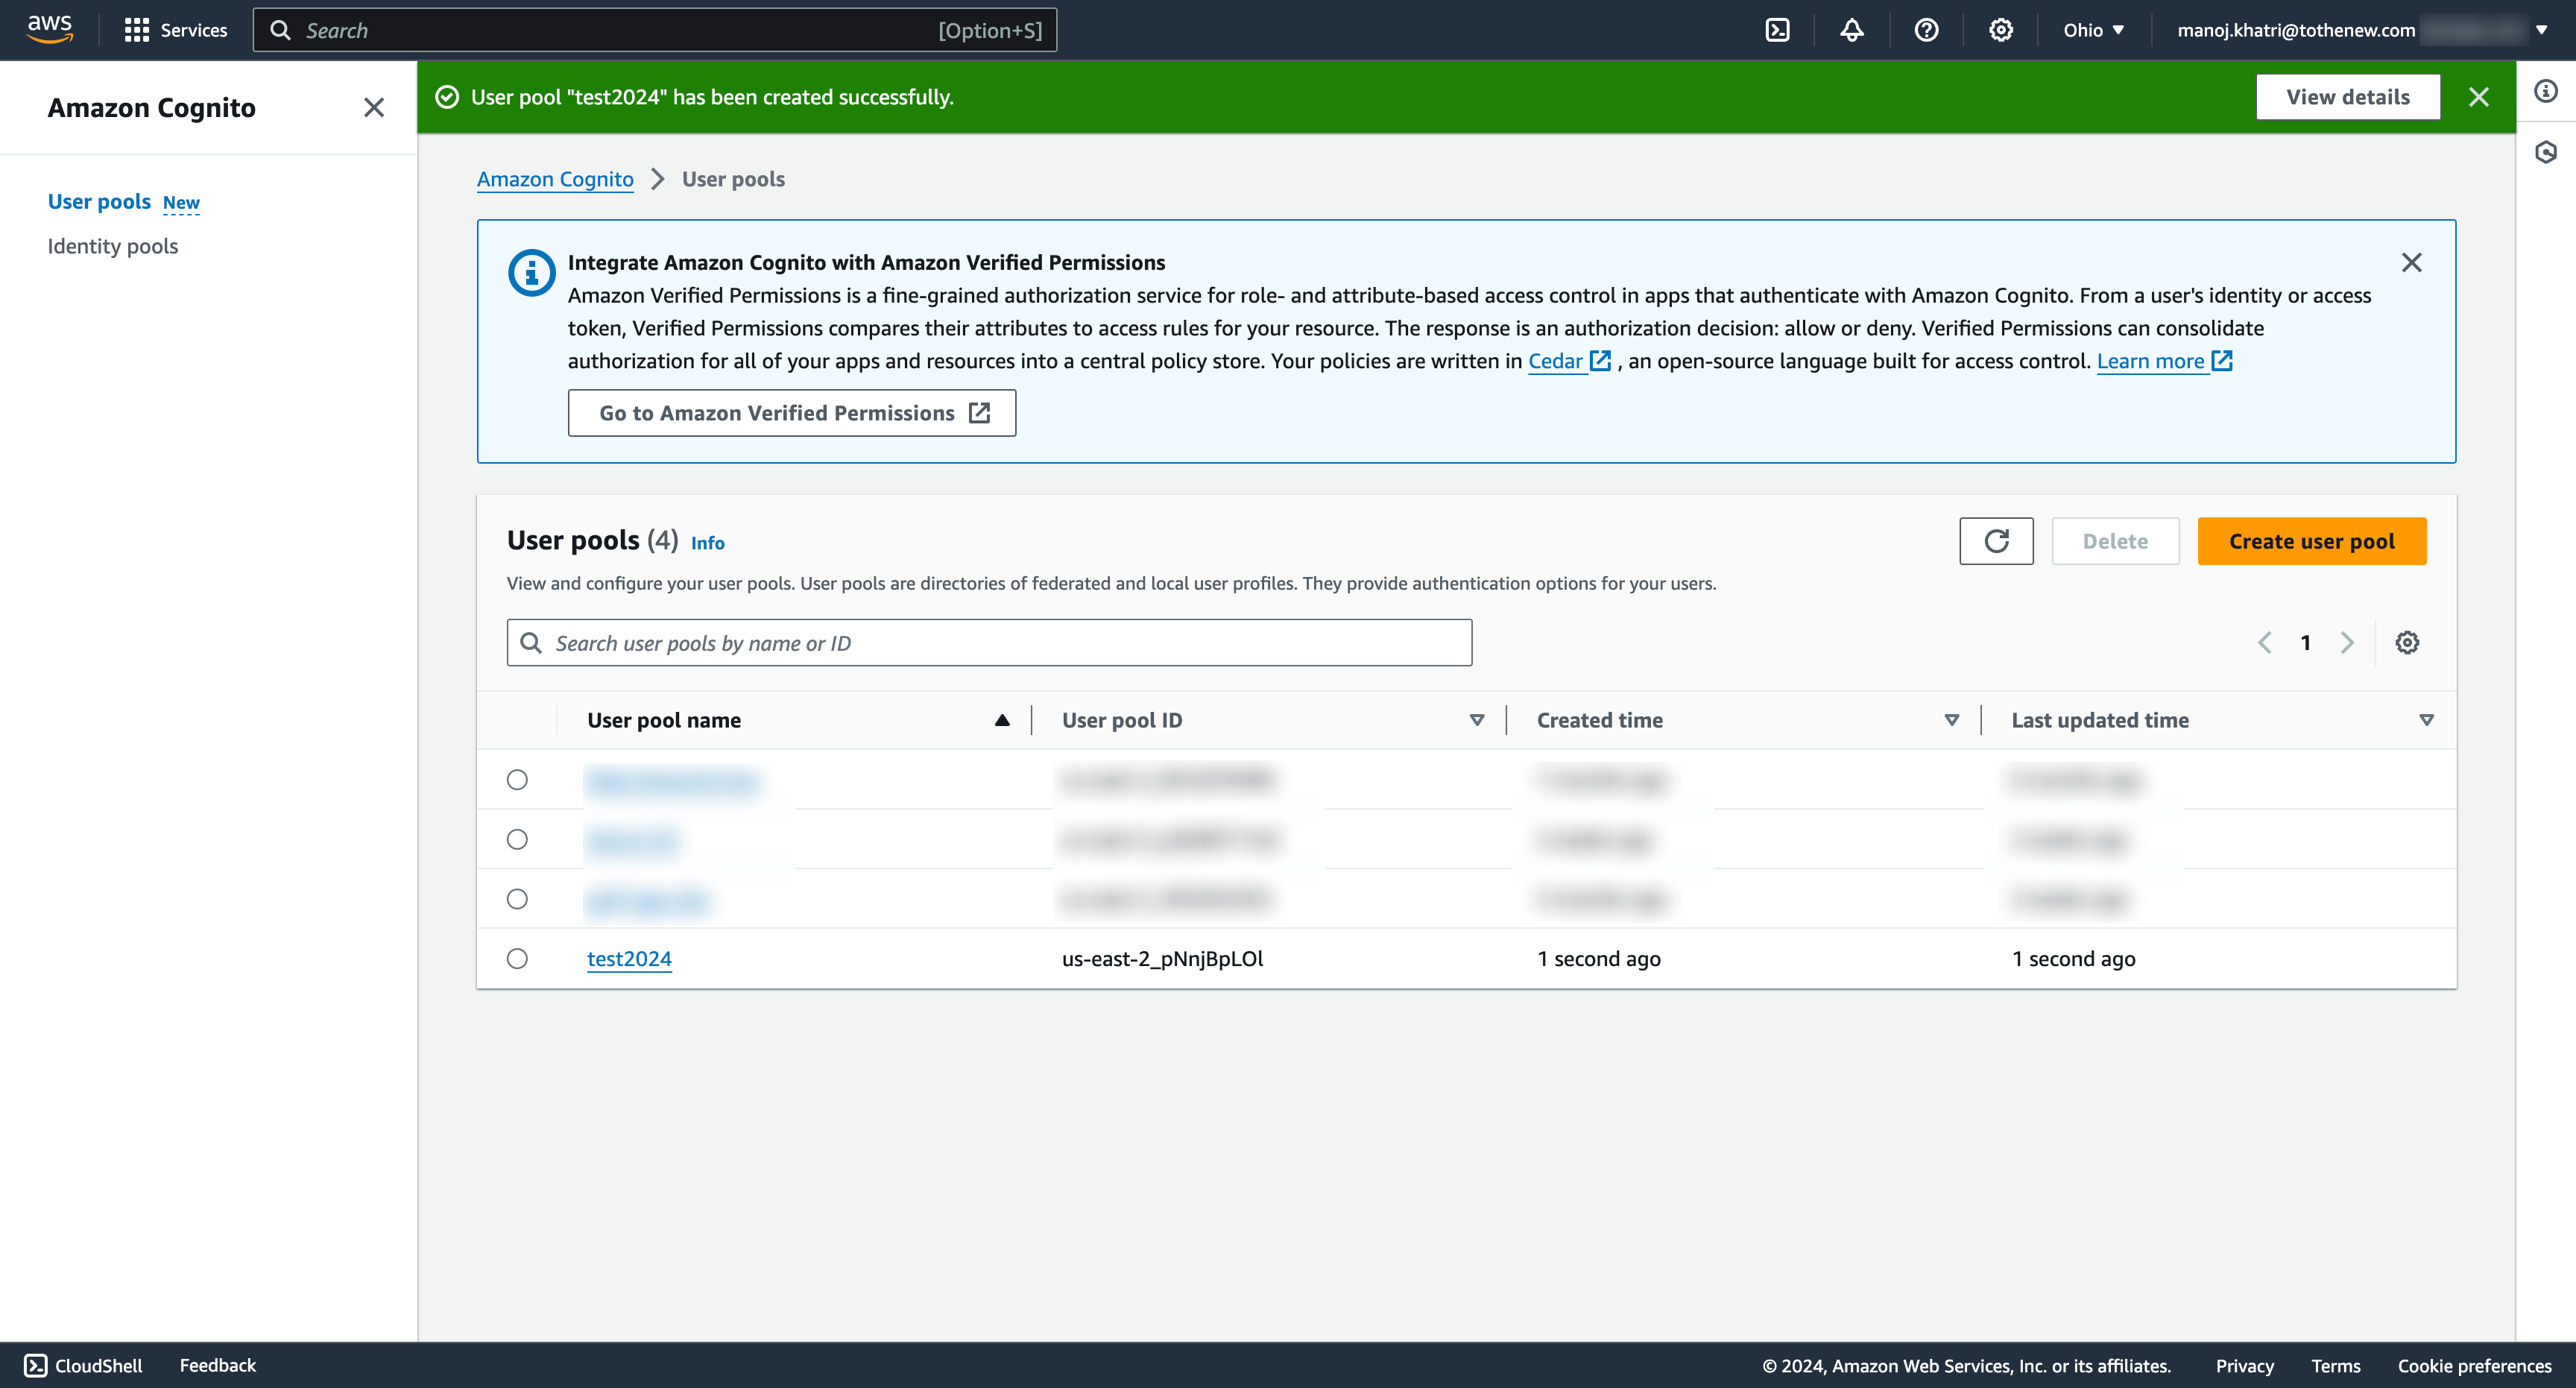
- After reviewing your configurations on the final page, you can create your user pool by clicking “Create pool” to create your user pool.
- After the user pool is successfully created, you will see it listed as shown below.
Now click on the User pool name that we have just created. It will redirect us to the User Pool overview page and click on the App integration tab.
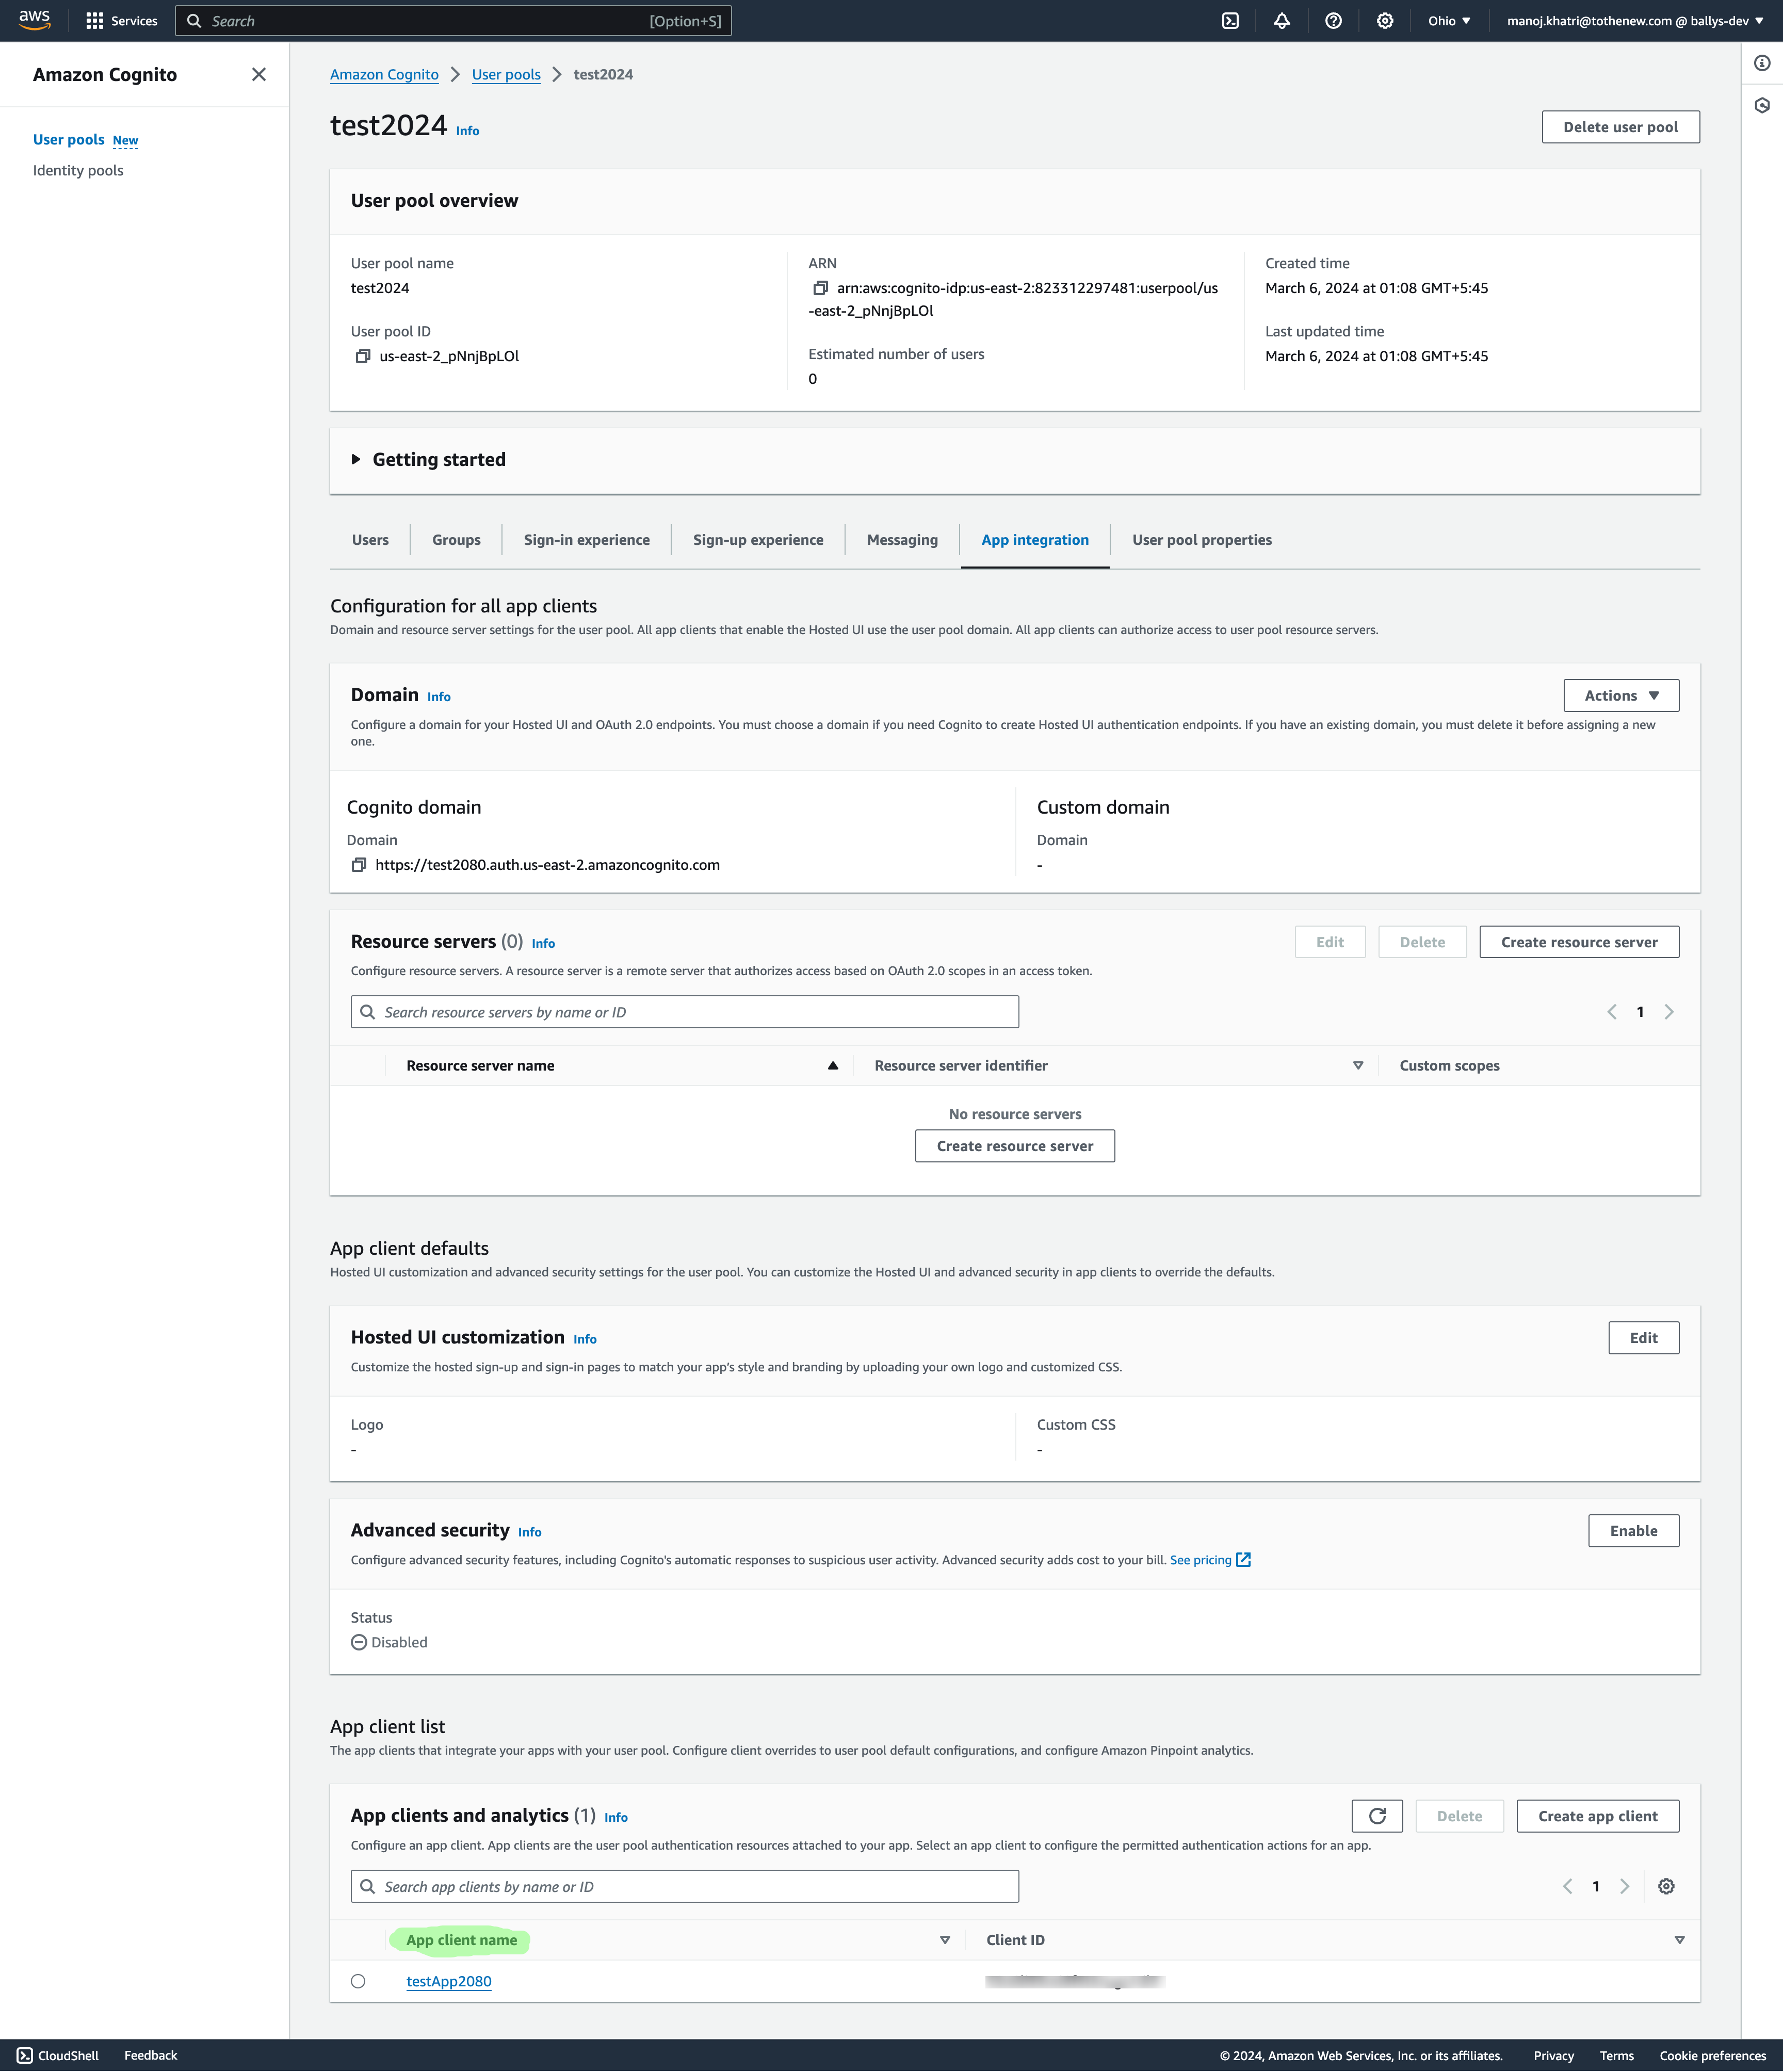
Scroll to the end and click on the App client name. It will redirect us to the App Client information page.
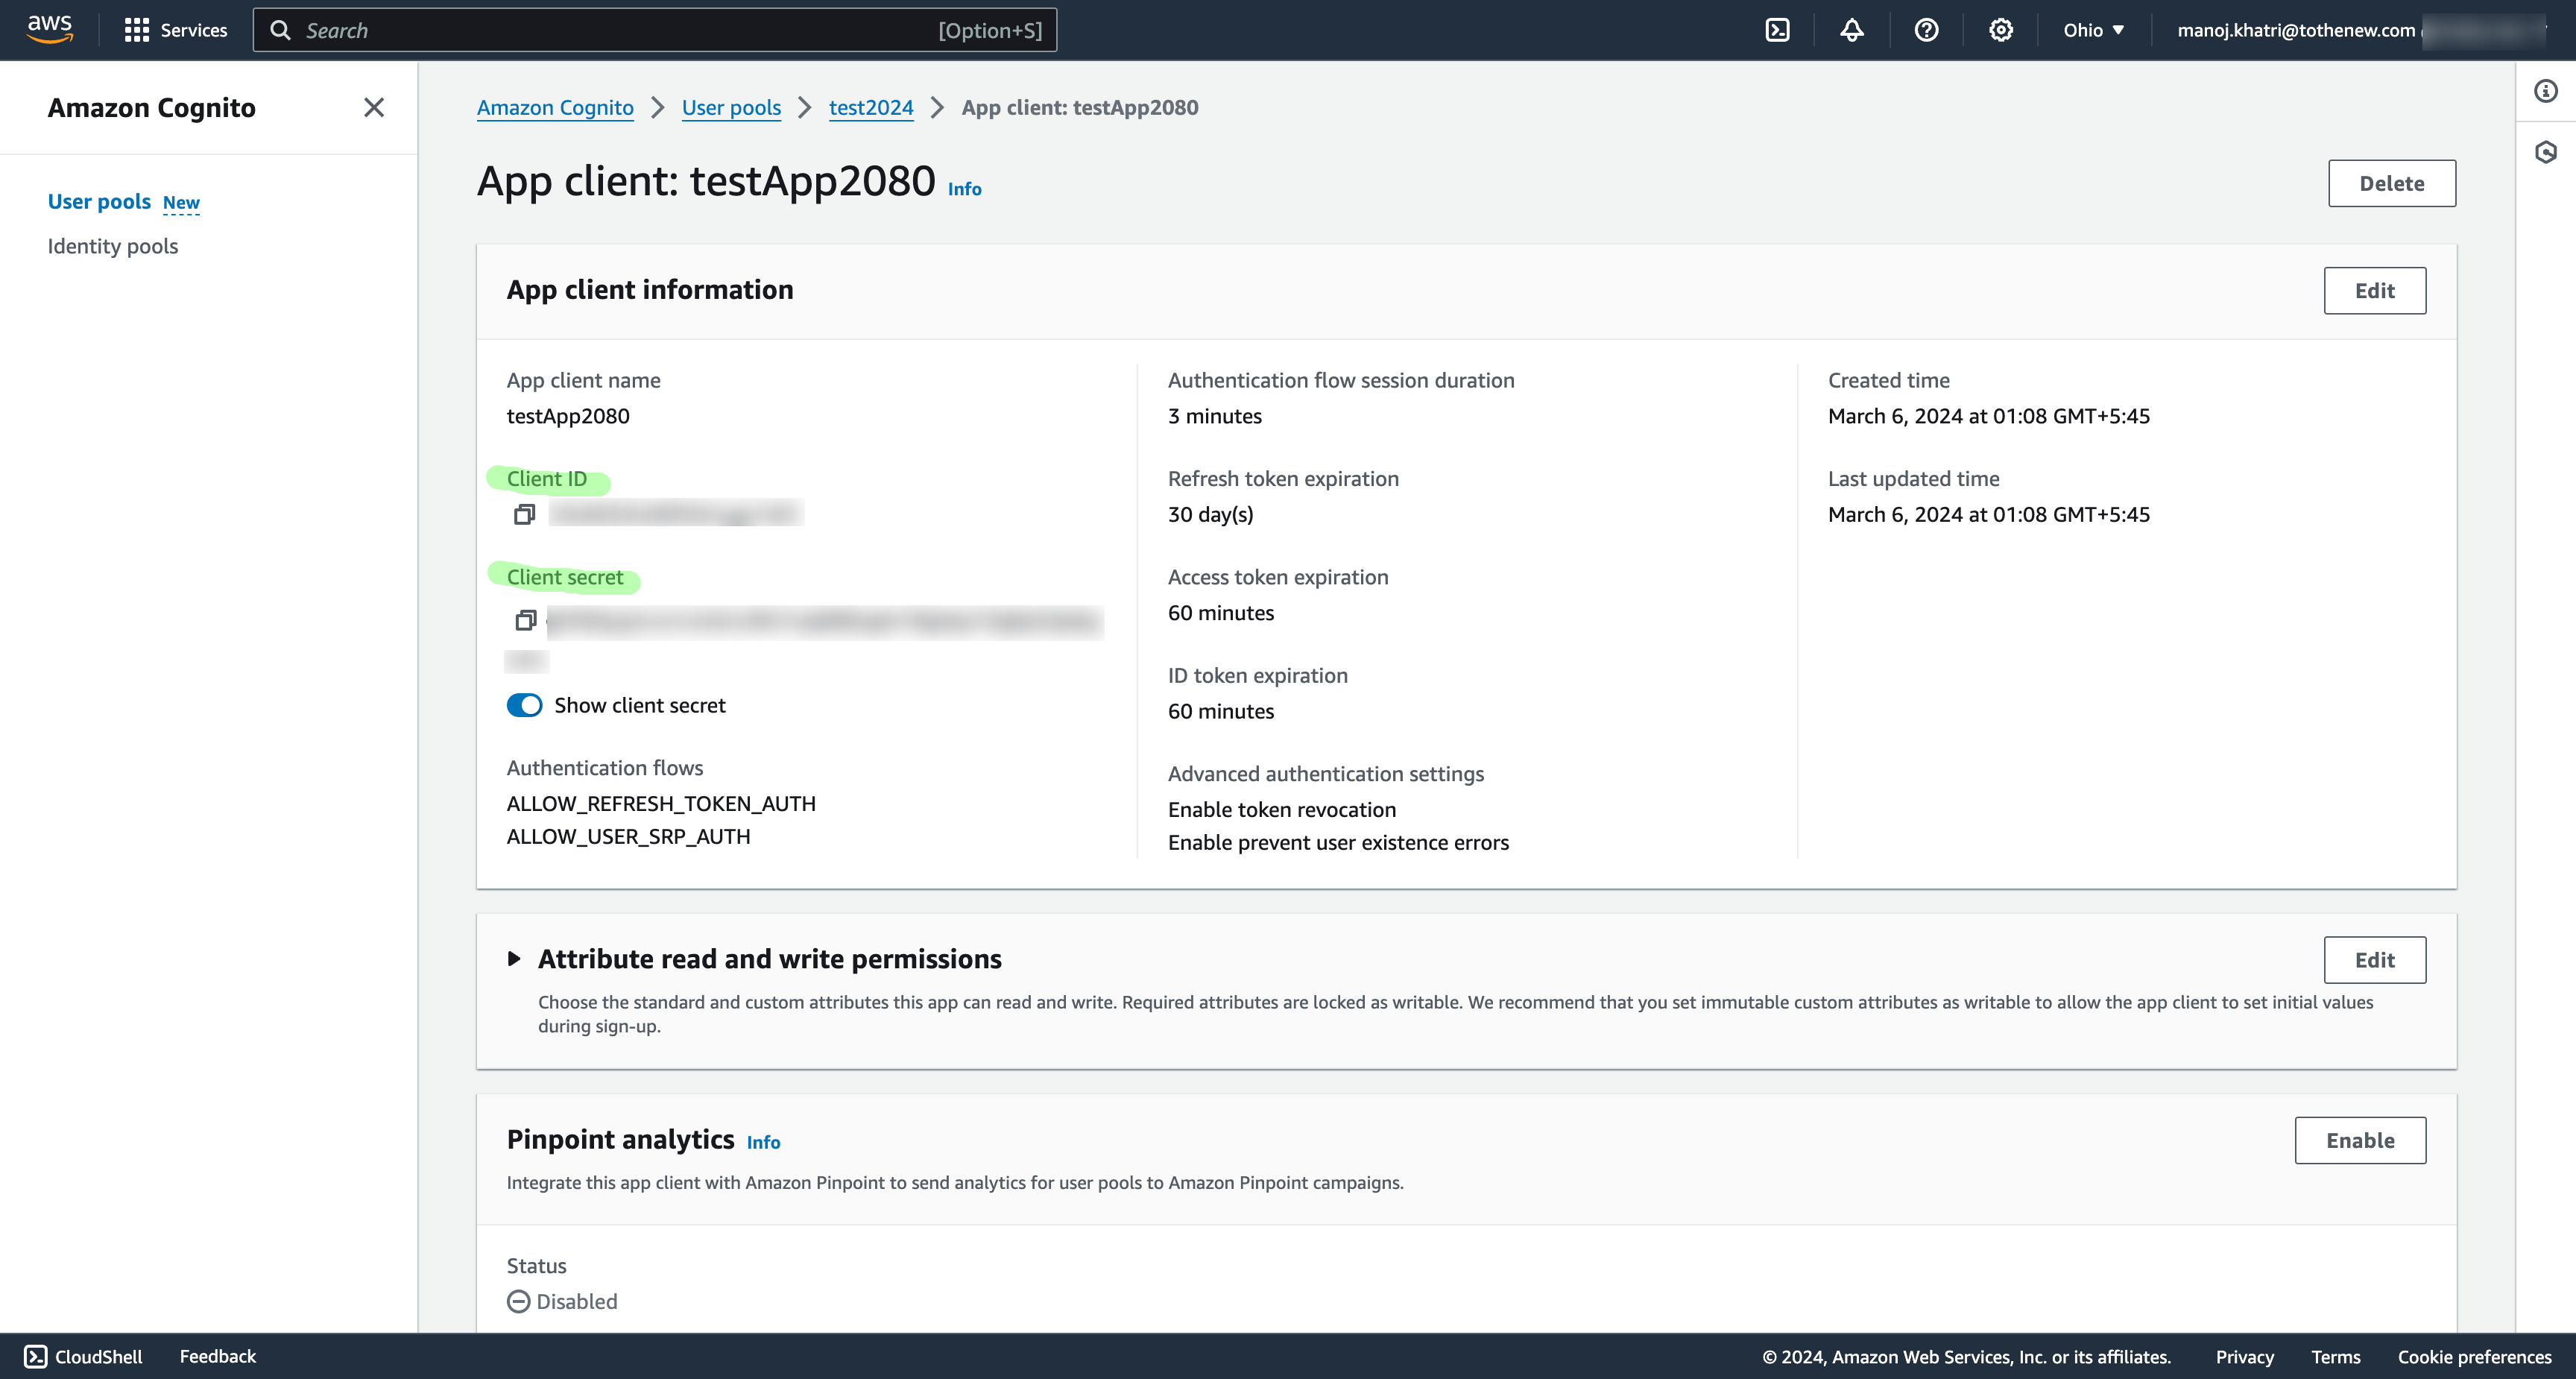
We will require Client Id and Client secret value to integrate cognito on our test app.
Here’s the basic structure of our Node.js application:
- views
- index.ejs
- loggedIn.ejs
- loggedOut.ejs
- .env
- app.js
- package.json
.env
CLIENT_ID=<client_id>
CLIENT_SECRET=<client_secret>
COGNITO_DOMAIN=<cognito_domain>
app.js
const express = require('express');

require('dotenv').config();


const app = express();


const port = 3000;

const clientId = process.env.CLIENT_ID;

const clientSecret = process.env.CLIENT_SECRET;

app.set('view engine', 'ejs');


app.get('/', (req, res) => {

res.render('index');

});


app.get('/logged-in', async (req, res) => {

res.render('loggedIn');

});


app.get('/logout', (req, res) => {

res.render('loggedOut');

});


app.listen(port, () => {

console.log(`Server running at http://localhost:${port}`);

});
Creating the Views
index.ejs
<head>
<title>Index Page</title>
</head>
<body>
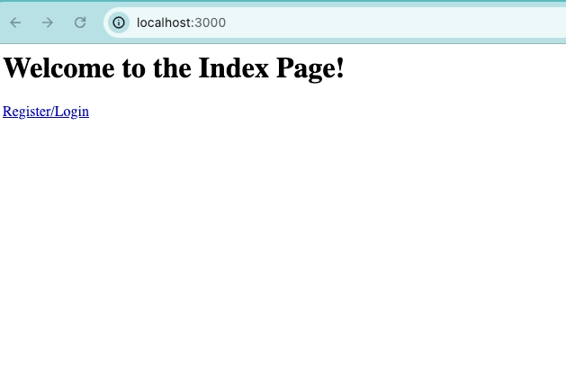
<h1>Welcome to the Index Page!</h1>
<a href="<%= process.env.COGNITO_DOMAIN %>/login?client_id=<%= process.env.CLIENT_ID %>&response_type=code&scope=email+openid+phone&redirect_uri=http://localhost:3000/logged-in">Register/Login</a>
</body>
</html>
loggedIn.ejs
<html>

<head>

<title>LoggedIn User</title>

</head>

<body>

<p>You have successfully logged in.</p>

<a

 href="<%= process.env.COGNITO_DOMAIN %>/logout?client_id=<%= process.env.CLIENT_ID %>&logout_uri=http://localhost:3000/logout">Logout</a>

</body>

</html>
loggedOut.ejs
<html>

<head>

<title>Logout Page</title>

</head>

<body>

<h1>Logout</h1>

<p>You have been successfully logged out.</p>

<a href="<%= process.env.COGNITO_DOMAIN %>/login?client_id=<%= process.env.CLIENT_ID %>&response_type=code&scope=email+openid+phone&redirect_uri=http://localhost:3000/logged-in">Log back in</a>

</body>

</html>
Lets’s run the test app

Let’s verify whether the user we just created exists in the Cognito user pool.
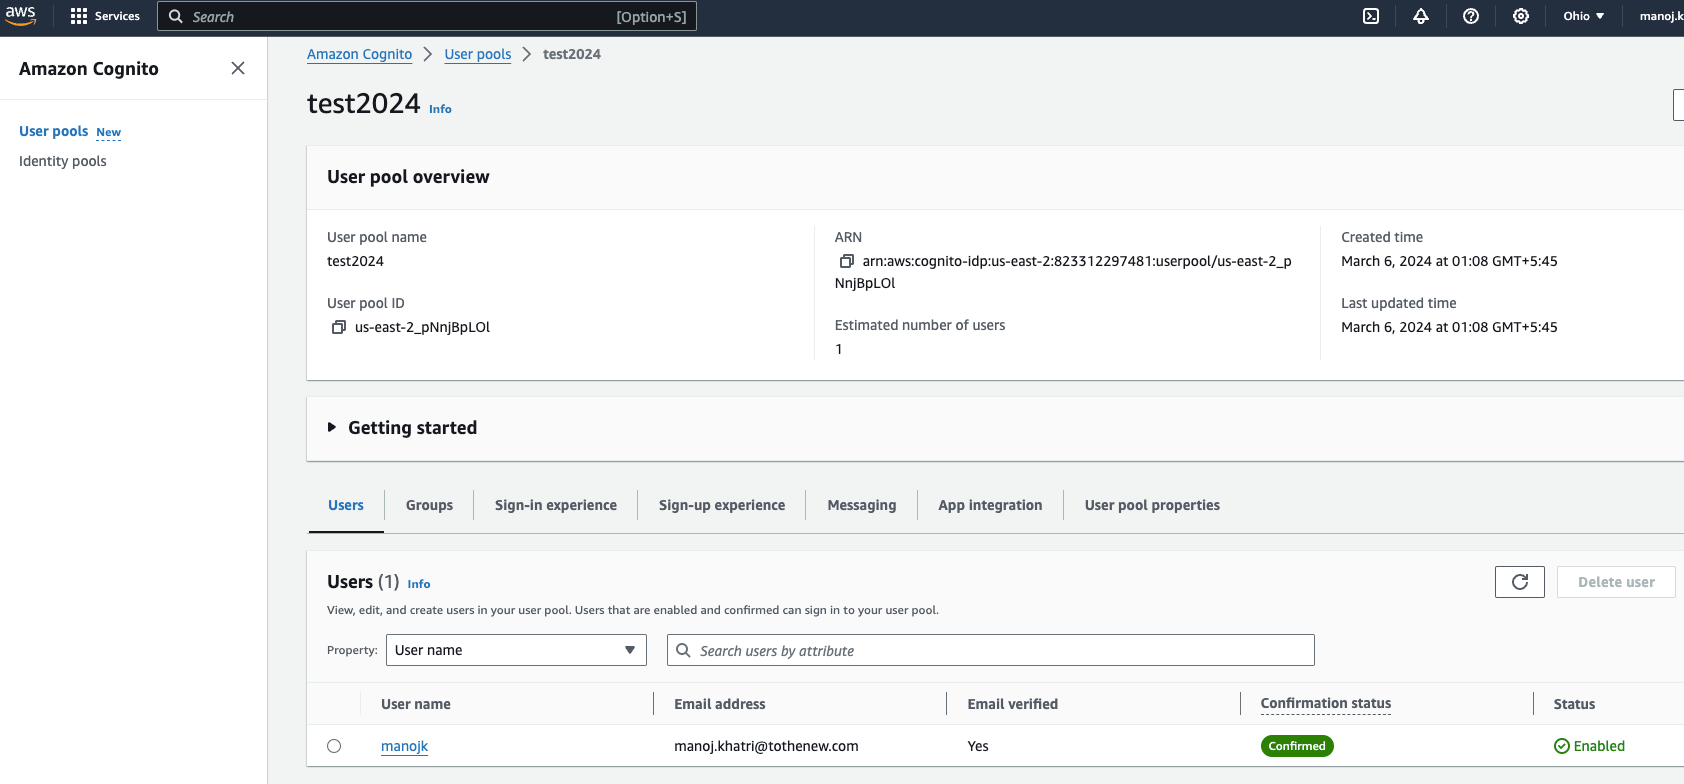
The user has just signed up for is successfully showing up in the Cognito dashboard.
Conclusion
Congratulations! We’ve successfully set up the authentication layer in your Node.js application using Amazon Cognito. Users can now log in securely through the Cognito-hosted UI, and upon successful login, they will be redirected to our specified endpoint. This is just the beginning of securing your application; feel free to explore more advanced features and configurations offered by Amazon Cognito based on your application’s requirements.