![]()
Kubernetes is one of the best orchestration tools for managing containerized applications.
Features of Kubernetes:
1. Open Source
2. Support for multiple OS (Run anywhere)
3. Production Readiness
In this blog, we are going to set up Kubernetes on our local environment through Minikube.
Minikube supports Kubernetes features such as:
- DNS (Domain Name System)
- NodePorts and LoadBalancer
- ConfigMaps
- Secrets etc.
Minikube does not provide support for cloud provider specific features:
- LoadBalancers
- PersistentVolumes
- Ingress
Let’s start!
I am using Ubuntu 14.04 for setting Minikube cluster.
Requirements:
- Checking that our system supports VT-x/AMD-v virtualization by running this command:
[js]
cat /proc/cpuinfo | grep ‘vmx\|svm’
[/js]
 if this command gives an output then it’s good.
- Currently, Minikube supports:
- VirtualBox
- VMWarefusion
- KVM
- xhyve
- Installing recent VirtualBox or VMWare fusion. We will be using VirtualBox.
[js]
sudo apt-get install virtualbox
[/js]
Now let’s get started:
- Downloading binaries:
minikube binaries: kubectl binaries:

For different k8s version, follow the link:
http://kubernetes.io/docs/getting-started-guides/minikube/#install-kubectl
- Starting our Kubernetes cluster:
We can also specify which driver we want to use by “minikube start –vm-driver=xx”
[js]
minikube start
[/js]
 Now as we can see our minikube cluster has been configured. Also, a hidden directory in our home has been created “.minikube” where all the configurations and ssh key, certificates etc. are stored.
- Checking the status of minikube:
[js]
minikube status
[/js]

- Let’s see how many pods are running:
[js]
kubectl get pods –all-namespaces
[/js]

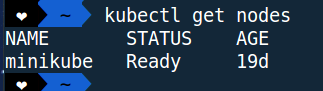
- Getting nodes:
[js]
kubectl get nodes
[/js]
- Minikube dashboard:
[js]
minikube dashboard
[/js]
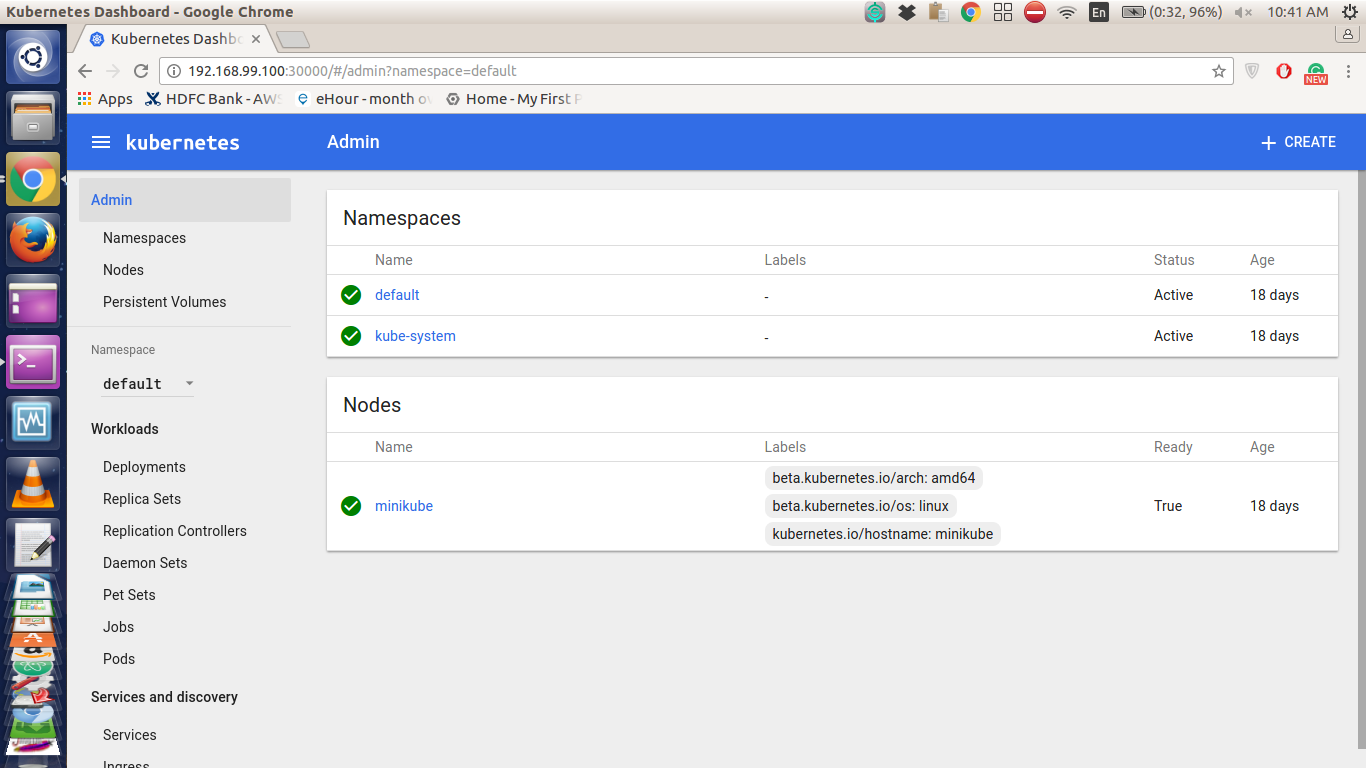
- Now we can deploy all our applications by dashboard or through kubectl commands.
Let’s deploy a Nginx application by kubectl command line interface:
Steps:
- kubectl run command will create a deployment
[js] kubectl run my-nginx –image=nginx –replicas=1 –port=80 [/js]

- Checking if our pod is up and running
[js]kubectl get pods[/js]

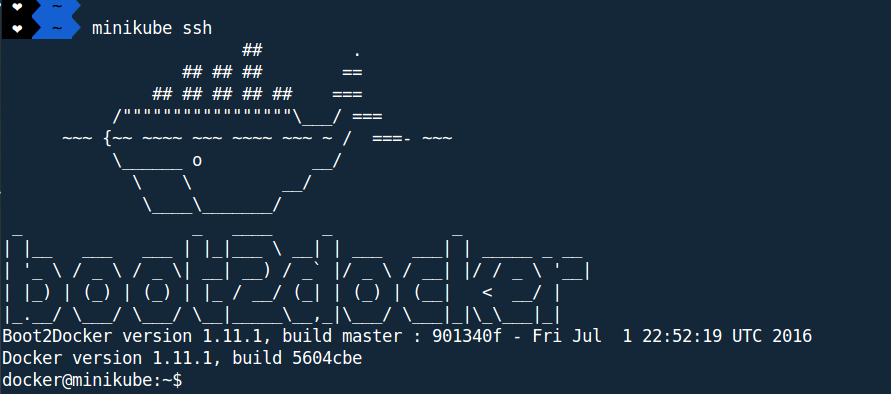
- If we want to go inside our node, just type minikube ssh
[js]minikube ssh[/js]
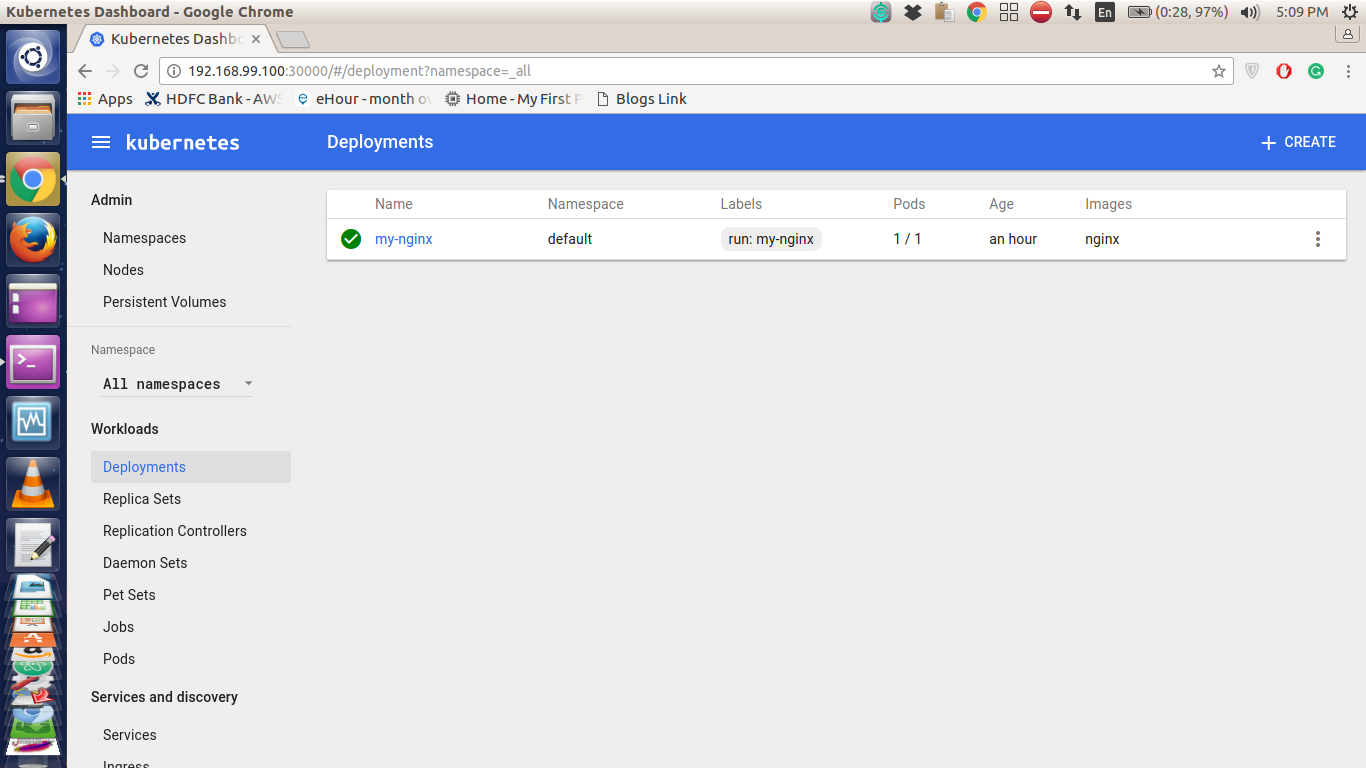
Now, we can see that “my-nginx” deployment has been created and can be seen on our dashboard
With the above steps, you can now setup minikube and test out your application locally instead of running on servers or cloud.