For Kotlin, Ktor is a lightweight and adaptable web framework that may be used to create high-performing, scalable web applications. Its extensibility and simplicity of usage, which enable developers to develop and launch applications fast with a clear and simple syntax, are the main reasons for its appeal. A wide range of capabilities are also available with Ktor, including as support for HTTP clients and servers, routing, templating, and asynchronous programming. Moreover, a lot of Kotlin developers prefer Ktor because of its versatility in working with various platforms and contexts, including cloud and Android environments.
This blog will teach you the fundamentals of Ktor and show you how to use it to build a basic backend application.
What is Ktor?
● Developed by JetBrains, Ktor is an open-source framework for creating asynchronous servers and clients with the Kotlin programming language.
● Because it provides a flexible and lightweight method of developing web applications with an emphasis on modularization and extensibility, Ktor has gained popularity. With Kotlin’s succinct syntax and functional programming features, developers can create web applications quickly and effortlessly. Because of its extremely scalable and performant design, it may be used to create online applications with heavy traffic. It can run on conventional servers, containerized environments, and serverless platforms like AWS Lambda, among other deployment possibilities.
Why do we need Ktor?
● Kotlin and Coroutines: Building web applications using Kotlin and Coroutines in Ktor offers a contemporary and effective approach. Building and maintaining code using Kotlin’s expressive syntax with Java interoperability is simpler, and writing asynchronous code with Coroutines is scalable and efficient.
● Lightweight and Flexible: Ktor is constructed from a collection of compact, targeted libraries that can be used separately or in combination based on the project’s requirements. It uses Kotlin’s robust features, such as DSLs (domain-specific languages) and extension functions, to offer a clear and expressive syntax that lets programmers flexibly organize their applications.
● Interoperable: As Ktor is based on Kotlin, it is quite compatible with Java. Ktor’s ease of integration with pre-existing Java code and libraries allows developers to use the framework with other Java-based frameworks like Springboot or in their current Java projects.
● Migration: Because Kotlin supports progressive migration, it makes it possible for big codebases to migrate smoothly from Java to Kotlin. Kotlin allows developers to write new code while keeping existing Java components of their system intact.
● Tooling support: Developers can create, maintain, and deploy Ktor applications with ease using their favorite tools and workflows thanks to Ktor’s robust tooling support. Specifically, the tight interaction with IntelliJ IDEA offers Ktor users a seamless and effective development experience.
● Community support: The Ktor community is committed to assisting developers in becoming familiar with and proficient users of the framework. It is robust and encouraging. Apart from the official documentation, the Ktor community provides assistance via other platforms like StackOverflow, Reddit, and GitHub.
Prerequisites & Tools used to develop rest API
In order to develop rest API using ktor, we need to have basic knowledge of Kotlin’s programming language and its syntax.
We need to use the following tools in order to develop this project
- Intellij IDE: For writing, debugging, and executing the code.
- MongoDB: Database for storing the data of the project.
- NoSQLBooster: Used to view the data stored in the MongoDB.
Creating a Ktor application
Depending on the specifications, several methods exist to begin your Ktor projects. You can make a Ktor project with IntelliJ IDEA Ultimate. Use the community edition, which allows you to create a Ktor project using a web-based project generator, if you’re interested in open-source development. Additionally, you can use start.ktor.io to create a new Ktor application and use IntelliJ IDEA to provide the necessary features.
In this section, we will create a project using the Ktor Project Generator web tool.
● Use your browser to open the https://start.ktor.io/ URL.
● Give the project a legitimate name, such as ktor-sample.
● By selecting the “adjust project settings” link, the user can view the project configurations as they are by default.
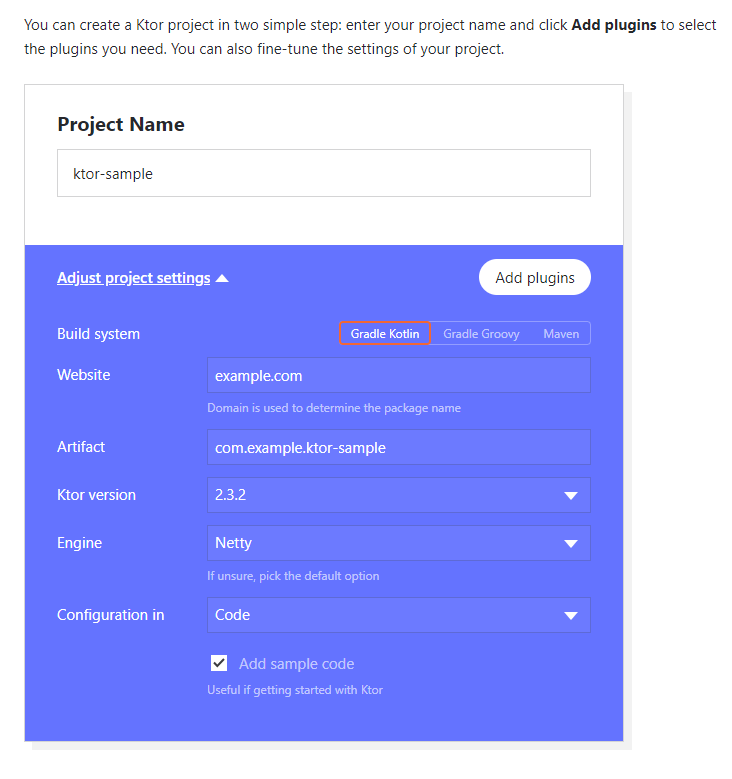
● In this demo, the default project configurations will be used.
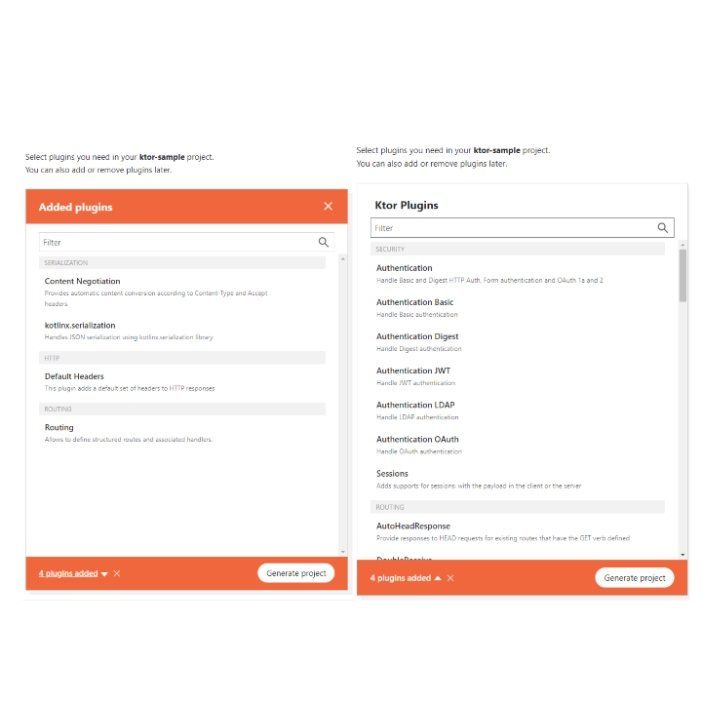
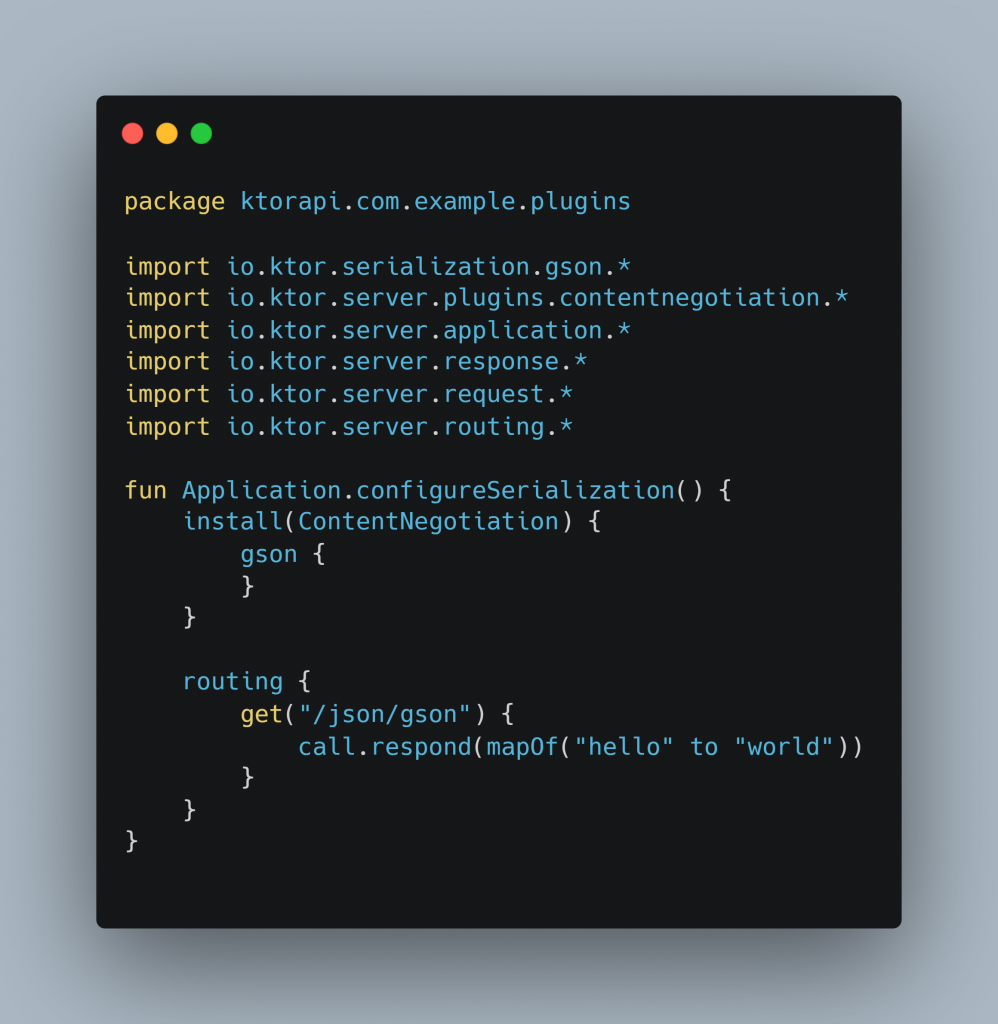
● Click the Add Plugins buttons to add features such as Content Negotiation, kotlinx.serialization, Default Headers, and Routing.
● kotlinx.serialization: ContentNegotiation allows the users to use content converters provided by the kotlinx.serialization library. This library supports JSON, CBOR, ProtoBuf, and other formats.
Routing: Routing is a plugin that is installed into an application to simplify and structure the page request handling. It provides a structured way to handle incoming HTTP requests and generate corresponding responses. With Ktor routing, developers can define routes that match specific request URLs and methods and then handle these requests with custom logic.
Click on Generate Project to generate the Ktor project.
● Download and extract the [project-name].zip (Eg: ktor-sample.zip) file.
● Open it in IntelliJ IDEA community edition and wait for the Gradle sync completion.
● Click on the play icon (▶️) to run the ktor server.
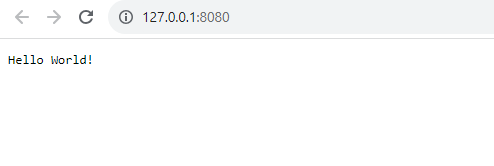
The Run window shows a message like “Responding at http://127.0.0.1:8080” if the server is running successfully.

The “Hello World!” message will be shown if you hit the http://127.0.0.1:8080 URL on the browser.
Understanding the Project Structure
A Ktor application’s project structure is quite adaptable and may be changed to suit the requirements of the developer. However, a Ktor project structure will typically contain the following common elements:
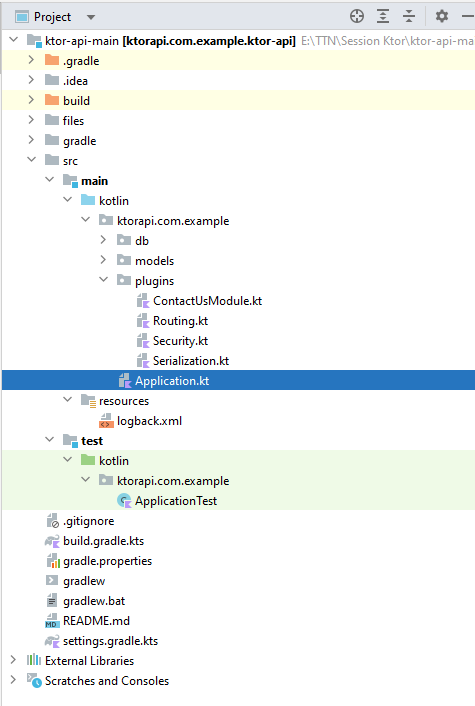
- src directory: This directory typically contains the source code for the application. It may be further divided into subdirectories based on the modules or features of the application.
- resources directory: This directory typically contains any non-source files that are required by the application, such as configuration files, static assets, or templates.
- test directory: This directory typically contains unit and integration tests for the application.
- build.gradle.kts or pom.xml: These files contain the build configuration for the application, including dependencies, plugins, and other settings.
- application.conf: This file contains the configuration settings for the Ktor application, such as server settings, logging, and security settings.
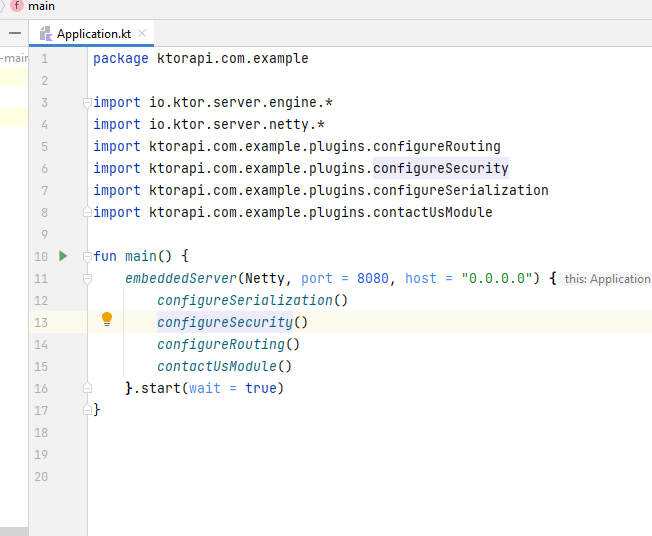
- Application.kt: This file contains the main entry point for the Ktor application, where the server is configured and started.
Additionally, a Ktor project may include other directories or files based on the user requirements, such as a database directory, custom libraries or modules, or additional configuration files.
Create your first Ktor application
This part will cover creating a custom Ktor application that provides the user with user information. To continue creating the application, we will use the beginning code (above), which was produced using the Ktor generator. The IntelliJ IDEA Ultimate IDE or the ktor generator can be used to create new applications if that’s your thing.
When the Gradle sync is finished, open the downloaded project in the IntelliJ IDEA community edition.
By right-clicking on the com.example directory, choosing New → Package, and entering a legitimate name named models, you can create a package called com.example.models.
Make your own paths for adding, removing, and creating users. Make a model of the user that includes the author, title, ID, and publications. For this, choose New → Kotlin by right-clicking the models folder.
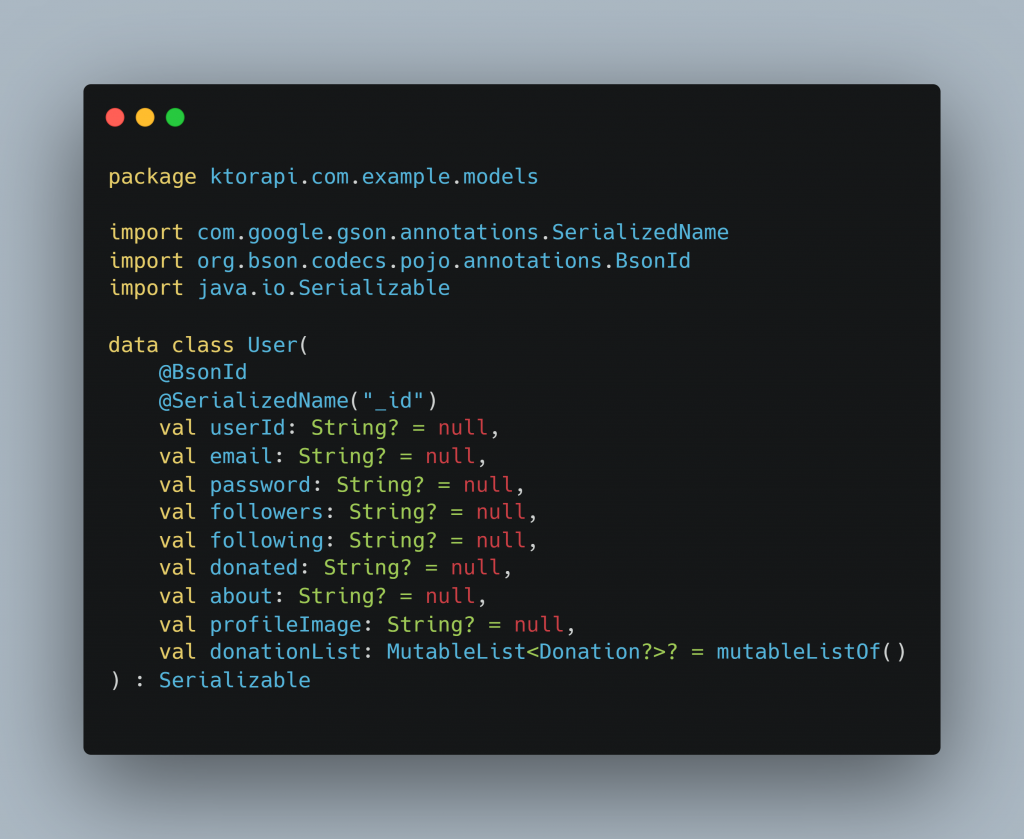
In this section, we will use a Mutable list-type structure for adding users and simulating the data without using any databases.
- POST(“/user”) — Create a new user
To create a new user, add a new endpoint as a post request to the Serialization.kt file. Add the following code to it.
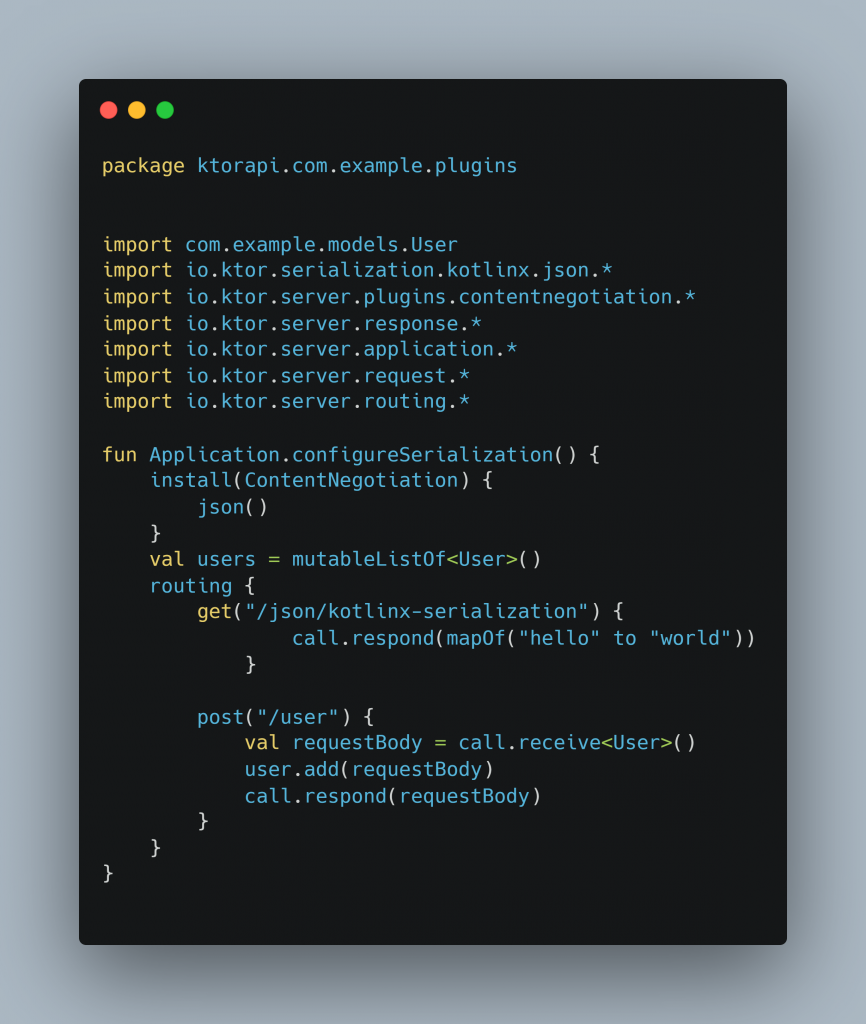
- GET(“/user”) — Fetch the list of users
Open the Serialization.kt file, add a new endpoint as a get request to retrieve all users. Follow the below code,
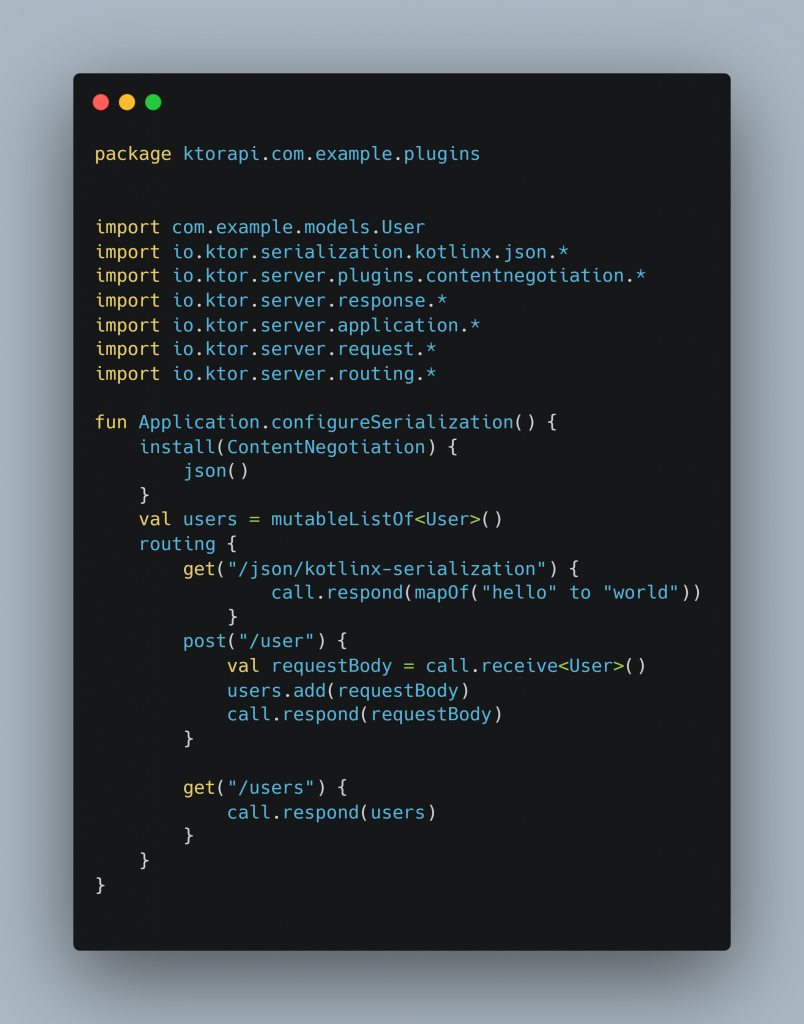
- To run the app, select the Application.kt file and press the play button (▶️). Open the postman and hit the URLs (Eg: http://127.0.0.1:8080/users) with a JSON request body.
Creating service and routing
We created a basic get/post request in the previous section. We will build a service and route that preloads user’s data in this section.
First, leave a remark as follows on the lines you added to the Serialization.kt file.
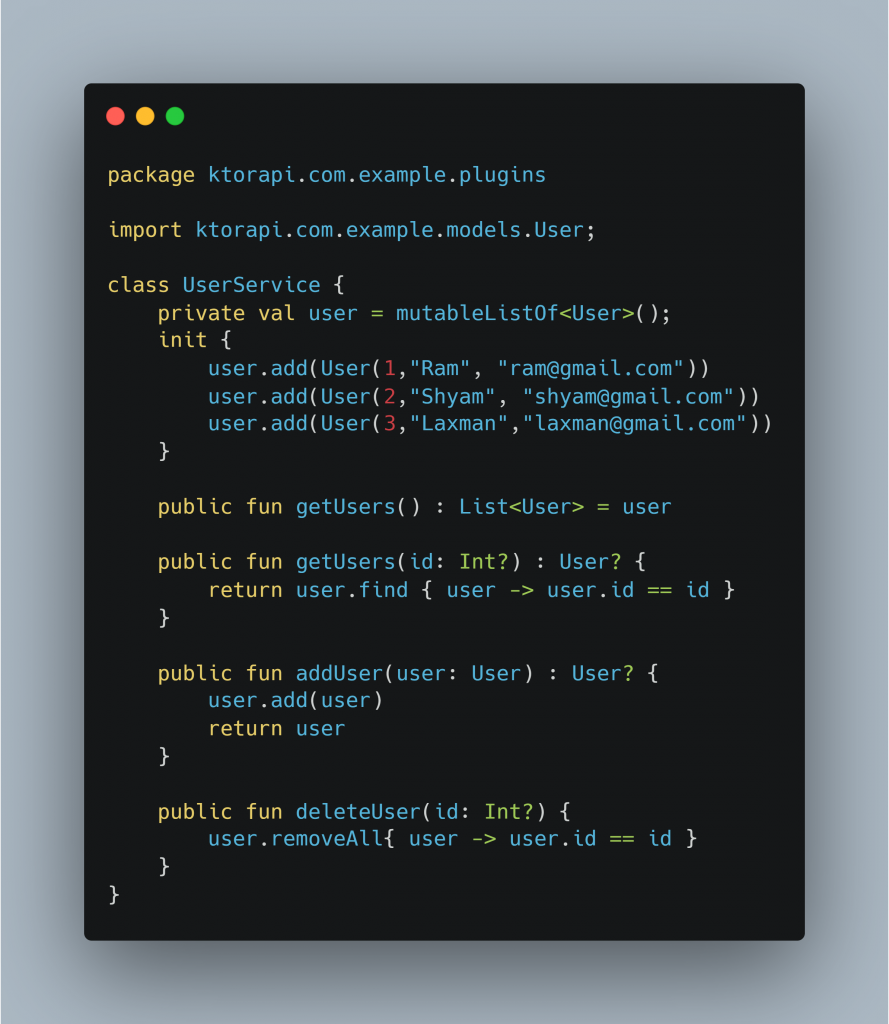
Create the service
Add a new Kotlin class or file called UserService.kt. Add the code that follows.
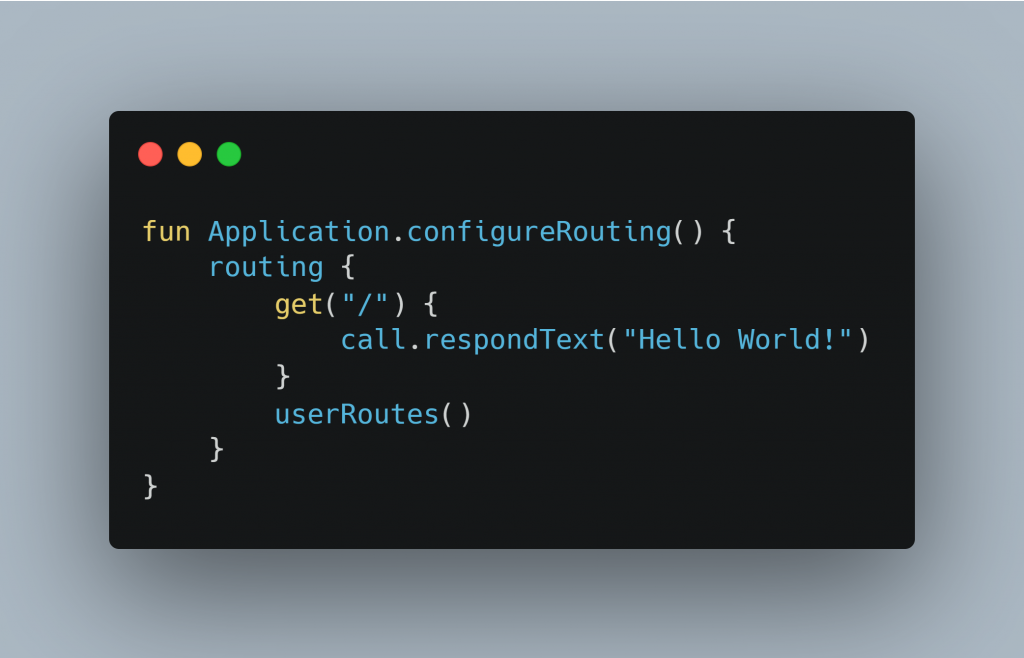
Create the route
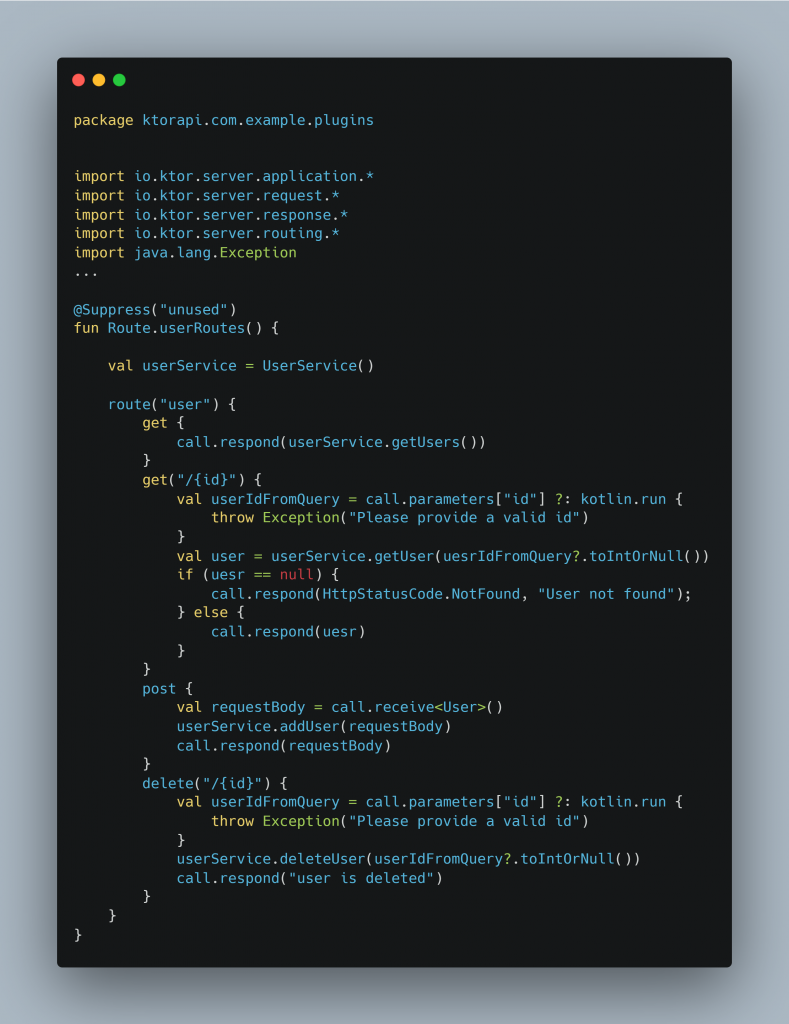
Add the route
Open the Routing.kt file and add the following code to it.
Test the app
We can now use the get, post, and delete routes to test the app. To start the application and test the URLs using Postman, choose the Application.kt file and click the play button (▶️).
Reference
https://codemaker2016.medium.com/introduction-to-ktor-6e238fa20c3
Check out our other blog posts for more insights. If you still have questions, comment and join the discussion.