In this blog, we have listed the steps to create a set-up using which we can capture live streaming from source camera & pass it to any streaming device which includes mobile, browser or smart-tv apps. Using this set-up, we can stream any live event like a conference, cricket match etc.
MediaLive is a real-time video service that lets you create live outputs for streaming. It is used to transform live video content from one format/package into another format/package. For different formats and packages, AWS Elemental MediaPackage comes into the picture.
Deployment of Live Streaming Template:
- Download a sample template from this link.
- Go to “cloudformation” from the services tab, and choose “stack” from the left navigation panel and then select “create stack”.
- Select “Template is ready” under prepare template and “Upload a template file” under the template source section. Then, select the template file which is to be uploaded and click on the next button.
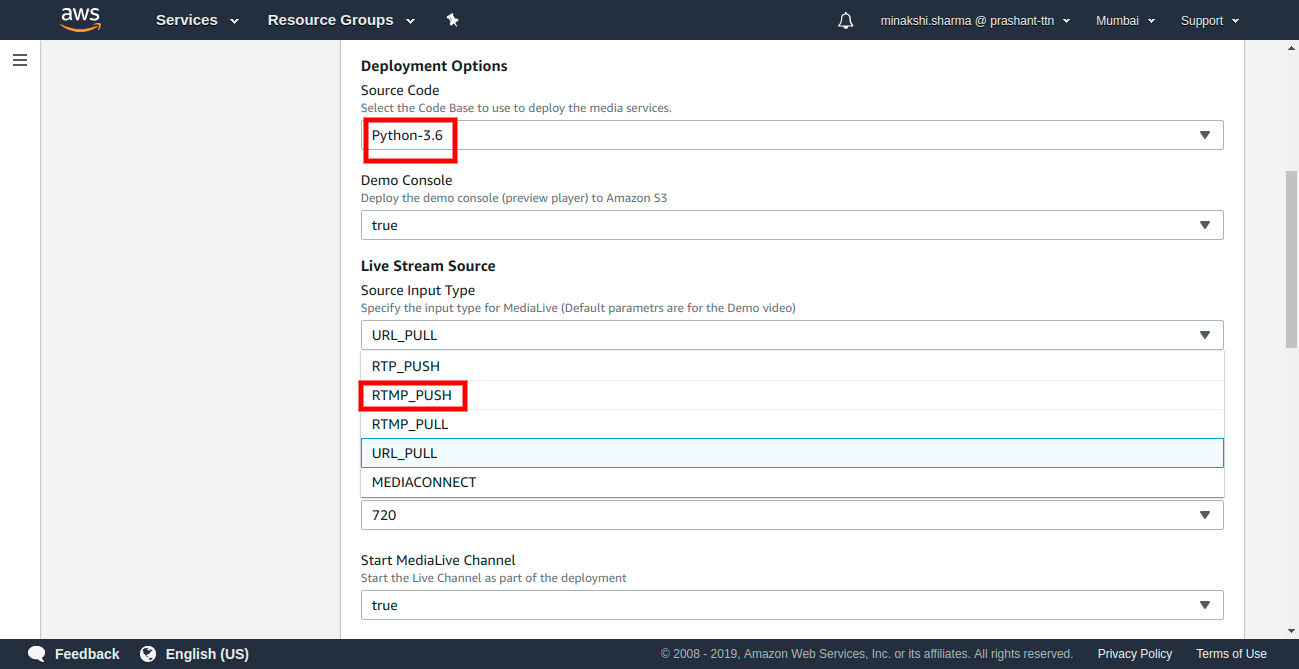
- “Specify stack details” form will be displayed wherein you can update the parameters. Set the source code to python, Input CIDR Block to “0.0.0.0/0” and source input type to “RTMP PUSH”.
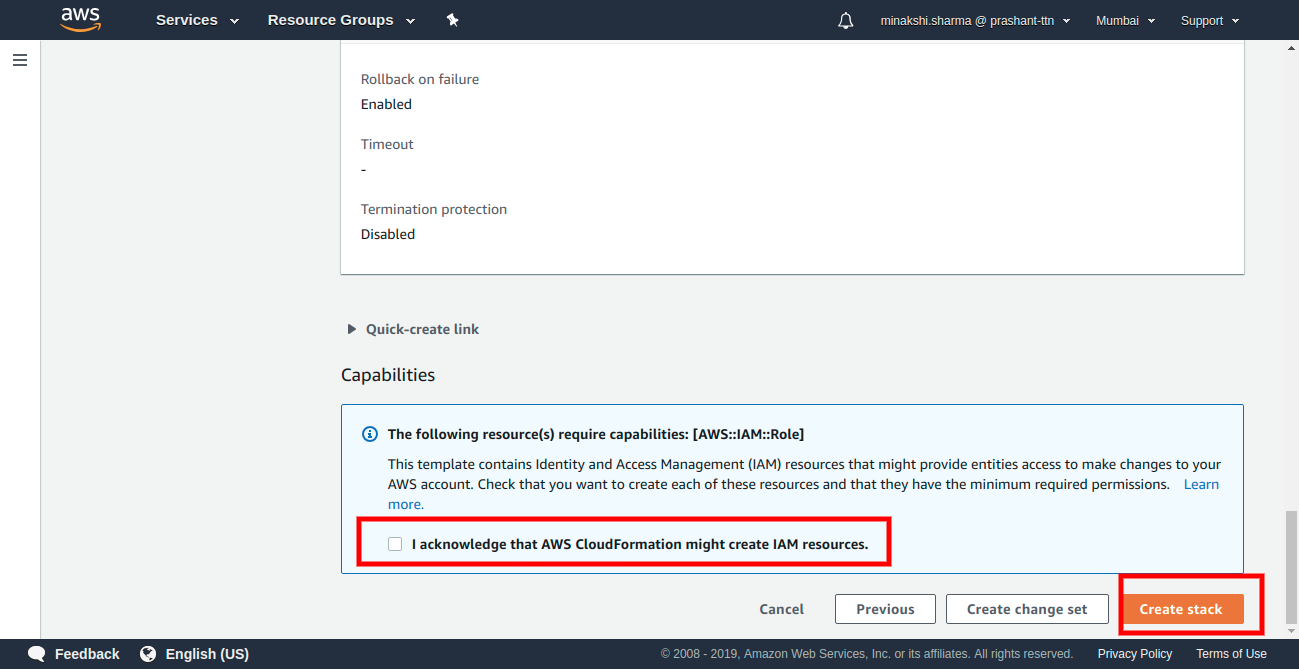
- Click on the next button. Check acknowledgment checkbox and click on the “create stack” button.
- It may take a while in processing. After completion, it will look like below screenshot.
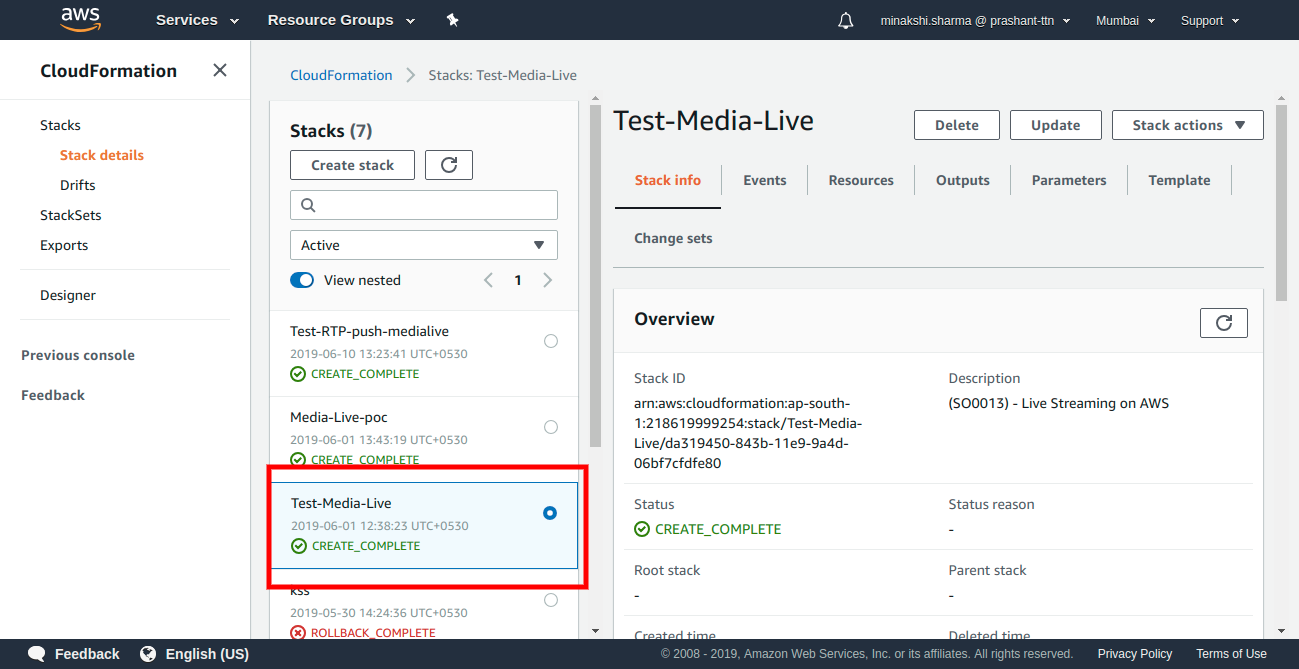
- Now, the template would have created the medialive input, media live channels and media package channel. You can confirm all this via AWS console.
Setting up live stream Encoder:
- Go to “medialive” service, choose inputs from the left panel and check input created by the template.
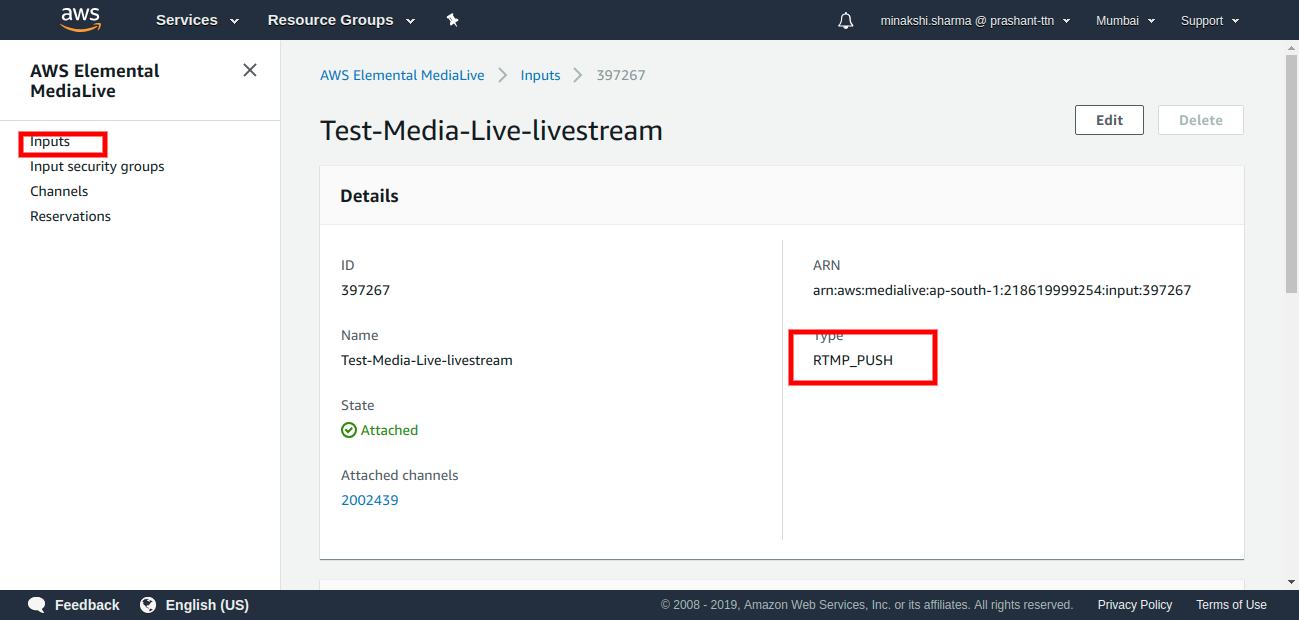
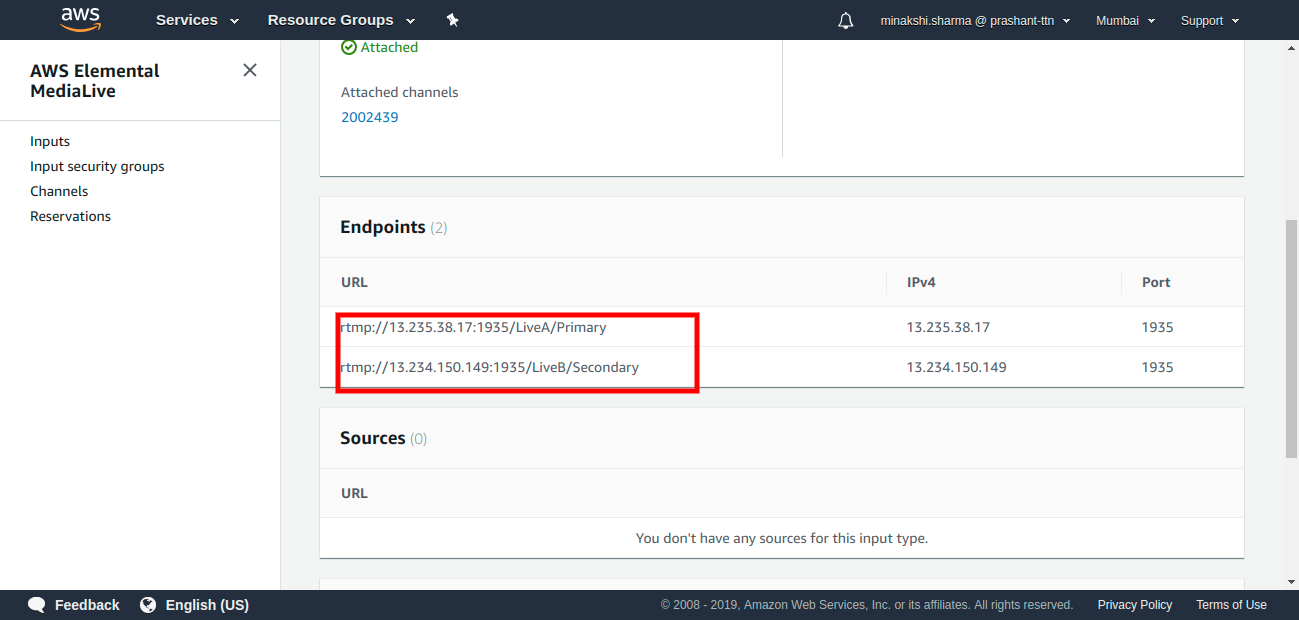
- Note down the streams generated on the input detail page.
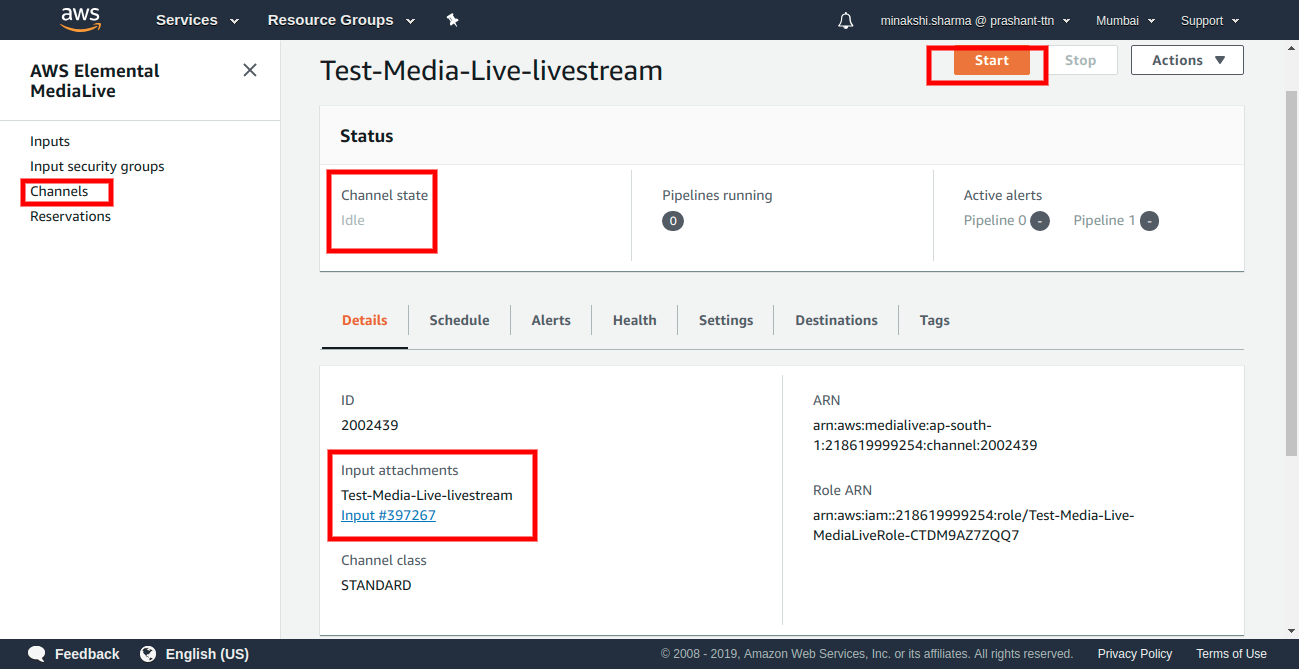
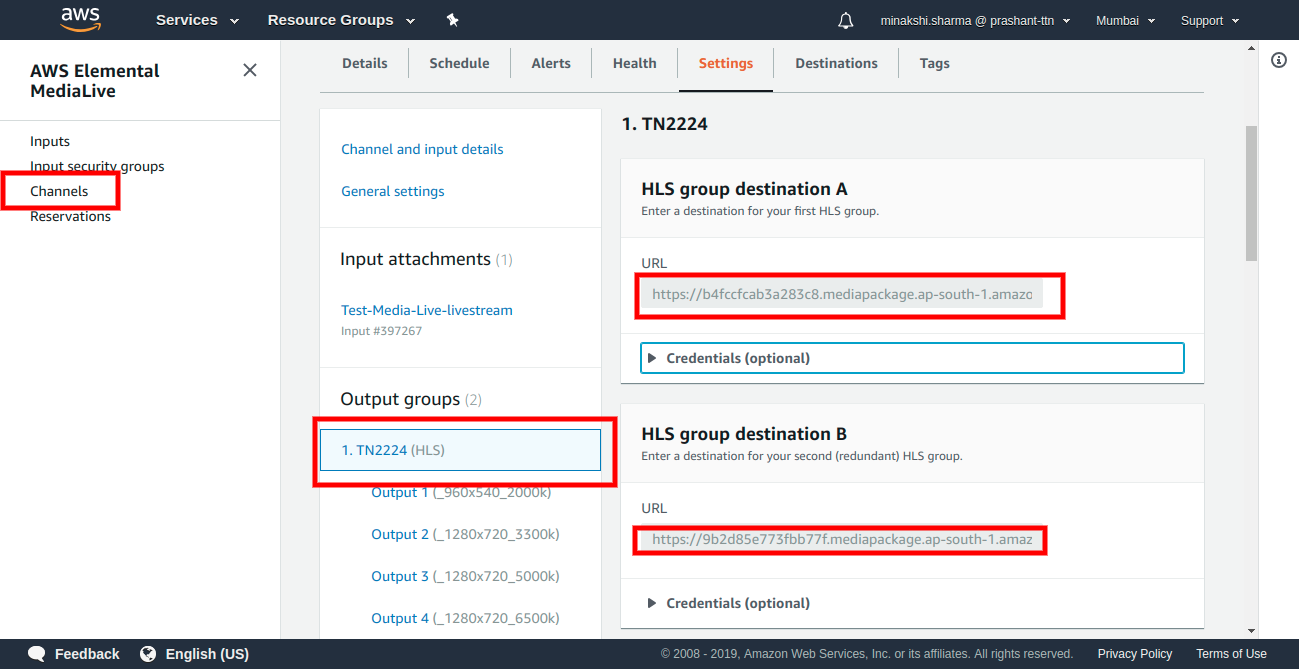
- Choose channels option from the left panel and check channel created by the template. You can verify the input associated with this channel.
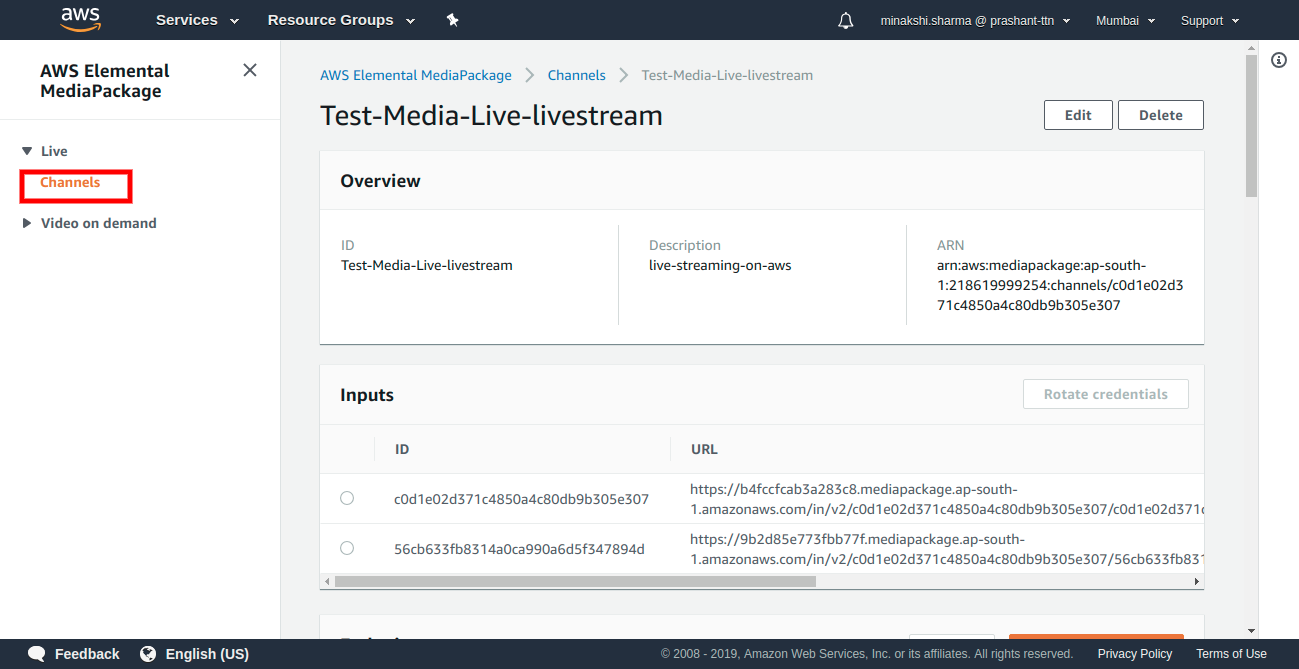
- Go to mediapackage service, choose channels from the left panel and check input URL/username/password created by the template.
- These URL/username/password are given as the destination in the output profile of mediaLive channel. You can verify the same under the settings tab of the media live channel.
- Now if everything looks fine, then it’s time to test live video streaming. For this, you need to install a mobile app named as “Larix broadcaster”.
- Once the app is installed on a device then go to the settings icon and click on choose connections, choose new connection, and provide any name in the name field, give that input stream URL in the URL field, which you noted down in the 2nd step. Also, save the connection.

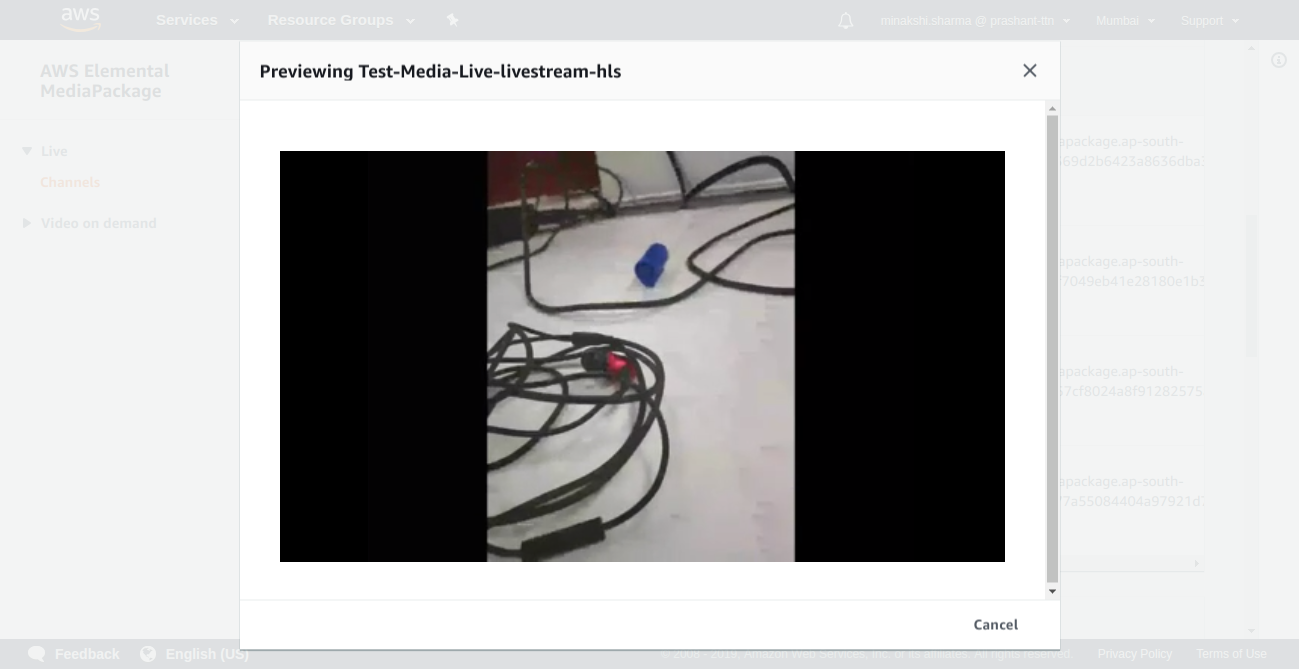
- Now, go to your media package channel where you can see the endpoints generated.
- Open medialive channel in the other tab and start the channel.
- Now, open your mobile app and make sure that your input stream is selected under the connections. Start capturing the video, if medialive channel is in the running state.
- Now your mobile app will start pushing the video to the input stream. Play the URL in the endpoint section of mediapackage channel. It will open the video preview.
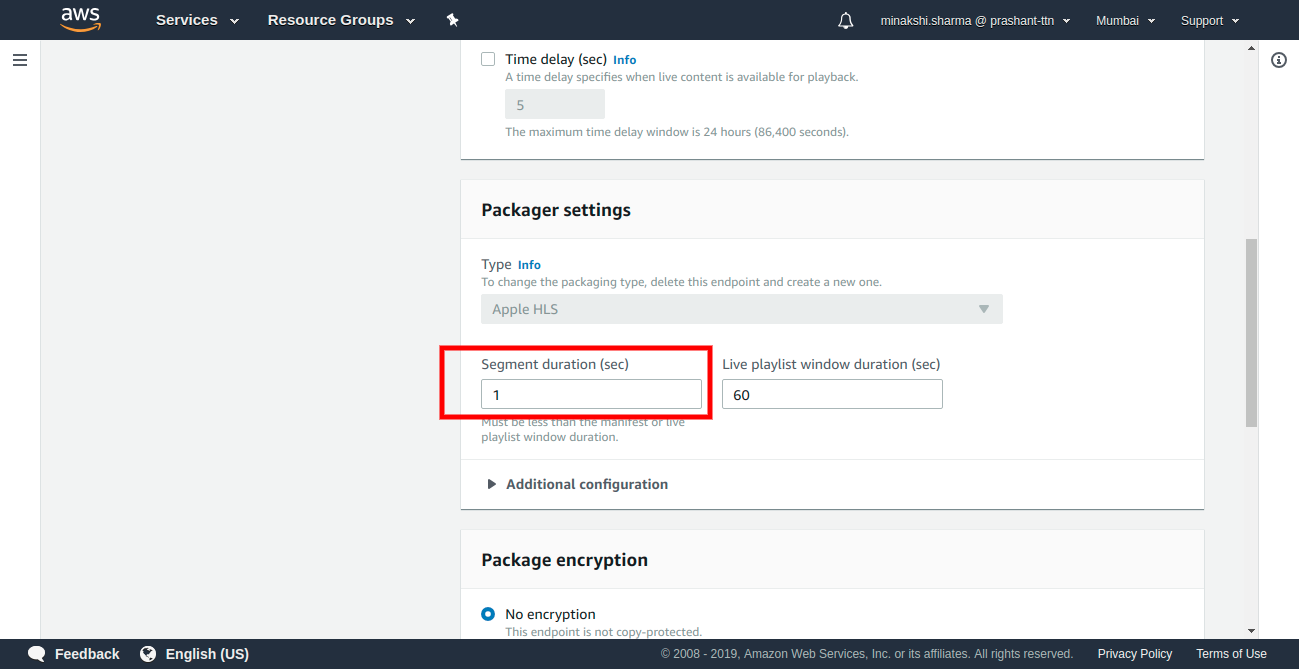
- Video may take upto 30 seconds to play on the mediapackage player. To decrease the latency, you can reduce the segment duration of mediapackage by editing any endpoint. You can find the segment duration under packager settings section of endpoint detail page.