Introduction
This article will help you through setting up SAML-based SSO between SonarQube and Azure Entra ID. You may simplify access control for your SonarQube instance, increase security, and expedite user authentication by turning on SSO. Additionally, it guarantees centralised identity control and lowers the overhead associated with maintaining local SonarQube accounts. This integration will make it easier for your team to utilise SonarQube, whether you’re using it for DevOps pipelines, security scanning, or code quality.
Prerequisites
- A running instance of SonarQube (Developer Edition or higher).
- Access to Azure Portal with permissions to register applications in Azure Entra ID.
- Admin access to the SonarQube instance.
NOTE
To integrate Azure Entra ID (Identity Provider) with SonarQube (Service Provider), both sides need to be configured:
-
- In SonarQube : Navigate to Administration > Authentication > SAML
- In Azure Entra ID: Log in and go to Azure Entra ID > Enterprise Applications
Use Case
You’re managing code quality and security across multiple teams using SonarQube, and your organization already uses Azure Entra ID for centralized identity and access management.
By enabling SAML-based Single Sign-On (SSO) between Azure Entra ID and SonarQube, you want to:
-
- Simplify and secure user access with corporate credentials.
- Avoid managing local SonarQube user accounts.
- Ensure access control aligns with organization-wide security policies.
- Streamline onboarding/offboarding processes across projects and teams.
This guide walks you through enabling SAML-based SSO, ensuring a seamless and secure login experience for your developers and administrators.
Configure Azure Entra ID Enterprise App for SonarQube
- Register the Sonarqube Application in Azure Entra ID
-
- Setup the Sonarqube Application
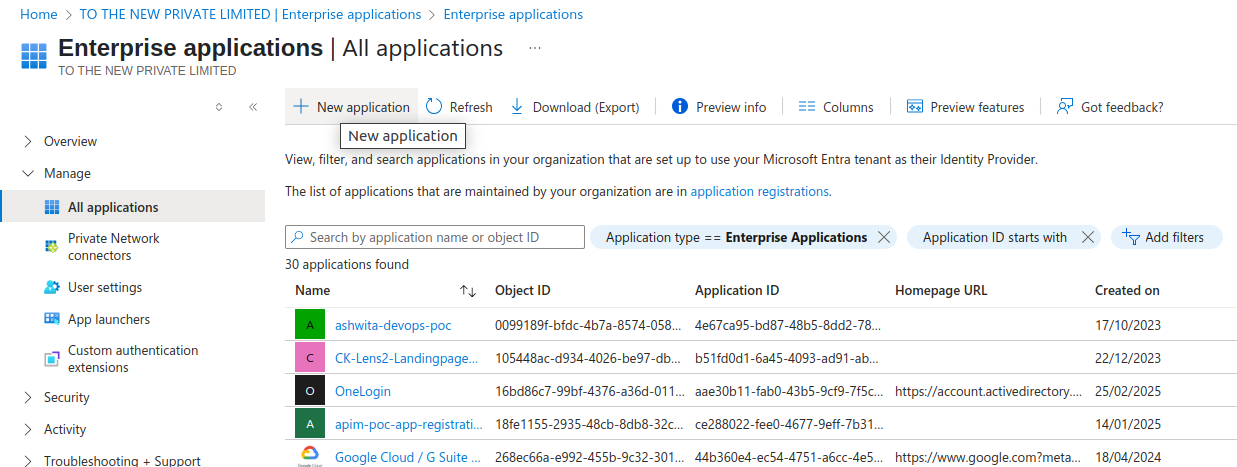
- Go to Azure Portal
- In Azure Entra ID, navigate to Enterprise applications and add a New Application.
- Setup the Sonarqube Application
-
-
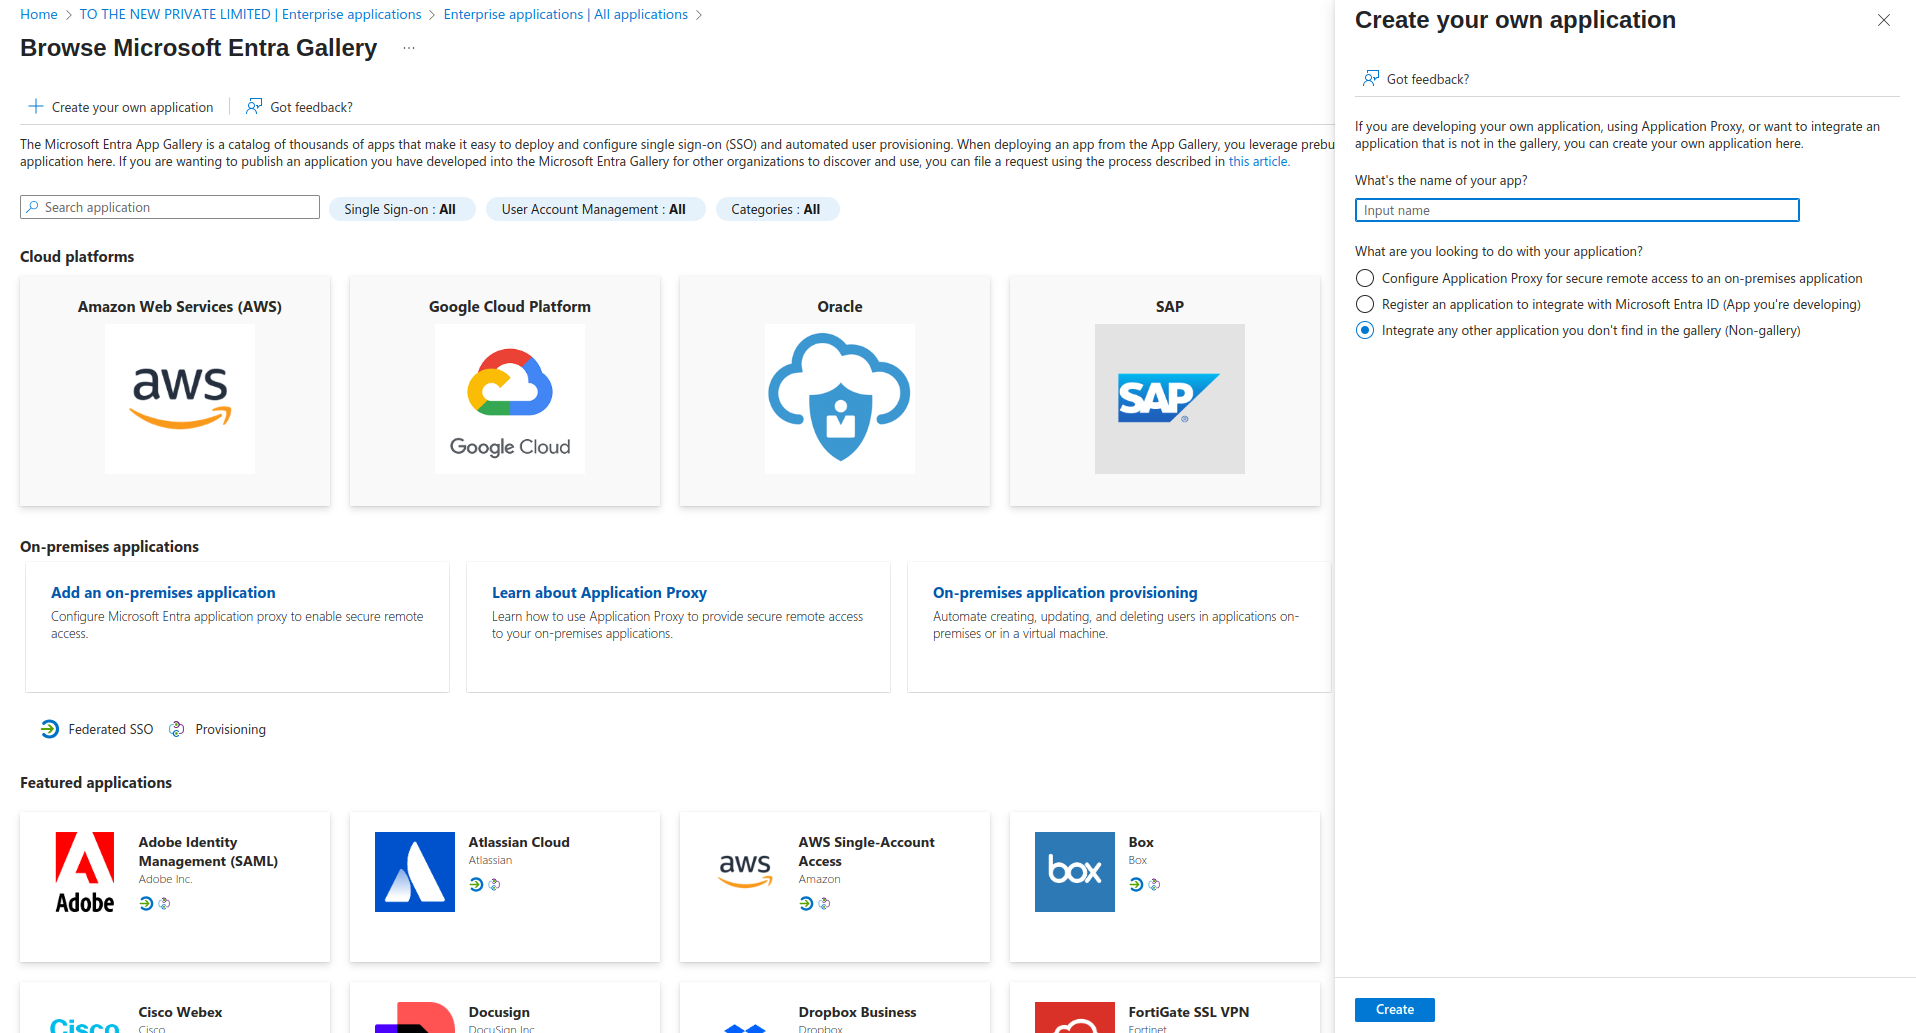
- Create your own application and fill in the name and then select create.
-
-
- Link Sonarqube with Azure Entra ID
-
-
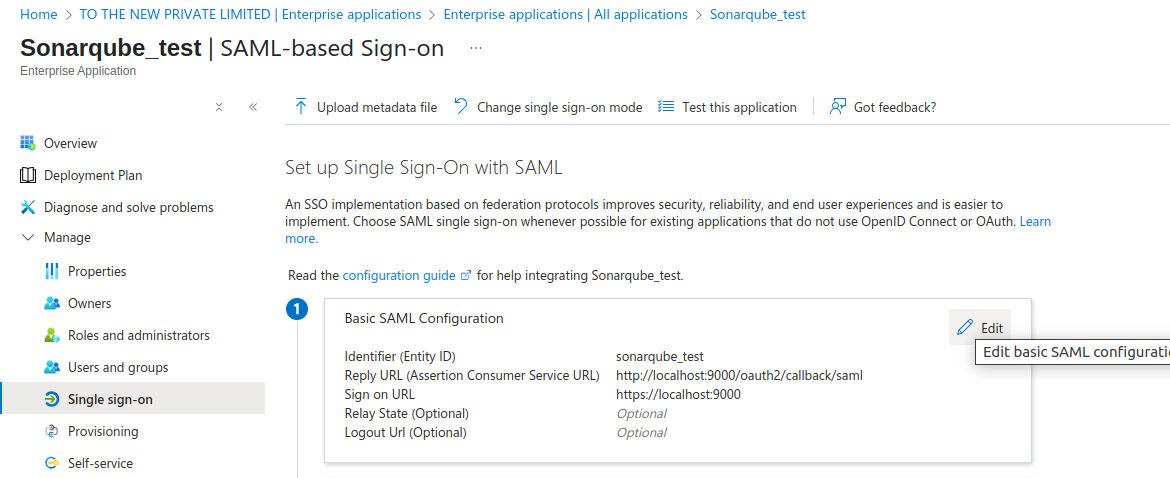
- Navigate to Single sign-on and select SAML.
-

-
-
- Edit the Basic SAML Configuration and fill the details like :
-
-
-
-
- Fill in the Identifier (Entity ID)
-
-
-
-
-
-
- The Identifier has to be the same as the Application ID in SonarQube.
-
-
-
-
-
-
- Fill in the Reply URL (Assertion Consumer Service URL)
-
-
-
-
-
-
- The Reply URL must have the format <Your SonarQube URL>/oauth2/callback/saml.
- The Reply URL uses the Server base URL provided in SonarQube under Administration > General.
-
-
-
-
-
-
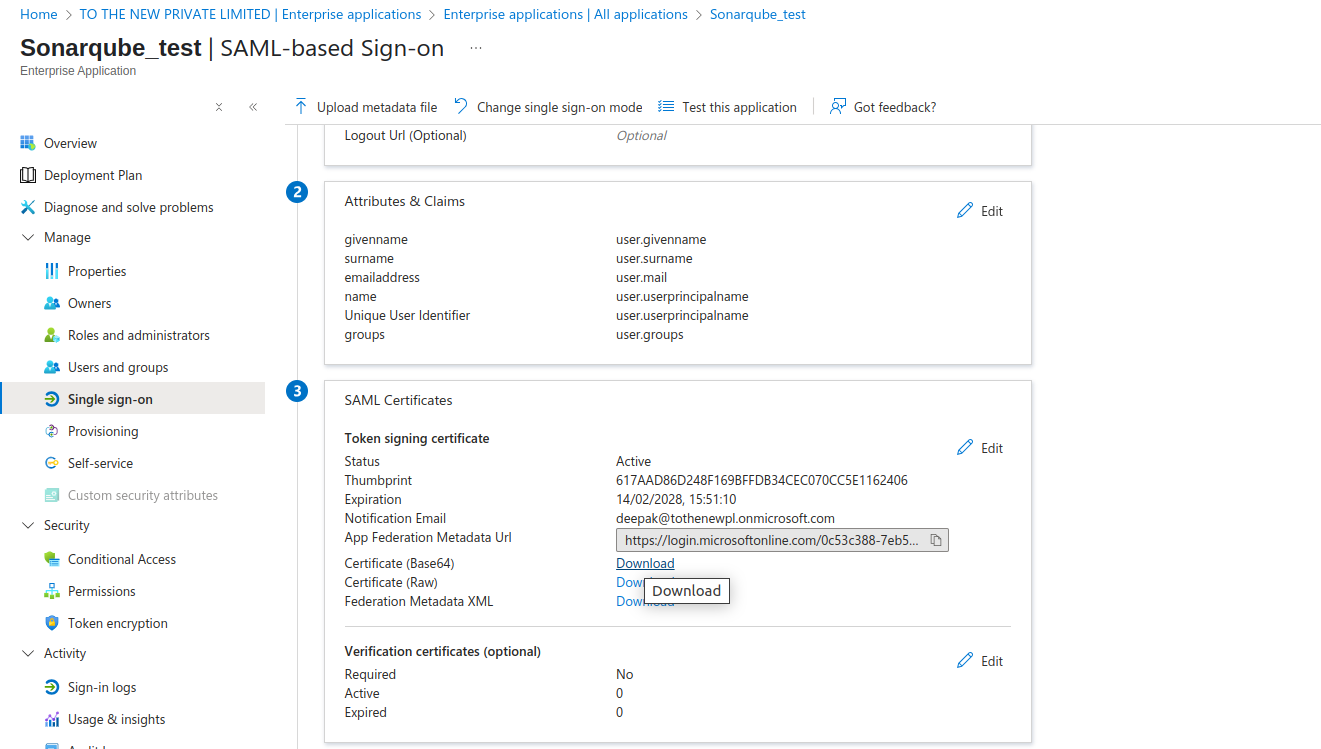
- Attributes and Claims
-
-
-
-
-
-
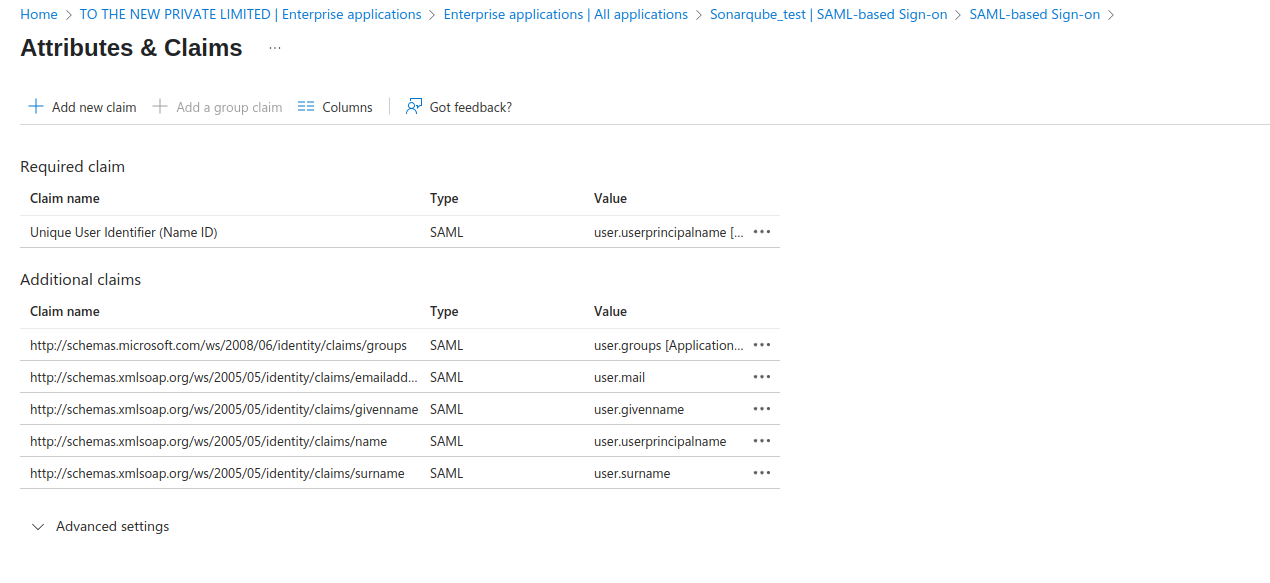
- In the Azure Entra ID SAML configuration, edit Attributes & Claims to view, edit or add attributes.
- SonarQube expects the following user attributes during SAML authentication:
-
-
-
-
-
-
-
-
- Login (Required): In Azure Entra ID, the default attribute used is givenname.
- Name (Required): In Azure Entra ID, the default attribute used is name.
- Email (Optional)
- Group (Optional): Group names passed from Azure Entra ID must exactly match group names in SonarQube. If no match is found, the user is automatically assigned to the default sonar-users group.
-
-
-
-
-
-
-
- SAML Certificates
-
-
-
-
-
-
- Navigate to SAML Certificates and download Certificate (Base64).
- The certificate should be copied into the Identity provider certificate field in the SonarQube SAML configuration.
-
-
-
-
-
-
- Setup Sonarqube Test
-
-
-
-
-
-
- You’ll need to configure the application to link with Microsoft Entra ID.
- So copy the Login URL and Microsoft Entra Identifier values which will be used in Sonarqube configuration.
-
-
-

Configure SonarQube for SAML
- Enable SAML in SonarQube
-
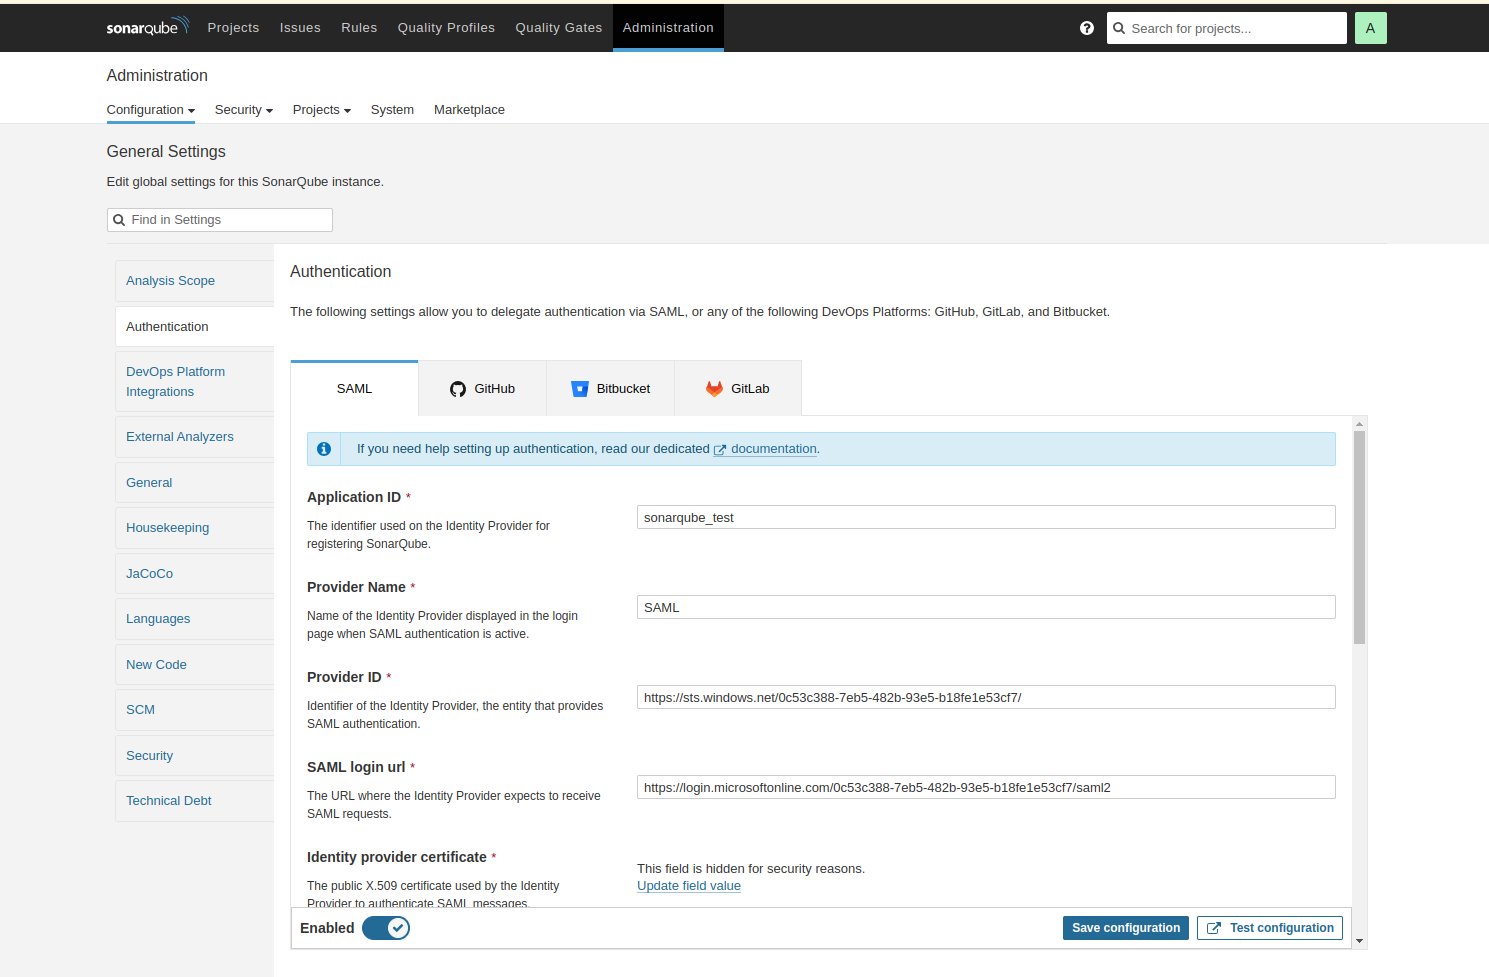
- SonarQube stores SAML settings in the following locations i.e Administration > Authentication > SAML.
- Go to the SAML file and make sure to add the following configuration:
-
-
- Application ID : Application ID should be the same as the Identifier or application name in Azure Entra ID.
- Provider ID : Provider ID should be the same as the Microsoft Entra Identifier in the Setup SonarQube Test section in the Azure Entra ID.
- SAML login url : SAML login url should be the same as the Login Url in the Setup SonarQube Test section in the Azure Entra ID.
- Identity provider certificate : Upload the base 64 certificate here which we downloaded from the Entra ID SAML certificate section in our previous section.
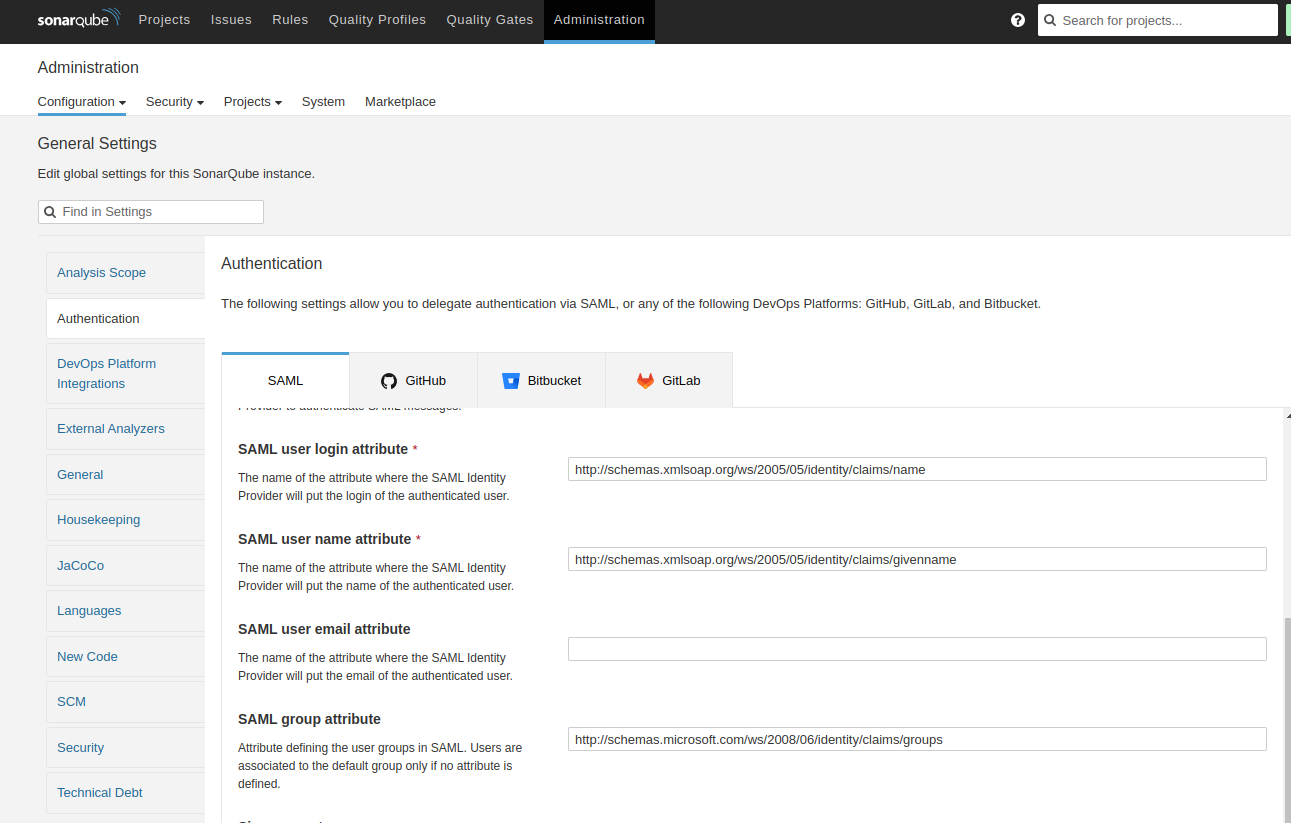
- SAML user login attribute :
-
-
- SonarQube uses the following attributes:
-
-
- SAML user login attribute (required) : A unique name to identify the user in SonarQube. The default Azure Entra ID attribute name used in this field.
- SAML user name attribute (required) : The full name of the user. The default Azure Entra ID attribute givenname is used in this field.
- Email (optional) : The email of the user.
- Group (optional) : Supports mapping to group names in SonarQube. Group name passed by Azure Entra ID and the group name in SonarQube should match. Otherwise, the default sonar-users group is assigned.
-
Enabling and testing SAML authentication
Step 1: In the SonarQube SAML settings, enable SAML.
-
- Enable the SonarQube and Test the configuration in SonarQube server.
- You will receive the required information if all configurations are correctly set.

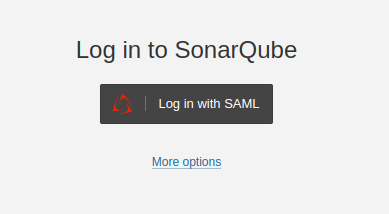
Step 2: In the login form, the new button Log in with SAMLallows users to connect with their SAML account.
Conclusion
Integrating SonarQube with Azure Active Directory using SAML provides a secure and centralized authentication mechanism for your development and DevOps teams. With this setup, user access is streamlined through single sign-on (SSO), enabling better control, enhanced security, and simplified user management through Azure Entra ID.