Few days back, I was trying to instantiate an RDS instance in Private subnet of a non-default VPC ( Custom VPC ). But unfortunately the launch wizard was not letting me to choose the new non-default VPC.
This problem can put you in worse situation in security terms as the wizard will not let you choose your respective VPC and hence you can not choose your Private subnet, and it can be a threat to data security.
Lets go through the solution for this problem.
It was found that the RDS launch wizard needs a subnet group inside when it launches a DB instance and by default it chooses a ‘default’ public subnet group of Default VPC. So, If you don’t have any custom Subnet group, you will have Default VPC’s Public -facing Subnet, launching your DB instance.
So, lets create a new custom Subnet group
1.
- Go to RDS Dashboard by clicking Services –> RDS.
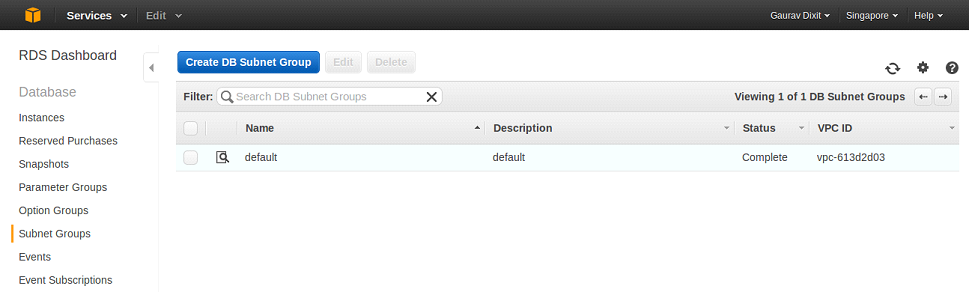
- Now , we have to create a Subnet Group. Click on ‘Subnet Group’ option given on the Dashboard. Here you can see a default Subnet group named ‘default’.
- Now click on ‘Create DB Subnet Group’ to create new Subnet Group.
2.
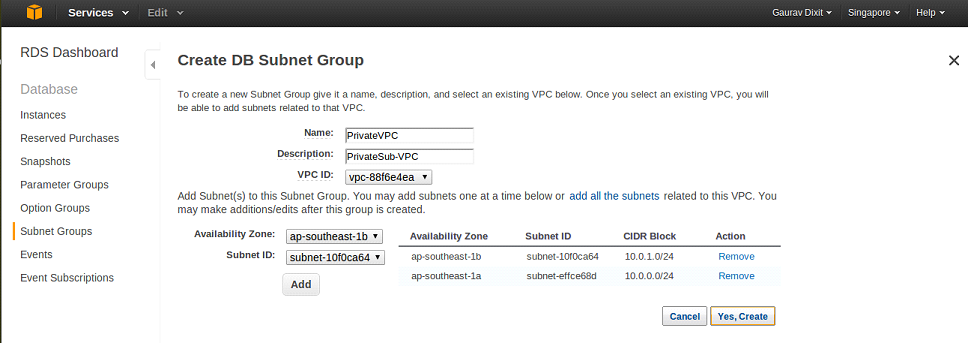
- In DB Subnet Group Wizard, give basic Subnet information as Name and Description for your custom DB Subnet Group.
- Choose a VPC ID from drop down menu showing all the VPC in current region. Click on ‘add all the subnets’ link to display all subnets available in chosen VPC.
- Now, choose one availability zone to select a Subnet ID to which this DB Subnet Group will be associated.
- Click ‘Yes, Create’ button to create this DB subnet group.
3.
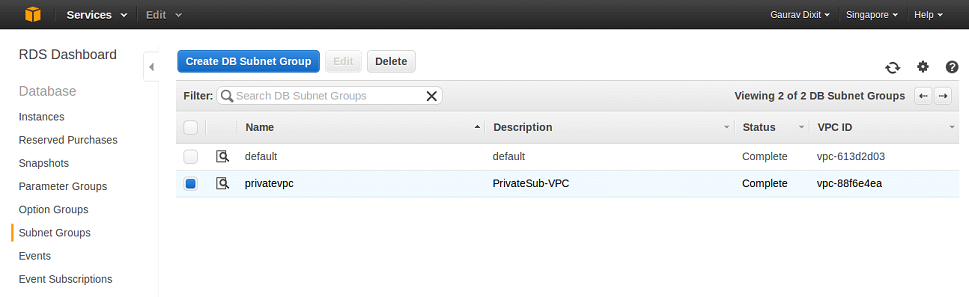
- Your new DB Subnet Group will be created in a moment . You can check it in Subnet Group panel.
Now, Lets create RDS DB instance inside Private Subnet (here Subnet ID: subnet-10f0ca64) of Non-Default VPC (here, VPC ID: vpc-88f6e4ea)
1.
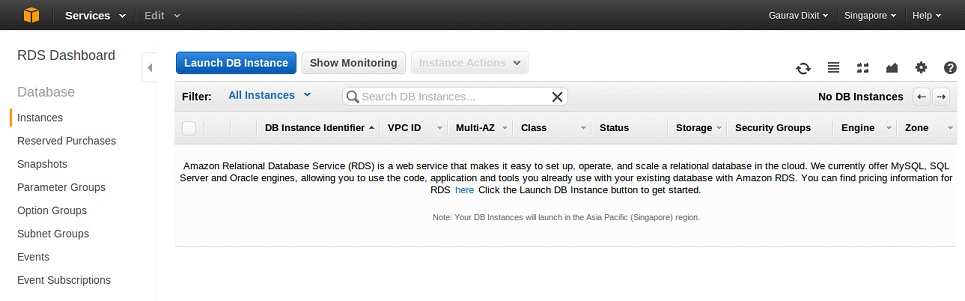
- Now to go to Instances Panel on RDS Dashboard: Services –> RDS –> Instances.
- Click ‘Launch DB Instance’ button to get started with DB launch wizard.
2.
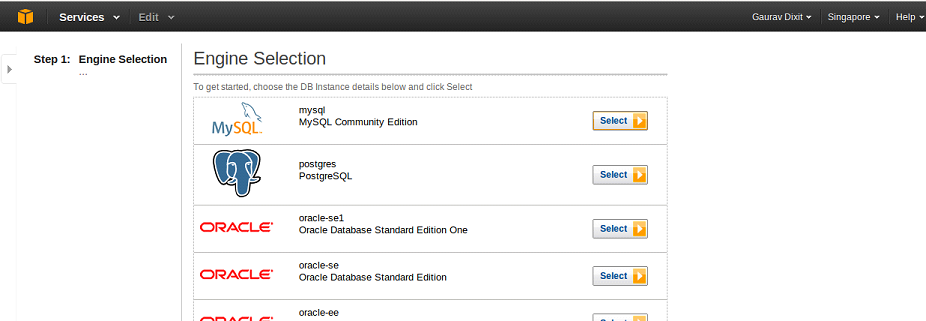
- Amazon RDS provides you with many DB Engine options such as PostgreSQL, oracle-ee, mysql, etc.
You can select any of these as per requirement (here we have selected mysql).
3.
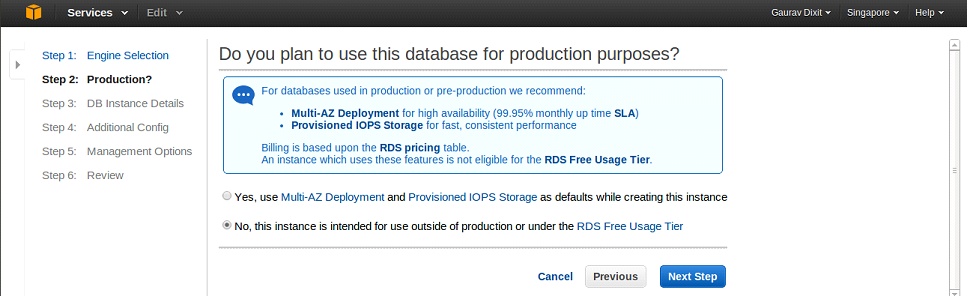
- In next step, if you want high availability and consistent performance of instance you can choose to use multi-AZ deployment and provisioned IOPS storage else you can use RDS free usage tier.
- Click ‘Next Step’.
4.
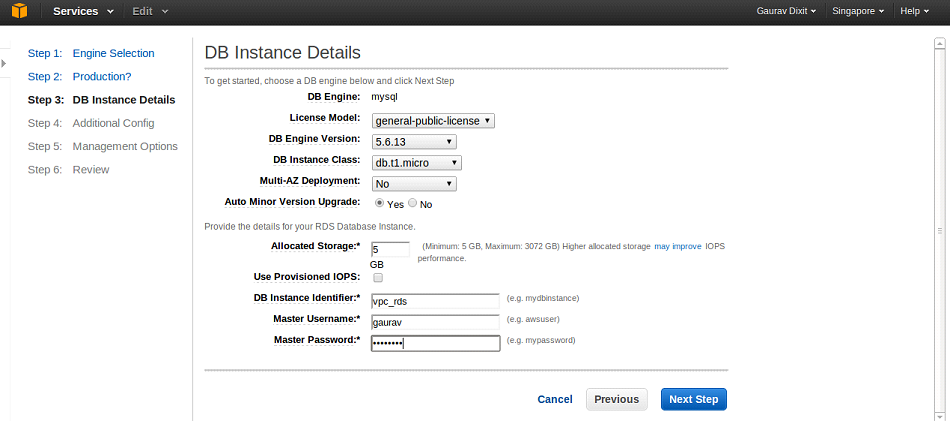
- Now, provide with DB Instance basic Details such as DB instance Class, Multi A-Z Deployment and Allocated Storage as per requirement.
- Put in DB Instance Identifier name (vpc-rds here), master Username and Password.
- Click ‘Next Step’ to proceed.
5.
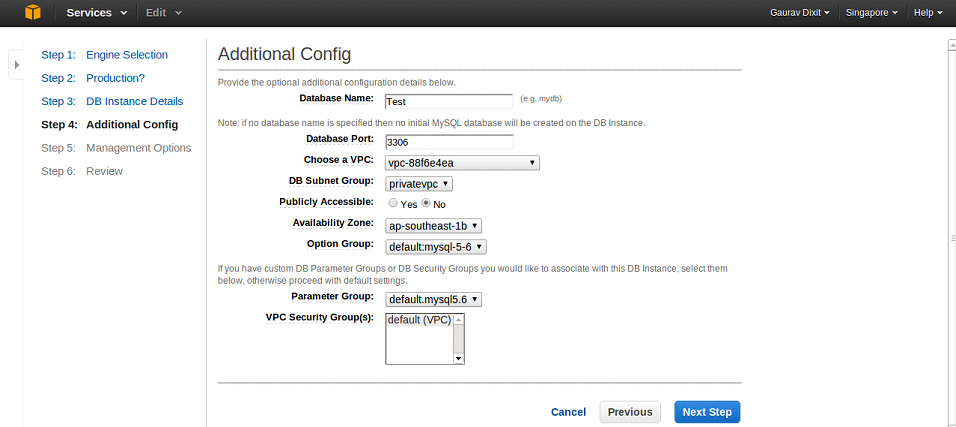
- In this step, you must provide some important configuration information such as Database name, Database Port (by default for mysql, it is 3306).
- Choose the VPC (here, VPC ID: vpc-88f6e4ea) and hence DB Subnet Group (here, privatevpc) which is associated with a subnet (here subnet-10f0ca64 ) wherein you want to instantiate a DB. Choose the associated Availability zone for Private Subnet of VPC. Leave everything else as default.
- Click ‘Next Step’.
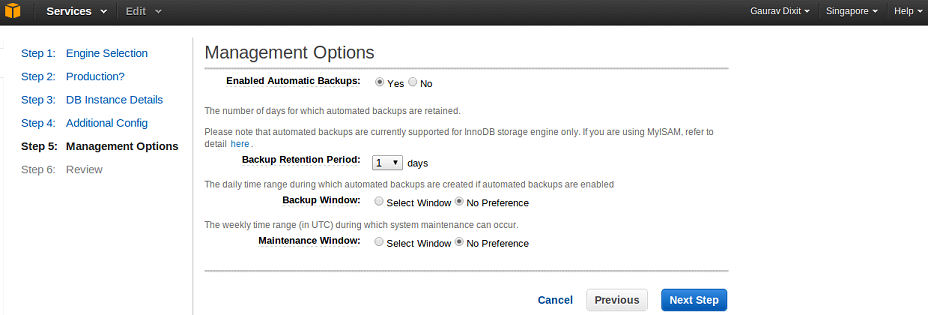
6.
- Choose options for DataBase Backup.
- You can provide frequency for automatic backups by providing Backup retention period.
- Click ‘Next Step’.
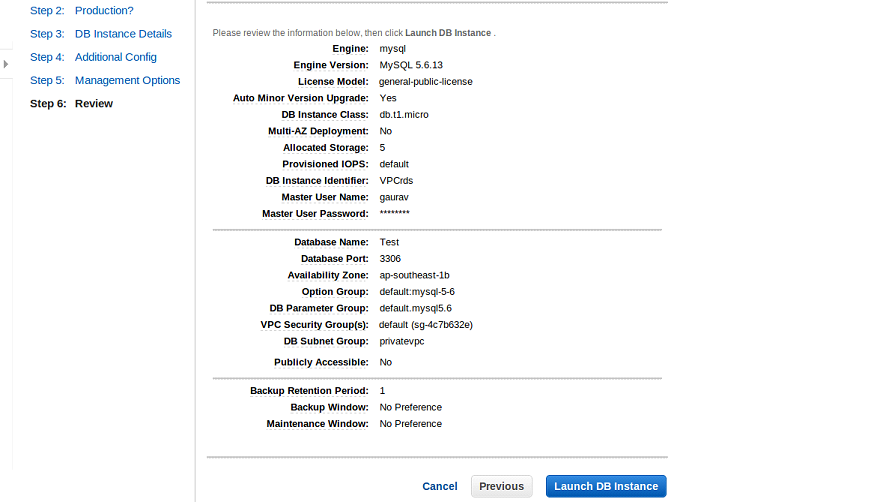
7.
- Review all the configuration settings for the DB Instance.
- Click ‘Launch DB Instance’ to launch DB.
- This DB will now be launched in Private Subnet of non-default VPC ( vpc-88f6e4ea).
Thank you, helped me to setup up my db instance, i was wondering why i cant choose subnet in the launch, until i saw the db subnet group in your article