In the age of digital streaming, Over-The-Top (OTT) platforms have become increasingly popular for delivering media content directly to viewers via the internet. With the rise of smart TVs and set-top boxes, developing an OTT application for tvOS has become essential for reaching a wide audience. In this guide, we will walk you through creating an OTT application for tvOS using SwiftUI, Apple’s powerful and intuitive framework for building user interfaces.
Introduction to tvOS and SwiftUI
Before we jump into the coding magic, let’s understand what tvOS and SwiftUI are. tvOS is Apple’s operating system designed specifically for Apple TV, allowing developers to create immersive and interactive apps for the big screen. SwiftUI, on the other hand, is a user interface toolkit that lets you design apps in a declarative way. It’s user-friendly and perfect for beginners.
Setting Up Your Development Environment
First things first, ensure you have the latest version of Xcode installed on your Mac. Xcode is the go-to integrated development environment (IDE) for Apple app development.
Creating a New tvOS Project
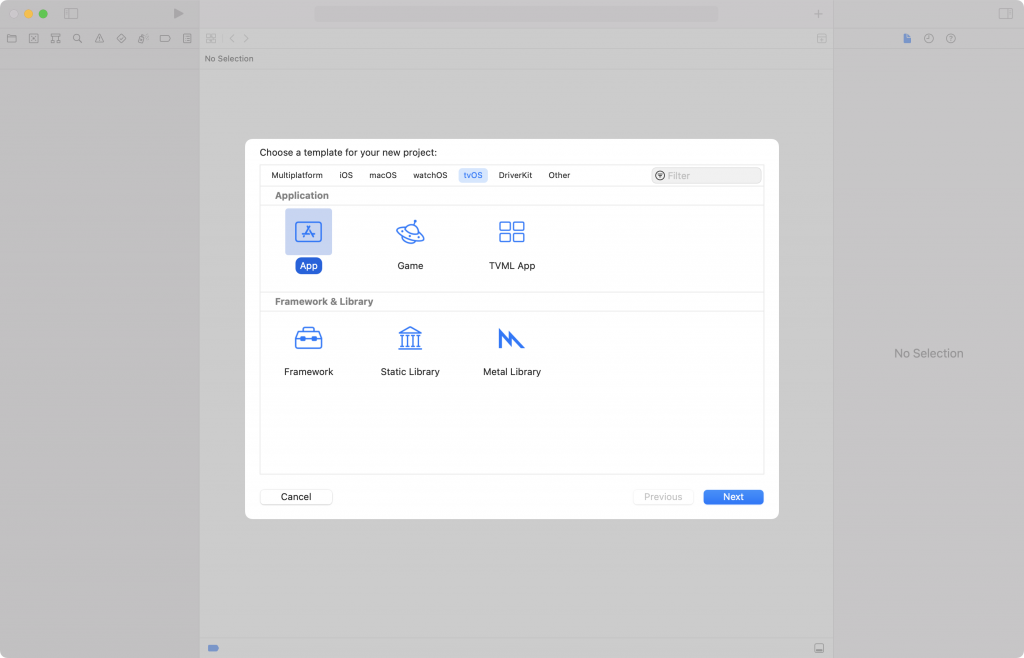
- Open Xcode: Launch Xcode and select “Create a new Xcode project.”
- Choose a Template: Choose “tvOS” under the Application section and select “tvOS App.”
- Configure Your Project: Enter a product name and organization identifier. Ensure the language is set to Swift and the Interface is set to SwiftUI. Click “Next” and choose a location to save your project.
Designing Your User Interface
In SwiftUI, the user interface is created using a combination of Views and Modifiers. Views represent visual elements, while Modifiers help you customize those elements.
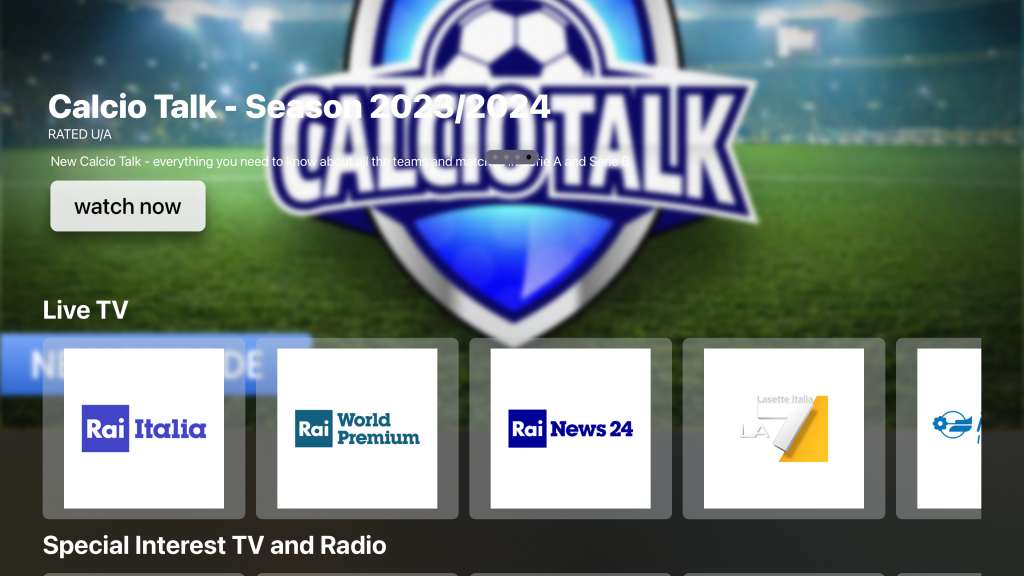
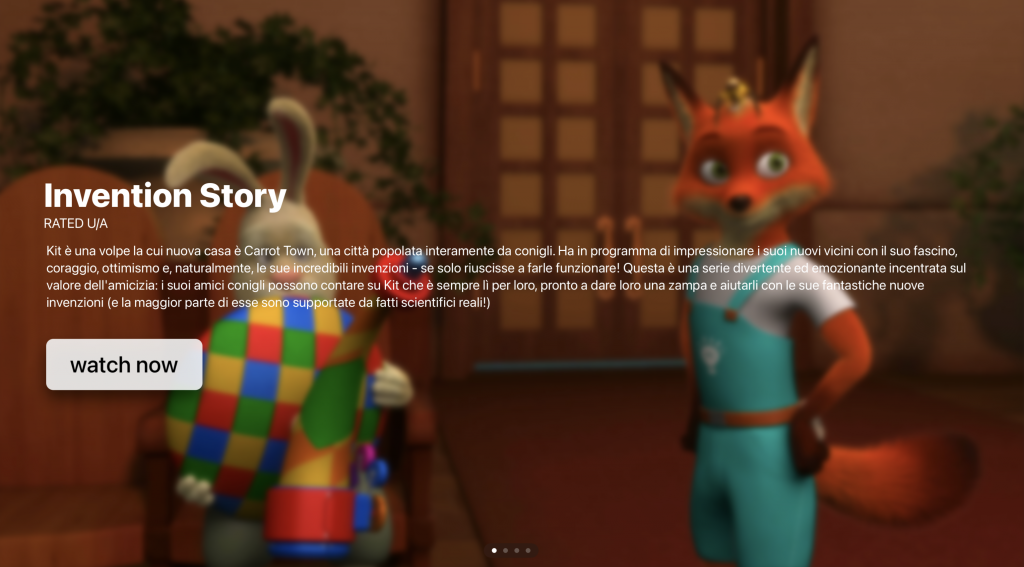
Step 1: Designing the Hero Banner
The hero banner is the first thing your users will see when they open your app, so let’s make it visually captivating.
-
Create a new SwiftUI View for the Hero Banner:
struct HeroBannerView: View { var body: some View {
// Your hero banner content goes here } }
-
Design the Hero Banner Content:
struct HeroBannerView: View {
var body: some View {
ZStack { // Background image or video player // Overlay with text, buttons, and animations } } }
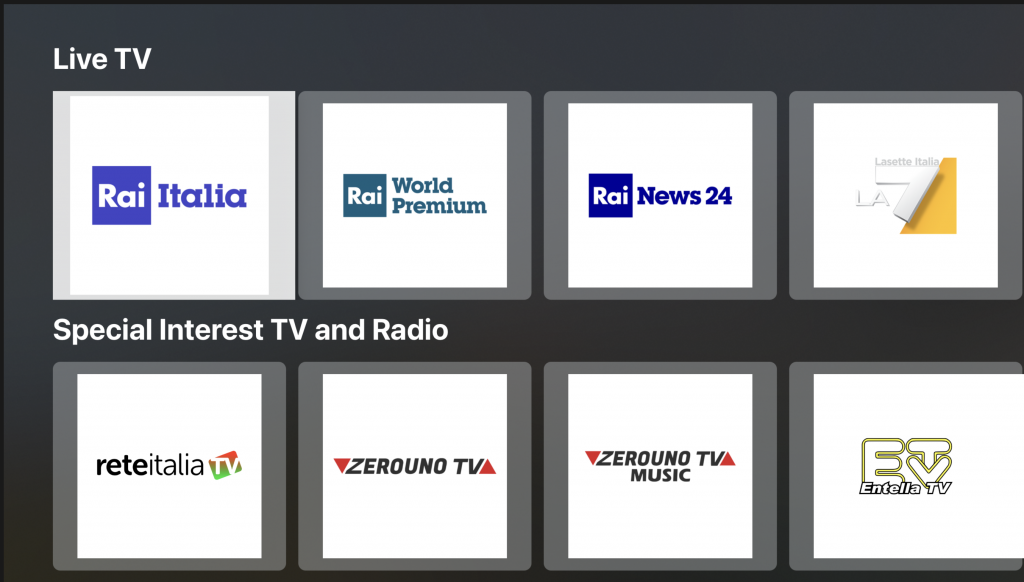
Step 2: Implementing Rails for Content
The rails beneath the hero banner are perfect for displaying various categories or featured content.
-
Create a Data Model:
Create a data model for your content items. For example:
struct ContentItem: Identifiable {
var id: UUID
var title: String
var thumbnail: Image
// Additional properties like description, category, etc.
}
-
Create a Rail View:
struct RailView: View {
var contentItems: [ContentItem]
var body: some View {
ScrollView(.horizontal, showsIndicators: false) {
HStack(spacing: 20) {
ForEach(contentItems) { item in
// Display content item using a custom view
ContentItemView(item: item)
}
}
.padding(20)
}
}
}
-
Customize the ContentItemView:
Create a custom view for displaying each content item within the rail. You can show the thumbnail, title, and any additional information here.
struct ContentItemView: View {
var item: ContentItem
var body: some View {
VStack(alignment: .leading, spacing: 10) {
tem.thumbnail
.resizable()
.frame(width: 200, height: 300)
Text(item.title)
.font(.headline)
}
.padding(10)
.background(Color.white)
.cornerRadius(10)
.shadow(radius: 5)
}
}
Step 3: Integrating Hero Banner and Rails in Home View
Now, integrate the HeroBannerView and RailView into your home view.
struct HomeView: View {
var heroBannerContent: HeroBannerView
var railContent: [ContentItem]
var body: some View {
VStack {
heroBannerContent
.frame(height: 300) // Set an appropriate height for the hero banner
RailView(contentItems: railContent)
}}
In your ContentView or root view, instantiate the HomeView with appropriate content for the hero banner and rails. For example:
struct ContentView: View {
var body: some View {
HomeView(
heroBannerContent: HeroBannerView(),
railContent: [
ContentItem(id: UUID(), title: "Movie 1", thumbnail:     Image("movie1")),
ContentItem(id: UUID(), title: "Movie 2", thumbnail: Image("movie2")),
// Add more content items as needed
.background(Color.black.edgesIgnoringSafeArea(.all))
}
}
Below is the final complete Screen of how it will look like