Social authentication is a powerful feature that allows users to log in to your Django web application using their social media accounts like Facebook, Google, Twitter, and more. It simplifies users’ registration and login process while providing additional user data for your application.
Basic Setup:
Step 1: Installation –
First, install the django-social-auth library using pip:
pip install social-auth-app-django
Step 2: Settings Configuration –
Add ‘social_django’ to your INSTALLED_APPS in your project’s settings (settings.py):
# settings.py
INSTALLED_APPS = [
    # ...
    'social_django',
    # ...
]
Step 3: Migrations
python manage.py makemigrations
python manage.py migrate
The library will automatically handle auth tokens and all the required information to deal with OAuth and OAuth2. Generally speaking, you won’t need to handle it manually or access the user’s social profile.
Step 4: Configuration of Django Social Auth App –
Update the MIDDLEWARE_CLASSES by adding the SocialAuthExceptionMiddleware to the end of it:
MIDDLEWARE_CLASSES = [
    'django.middleware.security.SecurityMiddleware',
    'django.contrib.sessions.middleware.SessionMiddleware',
    'django.middleware.common.CommonMiddleware',
    'django.middleware.csrf.CsrfViewMiddleware',
    'django.contrib.auth.middleware.AuthenticationMiddleware',
    'django.contrib.auth.middleware.SessionAuthenticationMiddleware',
    'django.contrib.messages.middleware.MessageMiddleware',
    'django.middleware.clickjacking.XFrameOptionsMiddleware',
    'social_django.middleware.SocialAuthExceptionMiddleware',  # <-- Here
]
Now we update the context_processors inside TEMPLATE:
TEMPLATES = [
    {
        'BACKEND': 'django.template.backends.django.DjangoTemplates',
        'DIRS': [BASE_DIR + '/templates/',],
        'APP_DIRS': True,
        'OPTIONS': {
            'context_processors': [
                'django.template.context_processors.debug',
                'django.template.context_processors.request',
                'django.contrib.auth.context_processors.auth',
                'django.contrib.messages.context_processors.messages',


                'social_django.context_processors.backends',  # <-- Here
                'social_django.context_processors.login_redirect', # <-- Here
            ],
        },
    },
]
Add the AUTHENTICATION_BACKENDS in your settings.py file:
AUTHENTICATION_BACKENDS = (
    'social_core.backends.facebook.FacebookOAuth2',
    'social_core.backends.twitter.TwitterOAuth',
    'social_core.backends.github.GithubOAuth2',

    'django.contrib.auth.backends.ModelBackend',
)
So, here, we must specify the correct backends, depending on your needs. Since we will be working with Facebook, Twitter, and GitHub in this example, I have just added those three backends you see above in AUTHENTICATION_BACKENDS.
Step 5:
Update the urls.py add the social-auth-app-django URLs:
from django.contrib import admin
from django.urls import path, include

urlpatterns = [
path("admin/", admin.site.urls),
path("",include("app.urls")),

path("oauth/",include("social_django.urls",namespace="social")),# <-- here
]
Facebook Login Integration in Django Website
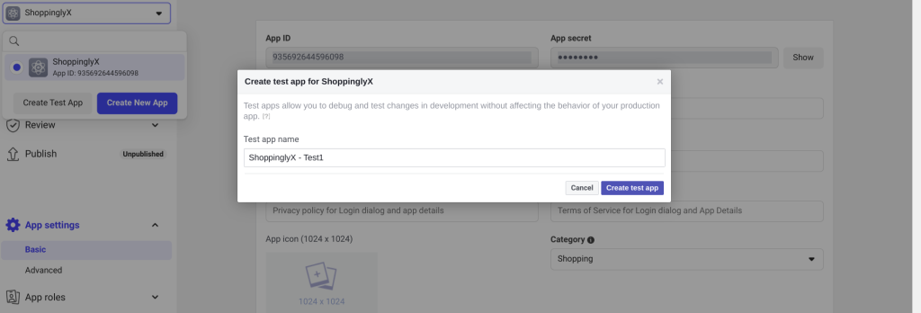
Go to developers.facebook.com/ click on My Apps and then Create App (If new, click on Get Started and create your developer account). Fill in the app name and contact email, and click on Create App ID.
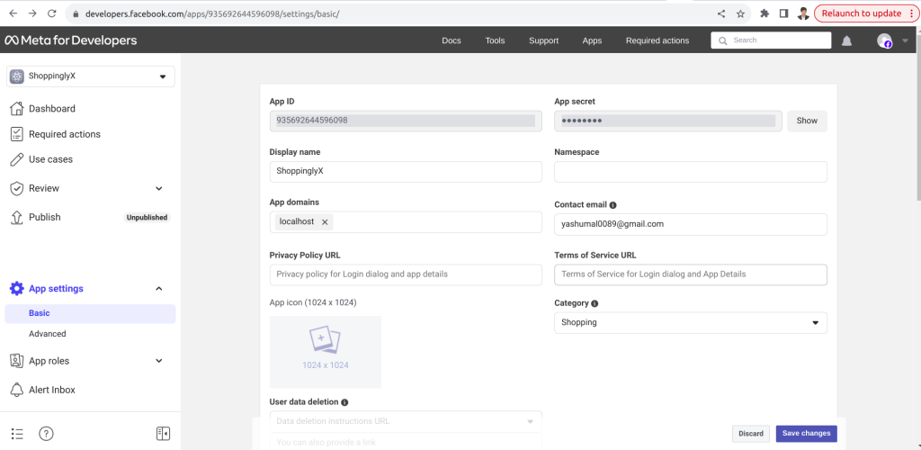
From the sidebar, go to Settings -> Basic, grab the App ID and App Secret (click on the Show button to get it as plain text):
SOCIAL_AUTH_FACEBOOK_KEY = 'APP_ID'
SOCIAL_AUTH_FACEBOOK_SECRET = 'APP_SECRET'
Change the above App ID and App Secret and add it to settings.py file
Now go to Settings -> Basic at the bottom. First, click on the button + Add Platform and add a website. For the Site URL, put http://localhost:8000, and then in the App Domains, put just localhost, like the picture below:

Note: For Facebook, we can’t use 127.0.0.1 as the callback. Instead, use the localhost.
Save changes and we are good to go. Now update the login.html file with the Facebook link:
{% extends 'base.html' %}

{% block title %}Login Page{% endblock title %}

{% block content %}


<h2>Login</h2>

    <form method="post">

        {% csrf_token %}

        {{ form.as_p }}

        <button type="submit">Login</button>

    </form>

    <br>

<!-- Social Auth Buttons -->

<divclass="text-center">

<ahref="{% url 'social:begin' 'facebook' %}"class="btn btn-primary"><iclass="fab fa-facebook-f"></i> Login with Facebook</a>

</div>
Note that the important part to start the Facebook authentication is {% url ‘social:begin’ ‘facebook’ %}.
Let’s try it now. Click on login with Facebook.
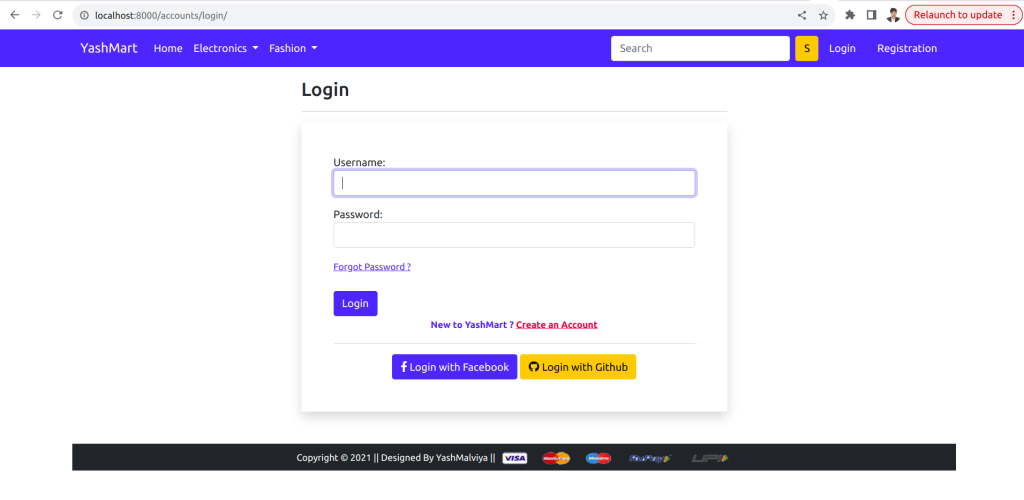
Successfully logged in with Facebook.

Django GitHub Login:
Log in to your GitHub account, and go to Settings. In the left menu, you will see Developer settings. Click on OAuth apps.
In the OAuth applications screen, click on Register a new application. Or simply click on the link – https://github.com/settings/applications/new
Provide the information below:
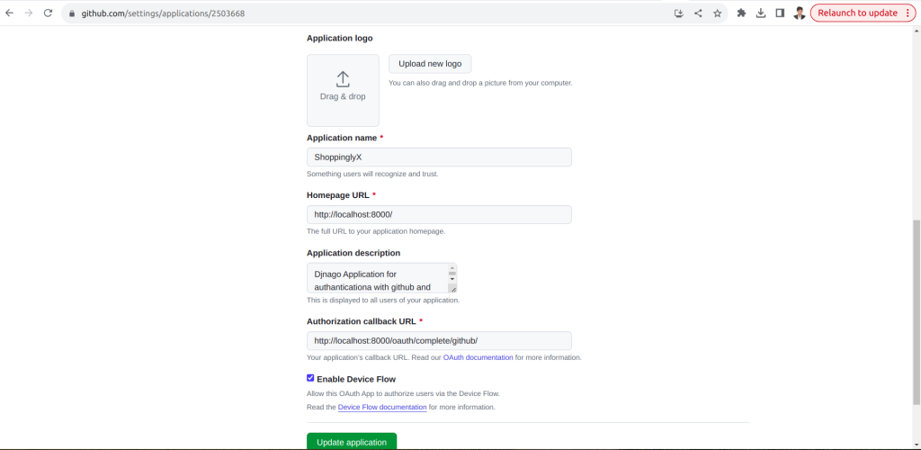
The most important step is the Authorization callback URL. I’m putting a localhost URL. http://localhost:8000/oauth/complete/github/.
After you create the app, you will be redirected to this screen:
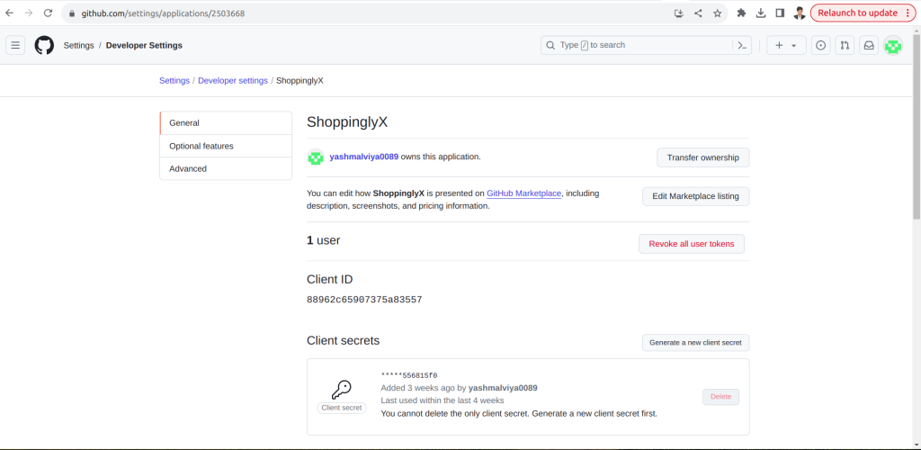
Now we update the settings.py with the client ID and client Secret:
SOCIAL_AUTH_GITHUB_KEY = 'AUTH_GITHUB_KEY'
SOCIAL_AUTH_GITHUB_SECRET = 'AUTH_GITHUB_SECRET'
Login View
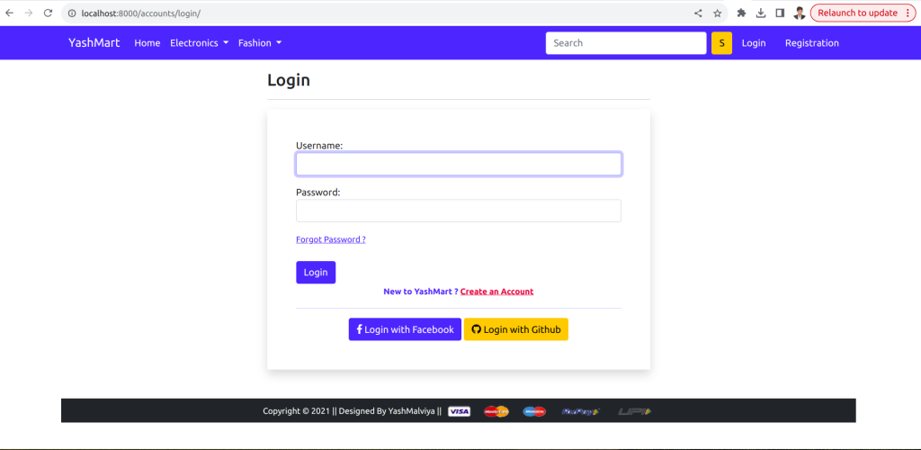
Let’s create a Login View that can handle the GitHub Login. The default login view looks for a template in login.html. Let’s create it:
login.html

{% extends 'base.html' %}

{% block title %}Login Page{% endblock title %}

{% block content %}


<h2>Login</h2>

    <form method="post">

        {% csrf_token %}

        {{ form.as_p }}

        <button type="submit">Login</button>

    </form>

    <br>

<!-- Social Auth Buttons -->


<divclass="text-center">

<a href="{% url 'social:begin' 'github' %}" class="btn btn-warning"><i class="fab fa-github"></i> Login with Github</a>

</div>
Note that the important part of starting the GitHub authentication is {% url ‘social:begin’ ‘github’ %}.
Now, the login page should look like this:
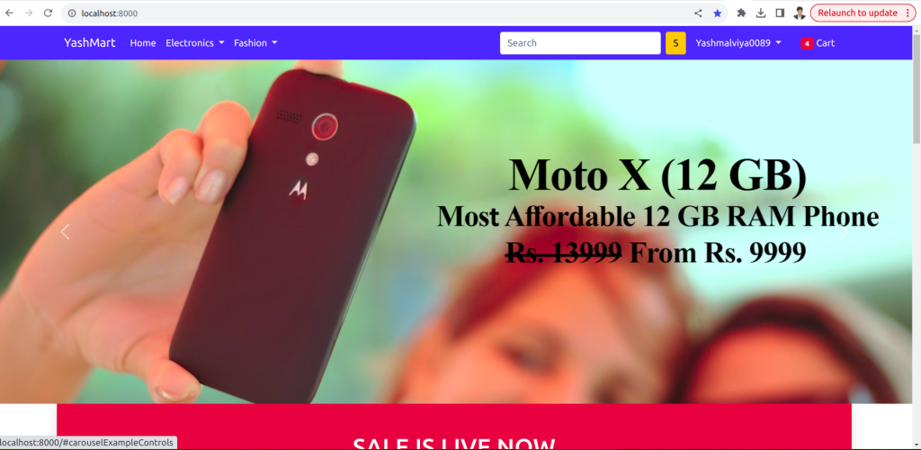
Successfully logged in with GitHub.
Thank You.