In my last blog we saw how a VPC with single public subnet is implemented. And now in this blog we will go through the second scenario of aws VPC i.e. a VPC with public and private subnets.
Let’s create a VPC with two subnets , Public and Private.
1.
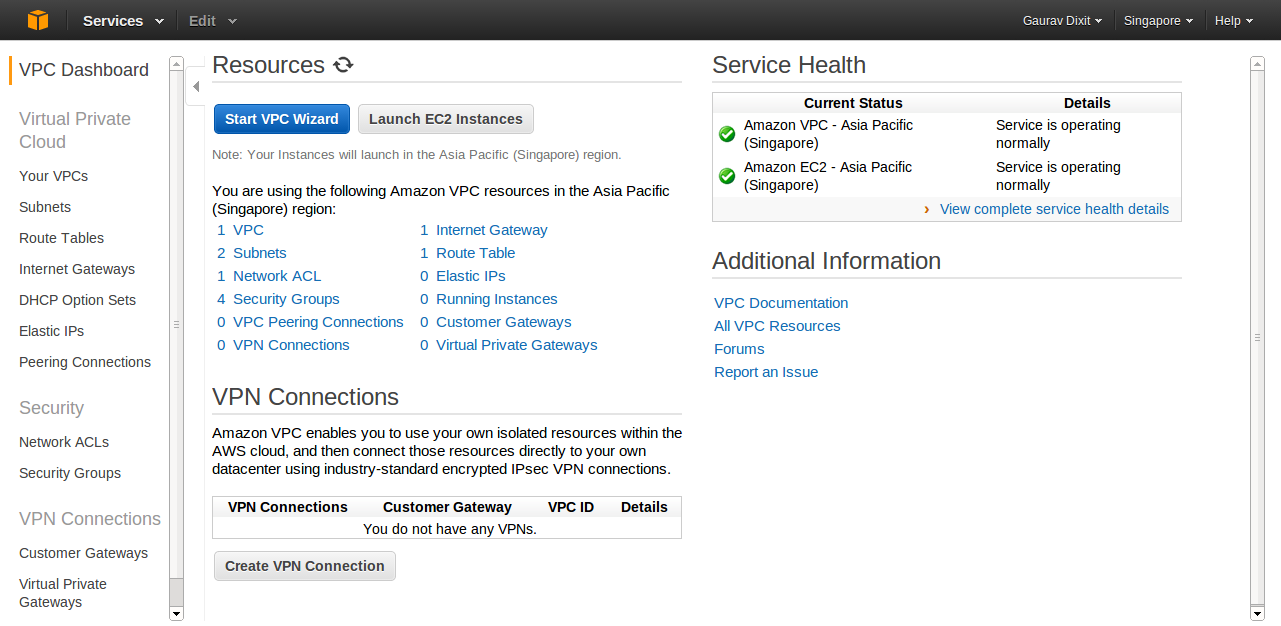
Login to your Amazon account and click on VPC in the services drop down to move on VPC Dashboard. Now you can choose a specific region (Singapore here) as per your choice.
Click on “Start VPC Wizard” button to get started with VPC creation.
2.
In the next step, you will be prompted to select configuration type of your VPC.
Configuration here lets you select the basic architecture of your VPC , like whether you want to have a single publicly accessible subnet in your VPC or to have separate public and private subnet for security concern.
Here we choose VPC with Public and Private Subnets as per our need.
Click continue.

3.
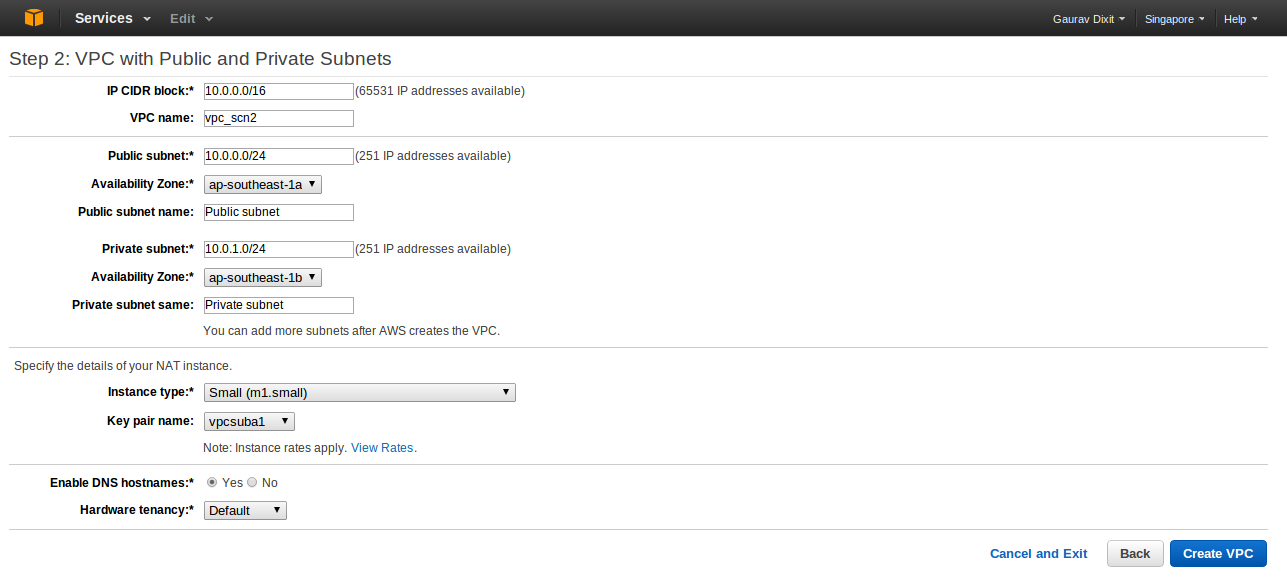
Now, put in the information to create a VPC plus its subnets, gateways, and routing tables, NAT Instance type and the Hardware tendency.
Inside VPC with Internet Gateway, IP CIDR block lets you decide number of private IP that will be available for you inside your VPC. Similarly, give IP CIDR for Public and Private Subnet. Also you can decide the availability zone for each subnet ( here, AP-Southeast-1a for Public Subnet and AP-Southeast-1b for Private Subnet) or leave it Default if you want Amazon to handle it.You can optionally use a network address translation (NAT) instance in a public subnet in your VPC to enable instances in the private subnet to initiate outbound traffic to the Internet, but prevent the instances from receiving inbound traffic initiated by someone on the Internet. So, under NAT instance with Elastic IP Address you can choose an instance type for the NAT (m1. small here) and provide a key pair name that is required for authentication purpose.And at last under Hardware Tendency, if you need your Instance to run on single-tenant hardware, you can choose Dedicated else can choose Default to run your Instance on Shared Hardware.
Click Create VPC button to create a custom VPC with providing configuration information.
4.
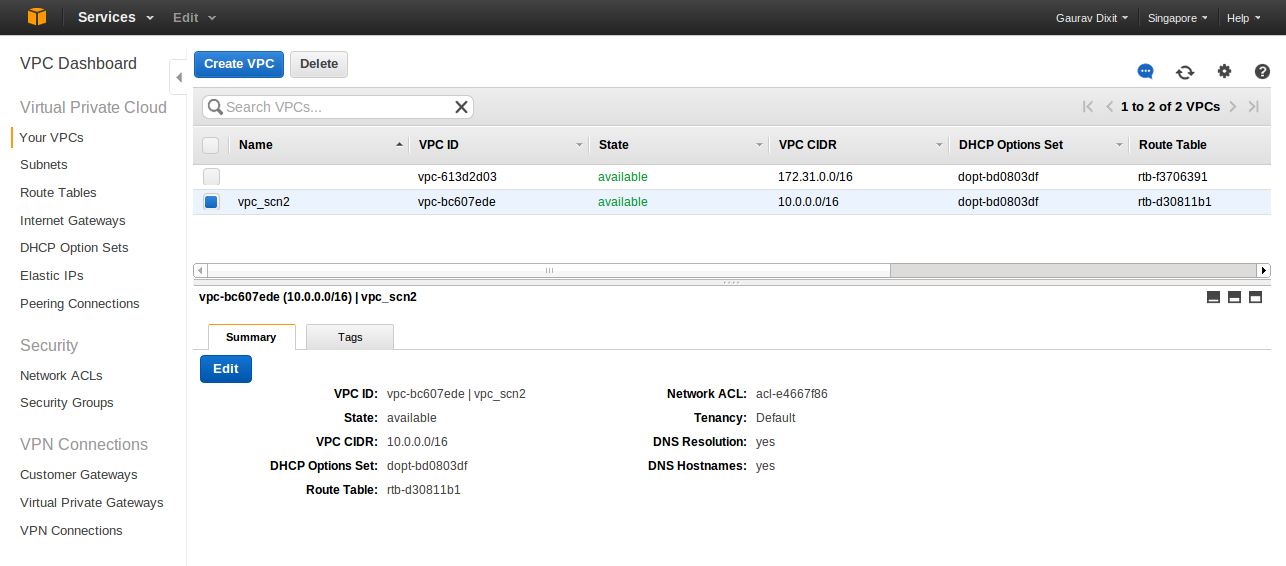
Finally, your VPC is configured and ready for launching Amazon services inside it.
Now, we will just instantiate an EC2 machine in public subnet which will be accessible as a web server and a mysql RDS instance in private subnet not accessible directly through internet. Also we will connect to the RDS instance through phpmyadmin installed on EC2 instance running in public subnet.
But before, we must create security groups that will be associated with each instance within the subnets. Lets create security group for our instances in public subnet.
On VPC dashboard , click Security Groups
- Click Create Security Group button.
- Put in the information such as group name,descriptions,etc. (here Name : public_subnet2)
- Click Yes, Create button to create security group.
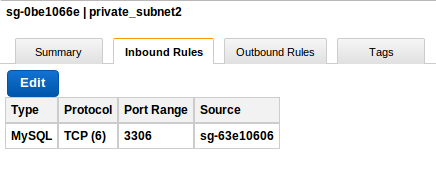
- Now, add inbound and outbound rules for security group.

Similarly create a Security group for private subnet. And add rules for inbound and outbound traffic. It is advisable to give permisson over some specific ports only to public subnet group and not to all intenet hosts.
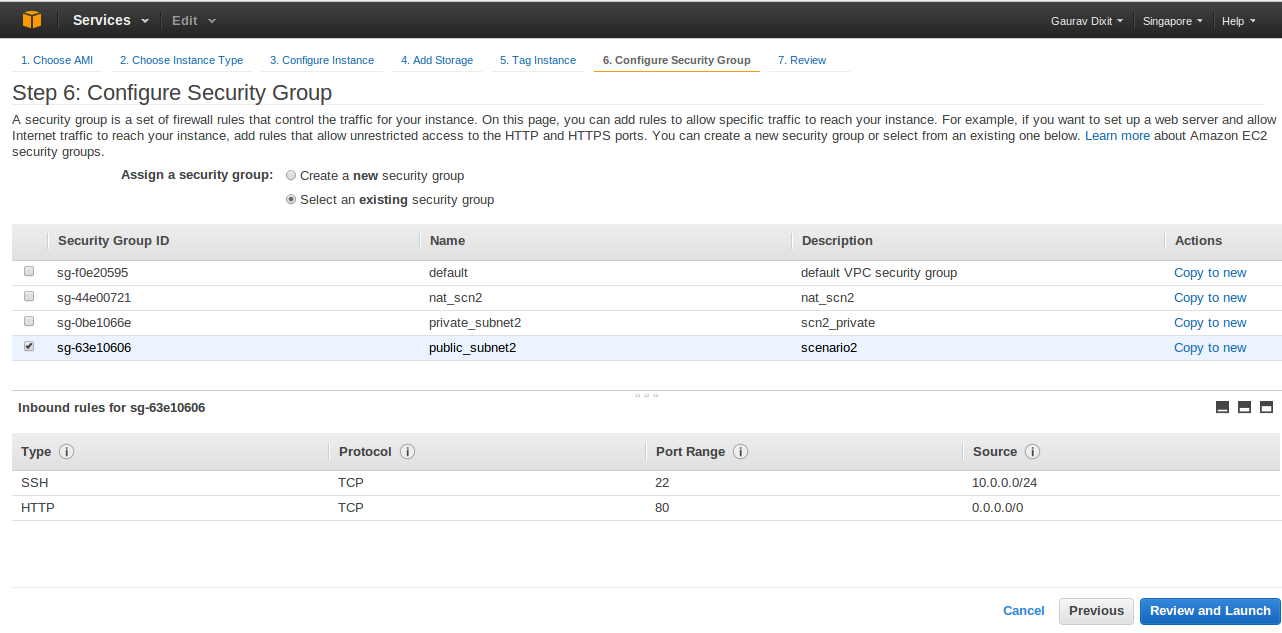
Here , sg-63e10606 is Group ID of public_subnet2 security group.
As now, security groups have been created we will proceed with EC2 instance creation.
- Go to EC2 dashboard.
- Click launch Instance and go through AMI selection,choosing instance type.
- In Configure Instance details, put in the information , selecting custom VPC and Public Subnet in which the instance is to be launched.
- Select the Public IP checkbox to assign Public IP to this instance ( Note: Public IP is not assigned by default).
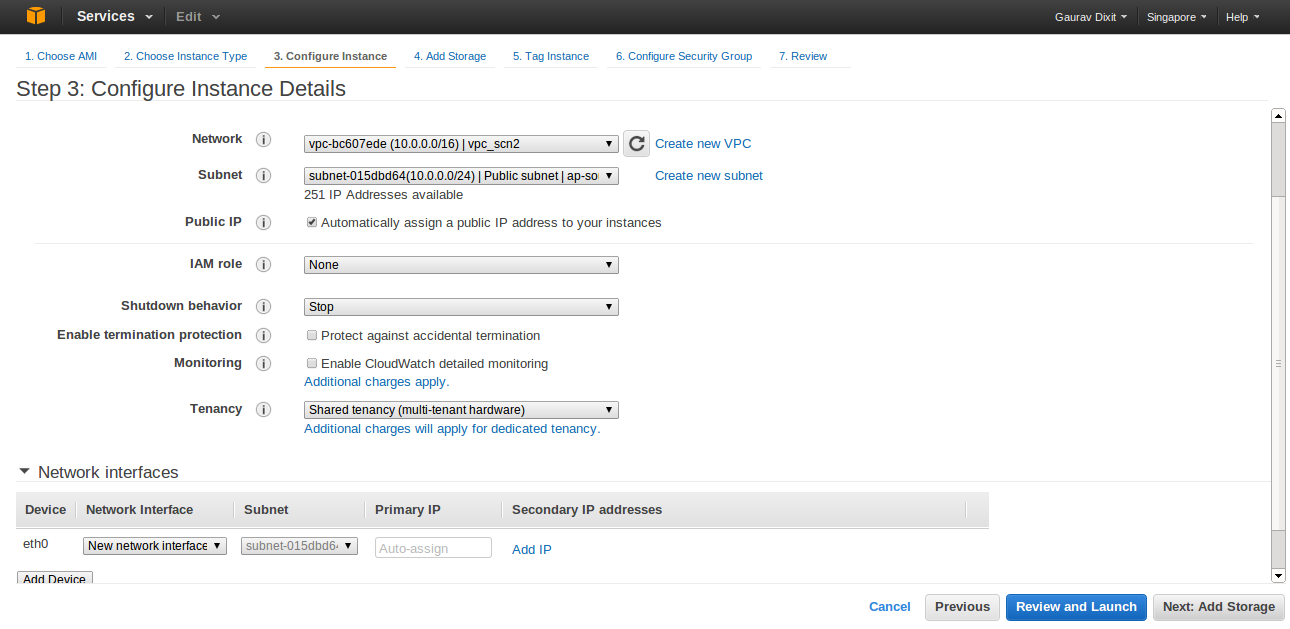
Customize your instance and proceed . In Configure Security Group , select the Security Group created for Public Subnet( here, Public_Subnet2).
Click Review and Launch to launch the Instance.
And now, to follow the steps to launch a DB instance in Private subnet of VPC, refer : http://www.tothenew.com/blog/amazon-relational-database-service-rds-in-amazon-virtual-private-cloudvpc-subnet/
Now to access mysql RDS instance, login to webserver and install phpmyadmin. Phpmyadmin works on lamp stack so also install the stack before installing phpmyadmin.
In debian based system, to install phpmyadmin simply execute the command:
apt-get install phpmyadmin
and then, everything you need to do is just add the following in /etc/phpmyadmin/config.inc.php
$cfg[‘Servers’][$i][‘auth_type’] = ‘HTTP’;
$cfg[‘Servers’][$i][‘hide_db’] = ‘(mysql|information_schema|phpmyadmin)’;
$cfg[‘Servers’][$i][‘host’] = ‘endpoint_url_of_DB_Instance’;
And here you go.. hit ‘web_server_url/phpmyadmin‘ in browser and manage your RDS in private subnet on the fly.