Introduction
With the evolution of React Native, the New Architecture brings significant performance and maintainability improvements through features like TurboModules, Fabric, and C++ shared logic. Upgrading to this architecture can seem intimidating—but with the right strategy, it’s achievable.
In this blog, I’ll walk you through two practical approaches to upgrading your project to the New Architecture in React Native, the recommended approach, the challenges I faced, and how I overcame them.
📌 When Should You Consider Upgrading?
If your current project is within 2 to 4 versions of the latest release, upgrading is relatively safe. Otherwise, it’s better to migrate code manually to a fresh project. We’ll cover both methods.
🛠️ Approach 1: Upgrade Using React Native Upgrade Helper (Recommended for Small Version Gaps)
This method is ideal if your current version is just a few versions behind (e.g., 0.75 to 0.79).
Step 1. Update Android Studio
- Make sure you’re using the latest stable version of Android Studio.
- This ensures compatibility with the updated Gradle, SDKs, and React Native tooling.
Step 2. Use the React Native Upgrade Helper
- Visit React Native Upgrade Helper.
- Select your current version (left) and target version (right, e.g., 0.79.3).
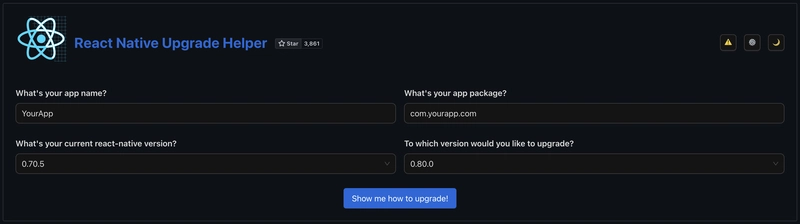
React Native Upgrade Helper.
Step 3. Follow the Diff Instructions Carefully
- Pay special attention to native file changes—these are critical for enabling the New Architecture.
- Use version control to commit incrementally and rollback if needed.
📦 Update Third-Party Dependencies
Once you’re on the latest version, update your dependencies:
- Visit React Native Directory
- Apply the filter: “Supports New Architecture”
- Replace or upgrade libraries accordingly
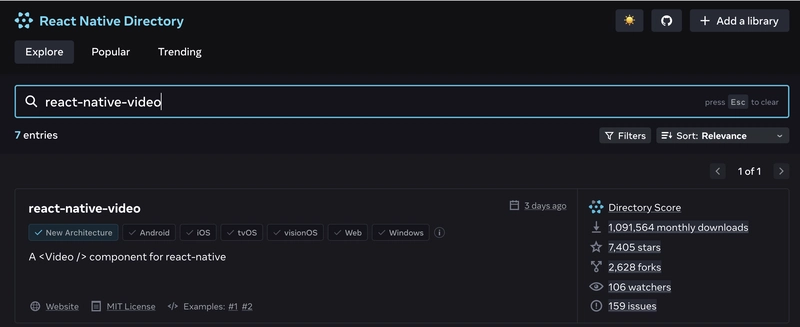
React Native Directory
✅ Approach 2: Create a Fresh Project (Recommended for larger Version Gaps)
If your current project is outdated or complex, this is the safest and cleanest way to upgrade.
Steps to Migrate
Step 1. Create a New Project
npx @react-native-community/cli init MyApp
Step 2. Migrate Your Existing Codebase
Once your new React Native project is created (preferably using the latest stable version like v0.79.3), it’s time to bring your existing app logic into the new environment.
📁 Step 3: Move Your src/ Folder
Start by copying the entire src directory from your old project into the root of the new project
📦 Step 4: Sync and Install Dependencies
Now, open both the old and new package.json files side by side.
- Carefully review the dependencies and devDependencies.
- Instead of copying everything directly, manually install each package in the new project using the latest version.
- Ensure that each dependency you bring in is compatible with React Native’s New Architecture.
Yes, it’s manual—but it’s also bulletproof for both Android and iOS
✅ Step 5: Verify It Works
After you’ve copied your source code and installed the updated dependencies:
- Clean the Android build
cd android && ./gradlew clean && cd ..
2. Run the app on both platforms to ensure everything is wired correctly:
npx react-native run-android
npx react-native run-ios
3. Watch the terminal and device logs for any errors, warnings, or compatibility issues.
💡 Tip: If any dependency causes issues with the new architecture, check the package’s documentation or GitHub issues. Some packages may still require legacy support or additional configuration to work correctly.
🧩 Challenges I Faced
As I migrated to the New React Native Architecture, I ran into some unexpected issues that weren’t immediately obvious. Here’s a breakdown of the most common ones — and how I resolved each.
🌐1. Translation failed
The old way of handling translations using i18n-js no longer works reliably in the new architecture.
✅ Sol
The recommended and stable alternative is react-i18next, which is modern, flexible, and actively maintained.
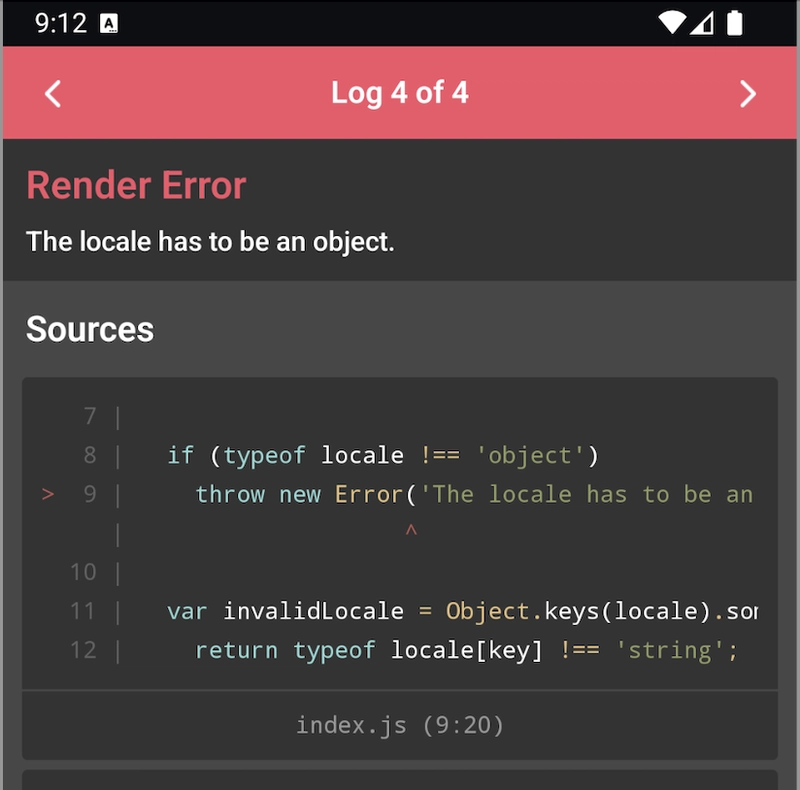
Translation failed screenshot
⚛️ 2. Redux not working
Redux can break in the new architecture, especially if you’re using older packages like ‘redux‘ and ‘redux-thunk‘.
The new approach uses the modern Redux Toolkit:
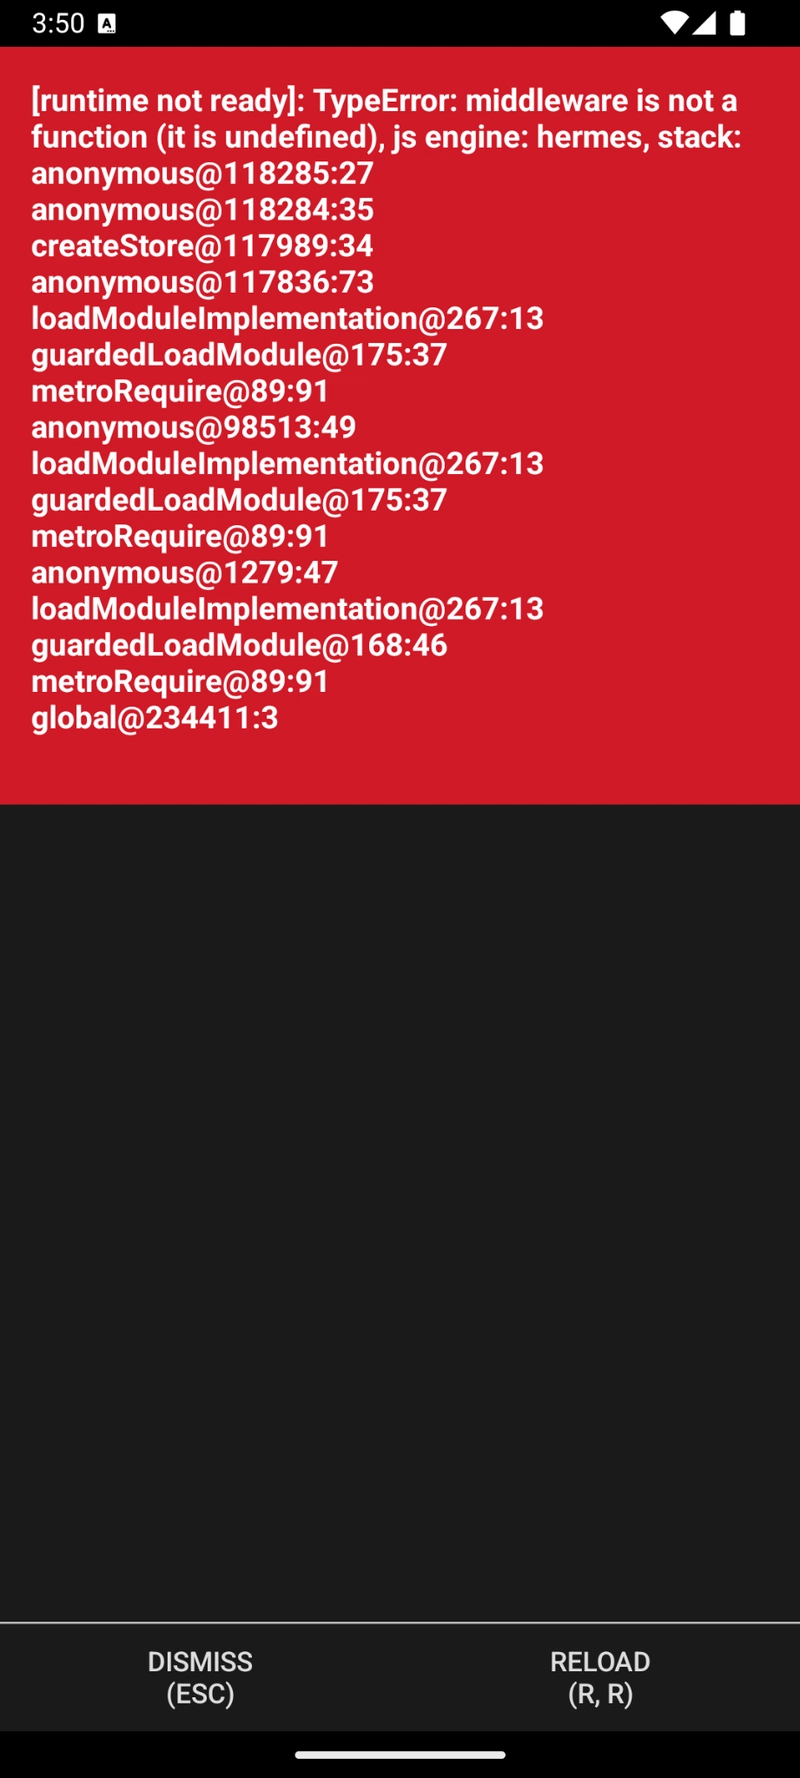
Redux failed screenshot
✅ Sol
Replace this
import {createStore, applyMiddleware, compose} from ‘redux’;
import thunk from ‘redux-thunk’;
import rootReducer from ‘./rootReducer’;
const composeStore = compose(applyMiddleware(thunk));
export const appStore = createStore(rootReducer, composeStore);
const store = () => {
return appStore;
};
export default store;
With this
import {configureStore} from “@reduxjs/toolkit”;
import rootReducer from “./rootReducer”;
export const appStore = configureStore({
reducer: rootReducer,
devTools: true,
middleware: getDefaultMiddleware => getDefaultMiddleware(),
});
const store = () => {
return appStore;
};
export default store;
After integrating this, You might getting this redux error
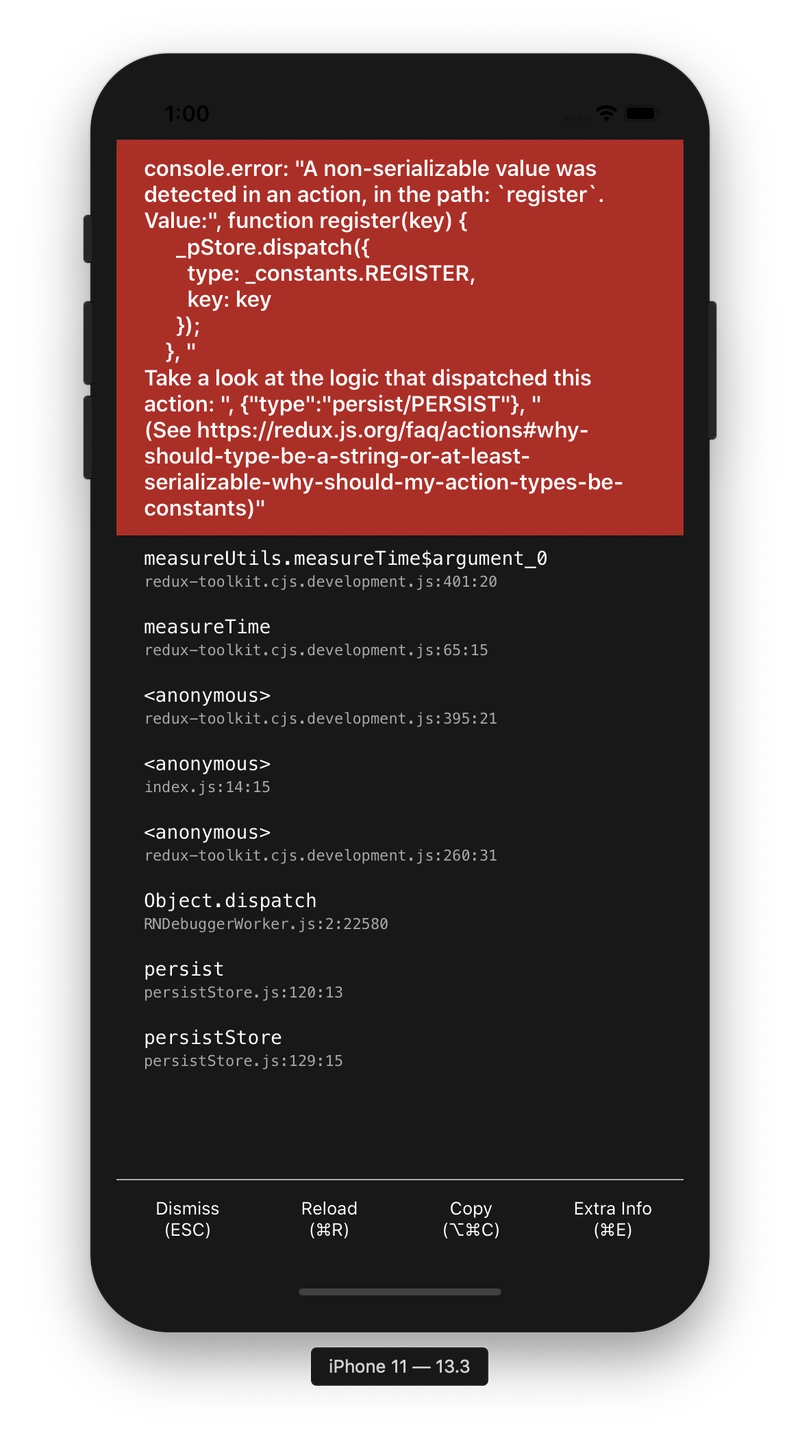
redux error
✅ Sol
…
middleware: getDefaultMiddleware =>
getDefaultMiddleware({
serializableCheck: false,
}),
…
📁3. Absolute imports fail
If you’re using absolute import paths like @abc/screens defined in package.json, you may find they don’t resolve properly in the new architecture setup.
🛠️ In my case, I had to temporarily fall back to relative paths like:
import MyScreen from ‘../../screens/MyScreen’;
✅ Sol
Later, I fixed this properly by configuring babel.config.js and tsconfig.json.
4. Bridging fails
With the New Architecture, React Native introduces a bridge-less communication model.
✅ Sol
- Legacy native modules written using the old bridge might stop working.
- You must migrate to TurboModules, define spec files, and rely on codegen for typed module integration.
While it’s more strict, it brings better performance, type safety, and native interoperability.
5. GIFs Fail to Load
If your app uses GIFs, they may not work properly with the New Architecture (Fabric/TurboModules).
✅ Sol
Add the Fresco GIF dependency to app/build.gradle:
implementation ‘com.facebook.fresco:animated-gif:3.6.0’
⚠️ Note: If 3.6.0 is not compatible, use the latest stable version of Fresco instead.
6. SafeAreaView Overlaps Status Bar on Android 15+ (Edge-to-Edge Issues)
If your app’s content overlaps the status bar or edge-to-edge display isn’t working properly on Android 15, try this solution.
✅ Sol
Add this line to your Android /android/app/src/main/res/values/styles.xml
<item name=”android:windowOptOutEdgeToEdgeEnforcement”>true</item>
7. react-native-linear-gradient Padding Not Applying
When adding padding directly to the <LinearGradient> component, it won’t work as expected.
Instead, wrap your content in a <View> and apply padding to that <View>.
✅ Sol
<LinearGradient>
<View style={{paddingHorizontal: 20, paddingVertical: 20}}>
<Text>Your text</Text>
</View>
</LinearGradient>
8. Custom Font Not Working on iOS
Some custom fonts may not render correctly on iOS due to font family and weight handling in RCTFontUtils.mm.
✅ Sol
GitHub Reference: PR #47691
9. APK Size Increased
After upgrading to the New Architecture, I noticed the APK size increased significantly:
However, with a simple tweak, I was able to bring it down drastically — my final APK was just 65 MB.
⚠️ Important: After applying this change, make sure to test your app’s performance and launch time thoroughly.
There have been community discussions mentioning that setting android:extractNativeLibs=”true” might slightly impact launch performance.
In my case, I carefully compared app launch behavior before and after the change — and found no noticeable difference in performance.
✅ Sol
Update your AndroidManifest.xml to include the following inside the <application> tag:
<application
android:extractNativeLibs=”true”
…
>
This ensures unused native libraries are not bundled unnecessarily.
10. 🛑 Proguard Build Failure
If you’re using Proguard or enabling minifyEnabled, you may see this common R8 error:
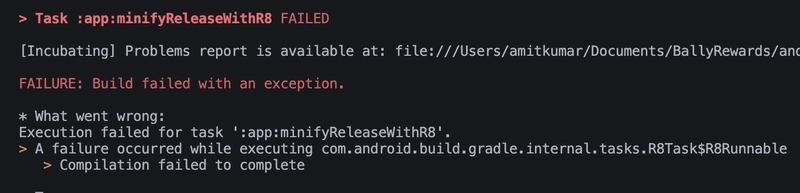
Proguard build failed screenshot
✅ Sol
Build a release APK first → generates missing_rules.txt at:
android/app/build/outputs/mapping/release/missing_rules.txt
Copy rules from missing_rules.txt → paste into android/app/proguard-rules.pro:
# From R8 missing rules
-keep class com.example.SomeClass { *; }
-dontwarn com.example.OtherClass
📌 Merge with existing rules to avoid conflicts.
📝 Ref: React Native GitHub Issue #36505
11. Android Double Splash issue
While running App, I notice double splash issue on android:
✅ Sol
1. Create a custom splash drawable
Inside your project, create the file:
android/app/src/main/res/drawable/splash_screen.xml
Add the following code:
<?xml version=”1.0″ encoding=”utf-8″?>
<layer-list xmlns:android=”http://schemas.android.com/apk/res/android”>
<!– Background that matches React Native splash screen –>
<item>
<shape android:shape=”rectangle”>
<solid android:color=”#000000″ />
</shape>
</item>
</layer-list>
2. Update styles.xml
Open android/app/src/main/res/values/styles.xml and add:
<item name=”android:windowBackground”>@drawable/splash_screen</item>
<item name=”android:statusBarColor” tools:targetApi=”l”>?attr/colorPrimary</item>
This ensures that the splash screen defined in splash_screen.xml is used as the window background, preventing the double splash issue on Android.
12. iOS Pod-Install Issues
While running pod install, I ran into the following CocoaPods and build error:
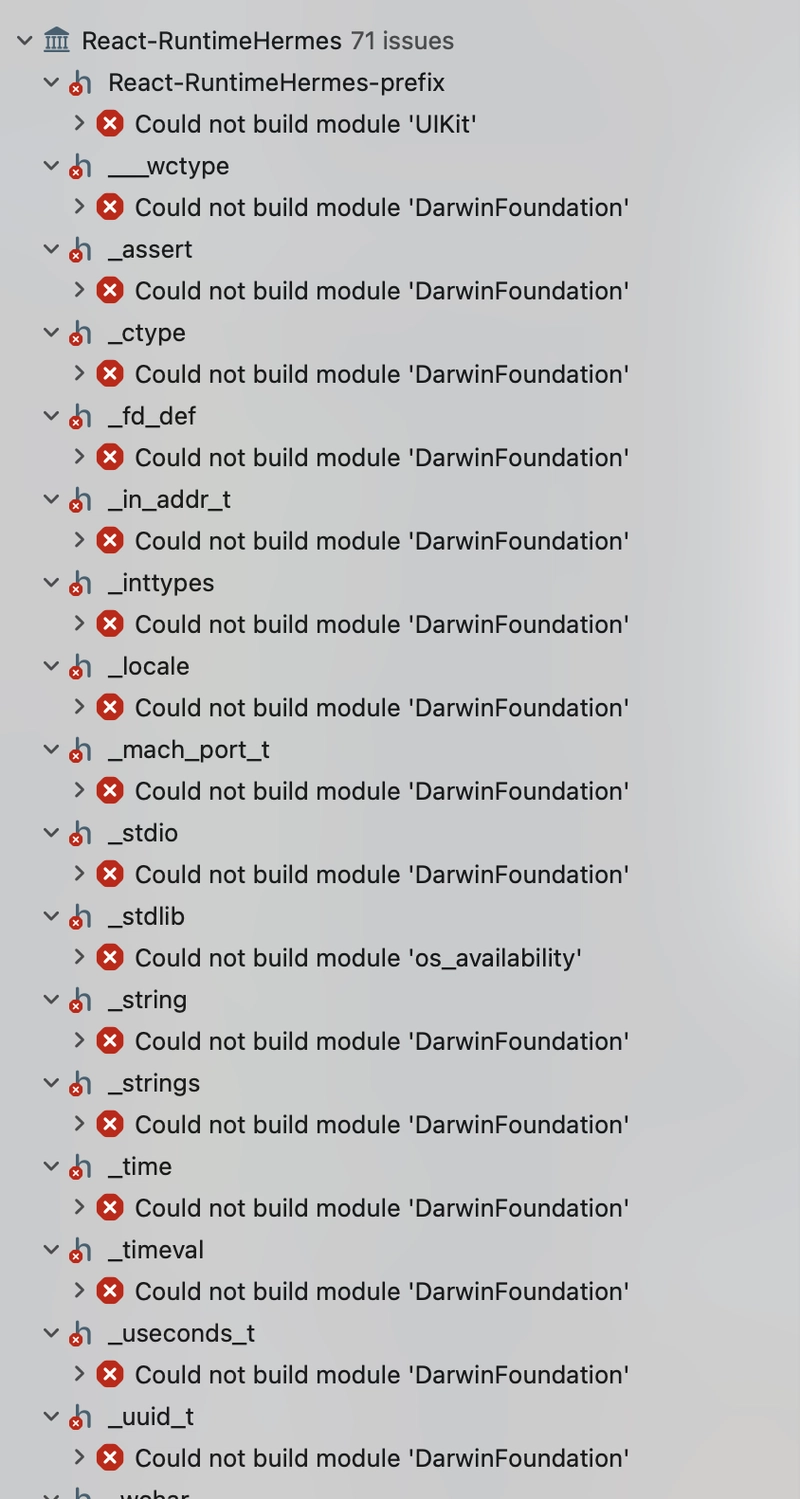
Pod Install error
✅ Sol
Edit your Podfile as follows:
platform :ios, ‘15.1’ # Add this
use_modular_headers! # Add this
target ‘YourAppName’ do
config = use_native_modules!
# ——— Add this block ———
$RNFirebaseAsStaticFramework = true
use_frameworks! :linkage => :static
pod ‘Firebase’, :modular_headers => true
pod ‘FirebaseCoreInternal’, :modular_headers => true
pod ‘GoogleUtilities’, :modular_headers => true
pod ‘FirebaseCore’, :modular_headers => true
# ——— End ———
use_react_native!(…)
end
Then run:
cd ios && pod install
This ensures compatibility with Firebase and other modular dependencies when using the new architecture.
13. iOS Double Splash Issue – Fix
- Open (or create) ios/YourApp/LaunchScreen.storyboard.
- Set Background Color (e.g., black #000000).
- Add App Logo (ImageView) → center with Auto Layout.
- Place logo in ios/YourApp/Images.xcassets (@1x, @2x, @3x).
- In Xcode → Project → General → set Launch Screen File = LaunchScreen.storyboard.
⚠️ Note:
The issues and solutions I’ve shared are based on my specific project setup.
You might face different roadblocks depending on your architecture, packages, and integrations.
Always validate each solution with your own setup, and don’t hesitate to tweak things accordingly.