What is Cypress?
The newest front-end testing standard that every developer and QA engineer should be aware of is Cypress automation. Modern web apps may use this cutting-edge front-end automated testing method.

Cypress is mainly used for:
- Unit Testing
- Integration Testing
- End-to-End Flow Testing
Nonetheless, it can be used for functional testing as well!
Although Cypress is frequently compared to Selenium, the two are fundamentally and structurally distinct.
WHAT MAKES CYPRESS UNIQUE AS COMPARED TO SELENIUM AND WHY?
- Fast, Consistent, Effortless, and Reliable: In comparison to the Selenium tool, Cypress delivers faster, consistent, effortless, and reliable test execution due to its architectural design, as the test runs directly inside the browser without the use of a browser driver.
- Automatic Waiting: There’s no need to include Waits and Sleep in your tests. Cypress automatically waits for commands and assertions. There will be no more synchronization.
- Time Travel: We can hover over each command in the Command Log to see exactly what happened at each step. In contrast to other automation tools, we can see and debug each step in the log while the tests are running.
- Easy debugging: Cypress’s Developer Tools make debugging simple. Debugging is quick and painless thanks to the errors and stack trace. The error messages are very readable and explain why our script failed.
- Screenshots and Videos: By default, Cypress can capture screenshots in the event of a failure. It can also record videos of the entire test suite running from the command line interface. When we run our tests from the Cypress Dashboard, we can watch videos of the entire process.
- Single easy universal Language: Because its architecture is based on Node JS, it only works with JavaScript, which is very simple to learn. JavaScript is extremely simple to work with for both developers and testers.
- Multiple browser support: It supports Chrome, Edge, Electron, and Firefox.
- API Testing support: Cypress can perform HTTP calls; thus, we can test APIs as well.
- External Plugin supports: Cypress supports external plugins to widen the test coverage.
- Statistics: Cypress has a test status menu that displays the number of test cases that have passed or failed.
- Auto Execution: Cypress reloads all updates made in the tests by default.
PREREQUISITES
- Basic understanding of Node.js
- Basic understanding of Cypress
- A suitable IDE such as VS Code
CYPRESS SETUP AND LIBRARIES INSTALLATION
Cypress is a Node.js application that comes packaged as an NPM (Node Package Manager) module.
Because it is built on Node.js, it uses JavaScript to write tests, but 75% of the coding can be done using Cypress’s inbuilt commands that are simple to understand.
- Install NodeJS first if not installed (you can check for a version using the below command
npm –v
- Create an empty project in your local machine
- Open the project in VS Code (You can choose other IDE’s as well)
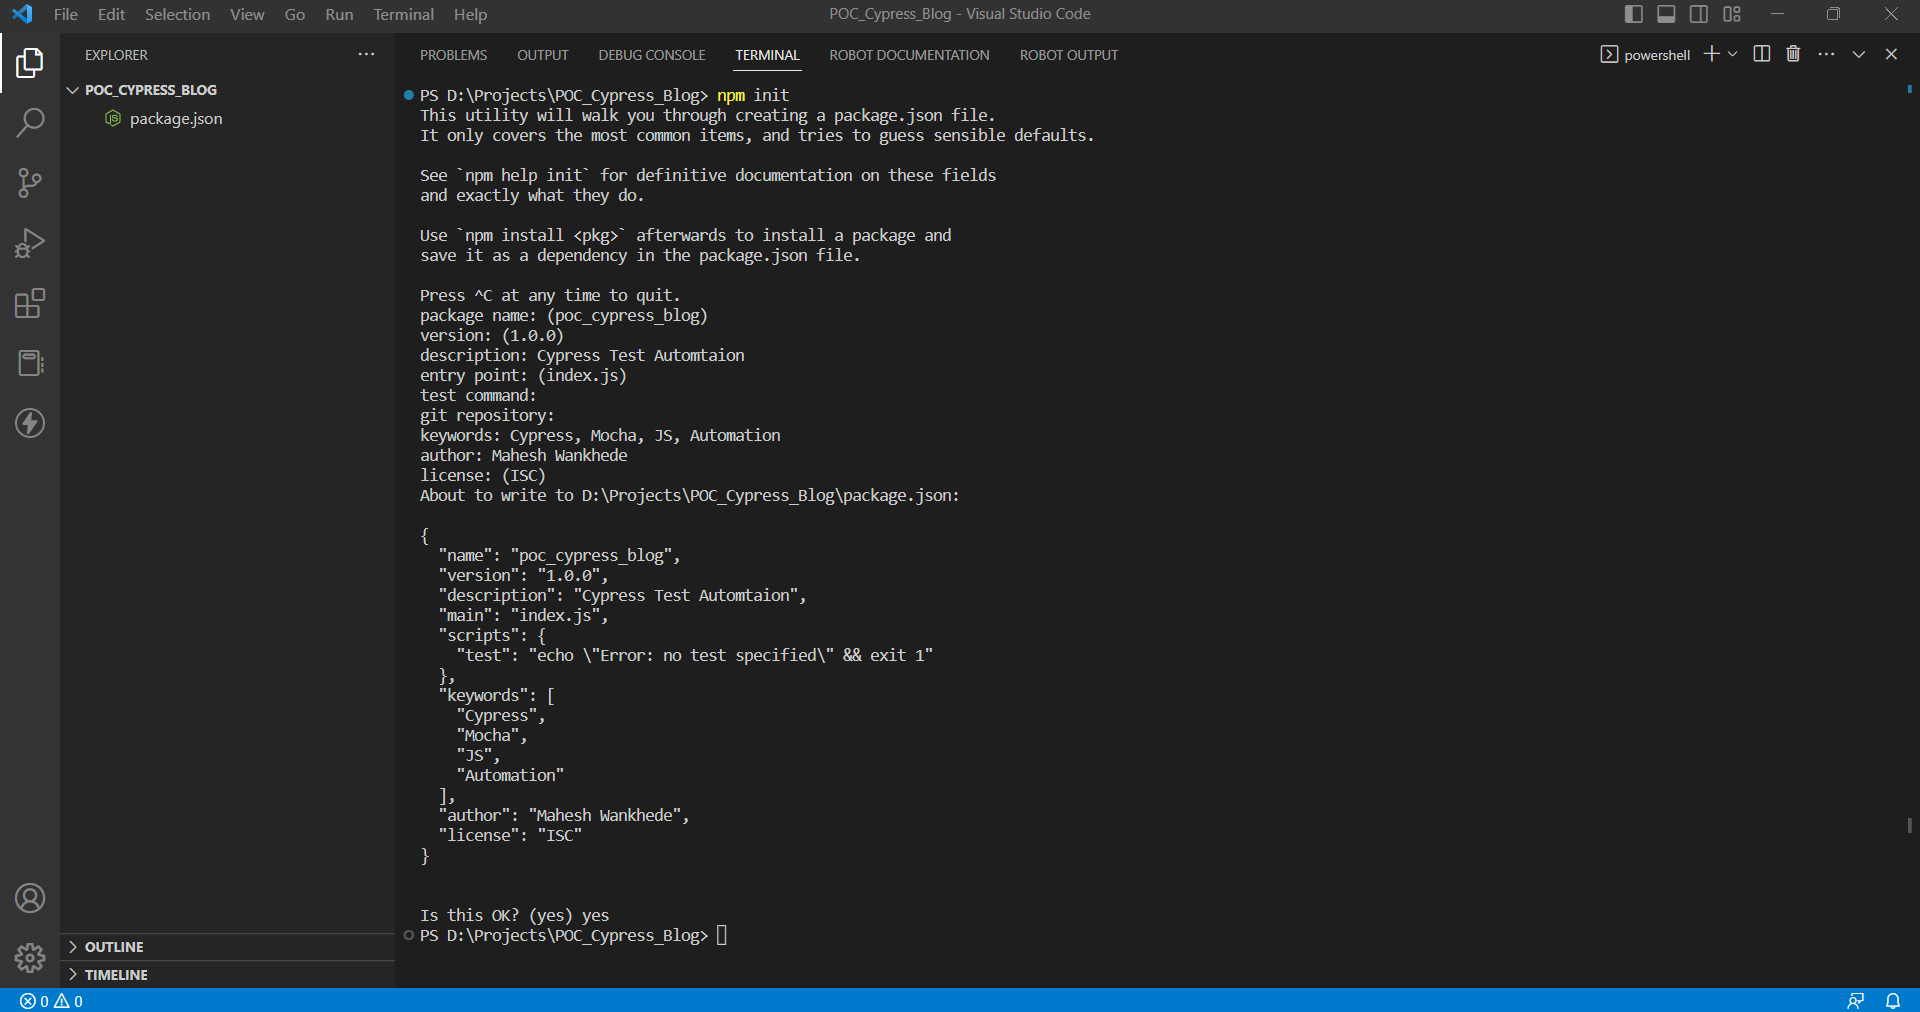
- Initialize the project setup using the command
npm init
And follow the questionaries’ below asked there for creating a package.json file (as shown in the screenshot below)
- Once the package.json file is created, install cypress dependencies
npm install cypress --save-dev
This will take some time to install and once it is done you are done with scripting.
Once Cypress is installed in your project, just type the below command to open Cypress GUI
npx cypress open
The above command will create a directory structure in your project and it will open Cypress GUI where there will be two options there,
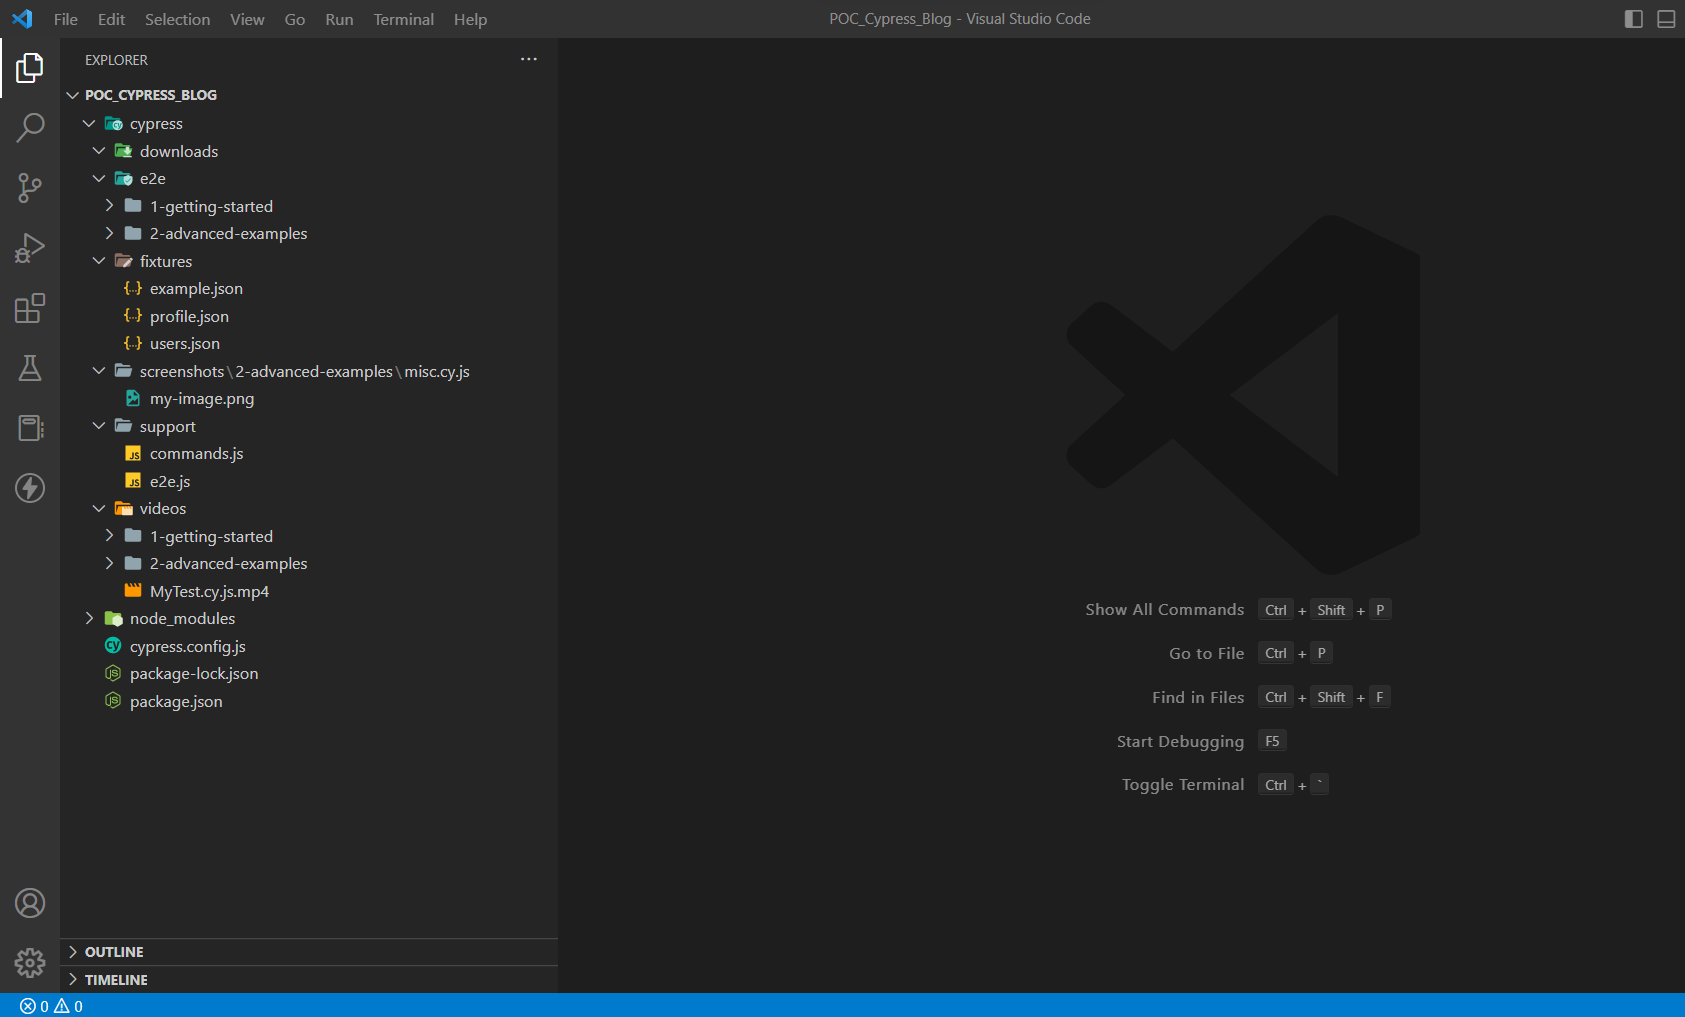
Directory structure: automatically created after executing command – npx cypress open
- First, is E2E Testing i.e. for End to End testing purposes, for QA we should select the same, and the second option is Component Testing i.e. useful for Developers for Unit Testing.
- Once you selected the E2E Testing option you will see a browser list where you have to select any one browser. Cypress supports chromium-based browsers and the list you will see is the same.
- Once you select the browser click on the below button to execute cypress tests. Then you will see the list of written Test Scripts in the browser and you just need to click on those tests to execute.
- So as of you now will only see the sample test scripts which came from cypress for understanding, you can delete those or keep it for understanding.
- Once the above setup is done, create a test file, you can create the spec file from the Cypress window or from the VS Code as well. For the test script the extension should be suiteName.cy.js (cy.js is mandatory)
- And then you can start writing scripts and validate test cases.
WHAT ARE THE CYPRESS LOCATORS?
A Selector or Locator is an object that finds and returns web page items/elements on a page based on the query. In Automation, to perform any operation on the web elements first, you need to locate an element and perform an action on that element. The Locator or Selector helps to locate an element in the webpage. There are different types of locators, such as id, CSS, XPath, tag-based selectors, etc.
Cypress supports various locators such as tags, id, class, attributes, text, etc. Cypress also supports XPath Selectors; however, it needs installation of the third-party plugin cypress-xpath. Xpath has not been supported out of the box in the Cypress framework.
To install cypress-xpath, please type the following command in terminal
npm install -D @cypress/xpath
Once you have set up cypress-xpath, please add the following code in your project -> support -> command.js file
require('@cypress/xpath')
To fetch the HTML element in Cypress using different types of locators except for XPATH – cy.get() method is used.
To fetch the locators in Cypress using XPATH – cy.xpath() method needs to be used.
Please watch the same steps mentioned above in the below video.
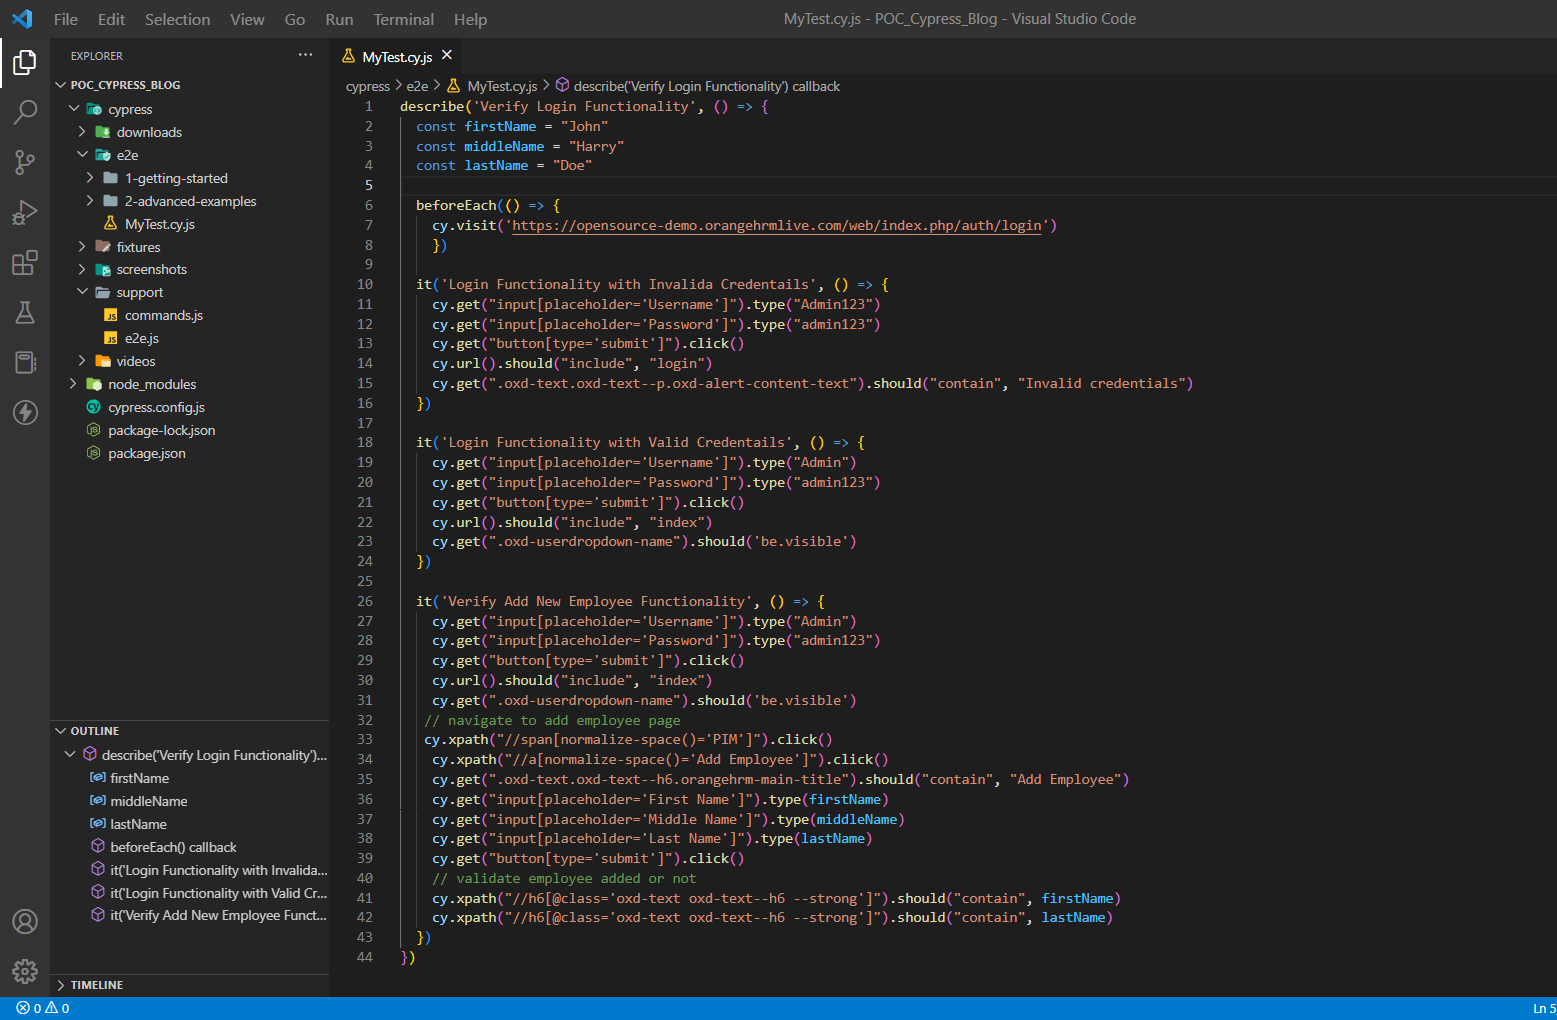
Let’s create a MyTest.cy.js file and add a few tests there, please check the code below for the same.
UNDERSTANDING OF CYPRESS CODE BASE
CYPRESS FRAMEWORK
All Cypress tests will be run in a recommended framework known as “Mocha.” It will be bundled with Cypress, so there will be no need to download it separately.
CYPRESS GLOBAL COMMANDS
‘cy’ is a global command to invoke all the cypress command just like a ‘driver.findElement()’ etc. we call all the required methods.
No need to create or import anything for ‘cy’.
CYPRESS TESTS:
As we will be working on Cypress and JavaScript, so we need ‘.cy.js’ file extensions to write our automation test scripts.
In Mocha or Jasmine, we can use the ‘describe’ and ‘it’ blocks to start writing our test.
The ‘describe’ block will be called a test suite. and it block is nothing but the test cases
All the test goes inside this suite.
CYPRESS ASSERTIONS:
Just like a TestNG, we can also use assertions here to validate the test cases.
Implicit Assertions –
- .should(‘contain’, ”)
- .should(‘have.text’, ”)
- .should(‘be.visible’)
Explicit Assertions –
- expect(‘name’).to.be.equal(‘cypress’)
Assert –
- assert.equal(4, 5, ‘Not equal’)
- assert.notEqual(4, 5, ‘Not equal’)
- assert.isAbove(4, 5, ‘Not equal’)
- assert.isExist(4, 5, ‘Not equal’)
CYPRESS TEST RUNNER:
You can run your test scripts using two ways,
- First is, using Cypress GUI as shown above in the video and steps and,
- The Second is, using VS Code terminal
To run test scripts using Cypress GUI use the following command
In the ‘Terminal’ type the below command –
npx cypress open
It will open the Cypress GUI, and from there click on the test case that we have just created.
To run test scripts using VS Code terminal, use the following command
npx cypress run
The above command will run your tests in headless mode, if you want to run your tests in without headless mode then use the following command
npx cypress run --headed
For more understanding please watch the below video:
We can access each step we have written in the code by using Log and also we can iterate each step one by one by hovering over them.
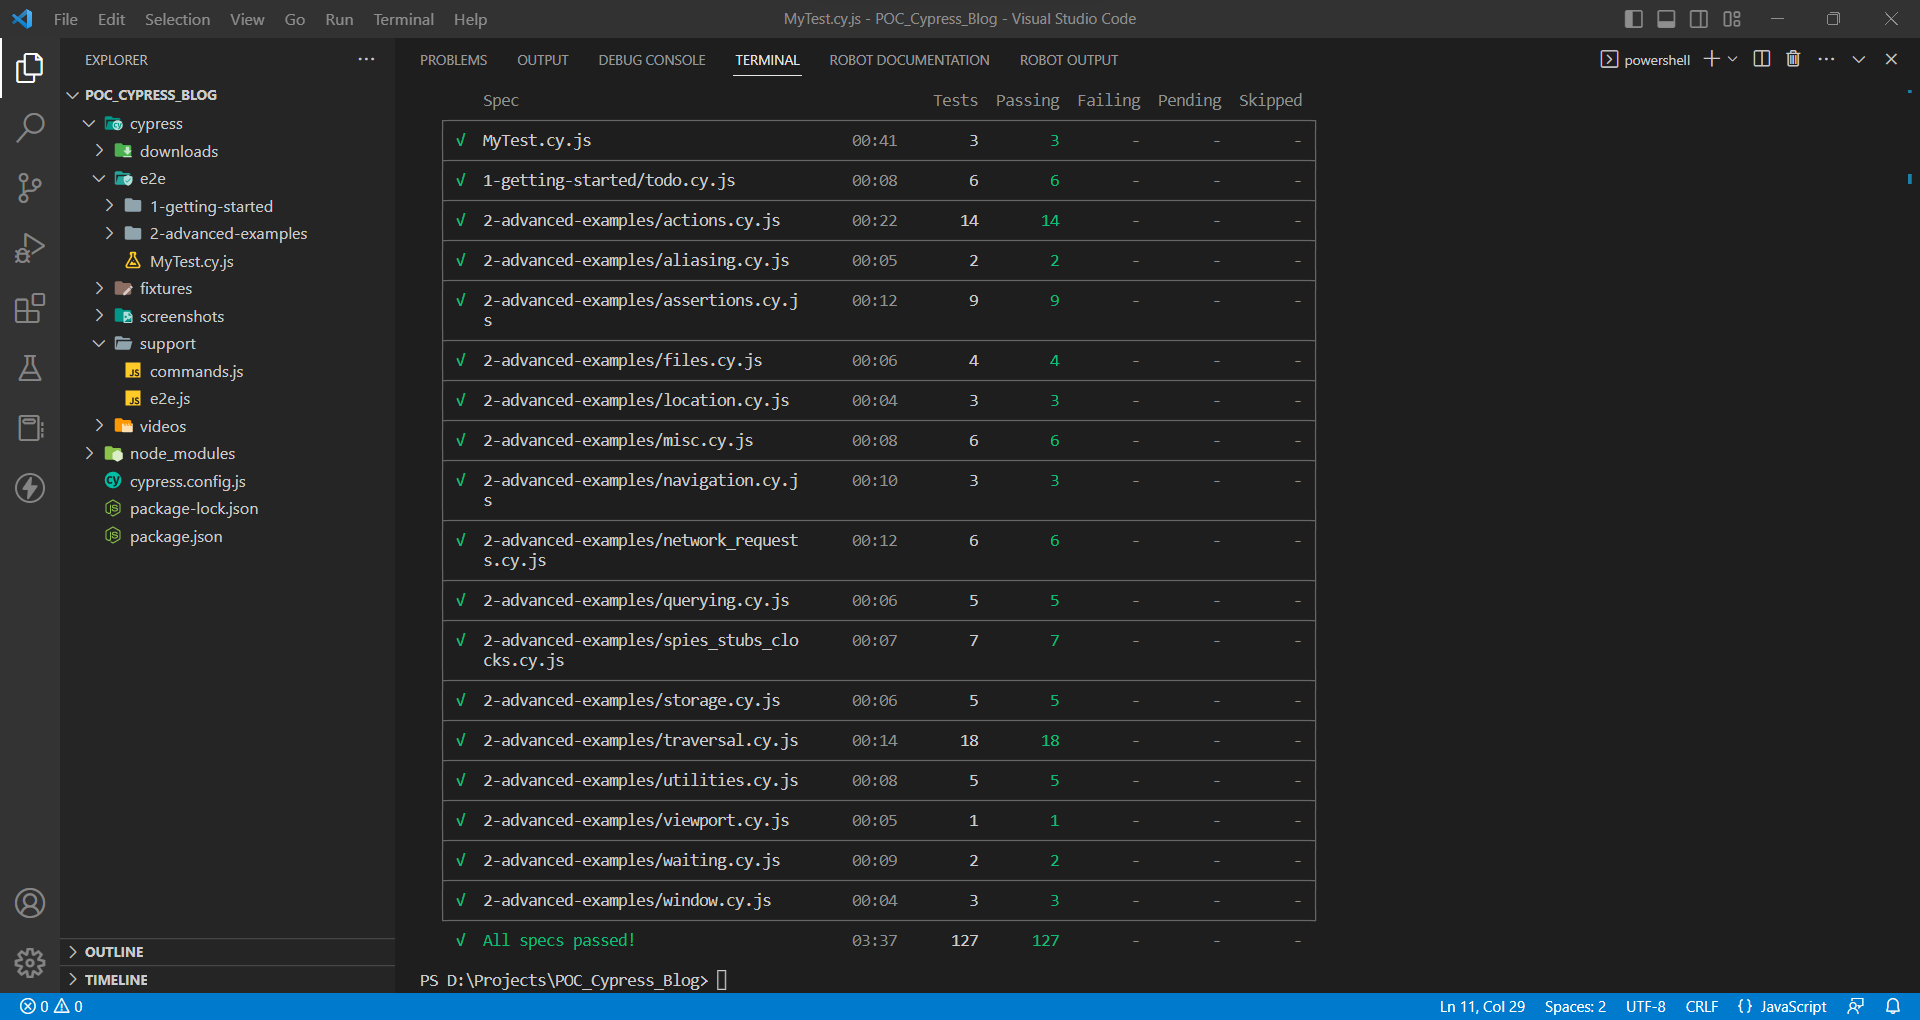
TEST STEPS AND EXECUTION REPORT:
You can see the test execution statistics with test suites wise in below image:
SOURCE CODE LINK:
https://drive.google.com/drive/folders/1Y3VkTKoYO1Z5K143a6mS8tMgFxFUOeUR?usp=share_link
CONCLUSION:
Cypress is a powerful web test automation tool for testing modern web applications. It supports the testing of all types of web elements easily using powerful in-built commands. It also supports the Page Object Model framework.
I think it’s one of the best tools to automate trivial tasks with an easy-to-use API; if you also feel so, go ahead and automate the tedious tasks in your day-to-day life with Cypress.
If you have any queries or feedback, please let me know in the comment section,
Thank You!