
Cross-Cloud Integration: Managing Azure Servers with AWS SSM
Introduction
AWS System Manager (SSM) is a secure, end-to-end process to be used for managing servers on AWS, on-premises, and on any other cloud platform. We can manage our servers from one central point using the SSM.
Prerequisites:
You must have an AWS account with the Required IAM permissions:
- SSM (Systems Manager), EC2, and IAM permissions with “AmazonSSMManagedInstanceCore” Policy.
- AWS SSM Agent must be installed and operational on Azure VMs.
Solution Architecture Diagram:
The below diagram illustrates the architecture of this configuration.
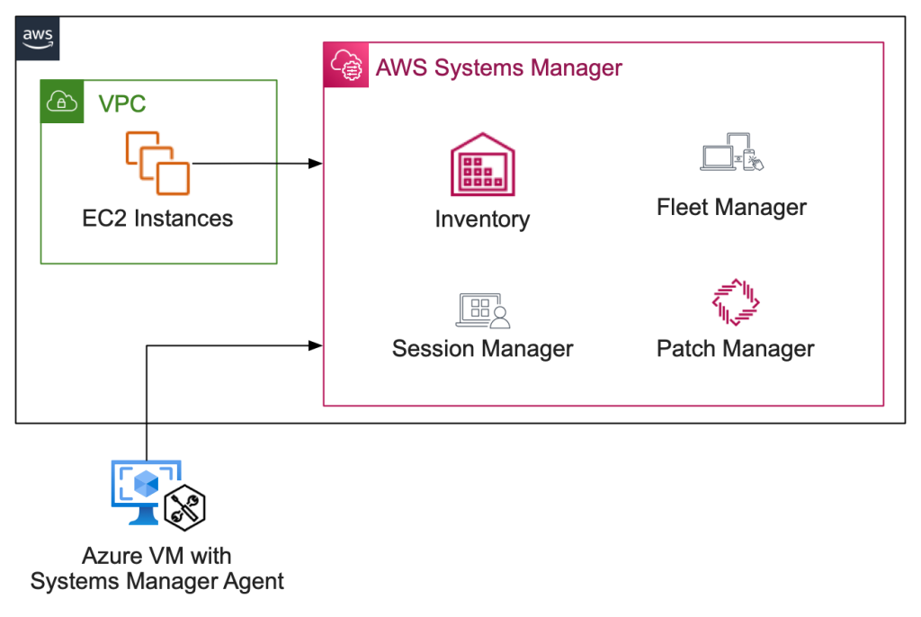
Architecture-Diagram
Step-by-Step Procedure:
Step 1: Log in to the AWS and navigate to the AWS System Manager service
https://console.aws.amazon.com/systems-manager/home
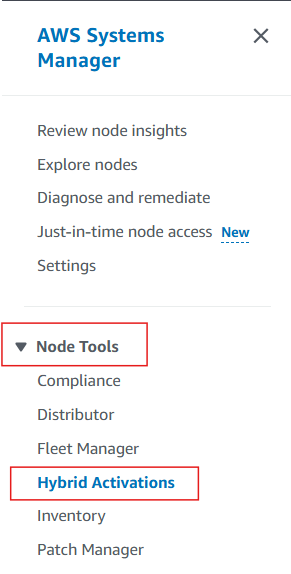
Step 2: Click the Hybrid Activations option under Node Tools
Click-on-Hybrid-Activations
Step 3: Click on “Create activation” and provide the mandatory fields-
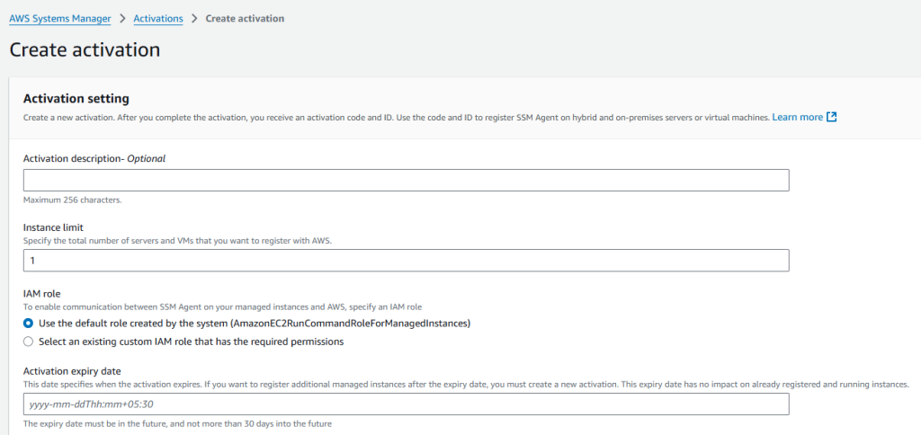
Create-activation
Note: Note: In the “Activation Expiry Date” field, you are instructing AWS that the hybrid activation code should expire within the number of days you enter here. The highest value you can use is 30 days. Once this time limit is reached, if you need to add more VMs (servers), you will have to create a new activation code.
Step 4: Once you filled in the details, when you press Create Activation, you will be provided with the Activation-Code and Activation-ID. Please note these points somewhere you will require them later.

Activation_Details
Step 5: SSH the server on your Azure cloud that you want to integrate with the AWS SSM.
Step 6: Install SSM agent if not already installed. Below are the installation commands for SSM agent.

Commands
Step 7: Now, run the below commands in order to set up the connectivity between AWS SSM and the Azure VM.
Note- Replace activation-code and activation-id with the ones you copied in Step 4.

Commands
Step 8: Now you can confirm that your server is registered in Fleet Manager.
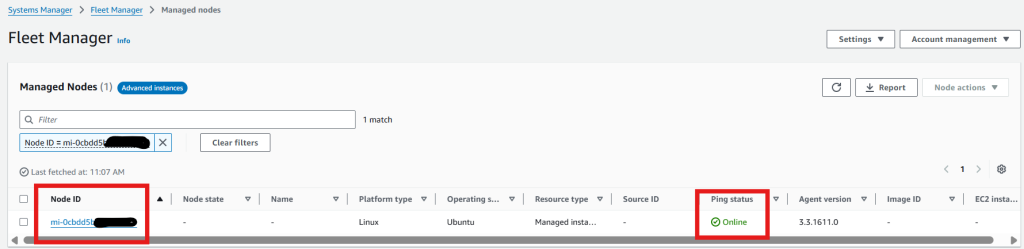
Server_Registered.
Step 9: If you click the Node ID, you can validate your server information-
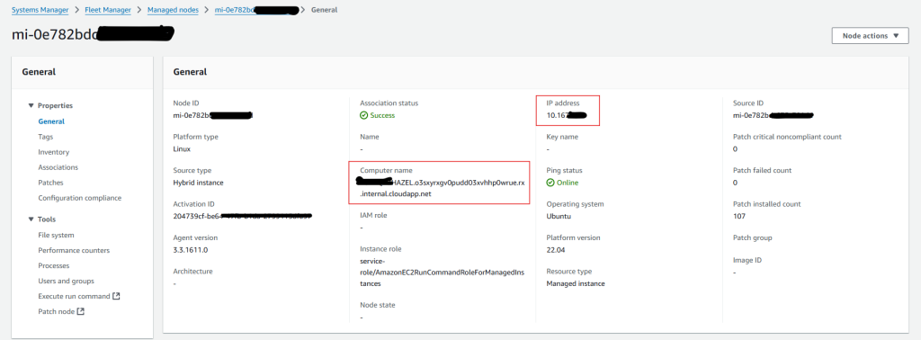
Server_Details
Step 10: Once you’ve verified the information, you access your server.

Start_Terminal_Session

Server
Conclusion:
Whenever we have multiple cloud architecture and want to manage servers from one place, we can enable Hybrid Activation across servers. We can perform operations on many servers from a single point using this feature, and it is supportive of security, simplifies access control, and makes processes more efficient.
If you have any questions for this article, you may comment below.
Thank You.
