
Django Application Deployment
Django is a high-level Python Web framework that can help you get your Python application or website off the ground. It includes simple development server for testing the code locally, but in the production environment, a more secure and powerful web server is required.
uWSGI is an application server container that aims to provide a full stack for developing and deploying web applications and services. It communicates with a variety of other protocols with the application using the methods defined by the WSGI spec. It is the piece that translates requests from a web server into a format that the application can understand.
virtualenv is a tool to create isolated Python environments. It creates a folder which contains all the necessary executables to use the packages that a Python project would need. It keeps the dependencies required by different projects in separate places, by creating virtual Python environments for them.
Use Case
Deploying Django application and configuring the uWSGI application container server to interface with our application and setting up Nginx to reverse proxy to uWSGI in order to achieve greater security and performance features to serve our apps. We will be installing our Django application in its own virtual environment in order to isolate the requirements for the project.
Prerequisites
An Ubuntu 14.04 server instance with a non-root user with Sudo privileges configured.
Install and configure virtualenv & Django application
1.We will be installing virtualenv using pip, the Python package manager:
[js]sudo apt-get update
sudo apt-get install python-pip
sudo pip install virtualenv[/js]
2. We will be creating a folder that will contain our virtual environment and virtualenv command is used to create a virtual environment:
[js]mkdir sample_virtual_env
cd sample_virtual_env
virtualenv myapp_virtual_env[/js]
3. Once the environment is created then it is activated. With this environment active, any software installed through pip will now be installed into the virtual environment. This allows us to isolate our packages on a per-project basis:
[js]source myapp_virtual_env/bin/activate[/js]
4. Now we will install Django using pip as we are installing it locally in our virtual environment:
[js]pip install django[/js]
5. Now we will create our first sample project. The below-mentioned command will create a directory called sample_django_app within our home directory. It contains a management script for handling various aspects of the project and another directory with the same name used to contain the actual project code:
[js]django-admin.py startproject sample_django_app[/js]
6. We will be setting up minimum requirements for our project i.e migrating the database to initialize the SQLite database that our project will use. We can set up an alternative database for our application also:
[js]cd sample_django_app
./manage.py migrate[/js]
7. We should now have a database file called db.sqlite3 in our project directory. Now, we will create an administrative user. We have to provide a username, email-address and password:
[js]./manage.py createsuperuser[/js]
8. Since we will be setting up Nginx to serve our site, we need to configure a directory which will contain our site’s static content. This will allow Nginx to serve these directly, which will improve the performance. We will tell Django to place these into a directory called static in our project’s base directory. Add the line to the bottom of the settings.py file to configure this behavior:
[js]vi sample_django_app/settings.py[/js]
STATIC_ROOT = os.path.join(BASE_DIR, "static/")
9. Now, we have to collect our site’s static elements and place them within that directory. We have to type “yes” to confirm the action and collect the static content. There will be a new directory called static in our project directory:
[js]./manage.py collectstatic[/js]
10. We can test our project by starting the development server. This will start up the development server on port 8726:
[js]./manage.py runserver 0.0.0.0:8726[/js]
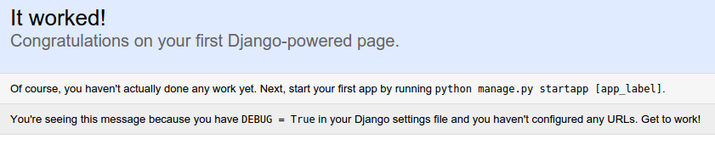
11.Visiting the browser domain name or IP address followed by the respective port will show a page like this:
Adding /admin to our browser address bar will take us to the admin login page: 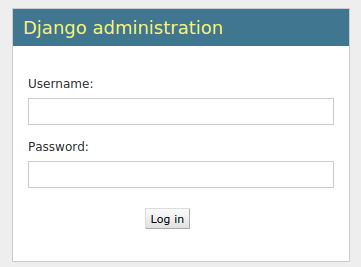
Using the login credentials that we created with createsuperuser command will take us to the admin login page:

12.We can now deactivate our virtual environment as we have completed our Django portion:
[js]deactivate[/js]
Install and configure uWSGI Application Server
1.In order to install uWSGi, we need Python development files on which software relies on and then we will install uWSGI:
[js]sudo apt-get install python-dev
sudo pip install uwsgi[/js]
2. We can test our application through uWSGI. Successful execution of the below command requires that we should be running it inside our project directory i.e sample_django_app:
[js]uwsgi –socket 0.0.0.0:8123 –protocol=http –venv /home/ubuntu/sample_virtual_env/myapp_virtual_env -w sample_django_app.wsgi[/js]
3. We will be running uWSGI in Emperor mode, which will allow a master process to manage separate applications automatically given a set of configuration files. So we will be creating a directory to hold our configuration file and then we will place our configuration file inside the created directory:
[js]sudo mkdir -p /etc/uwsgi/project
cd /etc/uwsgi/project[/js]
4. Now, we have to create our configuration file:
[js]sudo vi sample_django_app.ini[/js]
[uwsgi]
project = sample_django_app
base = /home/ubuntu

chdir = %(base)/%(project)
home = %(base)/sample_virtual_env/myapp_virtual_env
module = %(project).wsgi:application

master = true
processes = 5

socket = %(base)/%(project)/%(project).sock
chmod-socket = 664
vacuum = true
5. We will now create an Upstart script to automatically start uWSGI at boot:
[js]sudo vi /etc/init/uwsgi.conf[/js]
description "uWSGI application server in Emperor mode"

start on runlevel [2345]
stop on runlevel [!2345]

setuid ubuntu
setgid www-data

exec /usr/local/bin/uwsgi --emperor /etc/uwsgi/project
Install and configure Nginx as Reverse Proxy
1. First of all, we will be installing Nginx and then we will be making changes to default server configuration file:
[js]sudo apt-get install nginx
sudo vi /etc/nginx/sites-enabled/default[/js]
2. In the server block add the following lines:
location = /favicon.ico { access_log off; log_not_found off; }
location /static/ {
root /home/ubuntu/sample_django_app;
}
In the default location block add the following line:
include uwsgi_params;
uwsgi_pass unix:/home/ubuntu/sample_django_app/sample_django_app.sock;
Check Nginx configuration file and restart Nginx and uWSGI application server:
[js]sudo nginx -t
sudo service nginx restart
sudo service uwsgi start[/js]
Now, we can test our application by going to the domain name or public IP address. We set up Nginx to act as a reverse proxy to handle client connections and serve the Django application running on uWSGI application server.


Thanks a lot, writer !
You the man who help me in that area for which I am waithing. I need to know how to configure a home server for running django application. Though I have not implemented it yet but I just stranged that how easy this !
Actually is this easy like described before ?