CircleCI (Continuous Integration) is gaining a lot of traction nowadays because of its rich features. It provides both the features of continuous integration and continuous deployment. We can use CircleCI to test our code, perform various benchmark tests followed by deployments in specific environments.
Here are some benefits of CircleCI:
- Automatic provisioning of the required build environment
- Easy to use
- Reduced overhead of provisioning a server for the testing purpose
- Focuses on “what is to be done” instead of “how to be done”
- Integration with various deployment tools (AWS CodeDeploy, AWS ECS, S3, Google Container Engine, Heroku, Deploying via SSH)
- Generalized template to specify the structure of the plan
- Integration with Git/Bitbucket for automated build triggering
Use case:
How about testing the performance of your application at every Git push? The tests can be in any form such as Apache benchmark test, Spock test, integration test, and custom Gradle/Maven tests. How about getting automated emails from a tool that tested the last push to the GIT along with getting performance reports and test cases results?
CircleCI is truly a developer’s friend. You just need to tell it once how you wish to test your code and then it automatically takes care of the various tests you want to perform on the code at every push made to the Git.
What will this blog show you?
We have integrated our bitbucket account with CircleCi. We have put a file named circle.yml in the root directory of Git repository for which we want to perform test cases.
At every push which we make to the Git, CircleCI carries out some steps written in a file circle.yml. It reads this file and performs the operation in a sequential manner as they appear in it. Circle CI will first complete some Maven test cases, and on their successful results, it will carry out an Apache Benchmark test and show the report.
This example is just for demonstration purpose. We can add even more steps in the test and deployment phases such as sending the final reports to S3. Consequently, we’ll be notified by e-mail regarding the status the of the last build which CircleCi triggered.
How to do it?
Below are the steps which you need to follow:
- Signup on circle CI using your Github/Bitbucket account.
- Add a circle.yml (see sample file below) and put this file in the root directory of your Git repository. CircleCI searches for this file in the root directory only.
- Go to the “Projects” section on the left panel on the CircleCI dashboard and choose your git repository.
- A circle.yml has some predefined phases in which you can specify the operations.The phases are:
- machine: virtual machine or host related configurations (VM), e.g., timezone, Gradle version, Java version, specific Postgres and MySql version, etc. to be present on the server. CircleCi will configure the environment for you.
- checkout: Git checkout settings
- dependencies: Explicit dependencies or custom installations required
- database: Database related configurations which the code testing needs
- compile: Compilation steps
- test: to define the test cases
- deployment: for further deployment of the code or running any deployment scripts.
- For the purpose of testing, we are here using this sample maven project. Our circle.yml is shown as below:
[js]
## Customize the test machine
machine:
timezone:
Asia/Kolkata # Set the timezone
# Version of java and maven to use
java:
version: openjdk7
maven:
version: maven3
# Override /etc/hosts
hosts:
circlehost: 127.0.0.1
abc.example.com: 127.0.0.1
# Add some environment variables
environment:
CIRCLE_ENV: qa
## Customize dependencies
dependencies:
pre:
– sudo apt-get update # update apt repository
– sudo apt-get install apache2-utils -y # installing apache2-utils for running benchmark test cases
– sudo touch pre_dependency.txt # test command
## Customize test commands
test:
pre:
– mvn clean test # running maven test cases
post:
– java -jar ./target/spring-boot-rest-example-0.3.0.war: #running the application
background: true
– sudo netstat -ntlp
– sleep 20
– ab -n 1000 -c 100 -k >> /tmp/loadTest.txt #running apache benchmark tests
– cat /tmp/loadTest.txt
[/js]
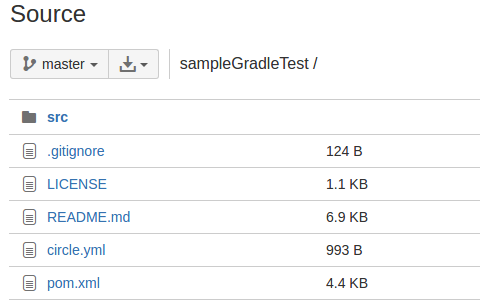
6. Add circle.yml to your code and make a Git push. Our bitbucket repository structure is shown below:
7. Go to CircleCI dashboard and click on “Build Project” button in front of your chosen Git repository.
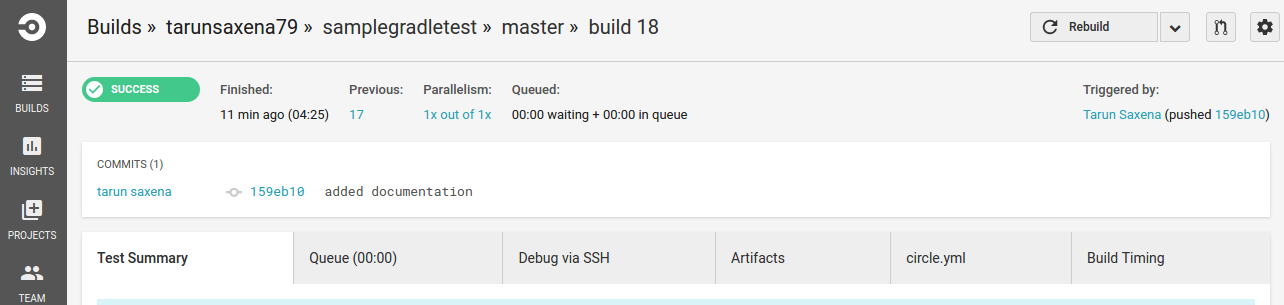
8. Once you follow the project, CircleCI will start running the build. You can view the builds in “Builds” section on the dashboard.
9. You can change the mail notification settings in Account Settings>Notification Settings.
10. Our Output appears as below:
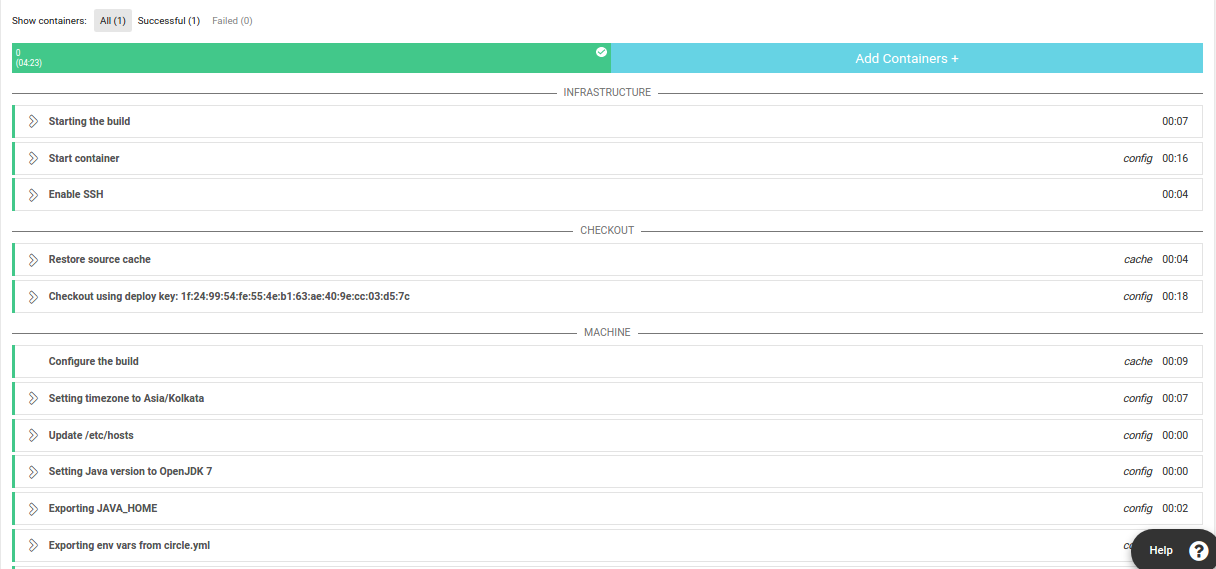
11. We can view the series of steps, their outputs, and the time spent on each step in the console itself.
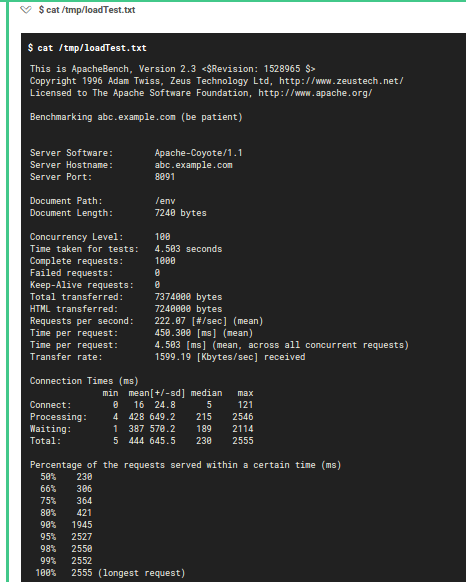
12. Here’s the final Apache benchmark report. CircleCi also allows SSH login on the machine which it has provisioned for you. You can troubleshoot the things anytime after you login to the machine.
CircleCI can be a very useful DevOps tool in different types of use cases. The single VM is free for the customers. You have to pay if you’re provisioning multiple VMs for some use cases. In our next blog, we’ll be writing about deployments using CircleCI.