Appium is a powerful open-source automation framework that has gained immense popularity among developers and testers for mobile app testing. However, getting started with Appium setup can be a daunting task for beginners. In this blog, we will walk you through a step-by-step guide to simplify the process and help make your Appium setup easier.
Prerequisites:
Before diving into the Appium setup, ensure that you have the following prerequisites in place:
– Java Development Kit (JDK)
– Android SDK/Android Studio
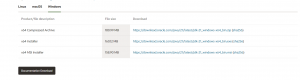
– Appium Inspector
– IDE (e.g., Eclipse, IntelliJ, or Visual Studio Code)
– Appium server and client libraries
Step 1: Installing Java Development Kit (JDK):
– Visit the Oracle website (https://www.oracle.com/in/java/technologies/downloads/#jdk21-windows) and download the latest version of JDK suitable for your operating system.
– Run the JDK installer and follow the instructions to complete the installation.
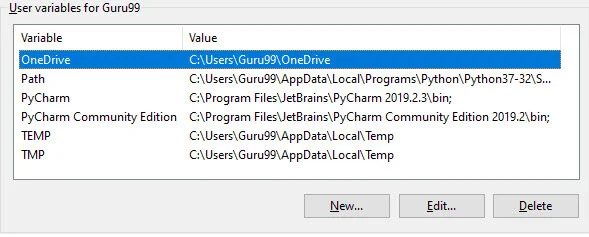
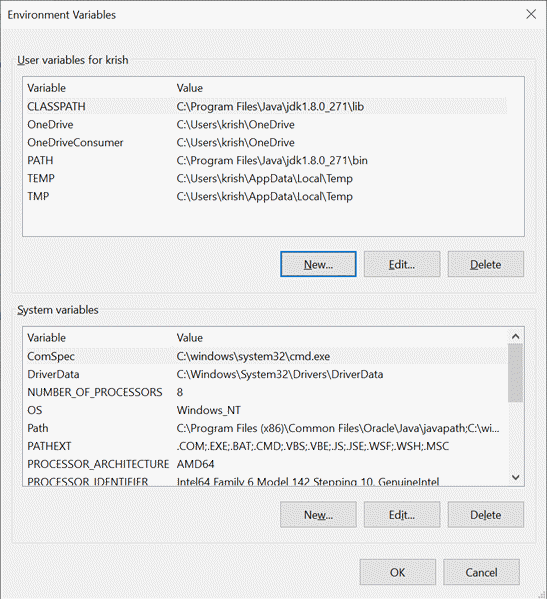
– Set up the JAVA_HOME environment variable by going to the system’s environment variables and adding a new variable with the name JAVA_HOME and the path to the JDK installation directory.
Follow the steps below for JAVA_HOME environment variable setup:
1) Go to MyComputer properties
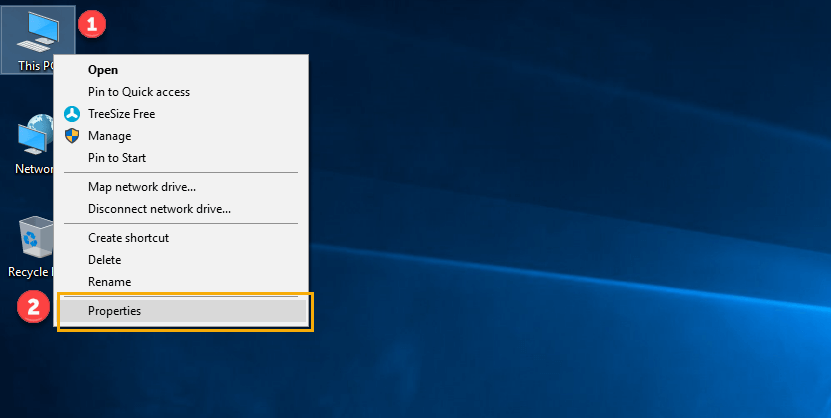
2) Click on the advanced tab
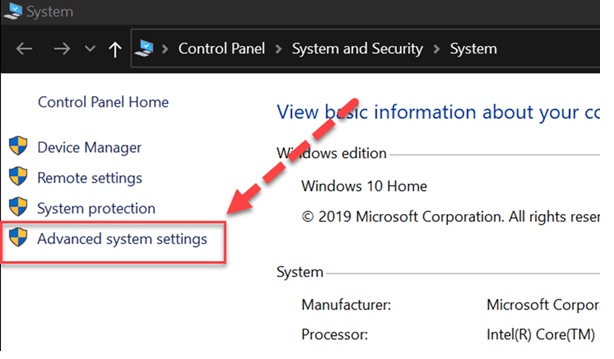
3) Click on environment variables
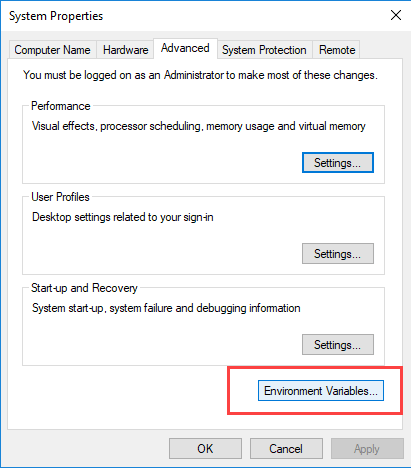
4) Click on the new tab of user variables
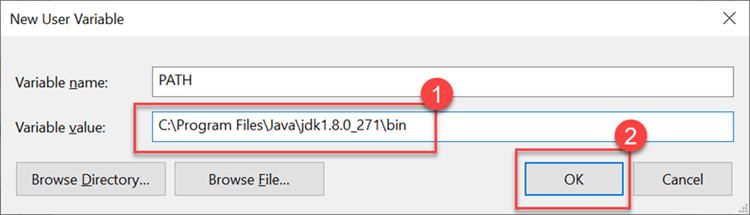
5) Write the path in the variable name
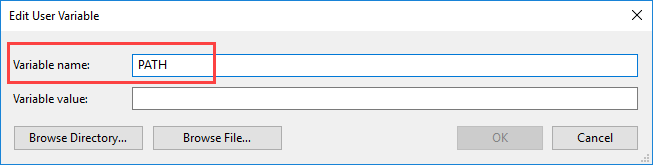
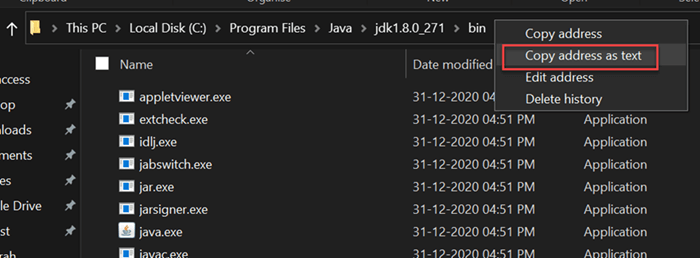
6) Copy the path of the bin folder
7) Paste the path of the bin folder in the variable value
8) Click on the OK button
9) Click on the OK button
Step 2: Installing Android Studio:
– Download and install Android Studio from the official Android developer website. (https://developer.android.com/studio)
– Run the executable file and click “Next” to start the installation.
– Accept the default installation settings for all steps.
– Click “Finish” when the installation is done.
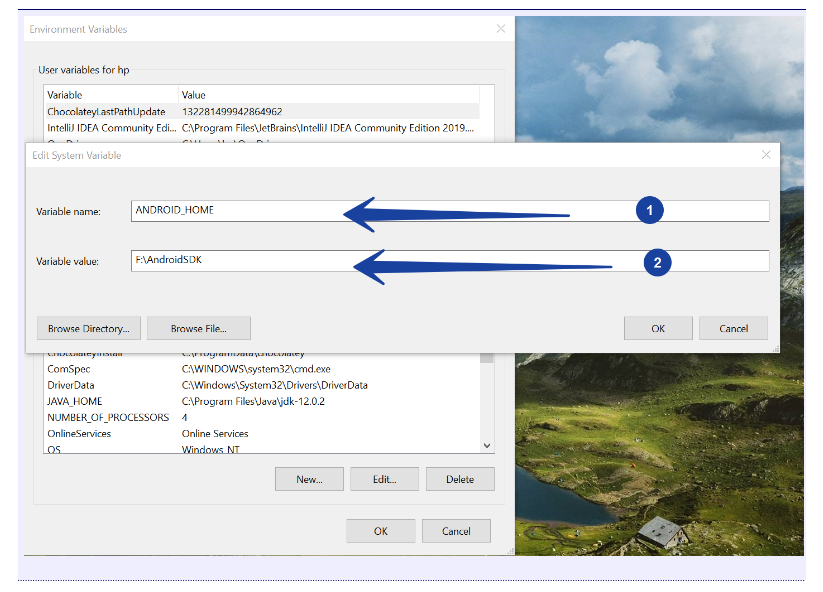
Step 3: Setting Up Android Environment:
– Once the installation of Android Studio is complete, set up the ANDROID_HOME environment variable by adding a new variable with the name ANDROID_HOME and the path to the Android SDK directory.
– Update the PATH system variable by adding the bin directory of the Android SDK to the PATH.
Follow the steps below for ANDROID_HOME environment variable setup:
- Right-click My Computer and select Properties.
- On the Advanced system settings, select Environment Variables… button.
- Choose System variables >> Click on the New… button to add a new environment variable.
- Add ANDROID_HOME to point to where the Android SDK directory is installed.
- Click on the OK button to save the changes.
Step 4: Installing Node.js and npm:
– Go to the official Node.js website and download the latest version of Node.js. (https://nodejs.org/en/download)
– Run the Node.js installer and follow the instructions to complete the installation.
– Verify the installation by opening the terminal or command prompt and running the commands: node -v and npm -v. The installed versions of Node.js and npm should be displayed if the installation was successful.
Step 5: Installing Appium Server:
– Open the terminal or command prompt.
– Run the command: npm install -g appium to install the Appium server globally. This will download and install the necessary dependencies.
– Wait for the installation to complete successfully.
Step 6: Installing Appium Client Libraries:
– Depending on the programming language you prefer (Java, Python, etc.), you need to install the respective Appium client libraries using a package manager (e.g., Maven for Java, pip for Python).
– Refer to the official Appium documentation for detailed instructions on installing the client libraries specific to your programming language.
Conclusion:
Following these detailed installation steps, you should have Appium properly set up on your machine. Happy testing!