Setup:
- Download the optimal version of Astro for your Windows system from link.
- Rename the downloaded file to “astro.exe” and save it.
- Add the file path to environment variables.
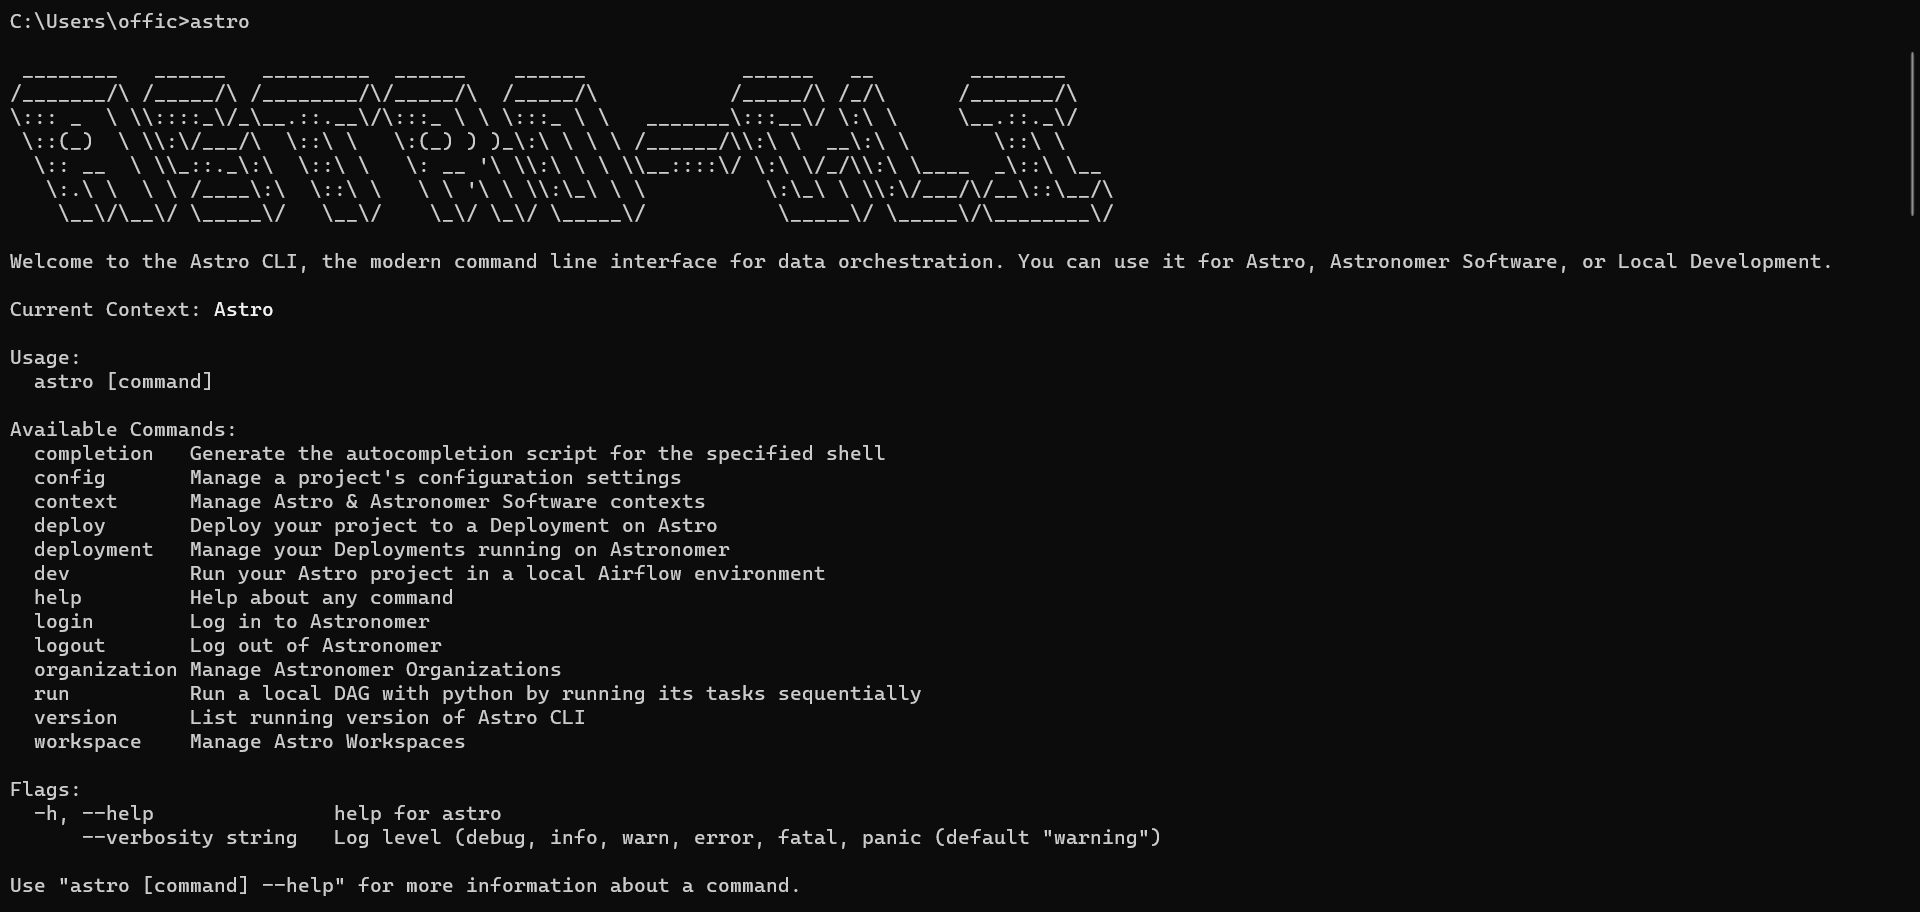
- To check if Astro has been configured correctly, run “astro” command
On cmd. After the successful configuration of Astro CLI, you should get a response like the one below:
How to make your first airflow DAG:
- Make a project directory for e.g. “test” and run “astro dev init” . What this command will do is it will initialize an Astro project in the local directory with all necessary airflow files and folders that are required to run airflow.
- Open the project directory “test” in any IDE.
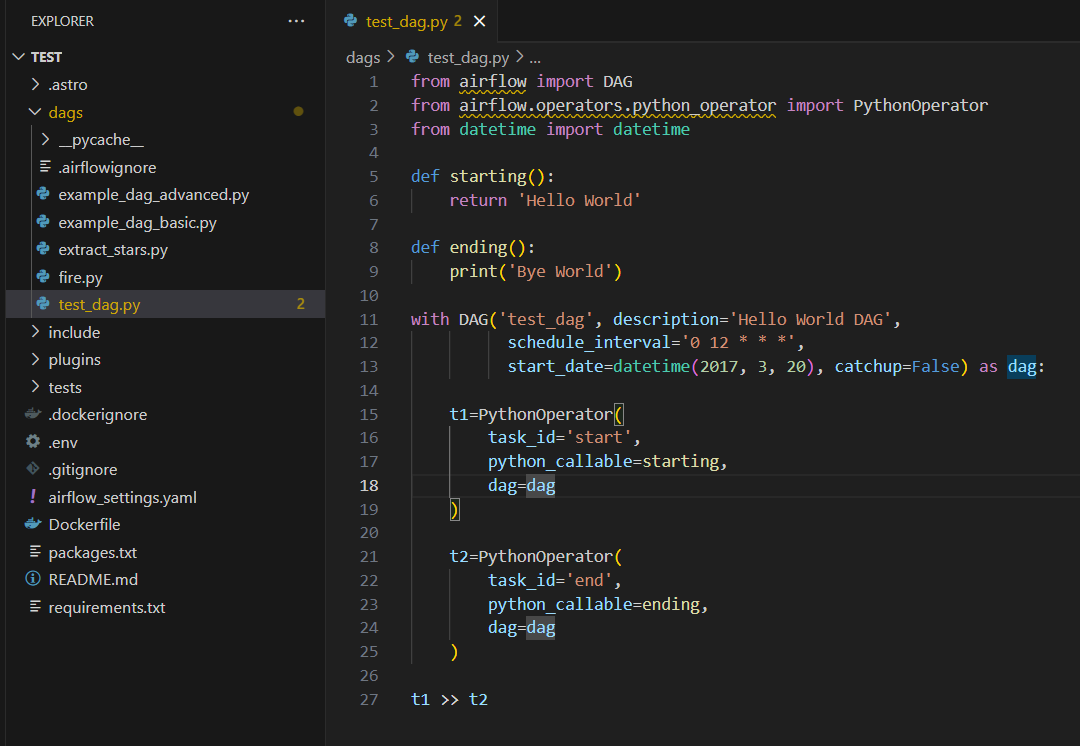
- In “test” go to “dags” and create a Python script of airflow dag “test_dag.py” in my case.
- Below is an example:
Deploy DAGs on Astro:
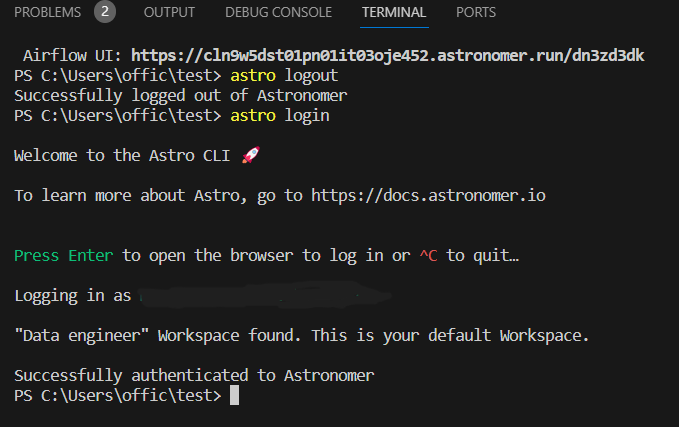
- Assuming we have access to an Astro account, we will run “Astro login” command in CLI and then enter.
- A pop-up window will appear in the default browser to ask for a login to Astro account.
- Login using your preferred way and allow access.
- Below are the screen grab of the process.
- After successful login, we can create an Astro workspace using
“astro workspace create –name “name of workspace” –enforce-ci-cd ON”.
In our case, we are sticking with the “data engineer” workspace. - To switch to a preferred workspace, use “astro workspace switch” and select the number.
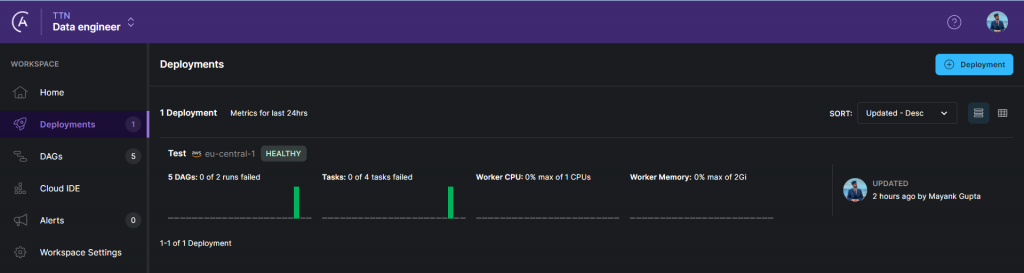
- Post that, use Astro UI to create the deployment. See below
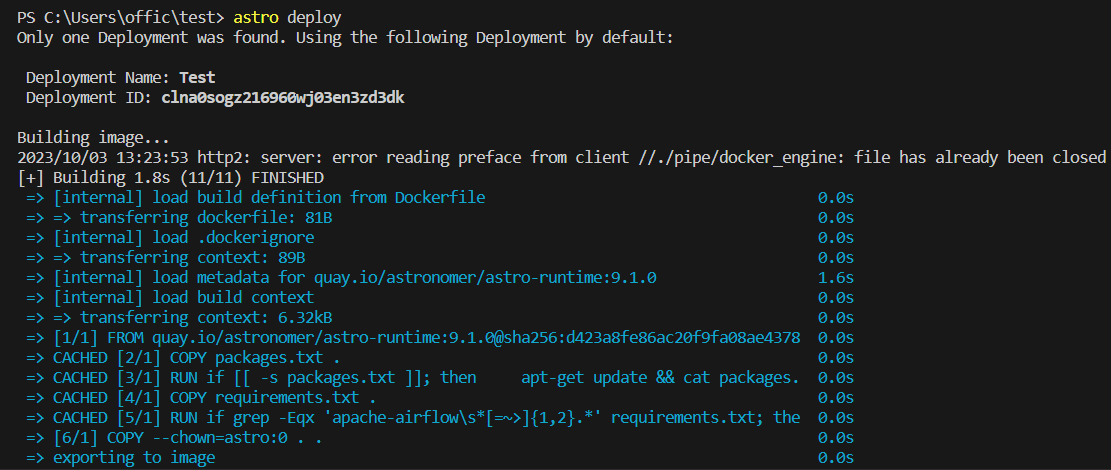
- Now use “Astro deploy” command to check for errors and send out all of your dags to Astro.
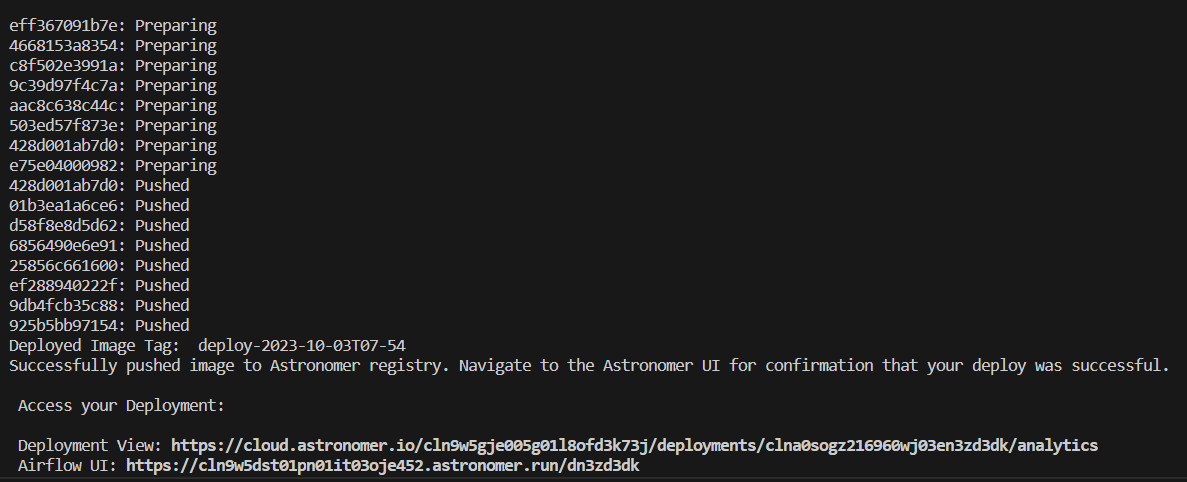
- After successful deployment, we can see all of our dags in “dags“ section of Astro UI.

- Now, we can trigger them manually or schedule them to perform our tasks.
- Adding below screen grabs of the output of our dag.

For local testing and development:
- To test a dag in the local environment before deploying it to Astro, we can use “astro dev start”. But to run airflow on the local machine, we will have to set up docker refer to this link for further process.
- Now go to “localhost:8080” and use credentials username=admin,password=admin to login.
- Now, you can try all of your dag for further debugging and optimization before deploying it to Astro.
References:
- https://docs.astronomer.io/
- https://academy.astronomer.io/your-onboarding-journey