
How to Solve Some Common Coding Challenges in React Native?
React Native is a framework that provides the facility to develop applications for both Android and iOS. If you are beginner on React Native, you can read more about it on React Native Concept or React Native Website.
For the last couple of months, I have been extensively working on this framework and through this blog I wanted to share some of the challenges I faced while coding with React Native.
The challenges are documented as follows;
1) How we can add the style classes dynamically in render function?
In React Native we don’t have display : none property. If there is no display:none property then the question arises how one can hide/show a view or a component.
2) How to make a list scrollable if we are using ListView component of React Native?
So, let’s discuss this one by one and understand how to solve them
We deliberately created certain solutions we thought will be helpful which are given below.
1) In React Native we don’t have display : none property. But if needed one can hide the component using the style properties height, width, opacity
[js]
//index.android.js file
import React, { Component } from ‘react’;
import {
AppRegistry,
StyleSheet,
Text,
View
} from ‘react-native’;
export default class ReactNativeHacks extends Component {
render() {
return (
<View style={styles.container}>
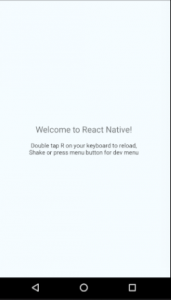
<Text style={styles.welcome}>
Welcome to React Native!
</Text>
<Text style={styles.instructions}>
To get started, edit index.android.js
</Text>
<Text style={styles.instruction2}>
Double tap R on your keyboard to reload,{‘\n’}
Shake or press menu button for dev menu
</Text>
</View>
);
}
}
const styles = StyleSheet.create({
container: {
flex: 1,
justifyContent: ‘center’,
alignItems: ‘center’,
backgroundColor: ‘#F5FCFF’,
},
welcome: {
fontSize: 20,
textAlign: ‘center’,
margin: 10,
},
instructions: {
textAlign: ‘center’,
color: ‘#333333’,
marginBottom: 5,
},
instruction2: {
textAlign: ‘center’,
color: ‘#333333’,
marginBottom: 5,
}
});
AppRegistry.registerComponent(‘ReactNativeHacks’, () => ReactNativeHacks);
[/js]
Output:

Now if we want to hide the second paragraph we can use the following class
[js]
instructions: {
textAlign: ‘center’,
color: ‘#333333’,
marginBottom: 5,
opacity:0
},
[/js]
Output:

or can use the style class with height, width
[js]
instructions: {
textAlign: ‘center’,
color: ‘#333333’,
marginBottom: 5,
height:0,
width:0,
opacity:0
},
[/js]
Output:
Using only opacity does not free the space occupied by the text or view component. So for that what we need to do is just add the height and width of component 0.
Use the below command to show / hide component or to add or remove styling classes dynamically.
[js]
//index.android.js file
import React, { Component } from ‘react’;
import {
AppRegistry,
StyleSheet,
Text,
View,
TouchableNativeFeedback
} from ‘react-native’;
export default class ReactNativeHacks extends Component {
constructor(props){
super(props);
this.state = {
flag: true
}
}
buttonClick() {
this.setState({
flag: !this.state.flag // toggle state `flag` on button click
})
}
render() {
return (
<View style={styles.container}>
{ this.state.flag && // show/hide on basis of `this.state.flag` value
<Text style={styles.welcome}>
Hide or Show text dynamically by just clicking the button.
</Text>
}
<TouchableNativeFeedback>
<View style={styles.button}>
<Text style={styles.buttonText} //call function `buttonClick`
onPress={() => { this.buttonClick()}}>Click here.</Text>
</View>
</TouchableNativeFeedback>
</View>
);
}
}
const styles = StyleSheet.create({
container: {
flex: 1,
justifyContent: ‘center’,
alignItems: ‘center’,
backgroundColor: ‘#F5FCFF’,
},
welcome: {
fontSize: 20,
textAlign: ‘center’,
margin: 10,
},
button: {
backgroundColor: ‘#ff8000’,
borderRadius: 4,
padding:10
},
buttonText : {
color : ‘#fff’,
textAlign:’center’,
fontWeight: ‘bold’
},
});
AppRegistry.registerComponent(‘ReactNativeHacks’, () => ReactNativeHacks);
[/js]
In this example the state that defines whether a component should be displayed or not is decided by the state flag.
[js]
{ this.state.flag &&
<Text style={styles.welcome}>
Hide or Show text dynamically by just clicking the button.
</Text>
}
[/js]
The same output can be generated using the code like :
By adding this code, if this.state.flag is true then statement ‘Hide or Show text dynamically by just clicking the button.’ displays otherwise the null is rendered.
We can also provide other component in place of null that we want to render.
[js]
{ this.state.flag ?
<Text style={styles.welcome}>
Hide or Show text dynamically by just clicking the button.
</Text> : null
}
[/js]
We can also show/hide using the styling class.
This also produces the same result as the above code. But in this we provide the styles dynamically according to the value of this.state.flag. If this.state.flag is true then styles.welcome class is applied otherwise styles.hideClass is applied which has heigh: 0 width: 0.
[js]
<Text style={this.state.flag ? styles.welcome : styles.hideClass}>
Hide or Show text dynamically by just clicking the button.
</Text>
[/js]
Define hideClass in Stylesheet.create()
[js]
hideClass: {
height: 0,
width: 0
}
[/js]
Output:
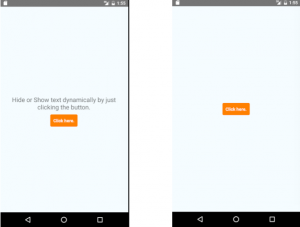
In this output the text hides as soon as the button is clicked.
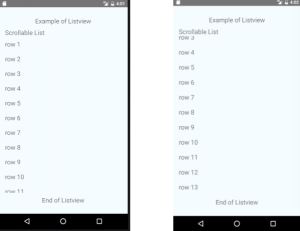
2) In case of listview, the list is scrollable by default, but in few cases, the list is not scrollable, so if someone wants to scroll the list vertically just define the flex property as 1 to all the parent views of the listview.
[js]
//index.android.js file
import React, { Component } from ‘react’;
import {
AppRegistry,
StyleSheet,
Text,
View,
ListView,
} from ‘react-native’;
export default class ReactNativeHacks extends Component {
constructor() {
super();
const ds = new ListView.DataSource({rowHasChanged: (r1, r2) => r1 !== r2});
this.state = {
dataSource: ds.cloneWithRows([
‘row 1’, ‘row 2’, ‘row 3’, ‘row 4’, ‘row 5’, ‘row 6’, ‘row 7’, ‘row 8’, ‘row 9’, ‘row 10’, ‘row 11’, ‘row 12’, ‘row 13’
]),
};
}
render() {
return (
<View style={styles.container}>
<Text style={styles.welcome}>
Example of Listview
</Text>
<View style={styles.container2}> //flex:1, parent View of ListView
<Text style={styles.listData}>Scrollable List</Text>
<ListView
dataSource={this.state.dataSource}
renderRow={(rowData) =>
<Text style={styles.listValue}>{rowData}</Text> }
/>
</View>
<Text style={styles.welcome}>
End of Listview
</Text>
</View>
);
}
}
const styles = StyleSheet.create({
container: {
flex: 1,
backgroundColor: ‘#F5FCFF’,
padding: 20
},
container2: {
flex: 1,
},
listData: {
fontSize: 20,
},
listValue: {
fontSize: 20,
paddingVertical:10
},
welcome: {
fontSize: 20,
textAlign: ‘center’,
margin: 10,
},
});
AppRegistry.registerComponent(‘ReactNativeHacks’, () => ReactNativeHacks);
[/js]
Output:
Find the code snippets here for the above examples.

Nyc Work DoDo.. Keep it up