In today’s digital world, everything is moving towards automation, including cloud computing.
Microsoft Azure is one example of a public cloud computing service. All hardware, software, and other supporting infrastructure within the public cloud is owned and managed by the cloud provider. Here you can access these services and manage your account using a web browser.
Terraform lets you set up your cloud infrastructure setup into IaaC. If you’ve used Microsoft Azure before, you’ll know that configuring your infrastructure through the Microsoft Azure Portal (the Web UI) is far from ideal. Terraform enables you to use Infrastructure as Code rather than manually executing the steps in the Microsoft Azure Portal.
We must install Terraform in our infrastructure and must follow a few steps:
- Setup Terraform
- Check the installation
- Download and install the Azure CLI tool.
- Use the Azure CLI to authenticate.
Install Terraform
- RHEL Installation
- Windows Installation
- Ubuntu Installation
- Mac Installation
RHEL Installation
To install Terraform on Redhat, we need to follow the steps mentioned below
a. Install yum-config-manager to manage your repositories.
$ sudo yum install -y yum-utils
b. Yum-config-manager command will be Used to add the official HashiCorp Linux repository.
        $ sudo yum-config-manager --add-repo
        https://rpm.releases.hashicorp.com/RHEL/hashicorp.repo
c. Install Terraform from the new repository.
$ sudo yum -y install terraform
Ubuntu Installation
To install Terraform in Ubuntu, the steps are almost the same, but you need to ensure that the curl package, gnupg, software-properties-common, and your system should be up to date.
Now follow the steps
a. To update your system
$ sudo apt-get update
b. To install gnupg and software properties common
$ sudo apt install software-properties-common gnupg2 curl
c. running the command: first add Terraform’s gpg key to Ubuntux
         $  curl https://apt.releases.hashicorp.com/gpg | gpg --dearmor > hashicorp.gpg
         $ sudo install -o root -g root -m 644 hashicorp.gpg /etc/apt/trusted.gpg.d/
d. Now, with the key imported, add Hashicorp repository to your Ubuntu system:
        $ sudo apt-add-repository "deb [arch=$(dpkg --print-architecture)]
        https://apt.releases.hashicorp.com $(lsb_release -cs) main"
e. To install Terraform
$ sudo apt install terraform
Windows Installation
To install Windows, we have the option to install it from an executable file of terraform, which is available over the internet.
But we need to configure environment variables for Terraform in windows.
Open and goto This PC(MyComputer)—>properties —>advanced system settings–>environment variables—>system variables—>path–edit–>new
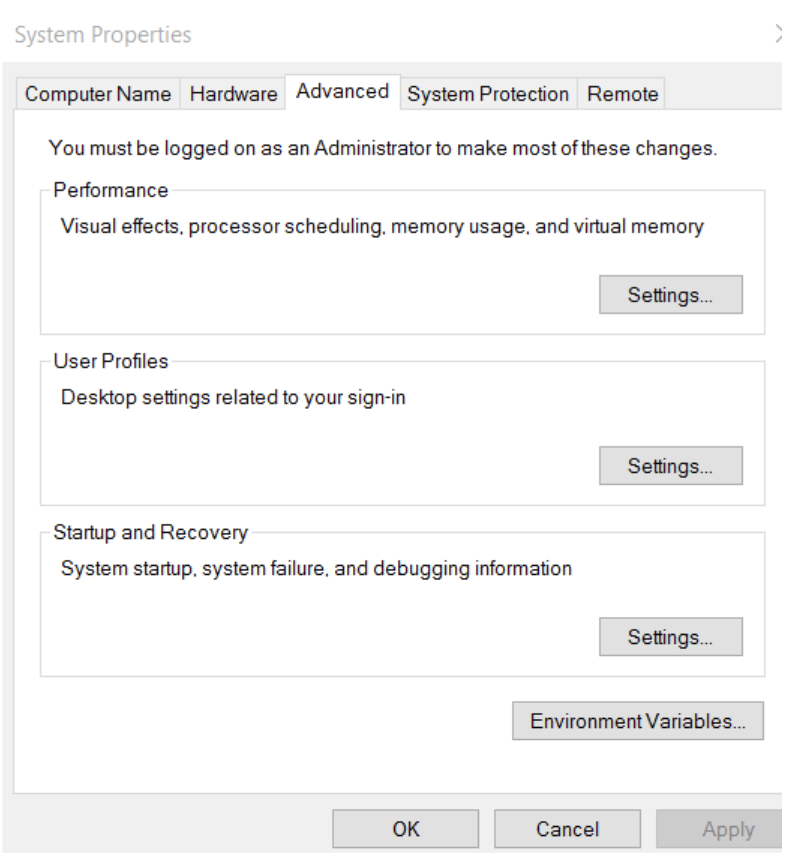
Edit System Variable, add terraform path
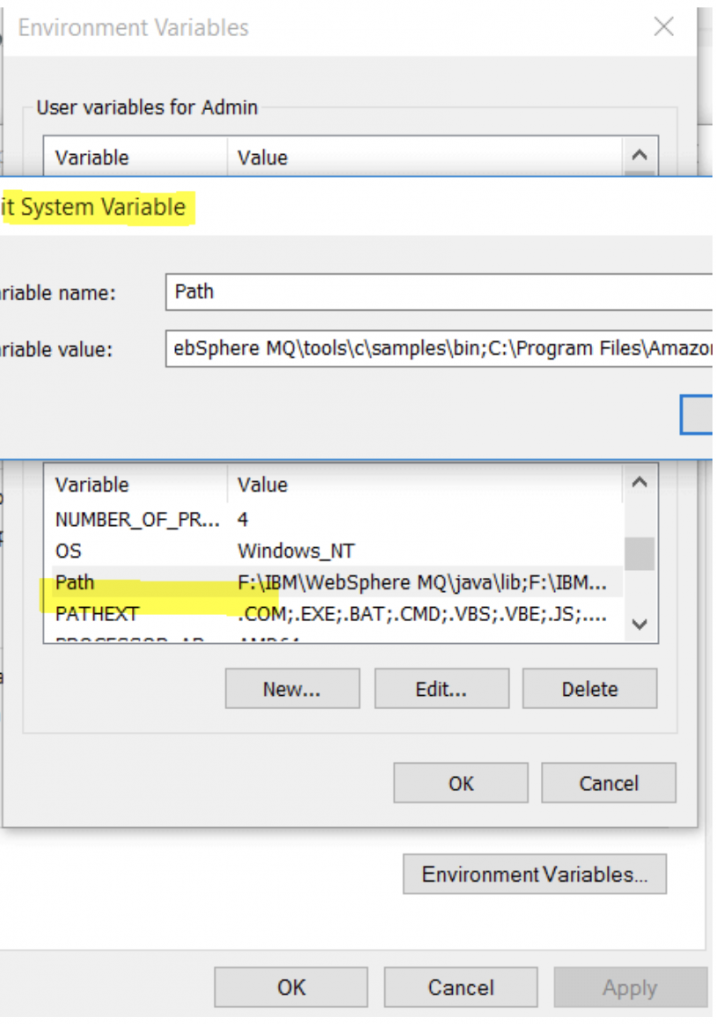
Click on OK and Apply to save changes.
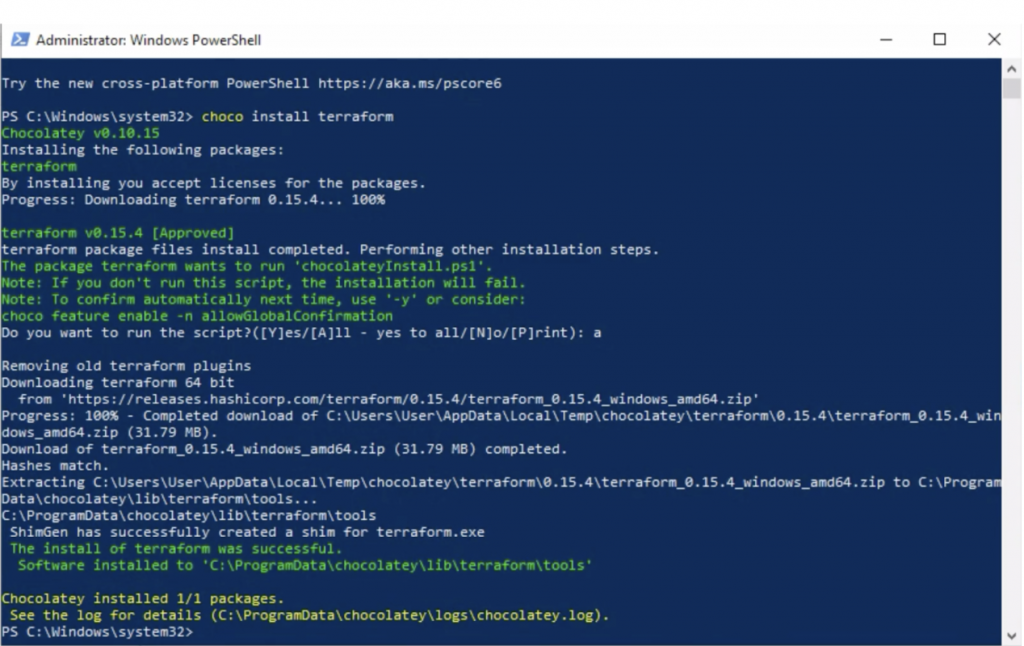
Manual Installation on Windows using Powershell and chocolatey
$ Choco Install terraform
Macintosh Installation
a. First of all, we need to install the HashiCorp tap, a repository of all our Homebrew packages.
$ brew tap hashicorp/tap
b. Now, install Terraform with hashicorp/tap/terraform
$ brew install hashicorp/tap/terraform

d. To update to the latest version of Terraform on the system,
$ brew update
e. Now run the upgrade command to download and use the latest Terraform version.
$ brew upgrade hashicorp/tap/terraform
Verify the installation
By starting a new terminal session and listing Terraform’s available subcommands, you can confirm that the installation was successful.
$ terraform -help
Install the Azure CLI tool
We need to install the Azure CLI tool for Windows and Macintosh systems so open cmd or terminal and follow the below-mentioned steps.
Install the Azure CLI on Windows Cmd prompt using run as administrator
       $ Invoke-WebRequest -Uri https://aka.ms/installazurecliwindows -OutFile .\AzureCLI.msi;
Start-Process msiexec.exe -Wait -ArgumentList '/I AzureCLI.msi /quiet'; rm .\AzureCLI.msi
Install the Azure CLI formula from the Macintosh terminal.
$ brew update && brew install azure-cli
Installation on Ubuntu Terminal
$ curl -sL https://aka.ms/InstallAzureCLIDeb | sudo bash
Authenticate using the Azure CLI
Now to get started, we must authenticate to the Azure portal using the credentials to create infrastructure.
a. Open your terminal or cmd prompt, and use the Azure CLI tool to set up your account permissions locally.
$ az login
b. Now, the browser window will prompt, and you need to enter our Azure login credentials. Once the authentication is successful, our terminal will display the subscription information.
Once the above steps are completed, we are ready to perform the Azure automation.
c. Now go to your Azure portal and Find the subscription ID for the account you want to use. Once we have the account subscription ID, set the account with the Azure CLI.
$ az account set --subscription "Azure-subscription-id"
d.Now we need to authenticate our terraform by creating a service principle in the Azure AD. A Service Principal is an application within Azure Active Directory with the authentication tokens Terraform needs to perform actions on our behalf.
$ az ad sp create-for-rbac --role="Contributor" --scopes="/subscriptions/<SUBSCRIPTION_ID>"
This is the same for new resources being added to Terraform code, as well as existing resources being imported.