What is Apache Solr?
Apache Solr is an open-source search platform developed by the Apache Software Foundation. It’s based on the Apache Lucene library and provides powerful search and indexing capabilities for websites, databases, and other content.
For Drupal users, it is possible to integrate your site with Solr. The Search API Solr Search module provides a Solr backend for the Drupal Search API module.
Why Apache Solr
- It allows for Full-text searches that offer precise results along with its near real-time indexing and searching capabilities. Indexing with Drupal Apache Solr is not only faster, it can also be merged and further optimized.
- Drupal Apache Solr offers Faceted navigation to let users add multiple filters that can help them navigate easily through piles of information. Facets are elements for navigation that can be queried.
Using Drupal Apache Solr enables better control over your website search and offers an interactive admin interface.
Implementing Apache Solr in Drupal
- Install Apache Solr
- Install the Drupal Solr Module
- Configure Apache Solr with Drupal Module
1. Install Apache Solr
Step 1: Install JAVA :
         $sudo apt install openjdk-11-jdk
         $java -version
Step 2: Download Solr : https://solr.apache.org/downloads.html
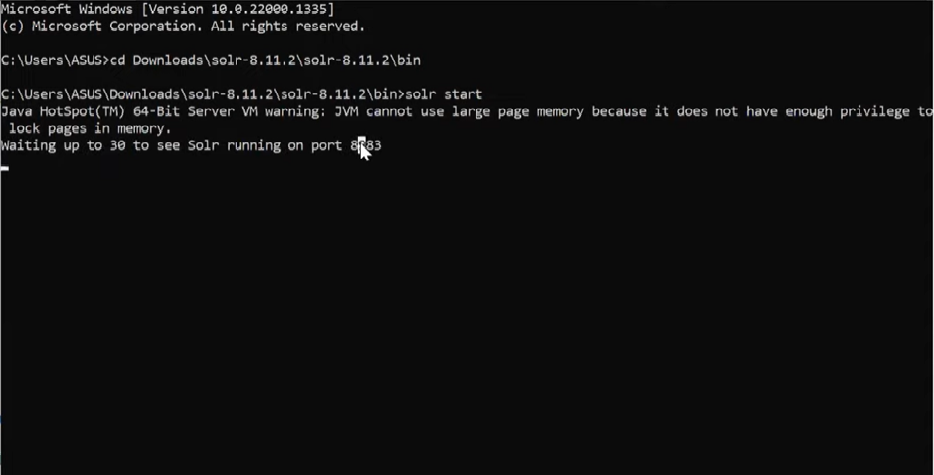
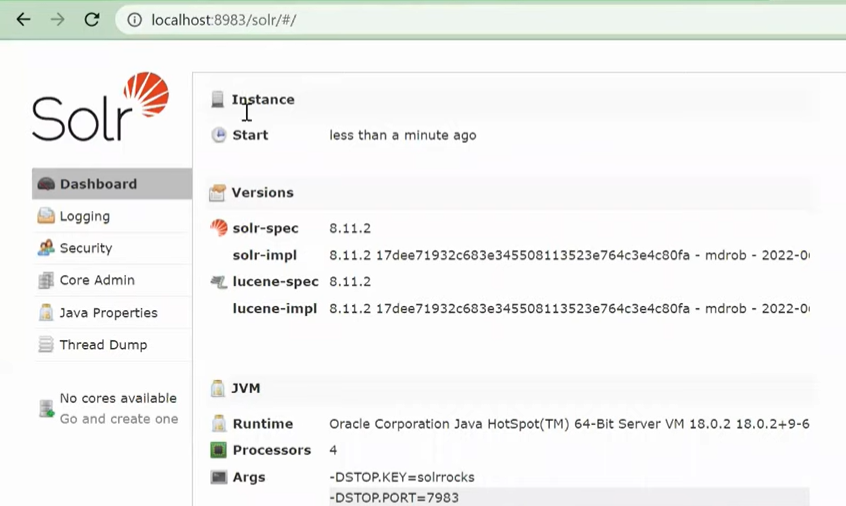
Now, Solr should be installed on your system. You can use these commands to Start, Stop, and check the status of the Solr service –
$sudo service solr stop
$sudo service solr start
$sudo service solr status
2. Installing the Search API Solr module in Drupal
composer require drupal/search_api_solr:^4.1. Once it is done, enable the module. Go to Extend → Search Search API Solr Search → Enable it
3. Configure Apache Solr with the Drupal Search API Solr Module
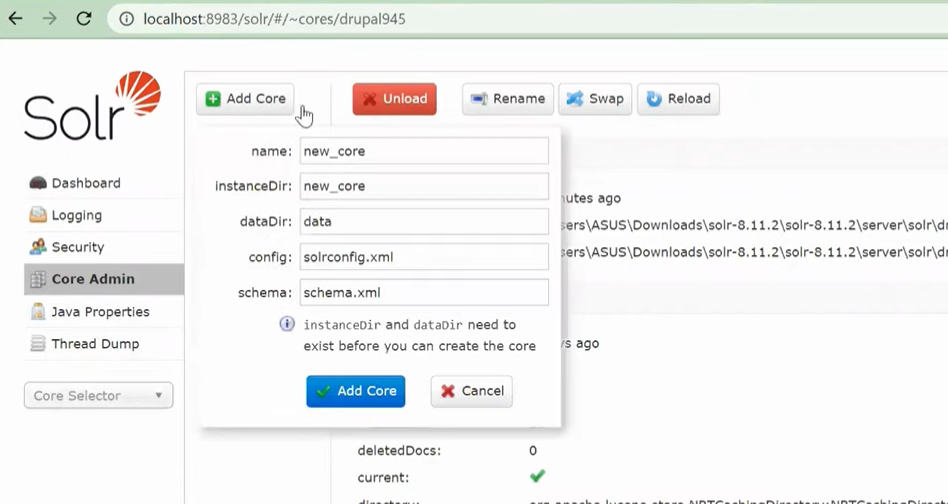
Step 1: Create a core in Apache Solr
Step 2: Create a Solr Server
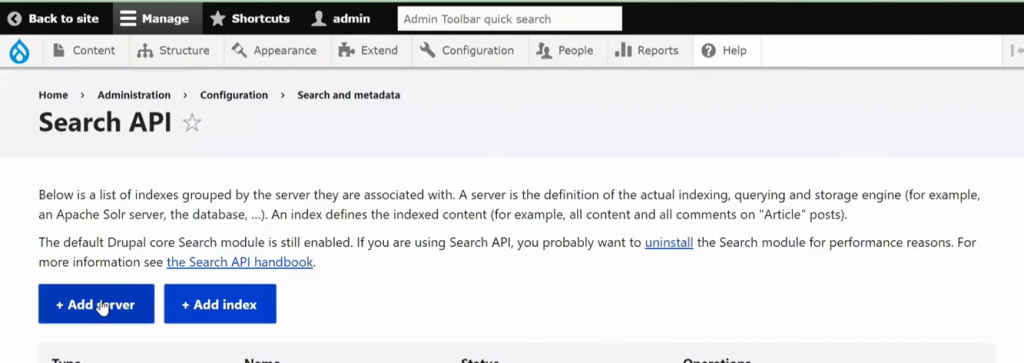
In this step you need to create a Solr server and index in your Drupal website. To create a Solr server –
Go to Configuration -> Search And Metadata -> Search API -> click on Add server
When you click on the Add server, you will get one form you need to fill out form
- Server name: Enter the Server name
- Enable: You need to check the Enable check box. If you don’t enable it, you cannot index the items
- Add server description: A brief description of the server.
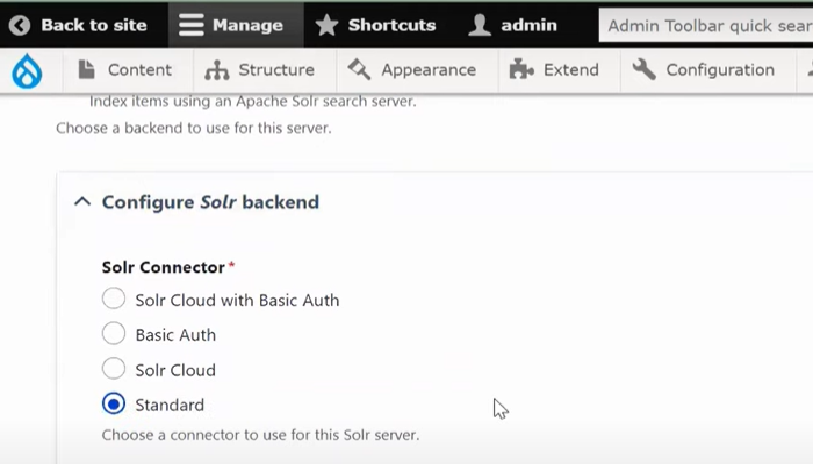
Next, you need to configure the Solr backend. Click on the CONFIGURE SOLR BACKEND in the form. You can see the form elements as shown in the image below:
HTTP protocol: Choose https or Http (depending on whether your server uses SSL or not).
Solr host: localhost (if your Solr Server is on a different machine, please enter the IP or hostname of that host here)
Solr port: 8983 (This is the Default port)
Solr path: “/” (The path to locate the server, and this is based on the Solr server version. If the Solr server version is 6.6.4, in this case, the Solr path is different like “/solr” ).
Solr core: Enter the Solr core name that you created before.
The values as defined default work fine. However, you can also change them accordingly.
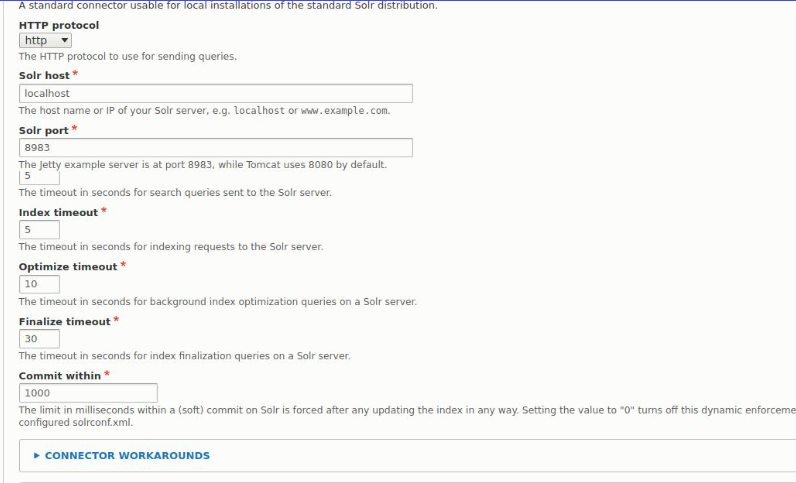
Step 3: Create the Search Index
Here, we are going to create a Search API index that will index the Datasources that you selected in the index. To create an index –
Go to Configuration -> Search and Metadata -> Search API -> Add index
After successfully creating an index, you now need to add fields to the index. To add the field that you need, go back to the search API and click on Edit the index that you have created. You will then see the Fields tab. Click on the fields tab, and you will see a window, as shown in the image below.
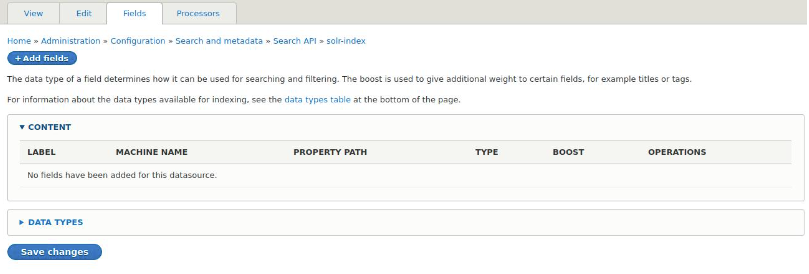
Next, click on the Add fields. In the popup that appears, you need to add the fields you need. After adding the fields, click on Done and then Save.

Now, the Index and server are created on the website. After this, the next important step is to copy the configuration files to the Solr core. For this, you need to download the config files from the server on the website.
Go to Configuration -> Search and Metadata -> Search API -> <Server name>
You will get a window as shown in the image below –
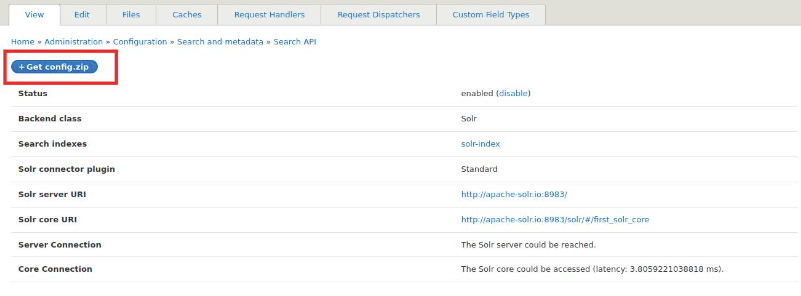
Next, click on the “Get config.zip” button. This will download the config folder. Once done, extract the zip folder and copy all the files into the conf folder in the core.
In the data folder, you will see the Solr core folder, which you had created earlier. Go to that Solr core folder, and you will find a folder with the name conf. In this folder, you will find some files. Delete those files and copy all the files from the config folder that is downloaded from the website server. Once done, you need to restart your Solr server in the terminal.
The next step is to index the contents –
Go to Configuration -> Search and Metadata -> Search API -> click on the index that you have created. You will see a window, as shown in the image below.
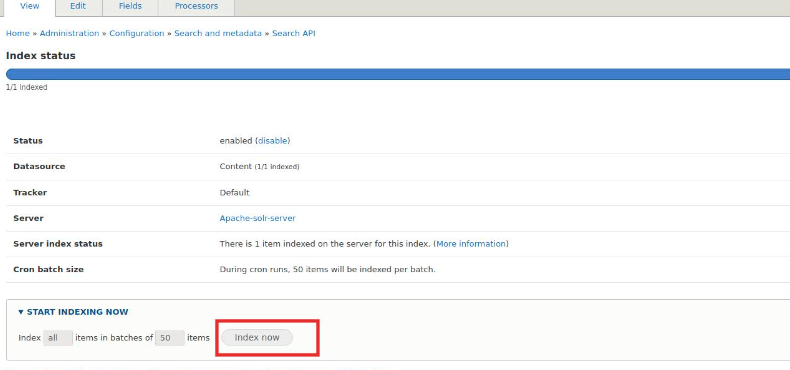
Next, click on the index to index the contents. Now, all the contents are indexed in the Solr core. Now, you can create a view of the Solr index and add the indexed fields to the view to get the results from the Drupal Solr.