What is Lando?
“Lando is a free, open-source, cross-platform, local development environment and DevOps tool built on Docker container technology. It is mainly designed to work with most major languages, frameworks, and services. Lando provides an easy way for developers of all skill levels to specify simple or complex project requirements and then quickly get to work on them.”
Some of the benefits of Lando
- Mimicking your production environment locally
- Offering speedy development with the prebuilt configuration of the composer, drush
- Add tooling to extend it from services like phpmyadmin, PHP, mailhog, apache, etc
- Recommends customizable out-of-the-box settings.
- Using a single local development environment for all your projects
System Requirements
Following are some basic guidelines for your smooth Lando experience:
Operating System
- macOS 11 or later
- Windows 10 Home or Pro version 21H2 or higher with the WSL 2 feature enabled
- Linux with kernel version 4.x or higher
Docker Engine Requirements
A Docker engine is required to run Lando. Based on operating system requirement varies as follow:
- Linux Docker engine requirements
- Docker Desktop for Mac requirements
- Docker Desktop for Windows requirements
Hardware Requirements
Minimum requirements
- 2-core x86-compat processor
- 4GB+ RAM
- 25GB+ of available disk space
Preferred
- 8-core processor
- 16GB+ RAM
- 100GB+ of available disk space
Installation
MacOS
Install DMG via direct download (recommended)
- Download the latest .dmg package from GitHub
- Mount the DMG by double-clicking it
- Double-click on the LandoInstaller.pkg
- Go through the setup workflow
- Enter your username and password when prompted
Install via HomeBrew (third party)
- Ensure homebrew is installed and up-to-date.
- Add the lando cask: brew install –cask lando
Linux
- Install the Docker Community Edition for your Linux version. Visit https://get.docker.com for the “quick & easy install” script.
- Install Docker Compose.
- Download the latest .deb, .pacman, or .rpm package from GitHub
- Double click on the package and install via your distributions “Software Center” or equivalent.
Windows
- Make sure you are using at least Windows 10 Home or Professional version 21H2 or higher
- Download the latest Windows
.exeinstaller from GitHub - Double-click on lando.exe
- Go through the setup workflow
- Approve various UAC prompts during the installation
Setup Drupal 9 with Lando
Download the Drupal codebase
It is recommended to download the Drupal core codebase using Composer because current Drupal uses composer-dependent modules and libraries. To create the project, we’ll use the official composer template for Drupal, it can be found at https://github.com/drupal/recommended-project. To create your project, you should run this command:
composer create-project drupal/recommended-project:^9 lando-demo
Above command will download Drupal core and dependencies into a lando-demo folder.
Initialise Drupal codebase with Lando
Now, let’s start playing with Lando and see how it’s easy to configure. Follow the given steps:
- Switch to project directory lando-demo
- Run lando init command and you will see below options

- Select current working directory as codebase directory, press Enter and you will see below options
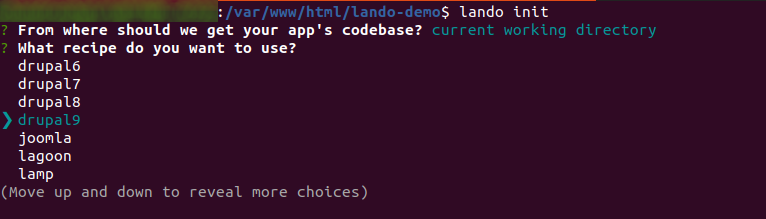
- Scroll down with the Down arrow key from the keyboard, select drupal9 as the recipe, and press Enter. You will see the below output.

- Write web in the web root, press Enter, and you will see the next step.

- Enter your app name (e.g. Lando Demo) and press Enter, and you will see the below screen.
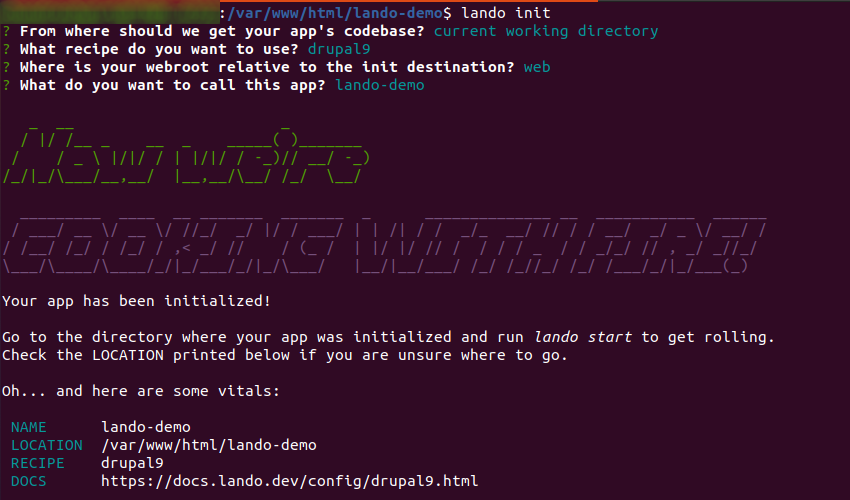
After finishing the above steps, .lando.yml file will be created (as a hidden file) in the project directory with some basic details like app name, recipe, webroot etc. The .lando.yml file will always be there in the project root folder. This file may also contain services, tooling, database etc., information based on your project requirements.
Drupal Installation
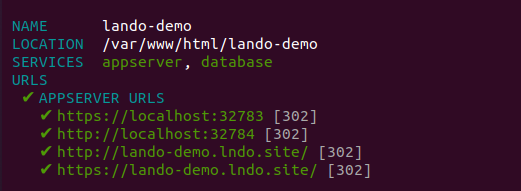
After initializing Drupal with Lando, we will now proceed to get local development urls. Now, let’s run lando start command to start Lando with docker containers, appserver, database server etc. Once you hit this command, you will see the below output.
To proceed further with Drupal installation, we need database name, username, password, host, etc details. To get these details, run lando info command, and you will get all details.
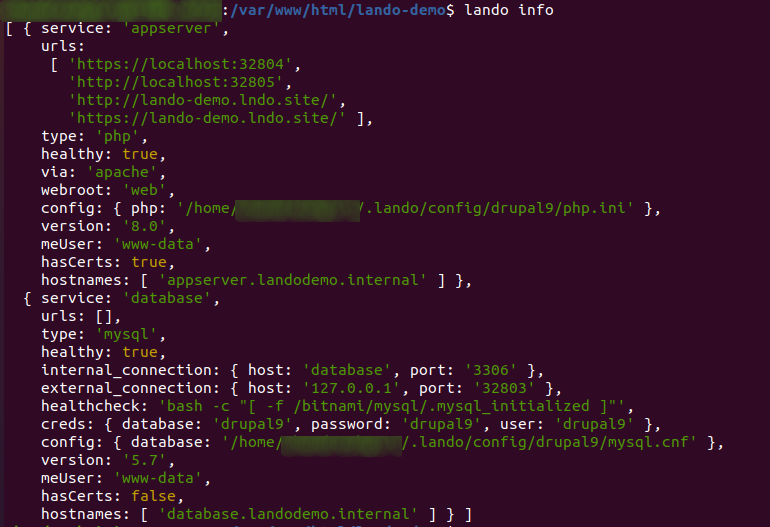
Get database details from the above screen from service: database section and set it into settings.local.php or settings.php. Proceed with further steps as you follow on normal Drupal installation.
Please click here to get familiar with some useful Lando commands.
Conclusion
Lando is a very powerful tool for managing local services, and it is effortless to install and configure. If you have basic knowledge of Docker, then you can easily customize and configure your Lando setup easily. That’s it! You are now ready to use Drupal with Lando.