In this article, we will learn a step-by-step process to set up Drupal multi-site, with a shared (single) codebase and a separate database per site on a local machine, using Lando.
When to consider multi-site?
- Before we dive into the technical details about setting up multi-site, let us first understand when to consider multi-site setup.
- The below-mentioned Pros & Cons and the reasons given will help you decide whether multi-site is suitable for your sites or not.
Pros:
- Easy to maintain:
- Less development cost:
- Have separate themes and features for each site:
Cons:
- Single point of failure:
- Site traffic management:
Please note that we are not going to cover instructions to install lando. Please see the official Lando document for details.
Let’s start with setting up a multi-site with lando
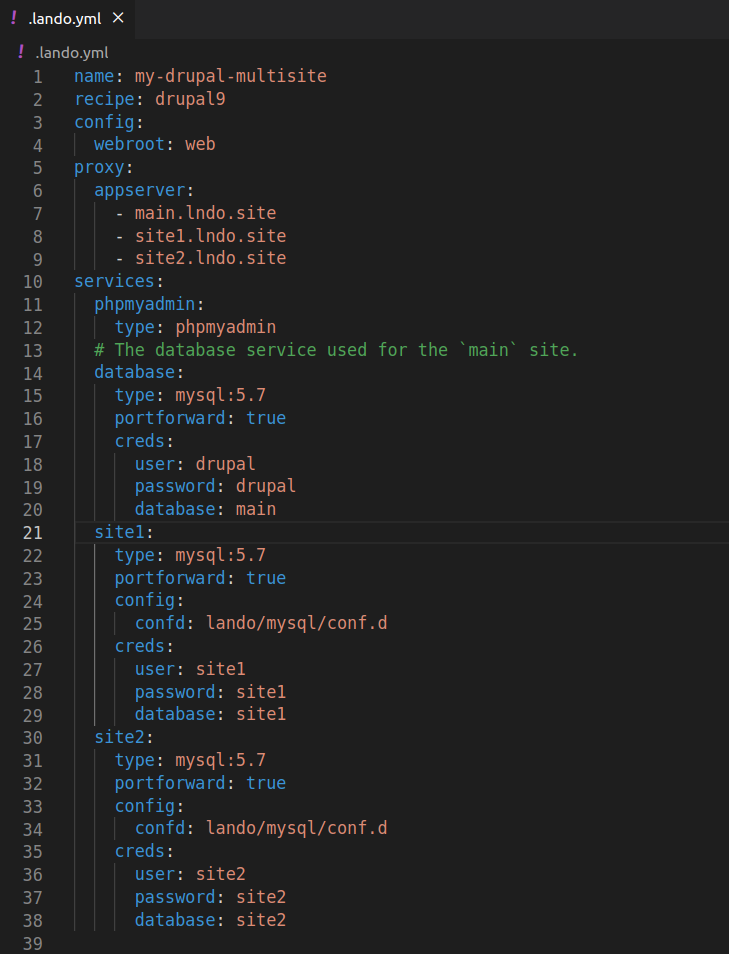
Step 1 – Configuring the .lando.yml file
- Lando works with a configuration file, allowing us to start different services so that our application works correctly. By default, in a normal Drupal installation, we would only have to run the lando init command, and this configuration file would be generated with everything necessary to run lando and Drupal without problems.
- However, in the case of a Drupal Multi-site installation, we will have to create our configuration file for lando and modify it according to our needs; for example, the URLs for our sub-domains, the access data for each database, etc.
- Although you can add many other configurations in a project of this type, below I will give you the basic file, with an explanation of each important section, so you can start several Drupal sites with Lando. Go to the folder where you have downloaded the Drupal Base files, then create a file called .lando.yml with the following code:
Explanation:
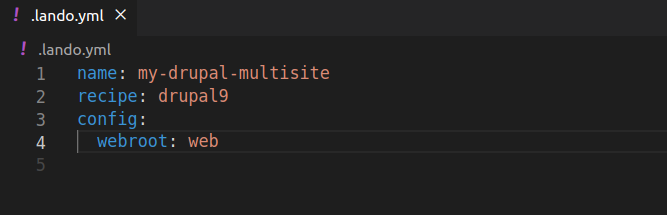
- In the first part of the configuration file, in addition to the project name, we have the main configurations, related to the web root.
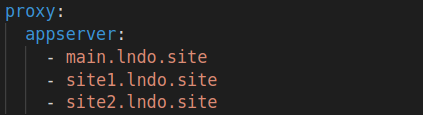
- In the Proxy section, we will define the different domains for our Drupal sites; the main name must correspond to their respective installation folder, just as happens in a Drupal Multi-site installation traditional.
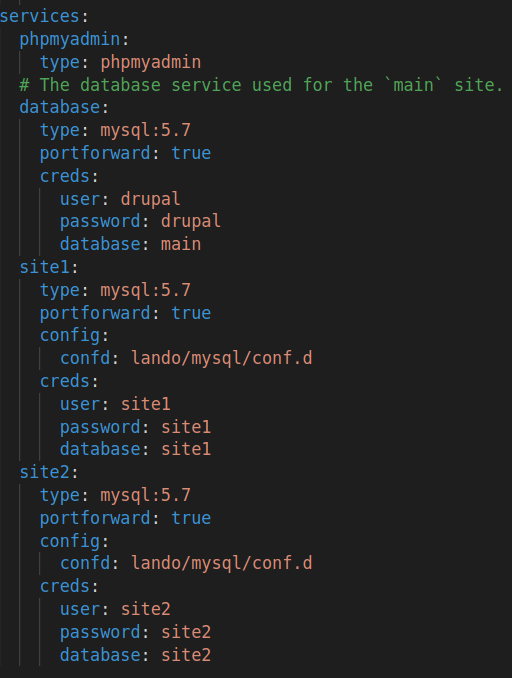
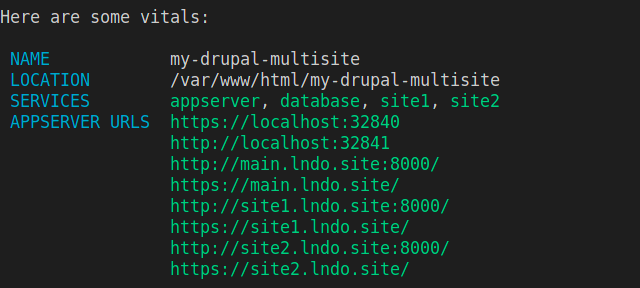
- The last part of the configuration file is where we will define all the data related to our databases. Remember that you can confirm all the information, once Lando is started, using the information command:
Step 2 – Setting up the main Drupal and multi-sites
At this point, before starting our Drupal project, we will have to make several adjustments:
- Rename the file example.sites.php and leave it as sites.php, inside we will have to add the different domains and the folders to which each of them will point.
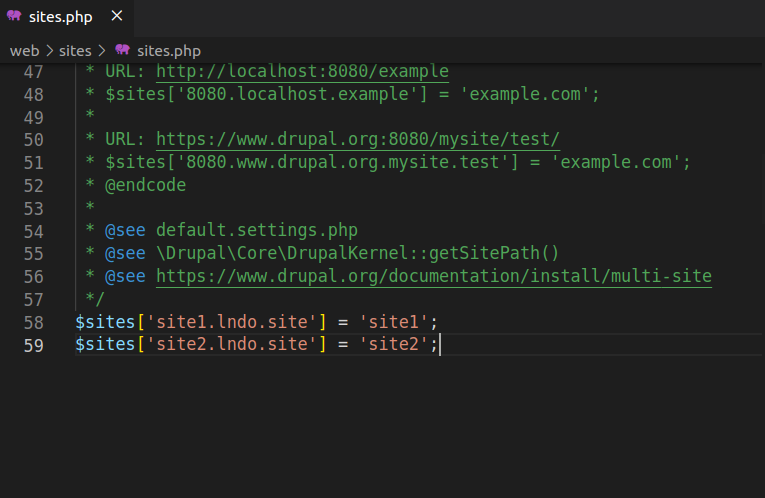
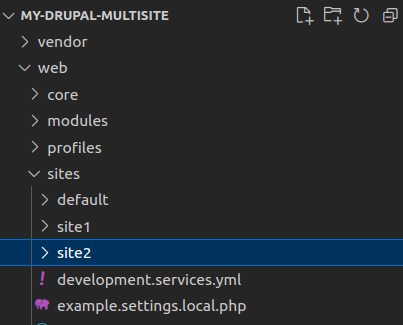
- Create the folders that correspond to the names of the domains that you have declared in the configuration file. The name of the folders must match both the name you have put in the lando configuration file and in the sites.php in the previous image.
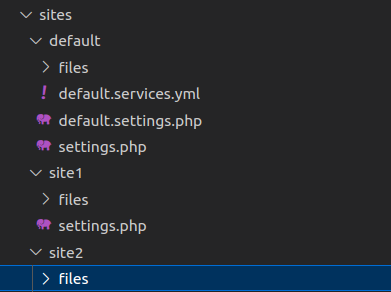
- Add configuration files to multi-sites. Every Drupal installation requires at least two files for its configuration: the file where all the access data to your database will be defined, called settings.php, and the files folder, where it will house all the files, images, cache, etc. .
So you will have to copy the model from the default.settings.php file that is inside the sites/default folder, and once inside each folder of your multi-sites, rename it to settings.php. Next you will create a files folder inside each folder.
- After creating each site folder, let’s permit the settings.php and /files directory.
          chmod a+w settings.php
         chmod a+w files
- Since we have all the necessary files to start installing each of our Drupal Multi-sites, we should execute the following commands in this order to avoid surprises:
    lando start
    lando composer install
    lando rebuild
    lando info
- With the “lando start” command, we will ensure that Lando boots correctly, using the configuration we have defined in the .lando.yml configuration file.
- The command “lando composer install” will start downloading the rest of the necessary dependencies to install our Drupal, since within the files, we will be missing main folders such as Vendor.
- The “lando rebuild” command performs a general review of the application. Once the files have been downloaded with Composer, at the end of the execution, the command should show us on the screen the different URLs available for each of the Multi-sites.
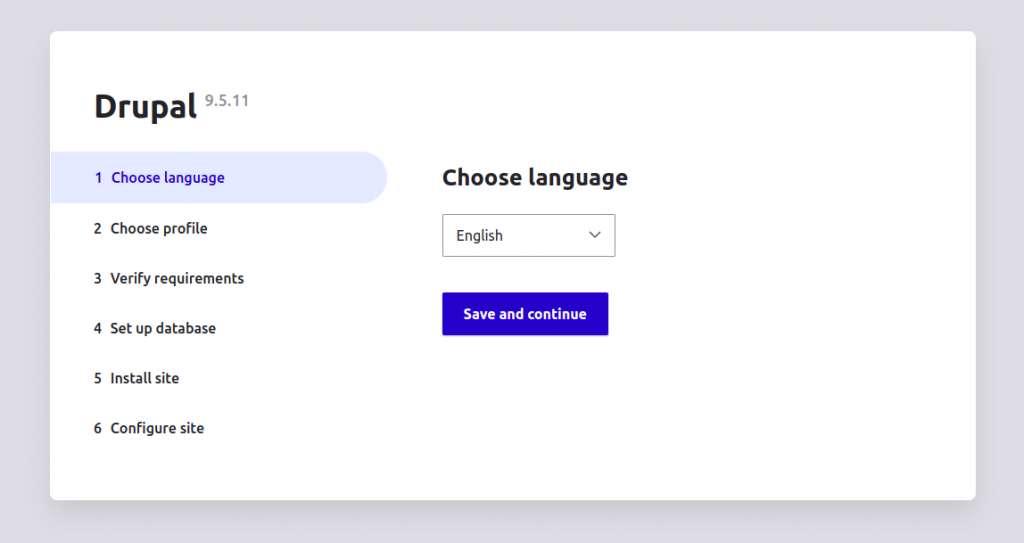
- While clicking on the above site URLs, it will take you to the drupal install page.
- The “lando info” command will help us confirm the access data to the databases, with their respective users and passwords.
- Once all the previous commands have been executed, we can begin the installation process of each of the multi-sites, writing the corresponding domain, which we have defined in the lando configuration file and which we confirm by executing the “lando info” command. Remember, if you install Drupal using Lando, you must change the localhost of the database server to the one that appears in the console.

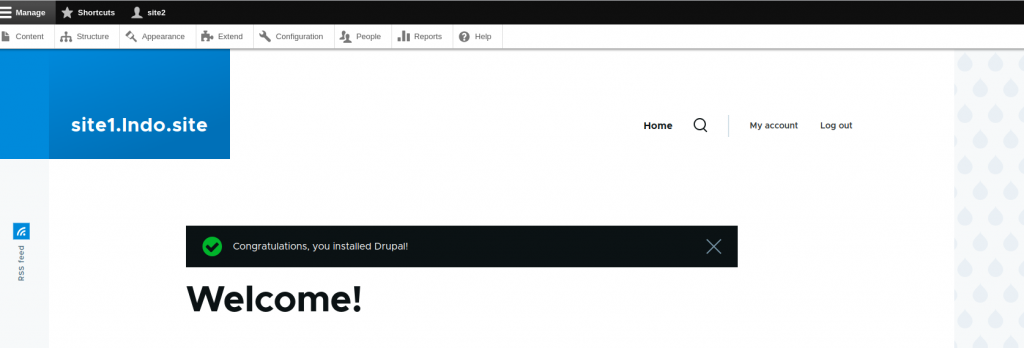
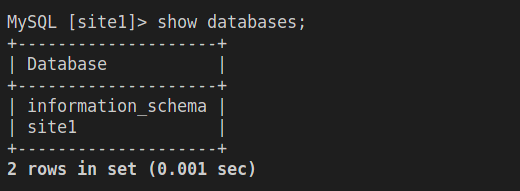
- Finally your multi-sites are successfully installed. For multi-sites DB access, you can use:
lando drush sql:cli --uri=http://site1.lndo.site:8080/
- Here –uri accepts the site URL created above after lando start. Now you can access their DB & continue to work on your multi-sites.
Conclusion
Throughout this blog, we delved into crucial aspects, gaining insights into fundamental site configurations and harnessing the power of Lando for seamless development. This newfound knowledge empowers us to establish robust Drupal sites and serves as a foundation for future endeavors. As we conclude this blog, let’s celebrate the accomplishment of mastering basic site and Lando configurations, paving the way for more efficient and streamlined Drupal development experiences.