In today’s digital age, data is at the heart of every organization. It serves as the lifeblood of businesses, offering valuable insights, facilitating decision-making, and driving operational efficiency.
Given the critical importance of data, companies must manage their data backups effectively to safeguard against data loss and ensure business continuity. However taking backups can indeed be a time and energy-consuming process, as well as the probability of all the human error possible in the process is vast.
So in order to save time and effort for the team, let’s start using the AWS service called AWS Backup.
AWS Backup is a fully managed backup service that centralizes and automates data protection across various AWS services, as well as on-premises environments. It simplifies the backup and recovery process, providing a unified solution for data backup, retention, and restoration.
Let’s start with understanding the components of service.
Backup plan
An AWS Backup service backup plan is a predefined policy that automates and manages backups for AWS resources, specifying settings like backup frequency, retention, and lifecycle rules for consistent and efficient data protection.
On-demand backup: An on-demand backup plan in AWS Backup Service allows for manual and immediate backup of AWS resources without following a predefined schedule. It provides flexibility for ad-hoc, one-off backups whenever needed.
Framework: In short, a framework in AWS Backup Service is a way to organize and manage backup policies for groups of AWS resources. It allows you to apply consistent backup settings and retention policies to multiple resources, streamlining data protection across various services.
Backup Vaults: Backup vaults are containers for organizing and managing backups. They provide a way to categorize and store backup data securely. Each vault can have access policies and retention settings, making it easier to manage backups for different purposes or departments.
Backup Vault Locks: Backup vault locks are a feature that enforces retention policies for backups stored in a vault. When a vault lock is enabled, it prevents the deletion of backups until the lock is removed or the retention period expires. This helps ensure data compliance and prevents accidental or unauthorized deletion.
Backup Plans: Backup plans are predefined backup policies that automate and manage backup operations for AWS resources. They include settings such as backup frequency, retention policies, and backup windows. Backup plans provide a consistent and efficient way to protect and retain data across various services.
Protected Resources: Protected resources refer to the AWS resources that you want to back up using AWS Backup. These resources can include databases, file systems, volumes, or other assets. You associate these resources with backup plans to ensure regular backups and data protection.
Jobs: Jobs in AWS Backup represent specific backup and restore tasks. When a backup plan is executed, it creates jobs to carry out the actual backup or restore operations. You can monitor the progress and status of these jobs in the AWS Backup console, allowing you to track the success or failure of your backup tasks.
Legal Holds: Legal holds are used for compliance and legal requirements. When a legal hold is applied to a backup, it prevents the backup from being deleted until the hold is removed. Legal holds help organizations preserve data for legal or regulatory purposes, even if the standard retention period expires.
How to use AWS Backup
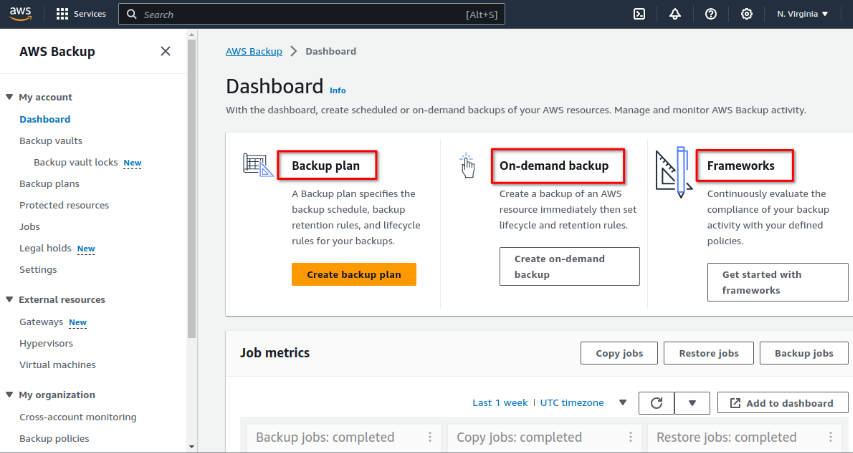
- Sign in to the AWS console, search for AWS Backup, and Dashboard opens up. Create a Backup plan:

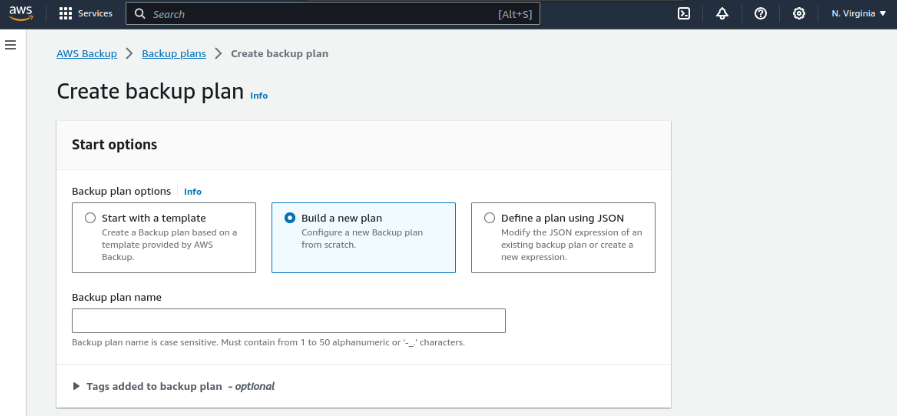
There are three ways to create a backup plan
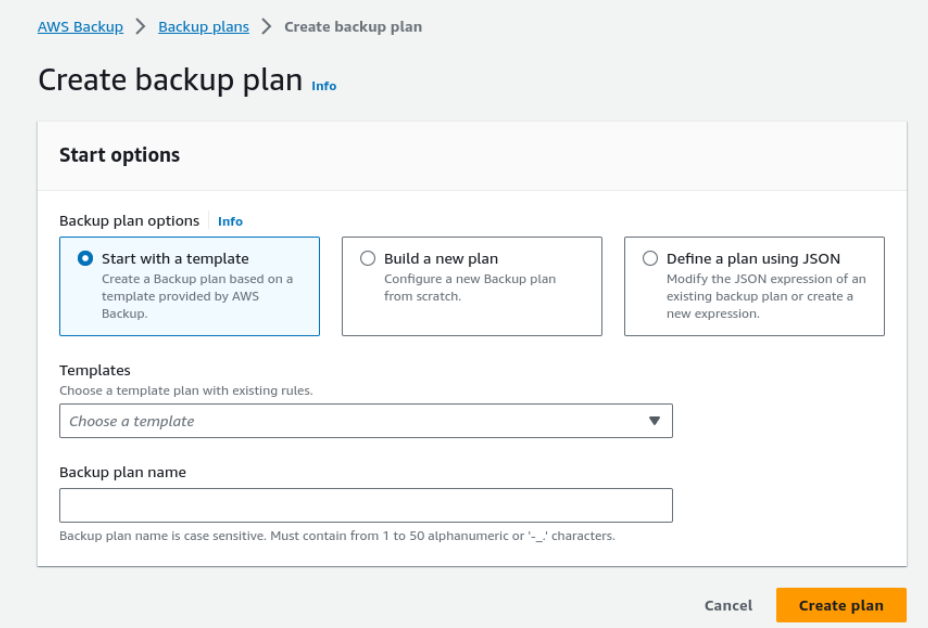
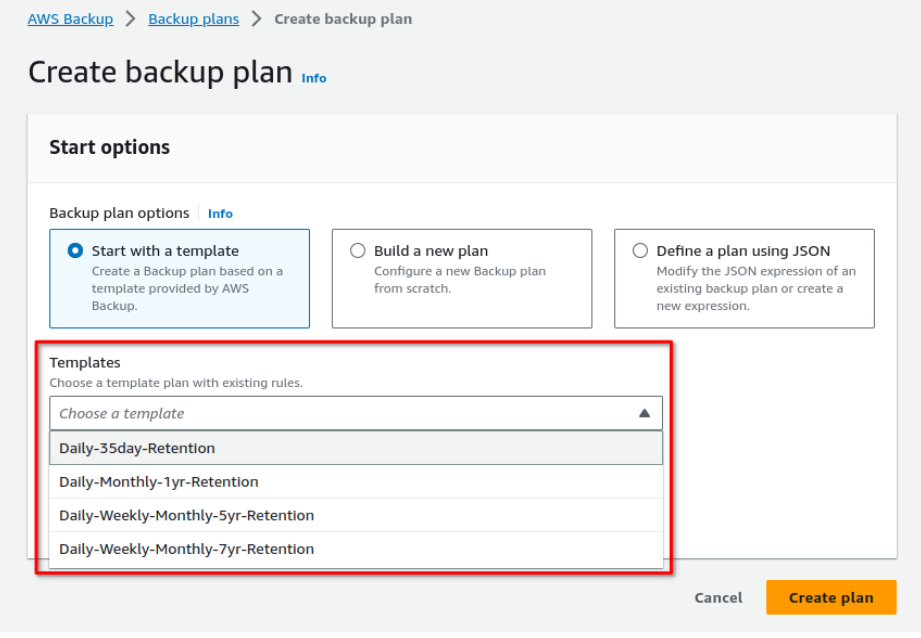
- Start with a template – Create a Backup plan based on a template provided by AWS Backup. The following templates are available: daily, monthly, and yearly.
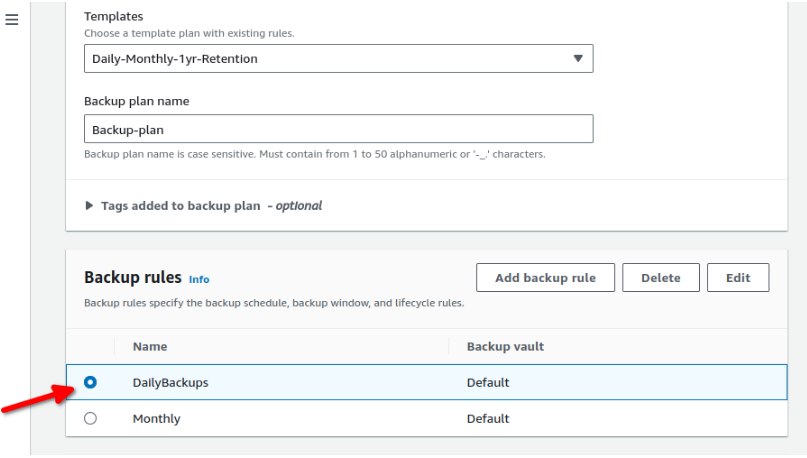
- Name the Backup plan and select the backup rule as per your requirements, daily or monthly.
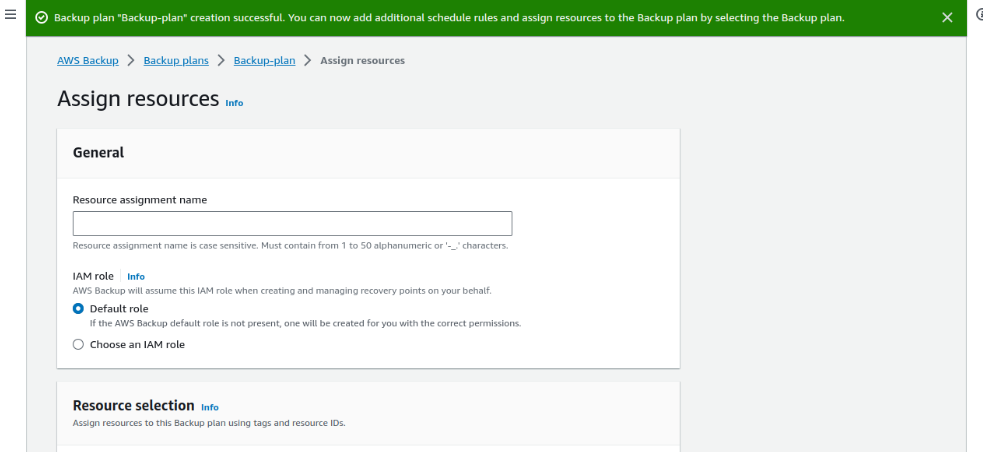
- After creating the plan, you need to assign resources to this plan. Name the resource assignment and select the default IAM role, which will be created by AWS with the required permissions, or create one manually.
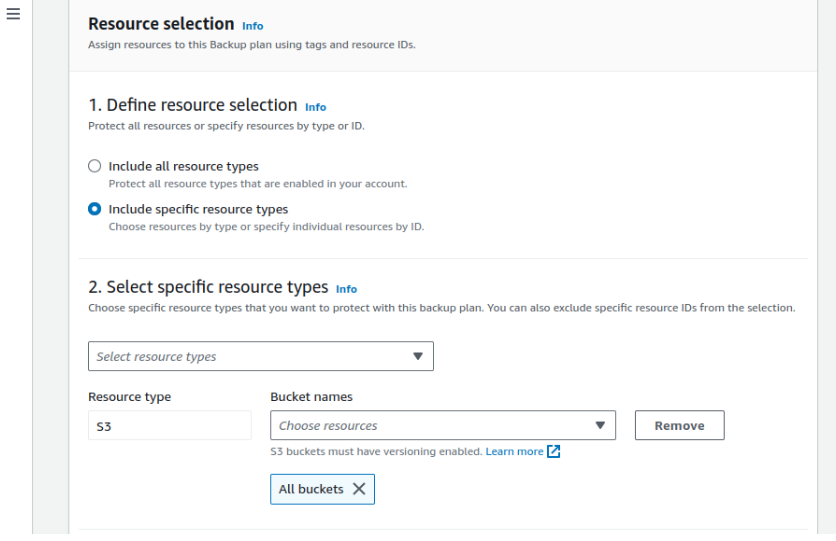
- Select the resources you want to take backup of according to this backup plan. You can select multiple resources such as EC2, RDS, S3, and more. You can also mention tags to filter resources.
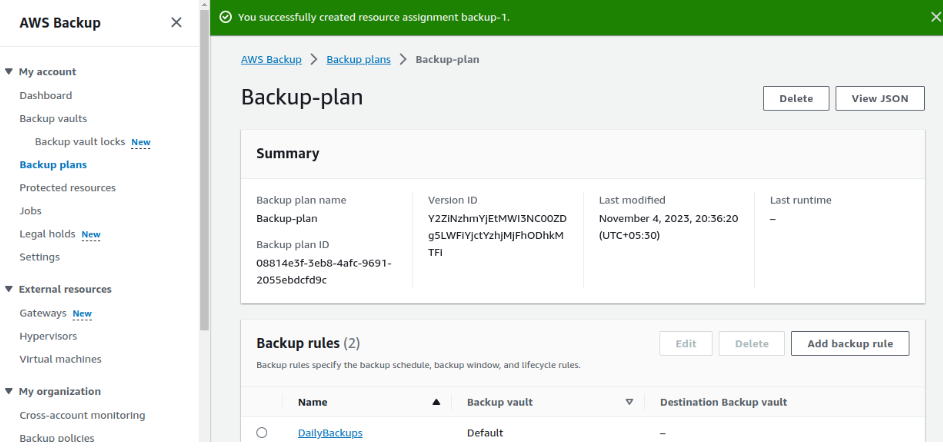
- A backup plan was successfully created.
- Build with a new plan- Configure a new Backup plan from scratch instead of using templates provided by AWS.
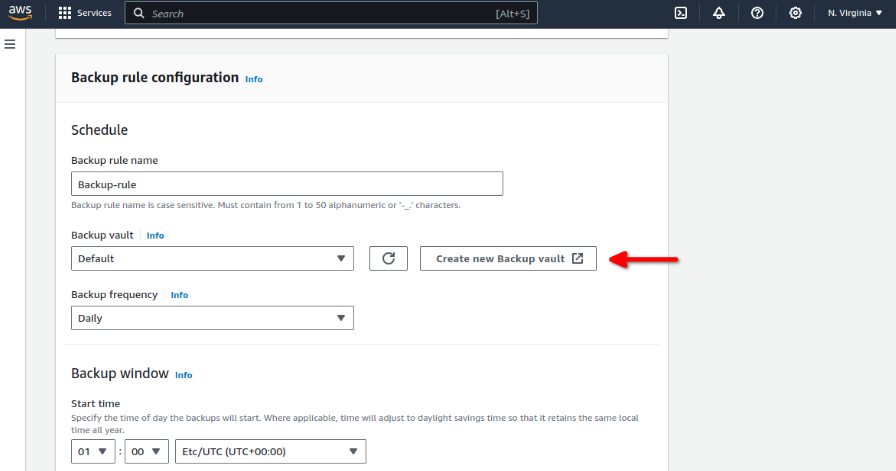
- Name the backup plan and backup rule as well. Now, you need to select a backup vault in which all the backups created using this plan will be stored. Select the Default vault or create a new one.
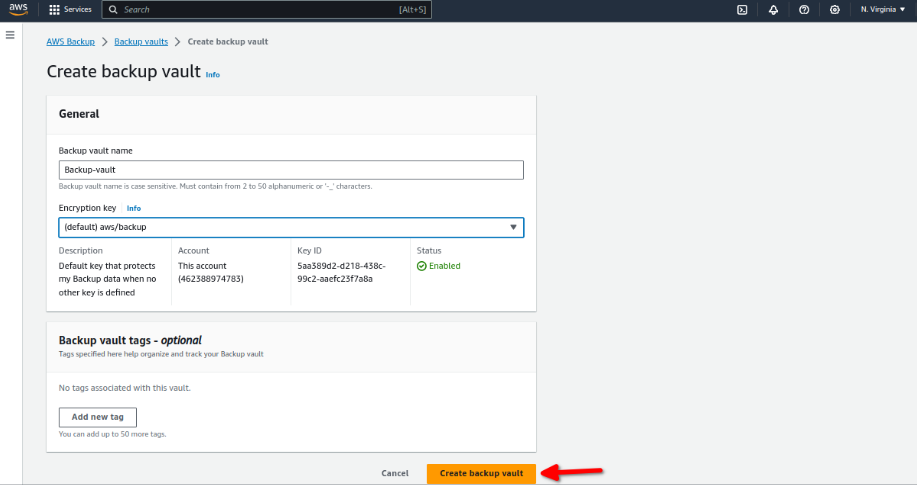
- Name the vault and select the KMS key that will be used to encrypt this vault. Select the default key or create a new key.
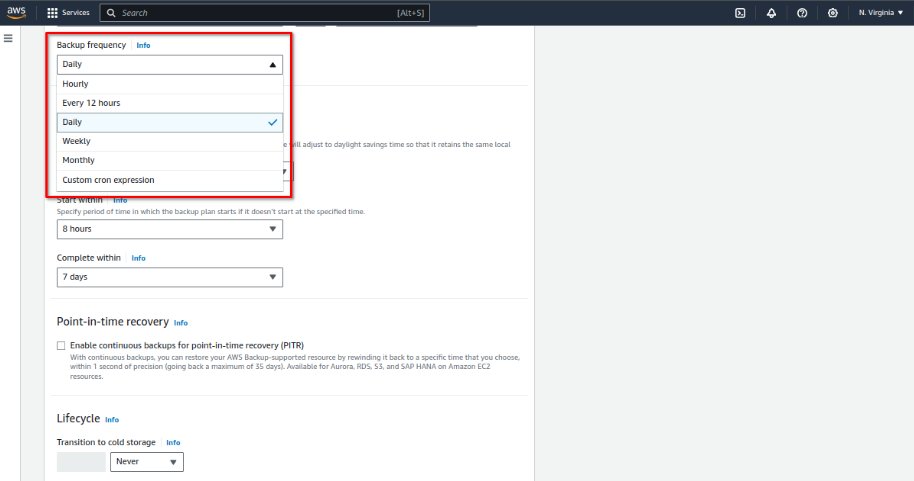
- Select the frequency of backup and the details of the backup window, the start time, start within time, and complete within time.
- When Point in Time Recovery is not selected, you must select the Transition to cold storage. This is the period after which the backups are sent from warm storage to cold storage, which is comparatively cheaper than hot storage, but the data is no longer accessible within seconds. Select retention period, the time for which a backup will be stored includes its days in hot storage and cold storage; after that period, the backup will be deleted.
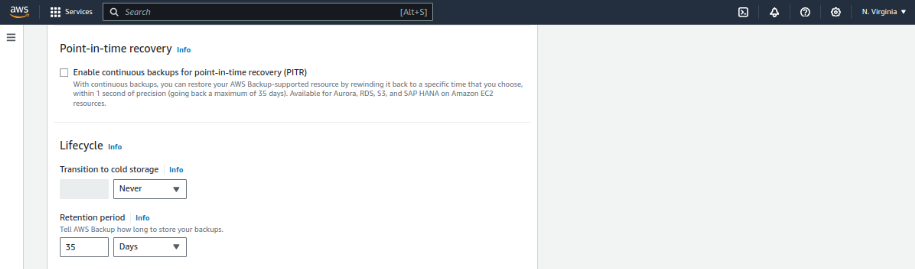
- With Point-in-time recovery selected, backups can be stored for a maximum of 35 days.

- You can choose to copy your backups to another region, create a backup vault in that region, and select the transition and retention period and backup will be copied to the destination.
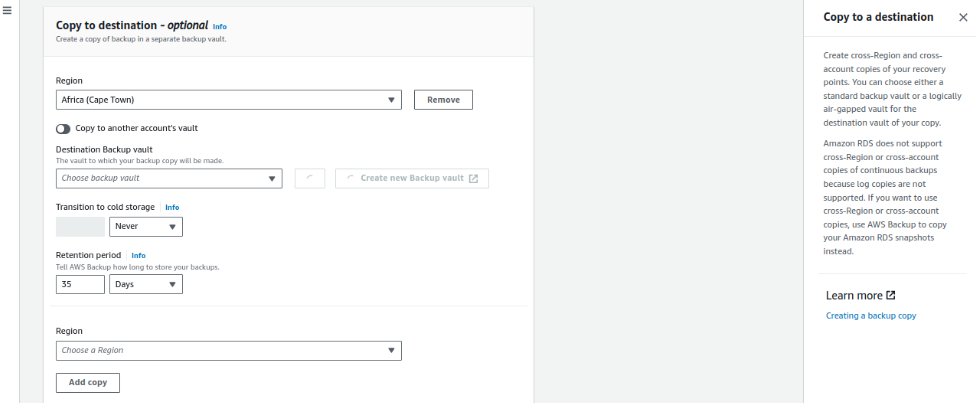
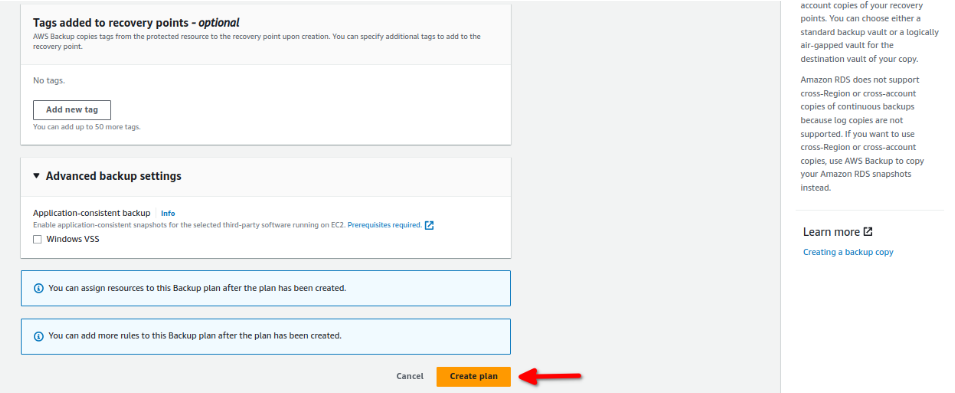
- Add tags and click on Create Plan.
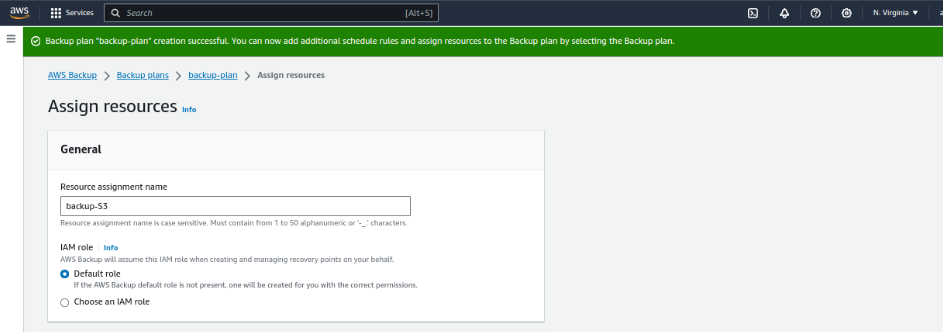
- After creating the plan, you need to assign resources to which you need to take the backup. Name the resource assignment and select the IAM role; upon selecting the default role, a role with required permissions will be created, or you can create a role manually.
- Include all resources.
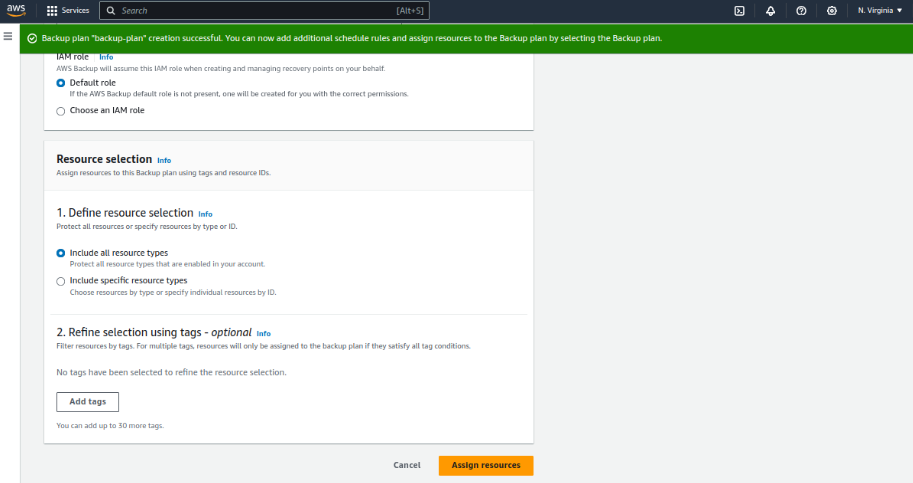
- Or select specific resources.
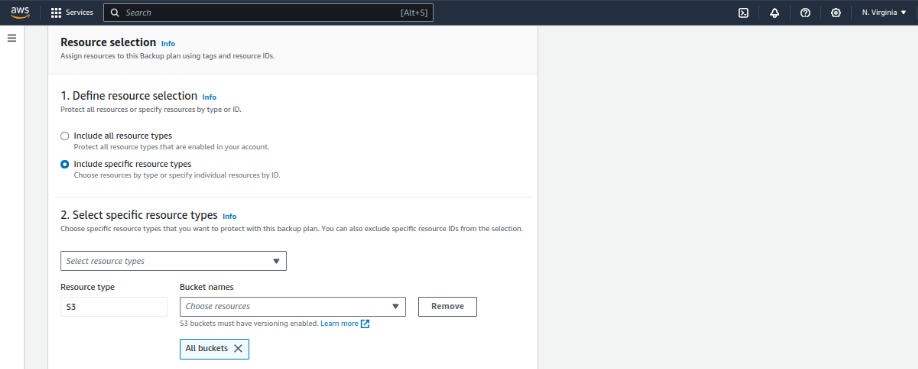
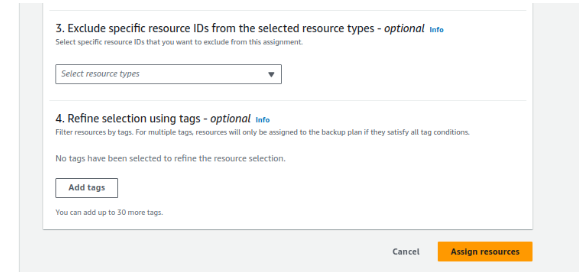
- You can also exclude resources using tags and then click on Assign resource.
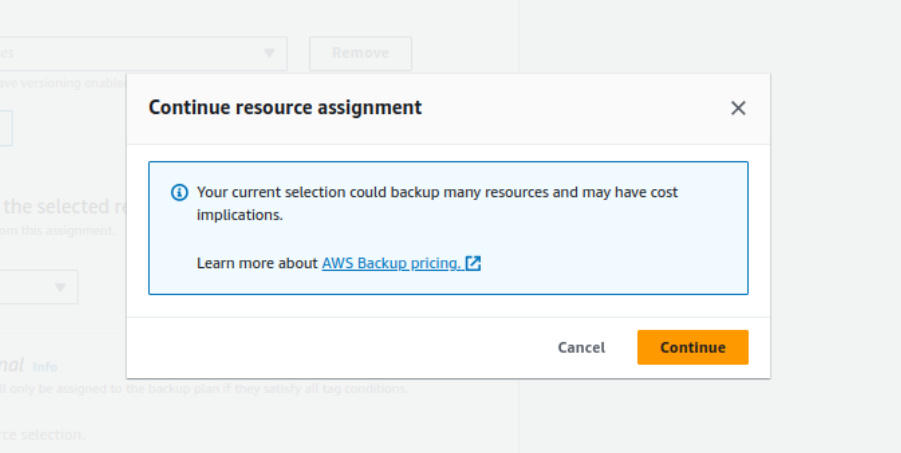
- Click on continue.
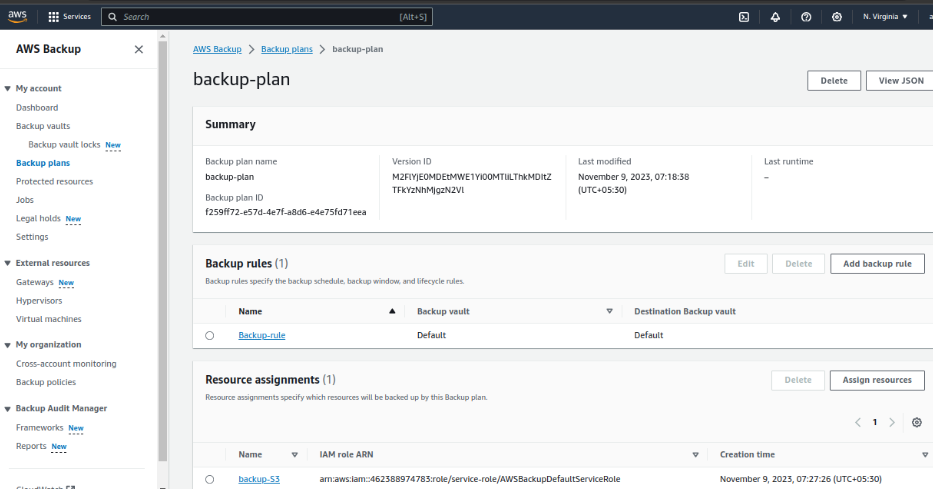
- Successfully created.
- Create a backup plan using Define a plan using JSON option.
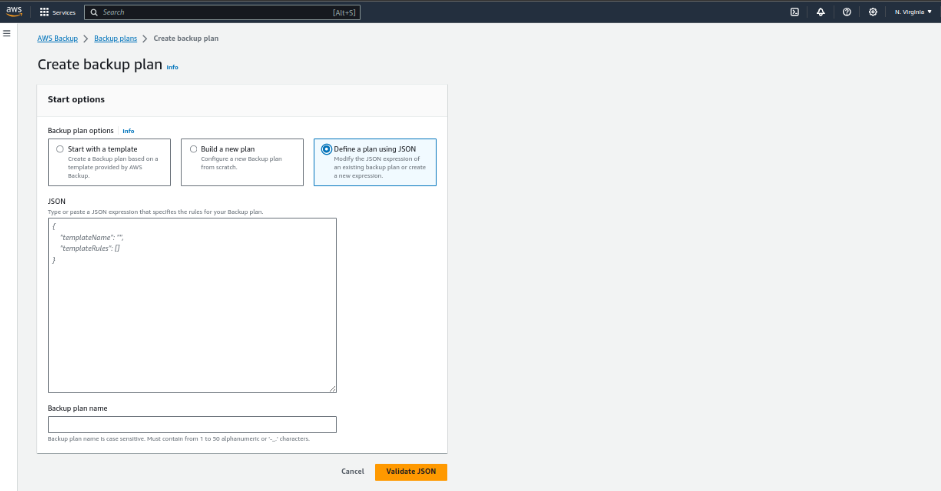
Modify an existing backup plan’s JSON expression or create a new one. Name the plan and click on validate JSON. After validating, you can create a backup plan. You can create a backup plan using the three ways described above.
In closing, remember that AWS Backup is not just a service; it’s a robust strategy. Your data is your lifeline, and a well-structured AWS Backup plan is the guardian that ensures it remains intact, ready for any challenge that the digital world may throw your way.