WordPress websites are mostly an easy target for attacks due to improper file permissions and vulnerable plugins being installed. Different factors that lead to attack on WordPress sites are :-
- Weak Passwords
- Vulnerable Plugins
- Obsolete version of WordPress being used
Possible Solution
Securing WordPress is a process and it involves a number of steps. A WordPress installation can be secured by a number of ways :-
- Setting Strong Password Policy
- Allowing Admin Access from specific IP only
- Restricting Directory Listing
- Implementing File Protection
- Specifying Upload file limit
We came across a number of security plugins for WordPress that can effectively secure it and one of them is iThemes Security. iThemes Security can secure our WordPress installation from common loopholes, stop automated attacks and strengthen user credentials.
So, this is a series of blogs explaining iThemes Security and its implementation. In this blog post, I will cover the “Global Settings” section and other sections will be covered in my next blog.
iThemes Security
This is a security plugin (formerly known as Better WP Security) that gets integrated into the admin panel of our WordPress account. Simply, clicking on the Security tab on the left reveals the complete interface of the iThemes Security. It can be installed from this link.
Dashboard of iThemes Security
The default dashboard consists of the following components:
-
Security Status
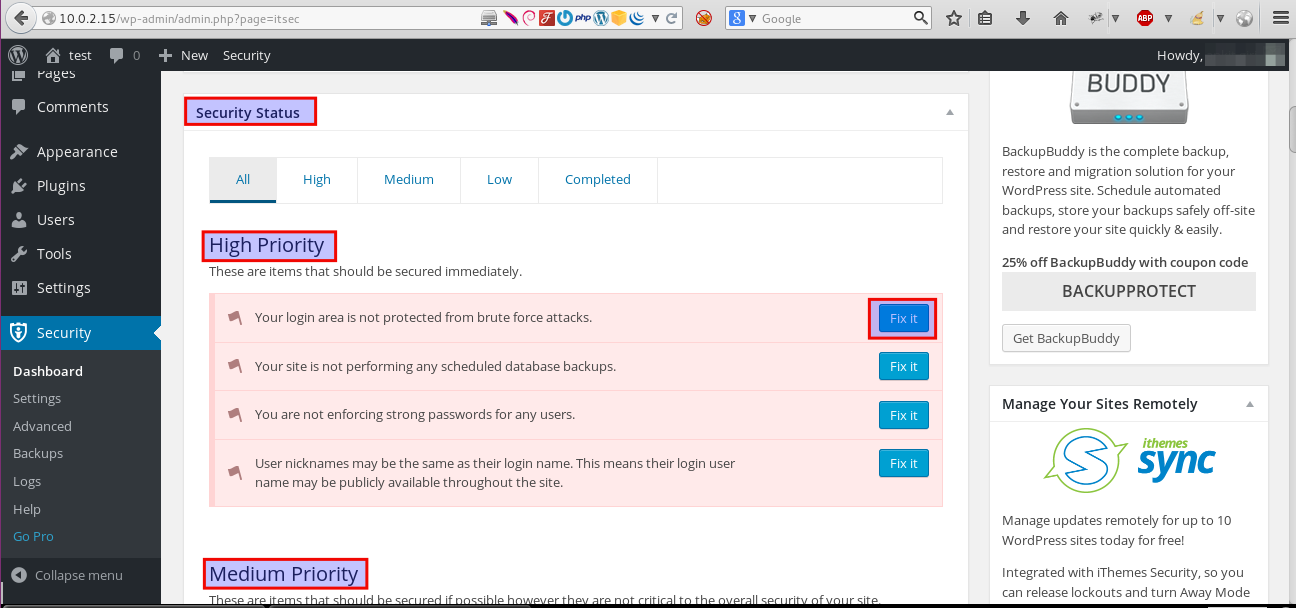
It will show High Priority, Medium Priority and Low Priority security issues and Completed security issues. We can also fix the security issues by clicking the “Fix It” button.
-
WordPress File Permissions
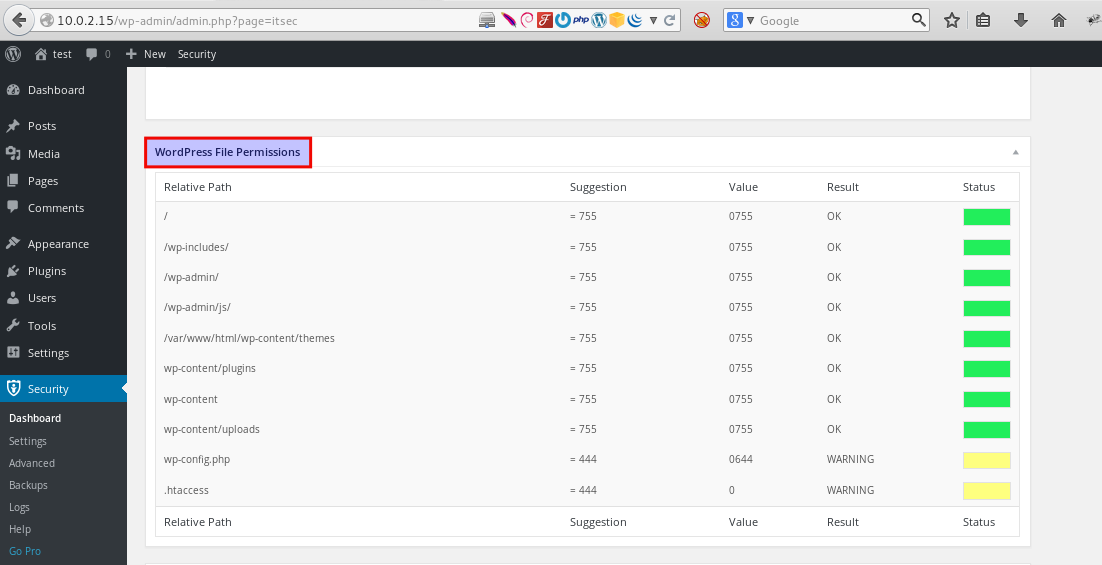
The file permissions block shows the existing permission, suggested permissions and status (vulnerable or not vulnerable).
- File System Information
- Database Information
- Server Information
- PHP Information
- WordPress Configuration
- Activate Lockouts and the feature to Release Lockouts.
Configuring iThemes Security
The iThemes setting tab in the interface has different sections. These sections have the detailed configuration. Different sections present are as follows :-
- Global Settings
- 404 Detection
- Away Mode
- Banned Users
- Brute Force Protection
- Database Backups
- File Change Detection
- Hide Login Area
- Secure Sockets Layer
- Strong Passwords
- System Tweaks
- WordPress Tweaks
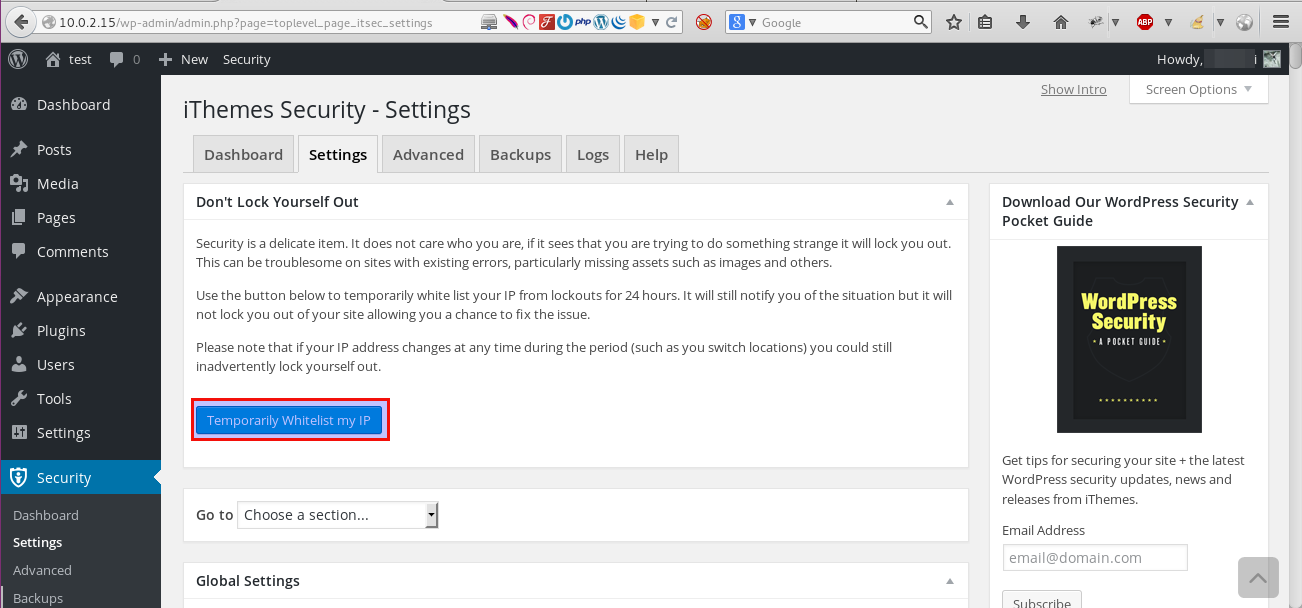
The button “Temporarily Whitelist my IP” prevents us from being locked out from our site.
Global Setting
The general settings that are required to be configured basically come under this section.
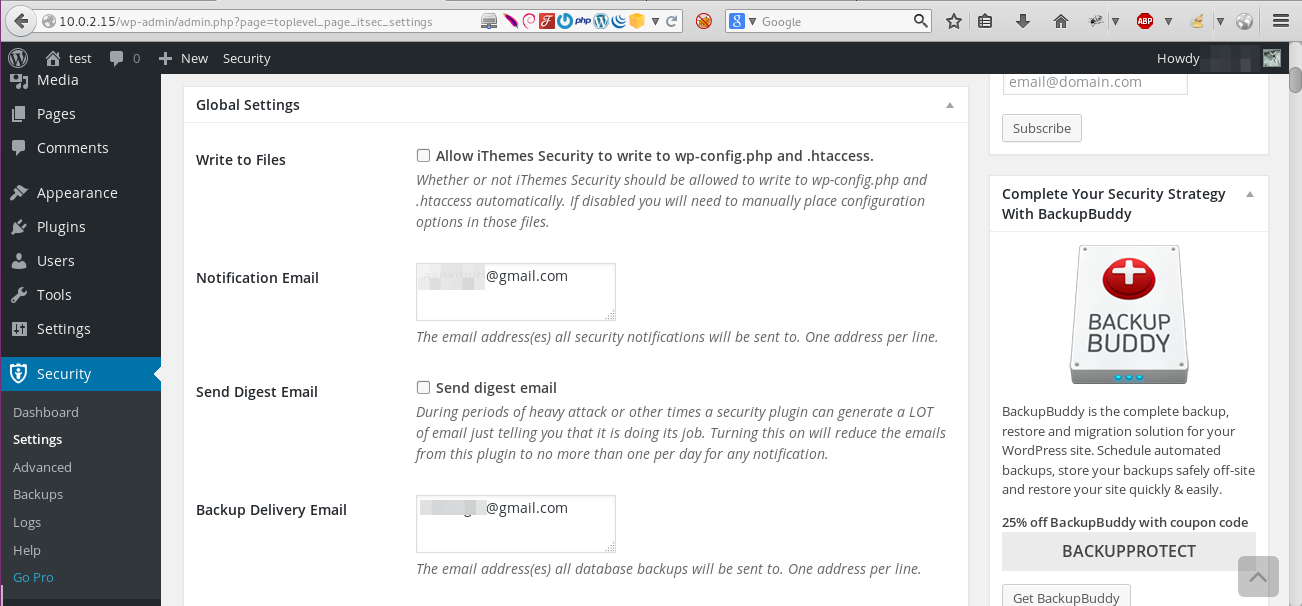
1) The first configuration “Write to Files” is the checkbox we need to select if we want to give iThemes plugin write access to the WordPress configuration files such as .htaccess and wp-config.php.
2) The “Notification Email” is the e-mail address to which we want to send the notification about the security alerts and misconfigurations.
3) The “Send Digest email” will restrict the number of emails sent to the notification email we have set in the previous section to a maximum of one mail a day.
4) The “Backup Delivery Email” is the e-mail address we want our database backups to be sent. We can set multiple e-mail accounts by inputting one email address per line.

5) The “Host Lockout Message” is the message which will be displayed to the user in case the computer system (host) is locked out due to continuous incorrect login attempts. We can also input HTML code to be displayed to the user.
6) The “User Lockout Message” is the message which will be displayed to the user in case the user account is locked out due to continuous incorrect login attempts.
7) The “Community Lockout Message” is the message to display to a user when their IP has been flagged as bad by the iThemes network.
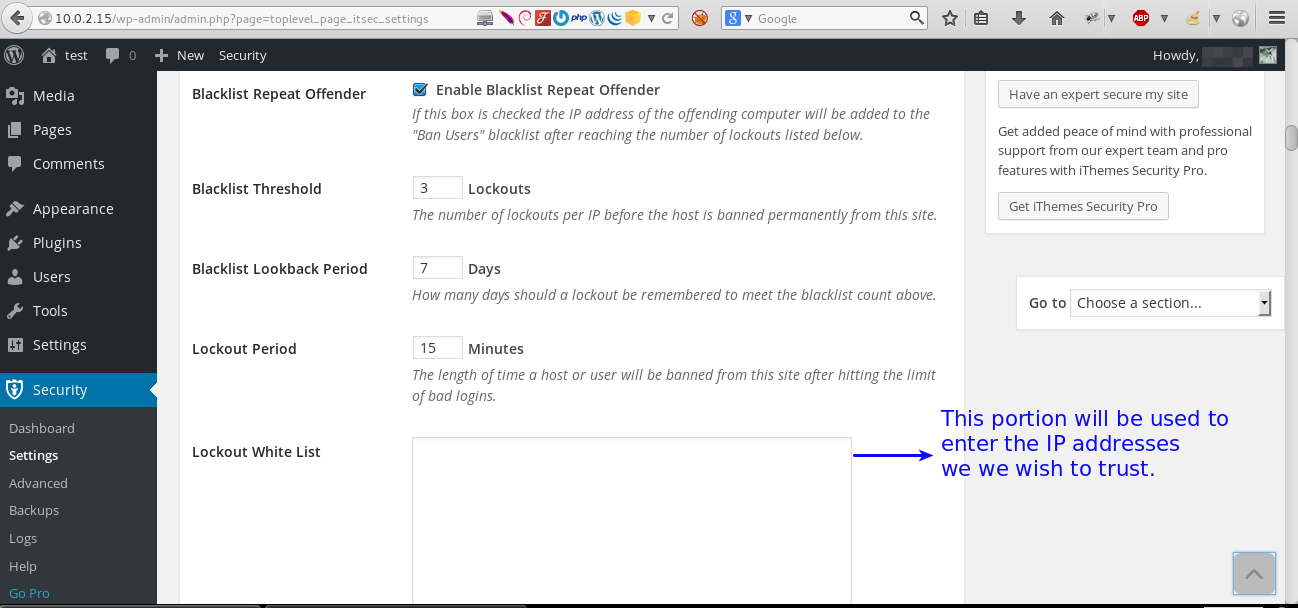
8) The “Blacklist Offender” is the checkbox that enables the banning of users according to the rules mentioned in the sections below.
9) The “Blacklist Threshold” is the number of Lockout from a particular IP that will permanently ban the IP of the user from which he/she is trying to log in.
10) The “Blacklist Lookback Period” is the number of days that the iThemes will remember the lockouts.
11) The “Lockout Period” is the time duration, during which the incorrect login attempts made will lead to banning the particular host or the user account.
12) The “Lockout Wishlist” can be used to whitelist users by individual IP address or IP address range.
Note: IP addresses must be in standard IPV4 format (i.e. 255.255.255.255 or 172.100.10.10/32). Wildcards (*) and a netmask is allowed to denote a pool of IP addresses. If using a “*” we can start with the right-most number i.e. 172.100.10.* and 172.100.*.* are permitted but 172.100.*.10 is not permitted. Enter only one IP address or one IP address range per line. This white list will prevent the IP’s listed from an automatic lockout. We can still choose to block the IP addresses manually by making an entry in the “banned users” settings.
It is important to assess the level of security of your WordPress application at regular intervals. This is as simple as answering a 5-minute questionnaire like the one below –
A detailed understanding of sections 404 Detection, Away Mode, Banned Users will be covered in my next blog post. Stay tuned 🙂