When working with AEM, we often have to make changes to our jcr content while developing components and to get those changes up to the AEM server, we have to deploy code again and again. These multiple deployments can slow down our development cycle and eat up developers’ time. So to tackle this problem, we can use the “AEM Repo tool”.
AEM repo tool is a simple solution to transfer jcr content from our local file system to the AEM server without deploying the whole code. This tool simplifies the transfer of files for the developers and makes the development cycle faster and more efficient. It can be integrated with IntelliJ or Eclipse.
Setting up the Repo tool on other OS is relatively straightforward, but for Windows, it can get a little tricky. So today, we will see step by step setup of the AEM repo tool on windows and will integrate it with IntelliJ.
Prerequisite
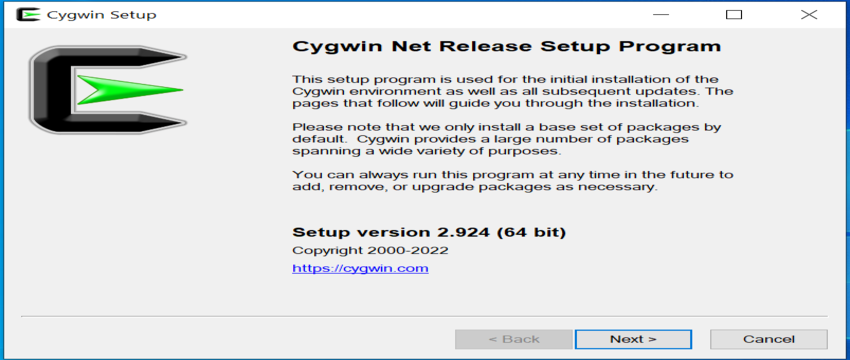
Install Cygwin for windows from the following link: https://www.cygwin.com/install.html
- Run the setup-x86_64.exe file downloaded from the above link and click “Next” to continue.
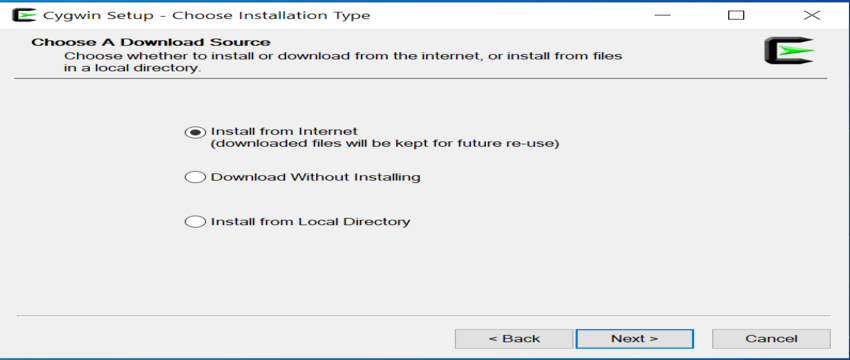
- A prompt to select the download source should appear. Here select “Install from Internet” and click “Next” to proceed.
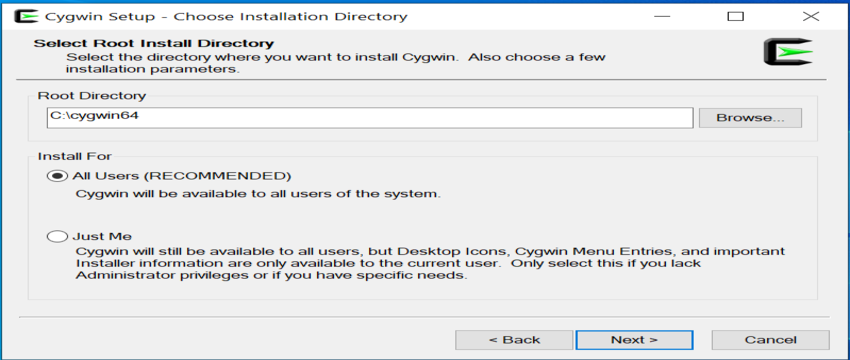
- Now it will ask to select the root installation directory and whether it should be installed for “All User” or “Just You.” Unless changing to the root directory is unnecessary, keep settings as default and click on “Next” to continue.
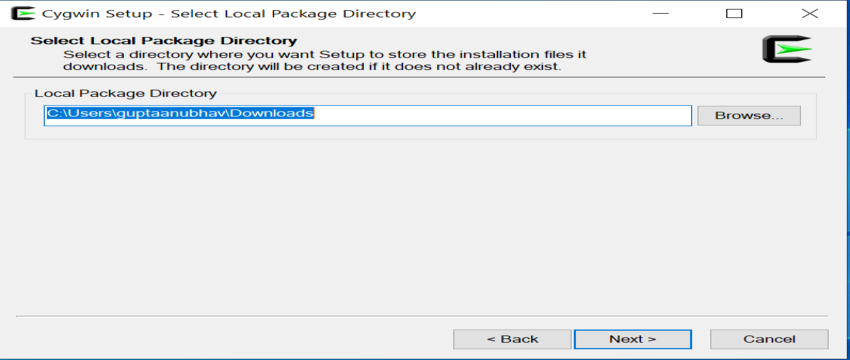
- To download the package files, the setup will ask you to specify a “Local Package Directory,” which by default points to system’s “Download” folder. In case you want to specify another location, specify its path here and click “Next” to proceed with the setup.
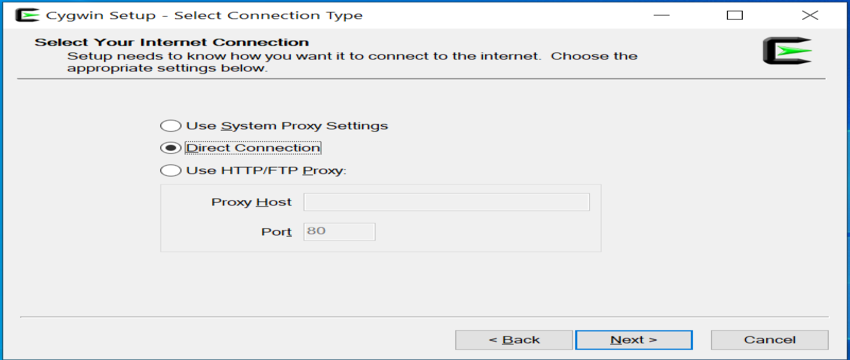
- In this step, the setup will ask to choose the internet connection. You can either select “Use System Proxy Settings” or “Direct connection” to proceed ( in my case, I’ve used “Direct connection” ). Click “Next” to proceed.
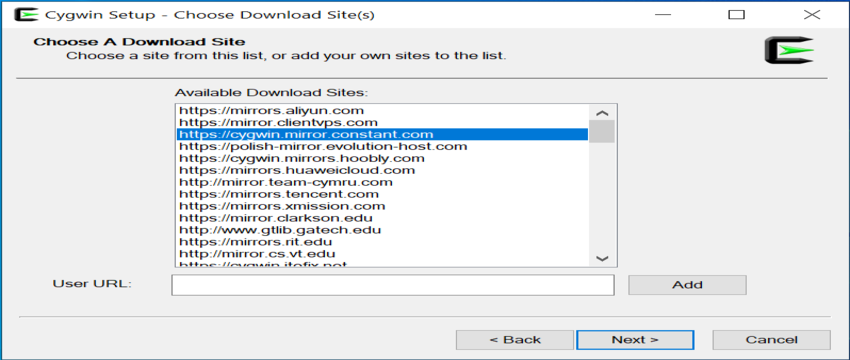
- In this step, the setup will ask you to choose a download site. You should ideally choose a site based on which domain is closest to your geographical location, as there are multiple top-level domains listed, such as .com, .au, .nz, .ca, etc.….. In my case in India, I chose “https://cygwin.mirror.constant.com”. If you are confused about which one to select, you can click on anyone in the list and click “Next” to continue.
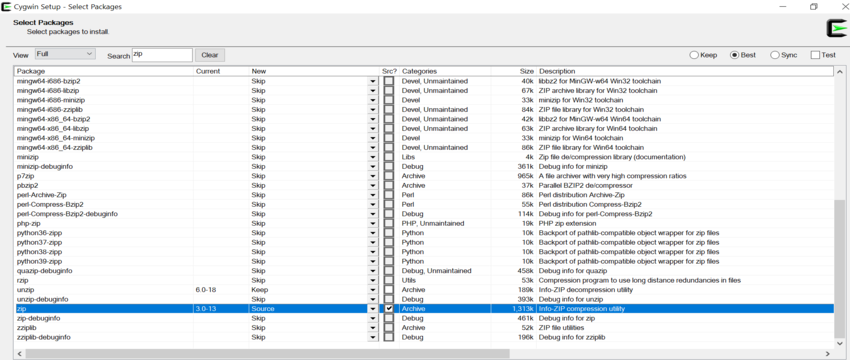
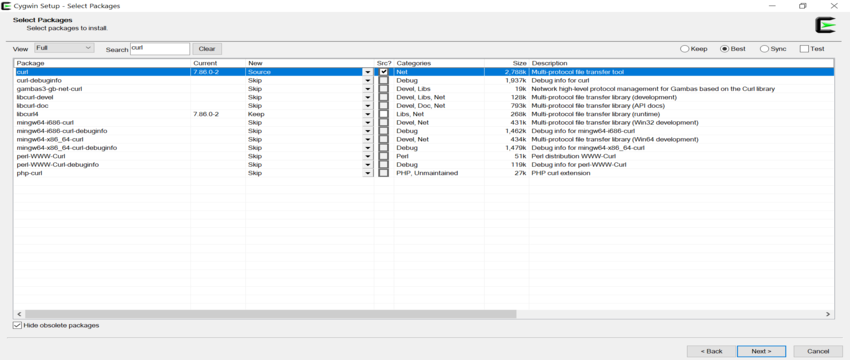
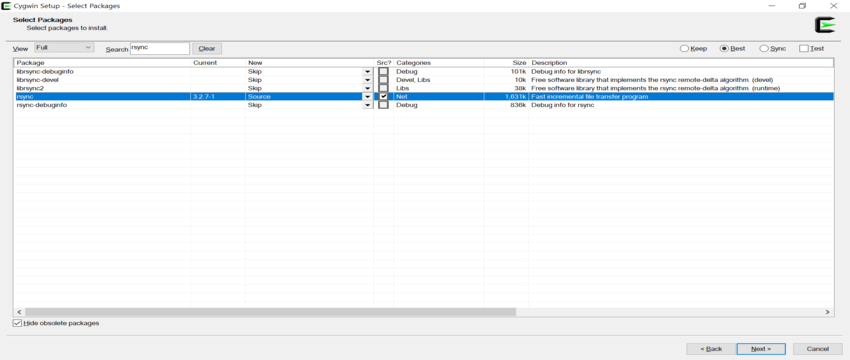
- Cygwin provides a lot of UNIX/Linux-based utilities that run on Windows. Not all packages get installed by default. Only a minimal set of important packages gets installed. In this step, you can customize the Cygwin setup by selecting/un-selecting different categories of packages. Now for our AEM Repo tool to work properly on windows, we need the following mandatory packages to be installed : zip, unzip, curl, rsync.Note: Make sure you install zip, unzip, curl, rsync packages with the cygwin installation. After selecting all the required packages, click on “Next” to continue.
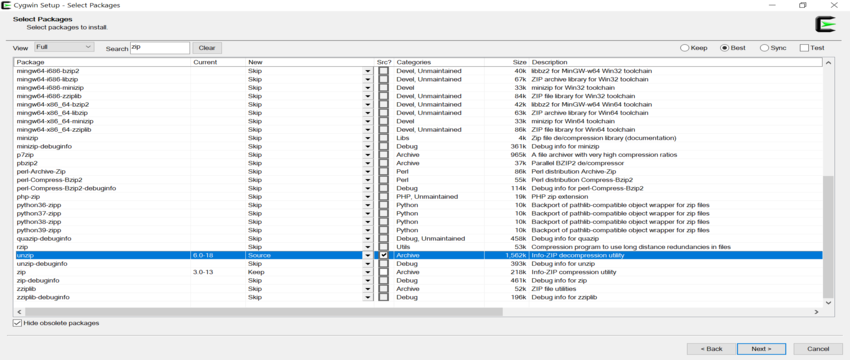
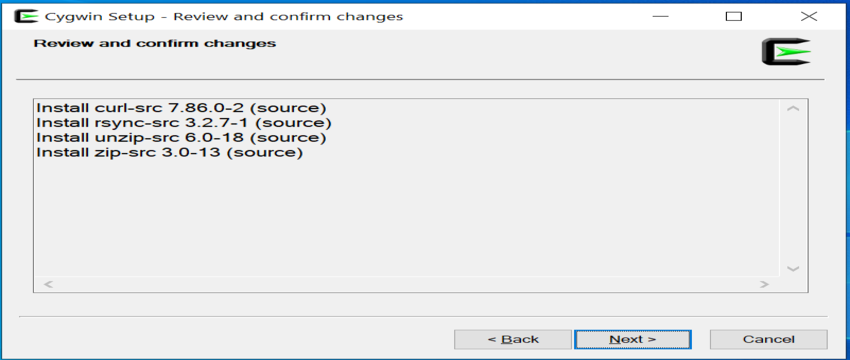
- Now verify all the packages that you have selected and click on “Next” to continue.
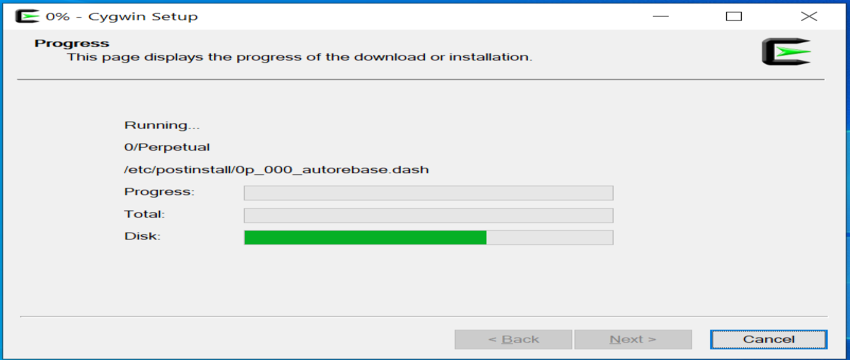
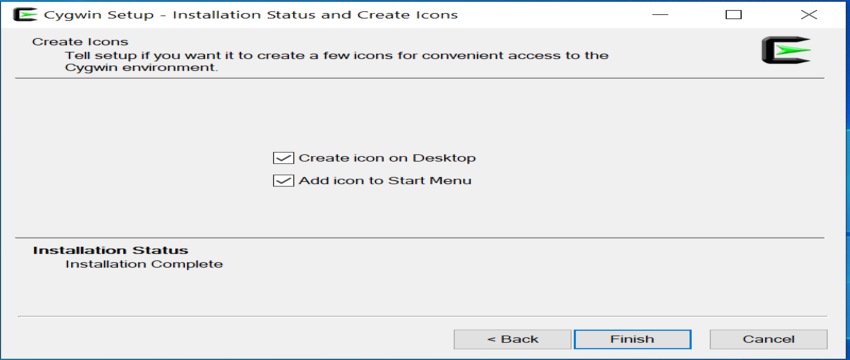
- Now the download will start for the selected packages, and the installation will be finished. Click on “Finish” to complete the Cygwin installation with the required packages.
Downloading and installing Repo tool
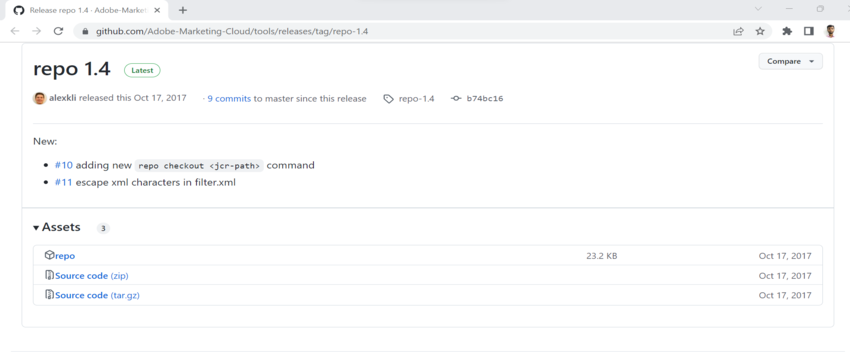
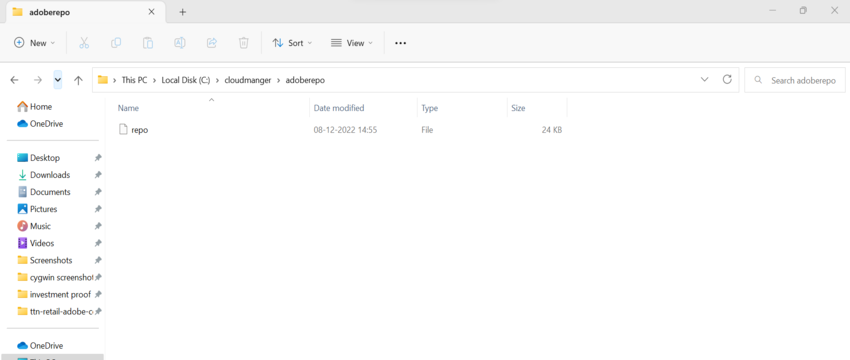
Create a folder called adoberepo under the c:\cloudmanager. Download the repo tool from here https://github.com/Adobe-Marketing-Cloud/tools/releases/tag/repo-1.4 and install it by copying the repo file and placing it under the c:\cloudmanger\adoberepo folder.
We can download the “Source Code (zip)” from the above link. Extract the zip and copy the “repo” file to the above folder.
Configuring the Repo tool in IntelliJ
- Launch IntelliJ
- Hit the Ctrl+Alt+S keys to launch the settings window.
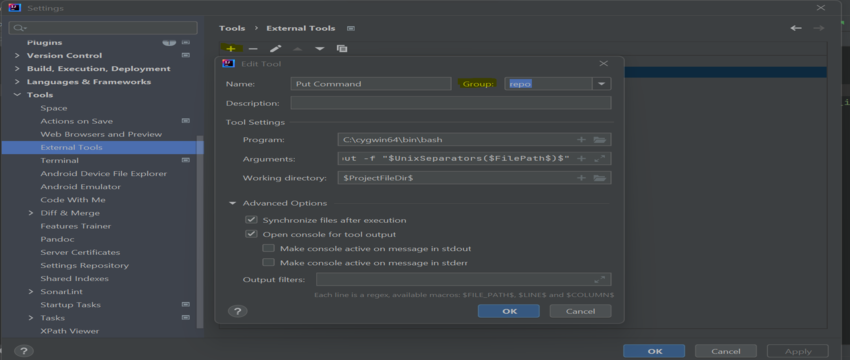
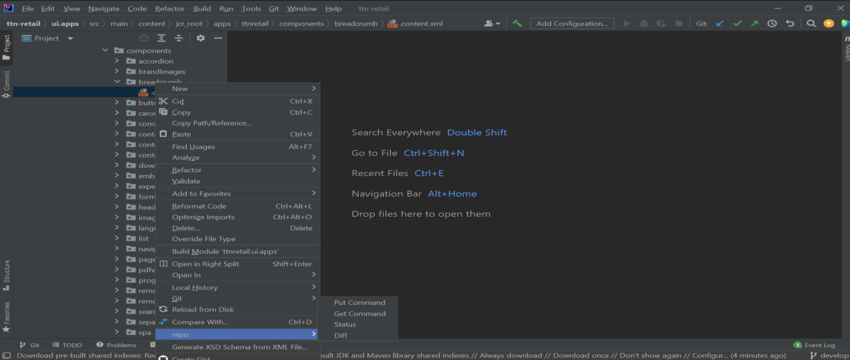
- Select Tools->External Tools, click the + sign and enter the following as shown in the screenshot.
- Make sure you create a group called repo by typing in “repo” in the Group drop down field (when creating the first command) and all the commands that you create belong to the repo group ( after creating group in the first command, select “repo” from dropdown for all other commands ).
Creating commands :
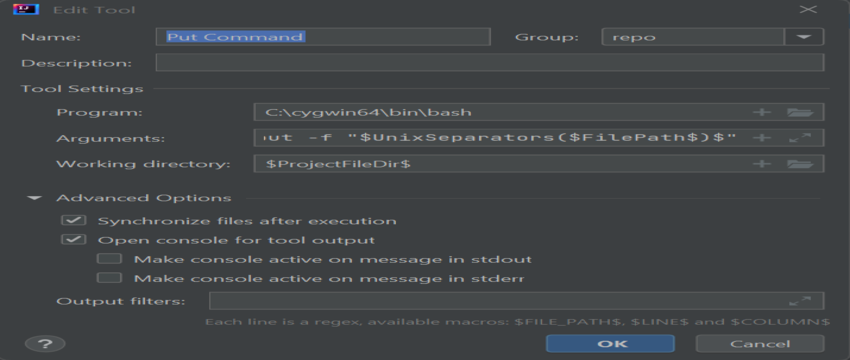
- Put Command
Program: C:\cygwin64\bin\bash
Arguments: -l C:\cloudmanger\adoberepo\repo put -f “$UnixSeparators($FilePath$)$”
Working Dir: $ProjectFileDir$
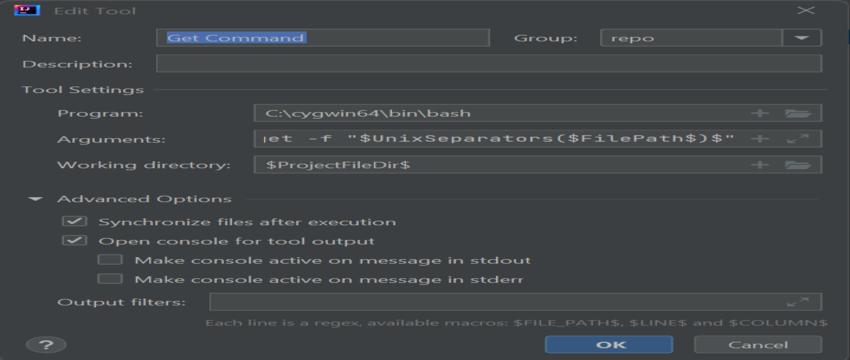
- Get Command
Program: C:\cygwin64\bin\bash
Arguments: -l C:\cloudmanger\adoberepo\repo get -f “$UnixSeparators($FilePath$)$”
Working Dir: $ProjectFileDir$
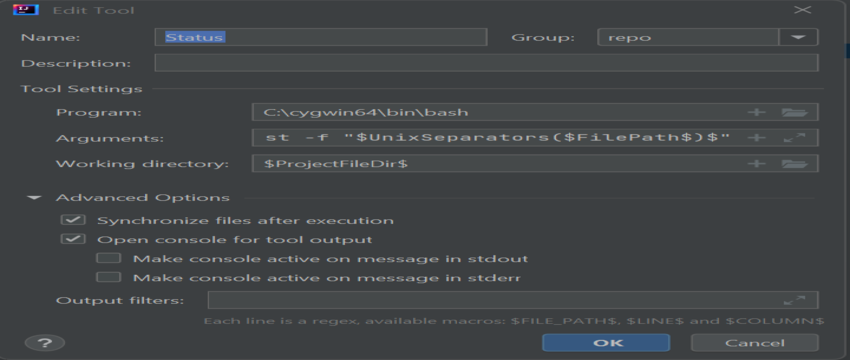
- Status Command
Program: C:\cygwin64\bin\bash
Arguments: -l C:\cloudmanger\adoberepo\repo st -f “$UnixSeparators($FilePath$)$”
Working Dir: $ProjectFileDir$
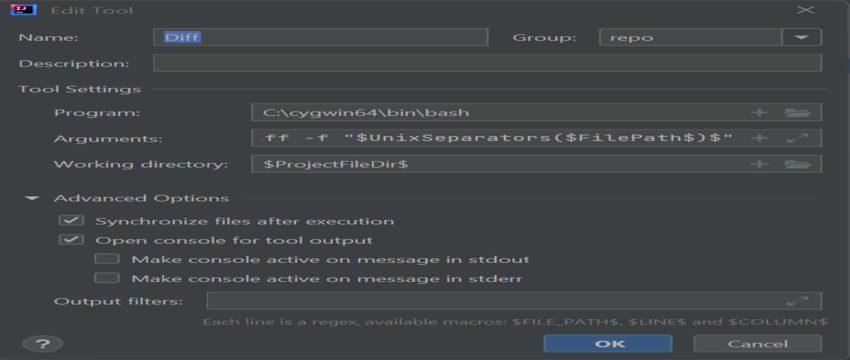
- Diff Command
Program: C:\cygwin64\bin\bash
Arguments: -l C:\cloudmanger\adoberepo\repo diff -f “$UnixSeparators($FilePath$)$”
Working Dir: $ProjectFileDir$
Adding keyboard shortcuts for the above command :
- Hit the Ctrl+Alt+S keys to launch the settings window.
- Click on Keymap.
- In keymap list go to external tool -> <group_name> -> <command_name>
- Click on any command for which shortcut needs to be added then click on “Add keyboard shortcut”.
- Then add whatever shortcut you want for that command. Such as “ctrl+shift+p” for the put command.

Configuring AEM credentials in .repo file
Extract the .repo file from repo.zip and place it in the AEM project root folder. (C:\CloudManager\aem-banking-application). Open the .repo file and ensure the server and credentials settings match the environment.

Open the .gitignore file and add the following towards the bottom of the file and save the changes
# repo
.repo

Validate the installation on IntelliJ
Select any folder/module within the aem-banking-application project, such as ui.content, and right click. You should see the repo option, and under the repo option, you will see the 4 commands we added earlier.
Now the installation of the AEM repo tool is complete, and you can sync the jcr content from IDE to the AEM server simply by executing these commands or via their shortcuts.
References :