Overview of AEM and vue.js
Adobe Experience Manager (AEM) is a powerful content management system that allows for seamless content creation and management. On the other hand, vue.js is a progressive JavaScript framework that simplifies front-end development. Integrating AEM with vue.js can enhance the user experience and streamline development processes.
Benefits of Integrating AEM with vue.js
- Improved performance and speed
- Enhanced user interface and interactivity
- Consistent code structure and organization
Creating Vue.Js project and component
Prerequisites:
- System node js version must be greater than 11.
Step 1
- Go to aem-guides-wknd directory and create a project vue-app by following the below steps.
1. Install Node.js – Before getting started, make sure you have Node.js installed on your system. You can download the specified version from the official Node.js website(https://nodejs.org/).
- Install Vue CLI – Vue CLI is a command-line tool that makes it easy to create and configure Vue projects. To install Vue CLI, open a terminal and run the following command: npm install -g @vue/cli.
This command will install Vue CLI globally on your system, allowing you to access the Vue CLI command-line interface from any directory. - Create a New Project – Once you have Vue CLI installed, you’re ready to create a new Vue project. Follow these steps:
- Open aem-guides-wknd directory.
- Run the following command to create a new Vue project:
vue create vue-app
- You will be presented with a list of preset configurations. You can choose from the default options or select a manual configuration to customize the features of your project.
- Once you’ve selected a configuration, Vue CLI will start installing the necessary dependencies and generate the basic structure of your project.
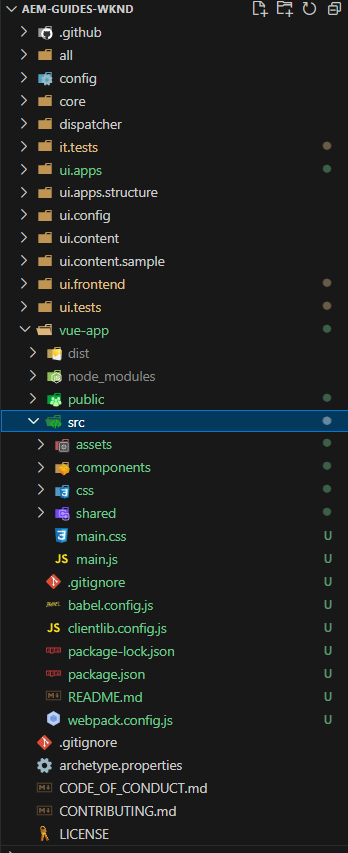
- After that your project named ‘vue-app’ will be created and the hierarchy will be like this.
Vuejs Component creation and integration inside AEM
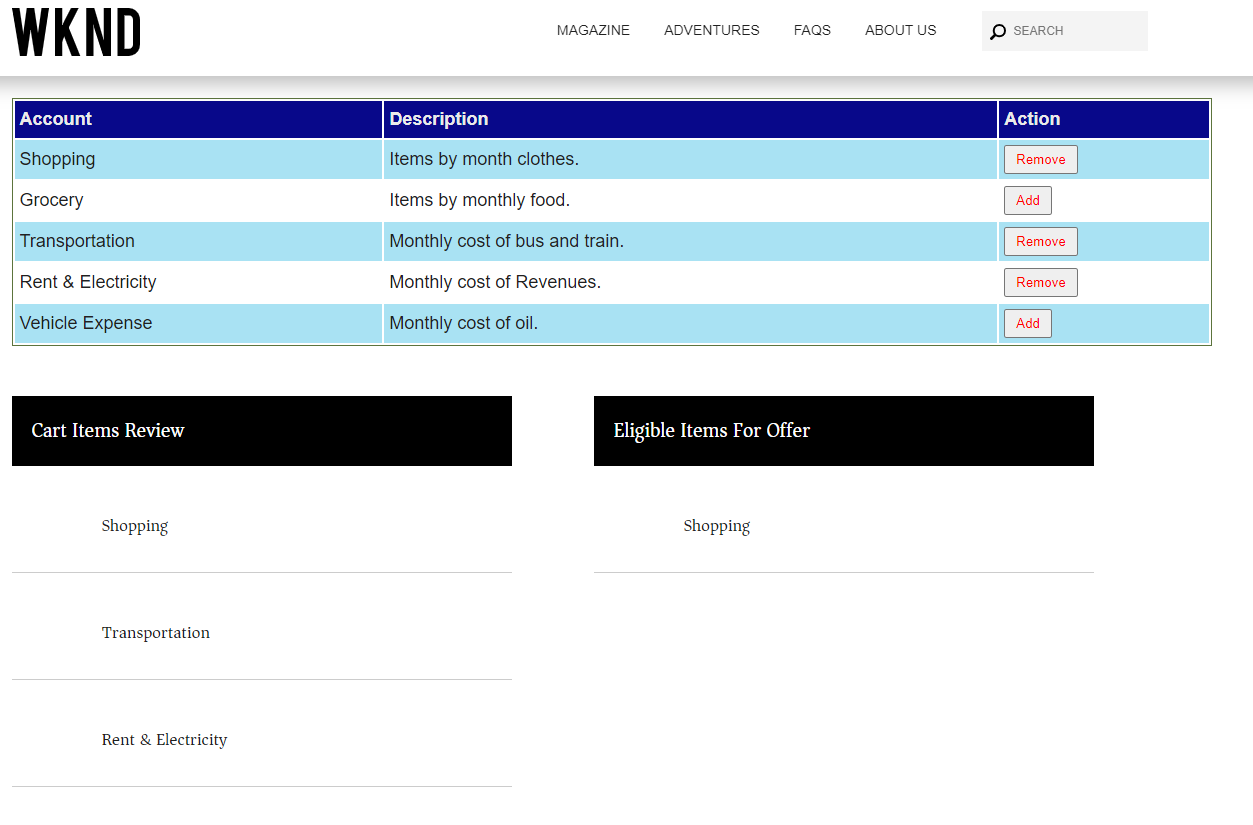
Purpose : Creation of three independent components i.e. checked items, item review, and items action.checkeditems component will show lists of items with add/remove button. After clicking on add, it will added to item review component, the button will be changed to remove, and if it is eligible for an offer it will be added to itemsaction component.
Component creation
Step 1
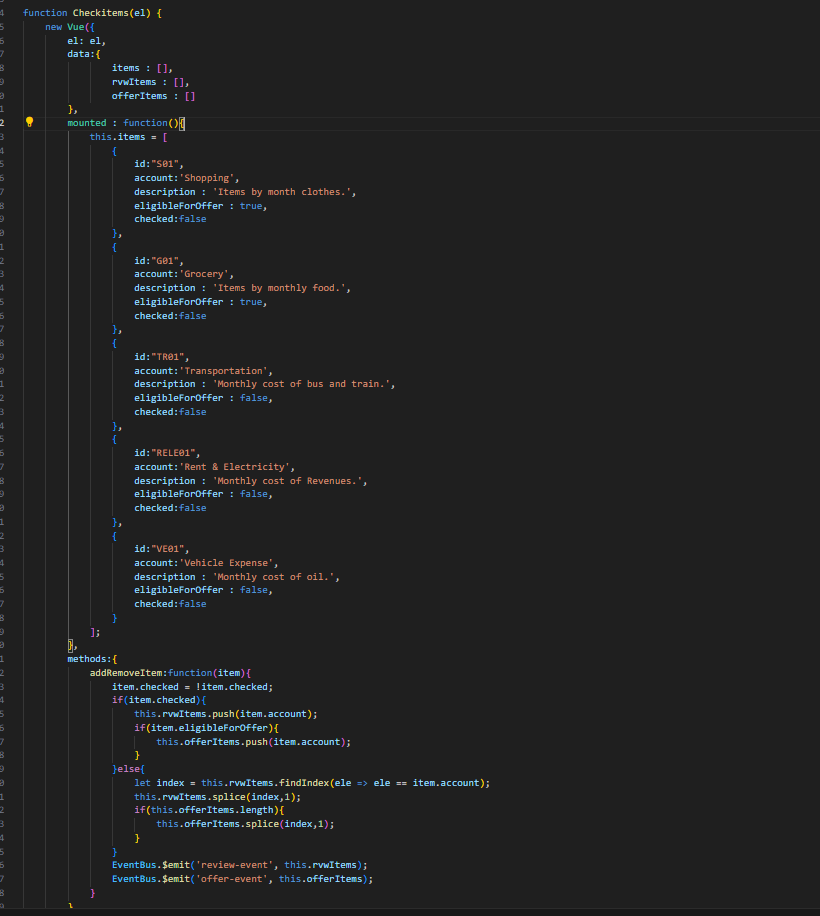
- Create three component named ‘Checkitems.js’,”Itemreview.js”,”Itemsaction.js” inside components folder.
We will create new vue to instantiate the component, then inside the data property initialize all properties,mounted hook is often used to perform one-time initialization logic, such as fetching data from an API or setting up event listeners.methods will be used for all dom actions related to the component.
Attached are some screenshot below:-
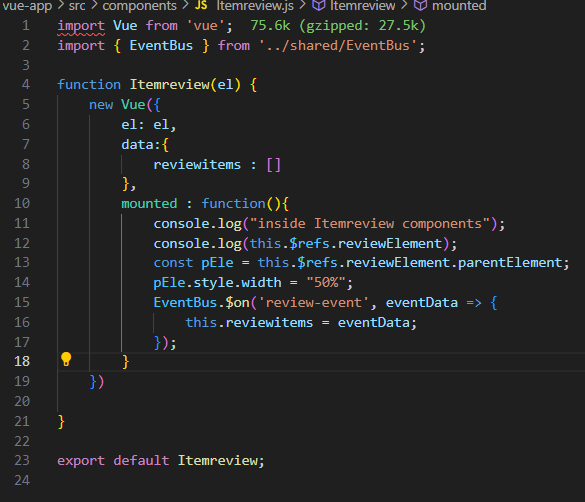
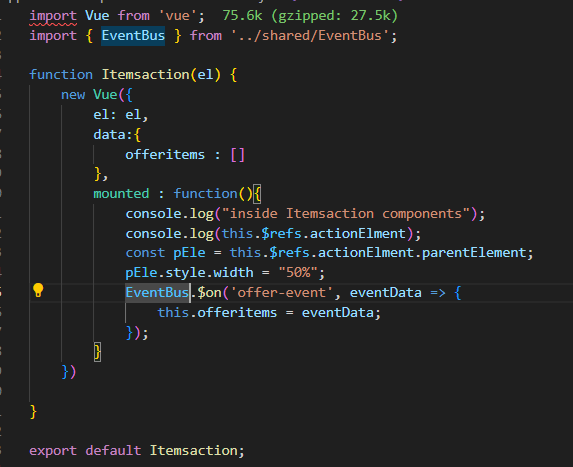
- To communicate between components, I will create a shared folder and create an EventBus,js file to send/receive Data.

- Create a css folder and add a respective css file for each component i.e checklist.css,
Menusreview.css,itemactions.css.
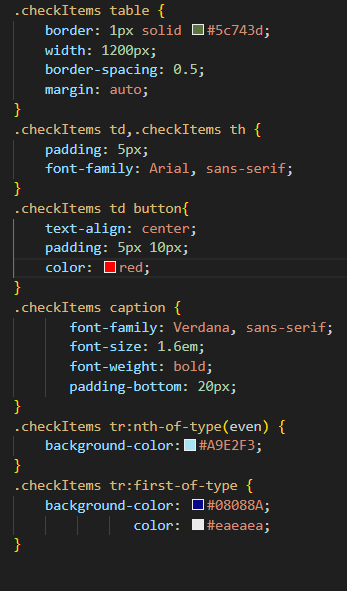
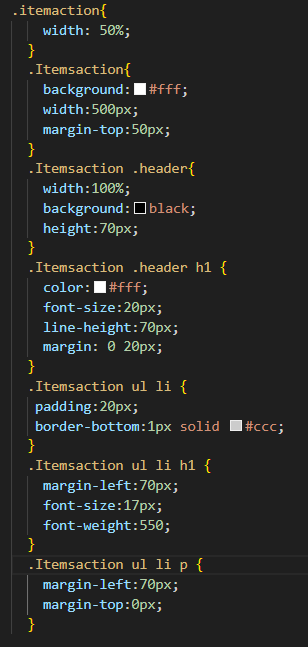
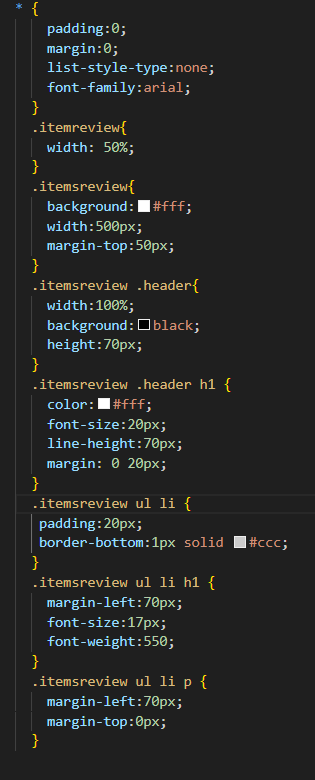
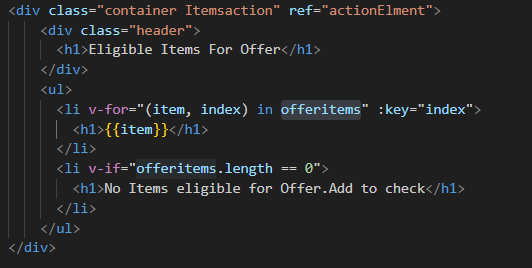
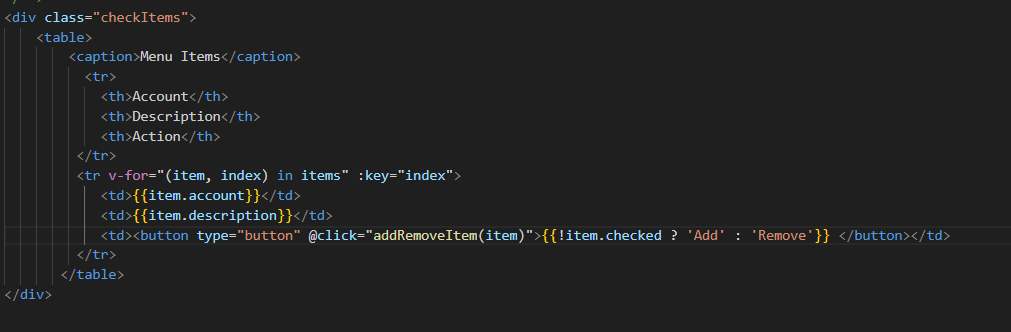
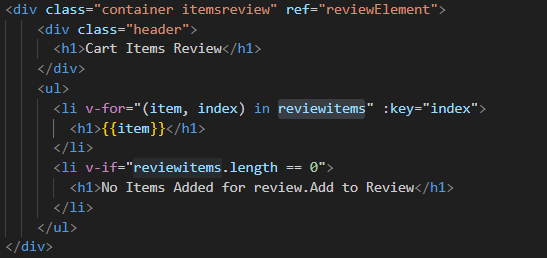
- Create three AEM components checklistitems.html,itemreview.html,itemaction.html inside ui.apps/src/main/content/jcr_root/apps/wknd/components. Along with that write the HTML using vue.v-for is used to display the list of items.@click is used for performing the click event. Attached are some screenshot below.
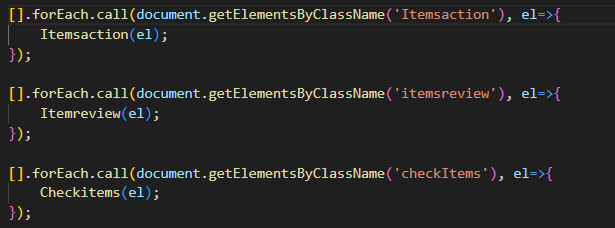
- After creation, import the component inside the main.js file of vue. Delete the App.js file inside the directory.checkItems,Itemsaction,itemsreview are parent classes of each component. We will integrate it by like this.Attached is a screenshot below:
Component Build and Integration
We are going to build the vue app by custom webpack configuration. So that the final build file will be stored inside the ui.apps folder.
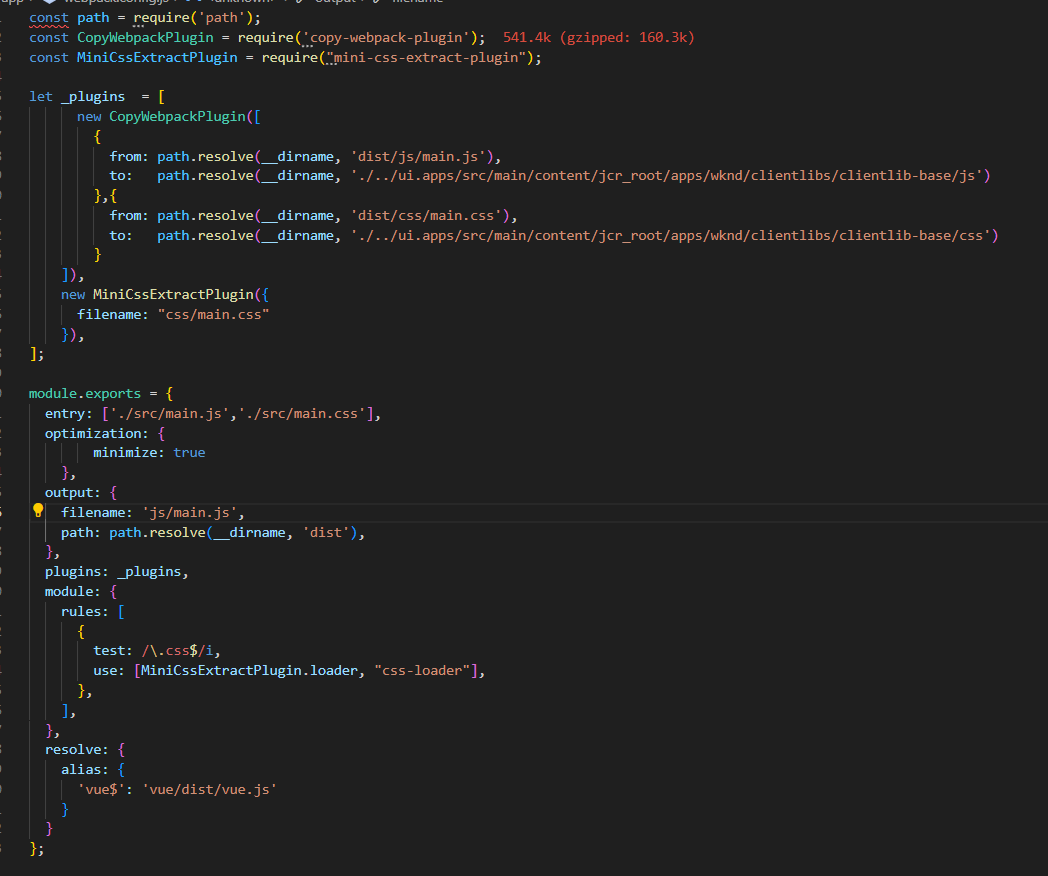
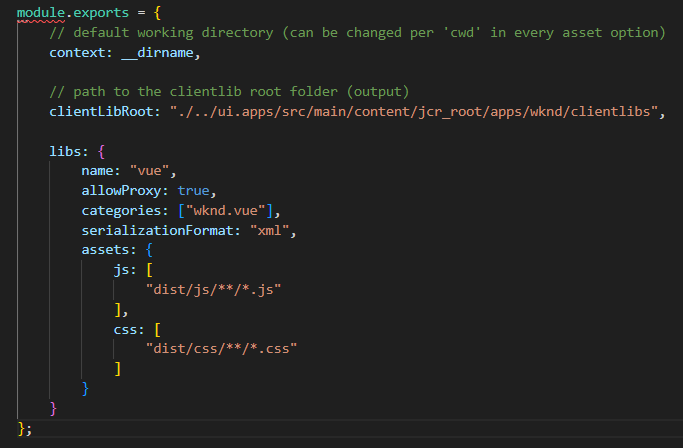
- Create a webpack.config.js and clientlib.config.js file inside vue-app and provide the copywebpackplugin to copy the build file from dist/js/main.js,dist/css/main.css to ui.apps/src/main/content/jcr_root/apps/wknd/clientlibs/vue and ui.apps/src/main/content/jcr_root/apps/wknd/clientlibs/clientlib-base/js and /css folder.
webpack.config.js and clientlib.config.js
- In package.json change the build inside scripts like below
“build”: “webpack && clientlib –verbose” . - Do npm install and npm install –save-dev webpack webpack-cli webpack-dev-server to download all the necessary webpack dependencies.
- Then run npm run build command inside the vue-app directory. So the build file main.js and main.css will be created in the dist folder of vue app. Along with that, it will be copied automatically to the clientlib folder and _content.xml file be created automatically. Attached is a screenshot below:
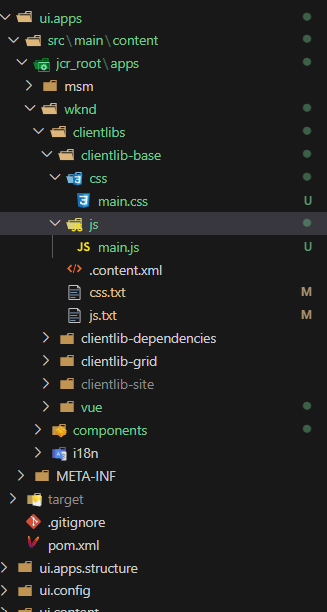
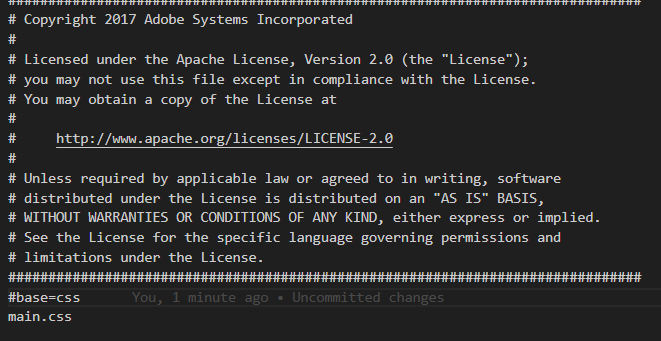
- Inside js.txt and css.txt write #base=js main.js and #base=css main.css.

Deploying AEM and Vue.js Integration
- Go to the root directory and run the command mvn clean install -PautoInstallSinglePackage -Pclassic.
- Open the browser and enter the URL http://localhost:4502/aem/start.html
- Login by user ID and password as admin. Then go to http://localhost:4502/editor.html/content/wknd/language-masters/en.html.

- Click on drag components and then insert checklist, item review, and item action component, then view as publish to see the results on UI.Added screenshot below.
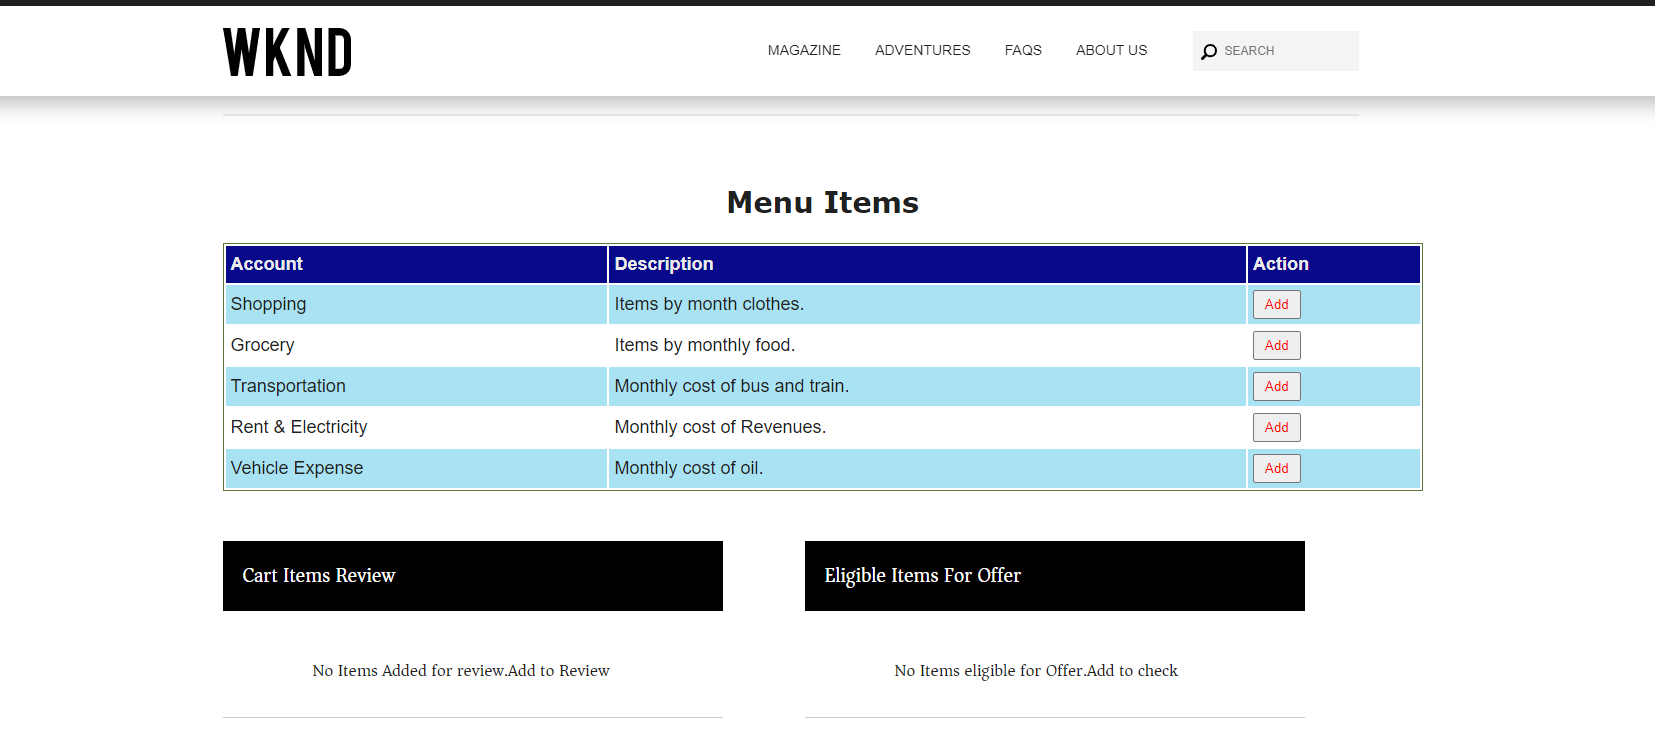
- Click on Add to see the items on the carts and the offer section. Added is a screenshot below.
Conclusion
In this comprehensive guide, we have learned the in and out of seamlessly integrating AEM with vue.js. By following these step-by-step instructions, you can optimize performance, create stunning components, and deploy your AEM vue.js project with confidence.