Apache JMeter, an open-source product developed in Java used to perform load testing of web applications and simulate user load with various parameters like a real-life scenario.
![]()
There were few use cases that I came across while performing load testing on my project.
These are simple and often very helpful in performing tests on daily basis. Also, it can be cumbersome if not understood properly before performing.
What to expect in this Blog ?
1) Scheduler Configuration in Thread Group
2) Get Hidden HTML Form Values
3) While Controller over CSV file
4) Counter Config Element
5) HTTP Recording (using JMeter and Blazemeter)
1) Scheduler Configuration in Thread Group
The Scheduler Configuration of JMeter, part of Thread Group allows to schedule the test plan to run at a specific time and for a particular amount of time.
The Scheduler Configuration works according to the Linux timezone of the shell in which the script also runs.
To use this, check the field “Scheduler” in Thread Group and set the Loop Count “Forever”.
There are four parameters :-
i) Start Time : The time at which the script will start running.
ii) End Time : The time at which the script will finish its execution and shut down all its threads.
Note – Keep Start Time and End Time as same as they will be modified according to the below two parameters :-
iii) Duration (seconds) : The duration in seconds for which the script will run, this overrides the End Time of the script.
iv) Startup Delay (seconds) : Time in seconds that script must wait before starting its execution, this overrides the Start Time.
Let’s schedule a script to run for 30 minutes (1800 seconds) and start at a particular time :
Firstly, check the Linux timestamp –
![]()
Scheduler Configuration-
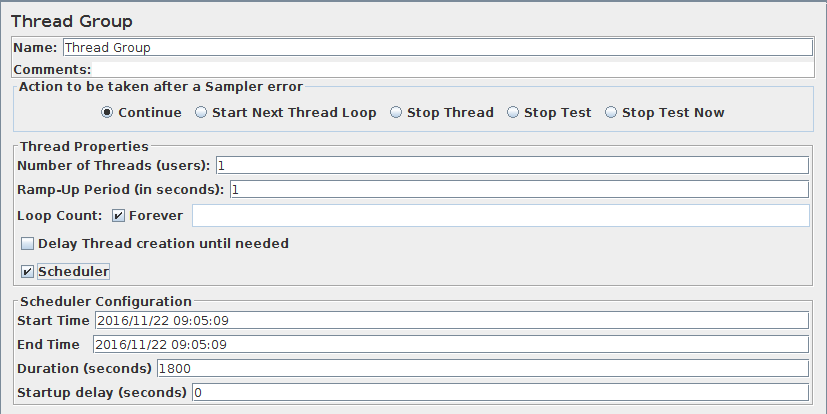
Set Start and End Time accordingly, for example, “2016/11/22 09:05:09” and Duration : 1800.
If this JMX script will be running on a server, then it becomes burdensome to make changes in UI locally and then upload the script to the server.
Better approach is to edit the JMX file :

The start and end time is stored as epoch time in milliseconds (Here, 147978570900) in the JMX file.
To find out epoch time use http://www.epochconverter.com/ , calculate the time and modify these parameters accordingly.
Now run the script, it will automatically start at the specified time ( Here, 2016/11/22 09:05:09 ) and will run for 30 minutes.
2) Get Hidden HTML Form Values
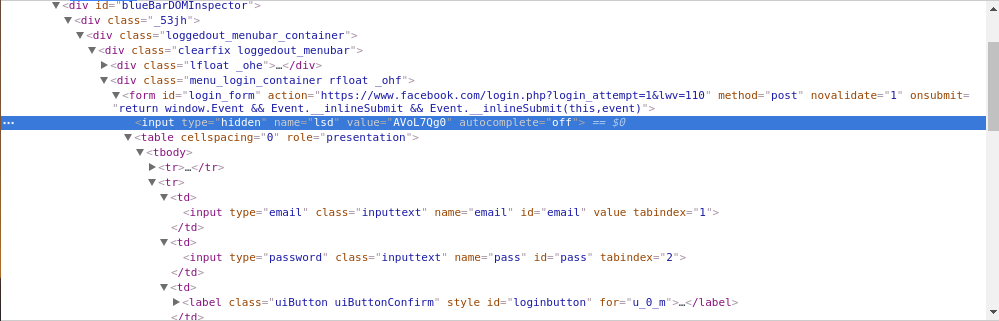
Suppose, hidden input field value named “lsd” is required from facebook.com’s login form.
Note: This value changes at run-time.
To get this value, XPath Extractor from Post Processors will be required in an HTTP Request, which uses XPath Query Language.
To get basic understanding of XPath Query Language follow this link : http://www.w3schools.com/xml/xpath_syntax.asp
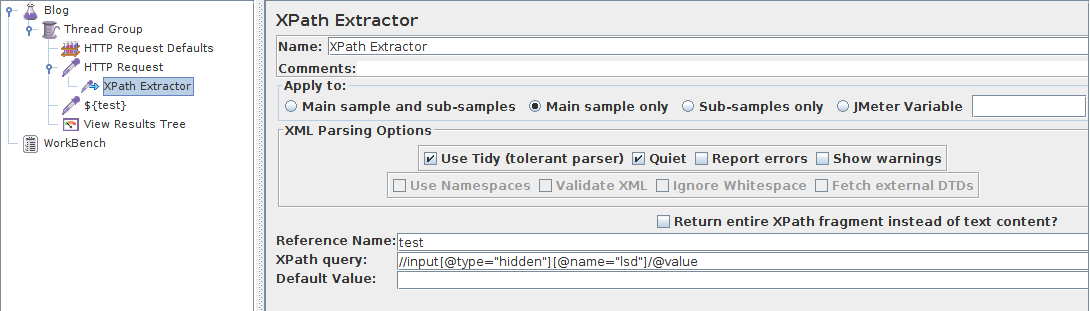
This is the XPath query used to get value of “lsd” named hidden field :
“//input[@type=”hidden”][@name=”lsd”]/@value”
XPath parses XML so check “Use Tidy (tolerant parser)” to convert the returned HTML response in XTML.
The value got stored in reference name test, which can be used later as “${test}”.
In next HTTP request name is passed as ${test} and on running the test the value is returned as “AVpDFtW9” :

2) While Controller over CSV
If there are multiple URLs for a domain that are supposed to be tested for a particular load. So, instead of using separate HTTP Request Sampler for each request a while controller can be used with CSV while containing the URL Paths.
It becomes very convenient to edit the URL Paths as they are changed according to the requirements.
For setting up this, a While Controller, CSV Data Set Config, HTTP Request Sampler, HTTP Request Defaults and a file containing URL paths will be required.
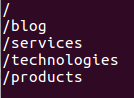
i) CSV file containing URL Paths :
ii) Configuring CSV Data Set Config :
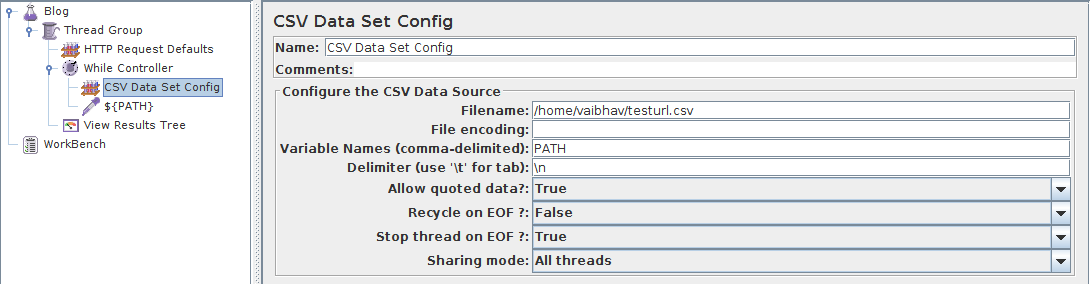 Specify the file path, Variable Names (Ex: PATH, which will be later used as ${PATH} in HTTP Request and in While Controller), Delimiter and other configurations.
iii) While Controller :

Condition is the basis on which the while loop in Jmeter will work.
Here, it works till there exists paths in the csv file.
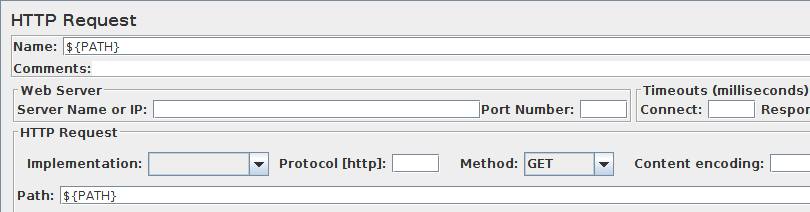
iv) Now specify the Path in HTTP Request as :
v) Output of above configured script is as follows :
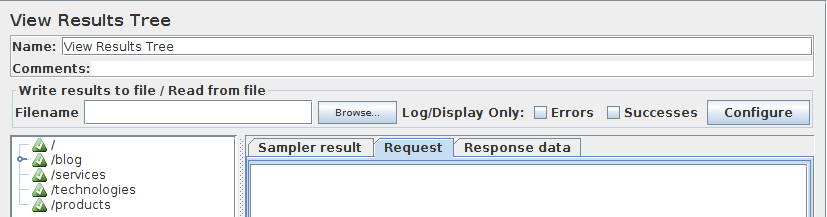
It successfully read 5 URL paths specified in the CSV file.
3) Counter Config Element
The counter is used to generate values in a particular format at particular intervals.
These generated values can be used for sign up process to create multiple users each with a username followed by a particular value.
Example : vaibhav.[1-100]@tothenew.com
Here are some parameters :-
i) Start : The starting value of the range from which counter should generate values
ii) Increment : At what intervals it should increment the values
iii) Maximum : The end limit of the range till which counter should generate values
iv) Number format : The format in which the numbers should be generated, Ex “0”, it generates values in the format 1,2,3 etc
If it is specified as “00”, the values generated are 01,02,03,etc.
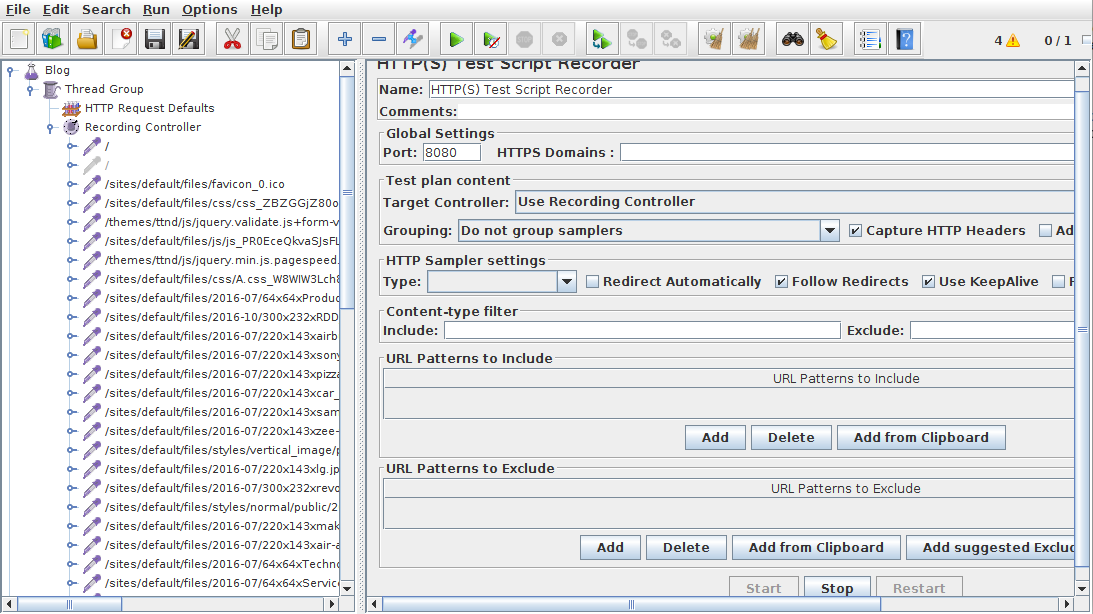
4) HTTP Recording (using JMeter and Blazemeter)
i) JMeter Recording : JMeter comes with a wonderful feature of recording controller which helps to record the entire flow of websites as the links are clicked in the browser as HTTP requests.
To set-up HTTP recording :
Firstly create a Thread Group.
Then, HTTP request defaults of the website for which the UX is to be recorded.
Add recording controller within the Thread Group.
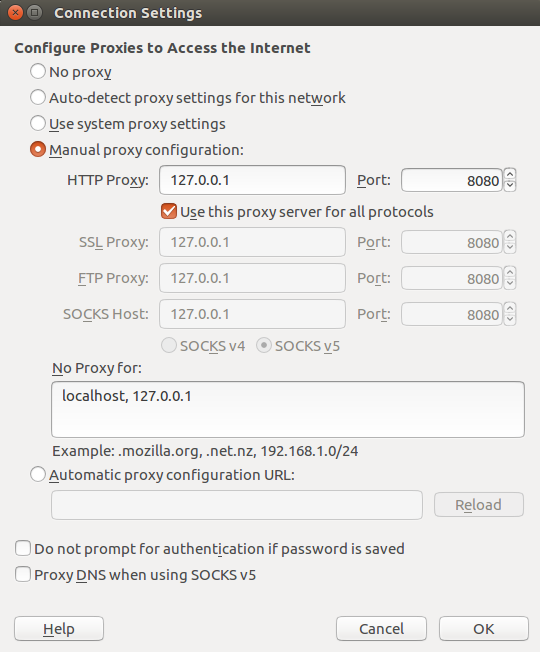
Next step is to set HTTP(S) Test Script Recorder in WorkBench and specify the port (Let’s say 8080).
Specify the network proxy in Firefox for port 8080 :
Start the HTTP(S) Test Script Recorder and hit the required page in the browser.
Now see that results are flooded in the recording controller:
ii) Blazemeter :
To save time and efforts of adding proxy and different controllers as in JMeter.
There is an online application namely Blazemeter available in Chrome store, here’s the link : https://chrome.google.com/webstore/detail/blazemeter-the-load-testi/mbopgmdnpcbohhpnfglgohlbhfongabi?utm_source=chrome-ntp-icon
Once it is downloaded and sign up credentials are provided it becomes ready to use and record.
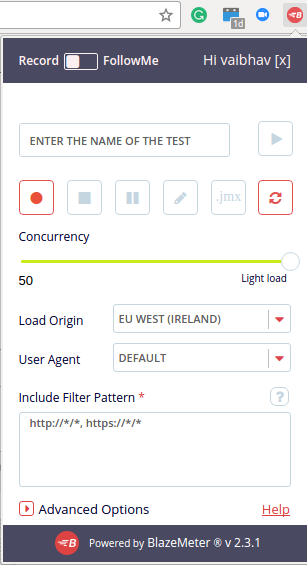
Specify the Load Origin, User Agent, Advanced Options (to filter out the results) and then click the record button to start recording.
Visit the required websites, once it is done, press the stop button to stop unnecessary recording.
Then, click.jmx button to download the entire recording as .jmx file, which can be imported in JMeter and the task of load testing is simplified.
I hope that you will find the load testing process simple and easy to perform now.