Welcome to our The Power of ARKit blog series!
In this series, we’ll explore how to integrate ARKit into SwiftUI and unlock new possibilities for building immersive and innovative iOS applications.
This first part will focus on the initial setup and configuration of ARKit within a SwiftUI project. We’ll also walk through how to track face points on a physical device, setting the foundation for more advanced AR experiences in upcoming posts.
Introduction
Why Use SwiftUI with ARKit?
SwiftUI is Apple’s newer way of building iPhone and iPad apps. It’s popular because it’s simple to use and shows live previews of your app while you design it.
Now, when you combine SwiftUI with ARKit, you can take things further—adding augmented reality (AR) to your apps. This means your phone isn’t just for normal apps anymore—it can turn into a tool that blends the digital world with the real one.
With ARKit handling the AR magic (like tracking space, faces, and objects) and SwiftUI making the user interface easy to design, developers can create amazing apps where the digital and physical worlds work together.
What is ARKit?
ARKit is Apple’s tool that lets developers build augmented reality (AR) apps for iPhones and iPads. It uses the device’s camera and sensors to mix digital objects with the real world in a very natural way.
What ARKit Can Do:
- World Tracking – Knows how your phone is moving in 3D space.
- Face Tracking – Detects and follows facial expressions.
- Plane Detection – Finds flat surfaces like tables, floors, or walls.
- People Occlusion – Lets virtual objects appear in front of or behind real people.
- LiDAR Support – Measures depth with high accuracy (on newer iPhones/iPads).
- Motion Capture – Tracks body movement in real time.
- SwiftUI & RealityKit Integration – Makes it easier for developers to quickly build AR apps with modern Apple tools.
ARKit gives developers everything they need to create realistic, interactive AR experiences—from games and learning apps to shopping tools and design apps—directly on iOS devices.
Real-World Uses of AR & VR
Augmented Reality (AR) and Virtual Reality (VR) are not just fancy future ideas anymore. They are being used today in many fields to solve real problems. By mixing digital visuals with real life, AR and VR are changing the way we learn, shop, work, travel, and even get medical treatment.
1. Education & Training
- Example: Medical students practicing surgery, pilots learning to fly, or workers learning to use machines.
- Benefit: People can train safely in a virtual setup, without the risks or costs of real-life mistakes.
2. Healthcare
- Example: Doctors seeing a 3D model of a patient before surgery, therapists helping people overcome fears, or remote checkups using AR.
- Benefit: Improves accuracy in treatment, makes healthcare easier to access, and helps doctors and students learn better.
3. Shopping (Retail & Online Stores)
- Example: Trying furniture in your living room using AR (like IKEA apps), or checking how clothes and makeup look before buying.
- Benefit: Reduces wrong purchases, builds trust, and makes shopping more fun and personal.
4. Property & Architecture
- Example: Taking VR house tours without visiting, or architects showing 3D building designs on-site.
- Benefit: Saves time, helps buyers make faster decisions, and avoids confusion during planning.
5. Factories & Industry
- Example: Workers wearing AR glasses to get step-by-step instructions, or experts guiding teams remotely.
- Benefit: Improves safety, speed, and accuracy while lowering training costs.
6. Fun & Entertainment
- Example: Playing VR games, using AR filters on Instagram/Snapchat, or watching concerts in VR.
- Benefit: Makes entertainment more engaging and interactive than normal screens.
7. Travel & Tourism
- Example: Virtual tours of famous places, AR guides in museums, or exploring destinations before booking a trip.
- Benefit: Lets people experience culture and travel even if they can’t physically go.
8. Teamwork & Remote Work
- Example: Virtual meeting rooms with 3D avatars, or digital whiteboards for group ideas.
- Benefit: Makes online meetings more natural and interactive, bringing the office feel to remote work.
AR and VR are making life easier, safer, and more exciting. They save costs, improve learning, boost customer experience, and open up new ways to connect with the world. These technologies are shaping the future of how we live and work.
Screen Design & UI
Getting Started in Xcode
Now it’s time to set up our project. Open Xcode (Apple’s app for making iOS apps) and create a new project. This will be the starting point where we connect ARKit and SwiftUI together.
Follow the steps shown in the screenshot to guide you through the setup.
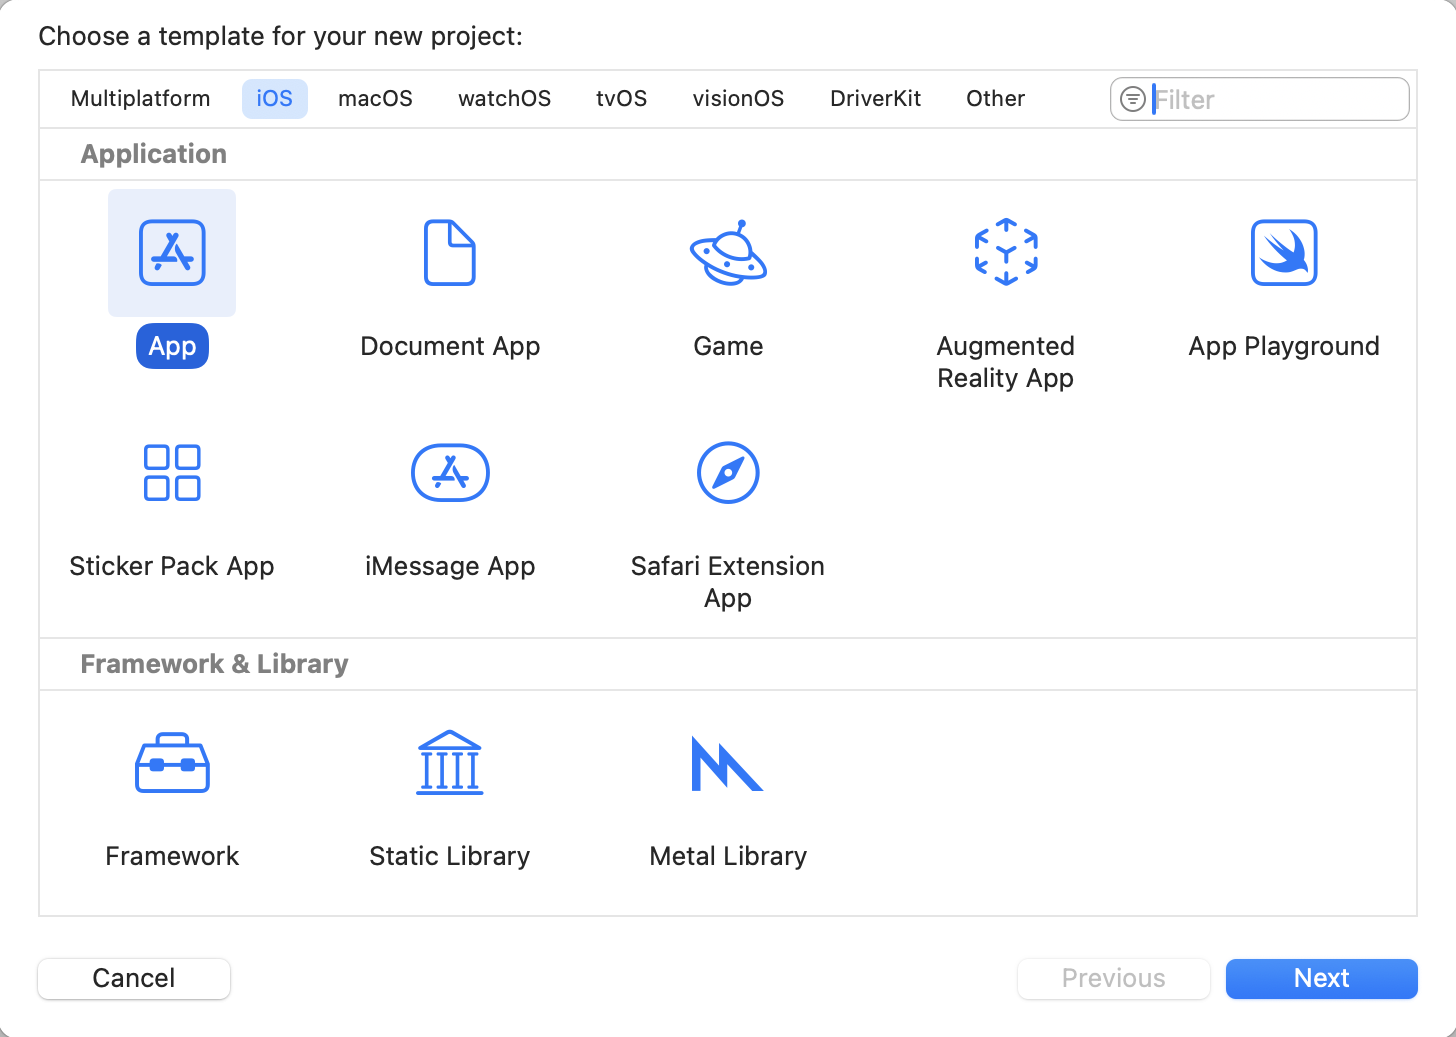
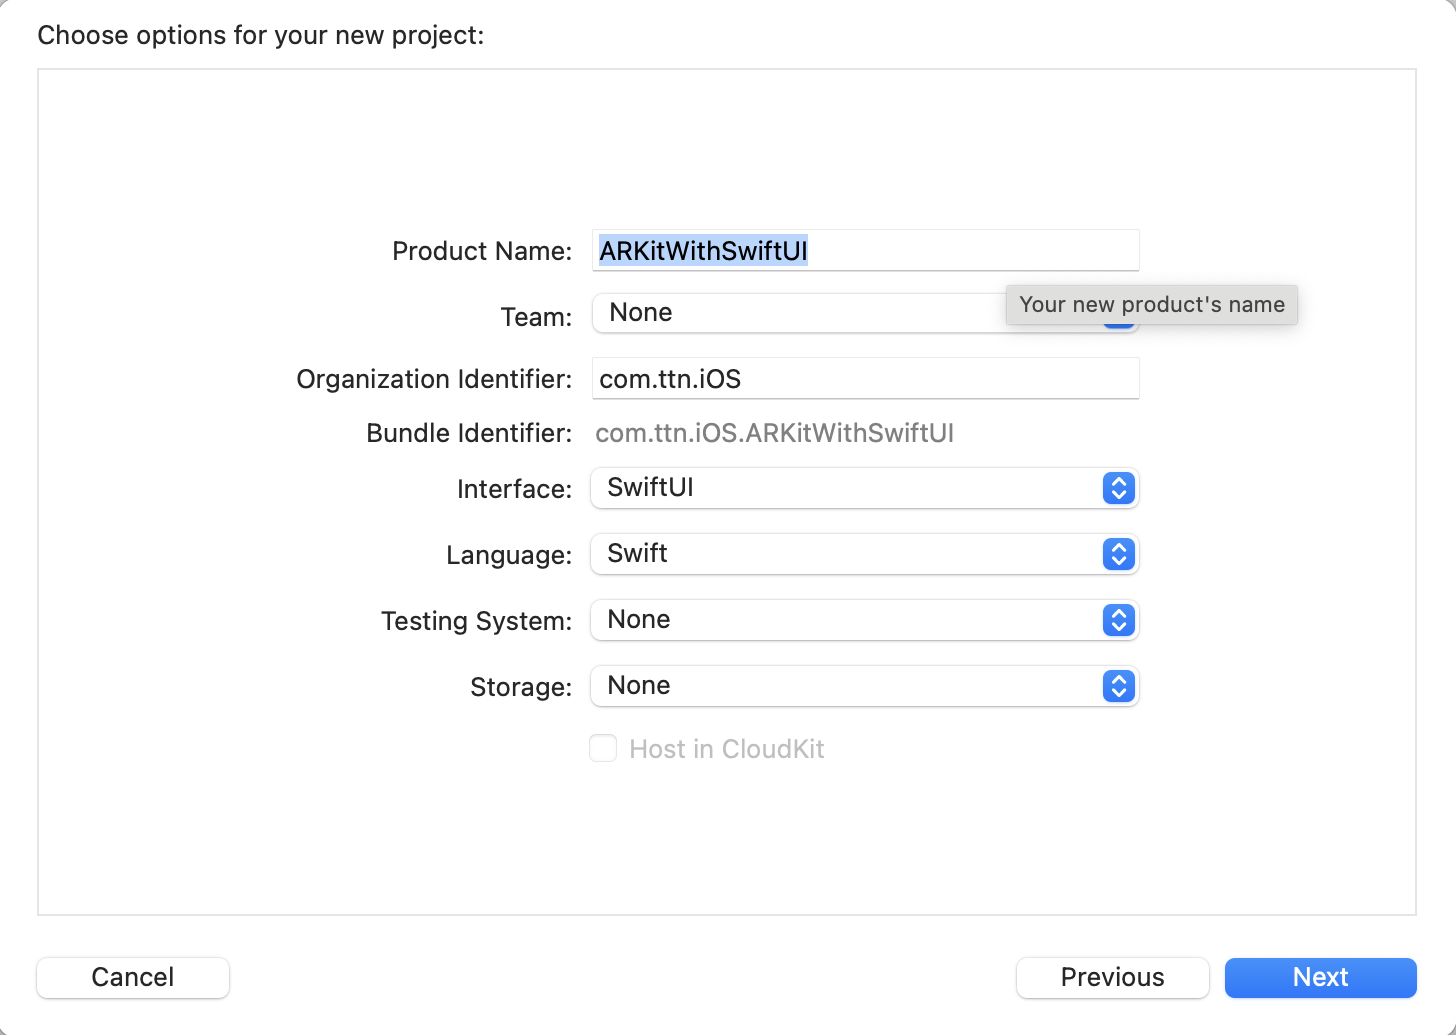
Create a New App Project
In the project setup window, select the App option under the iOS section. For this tutorial, we’ll name the project ARKitWithSwiftUI.
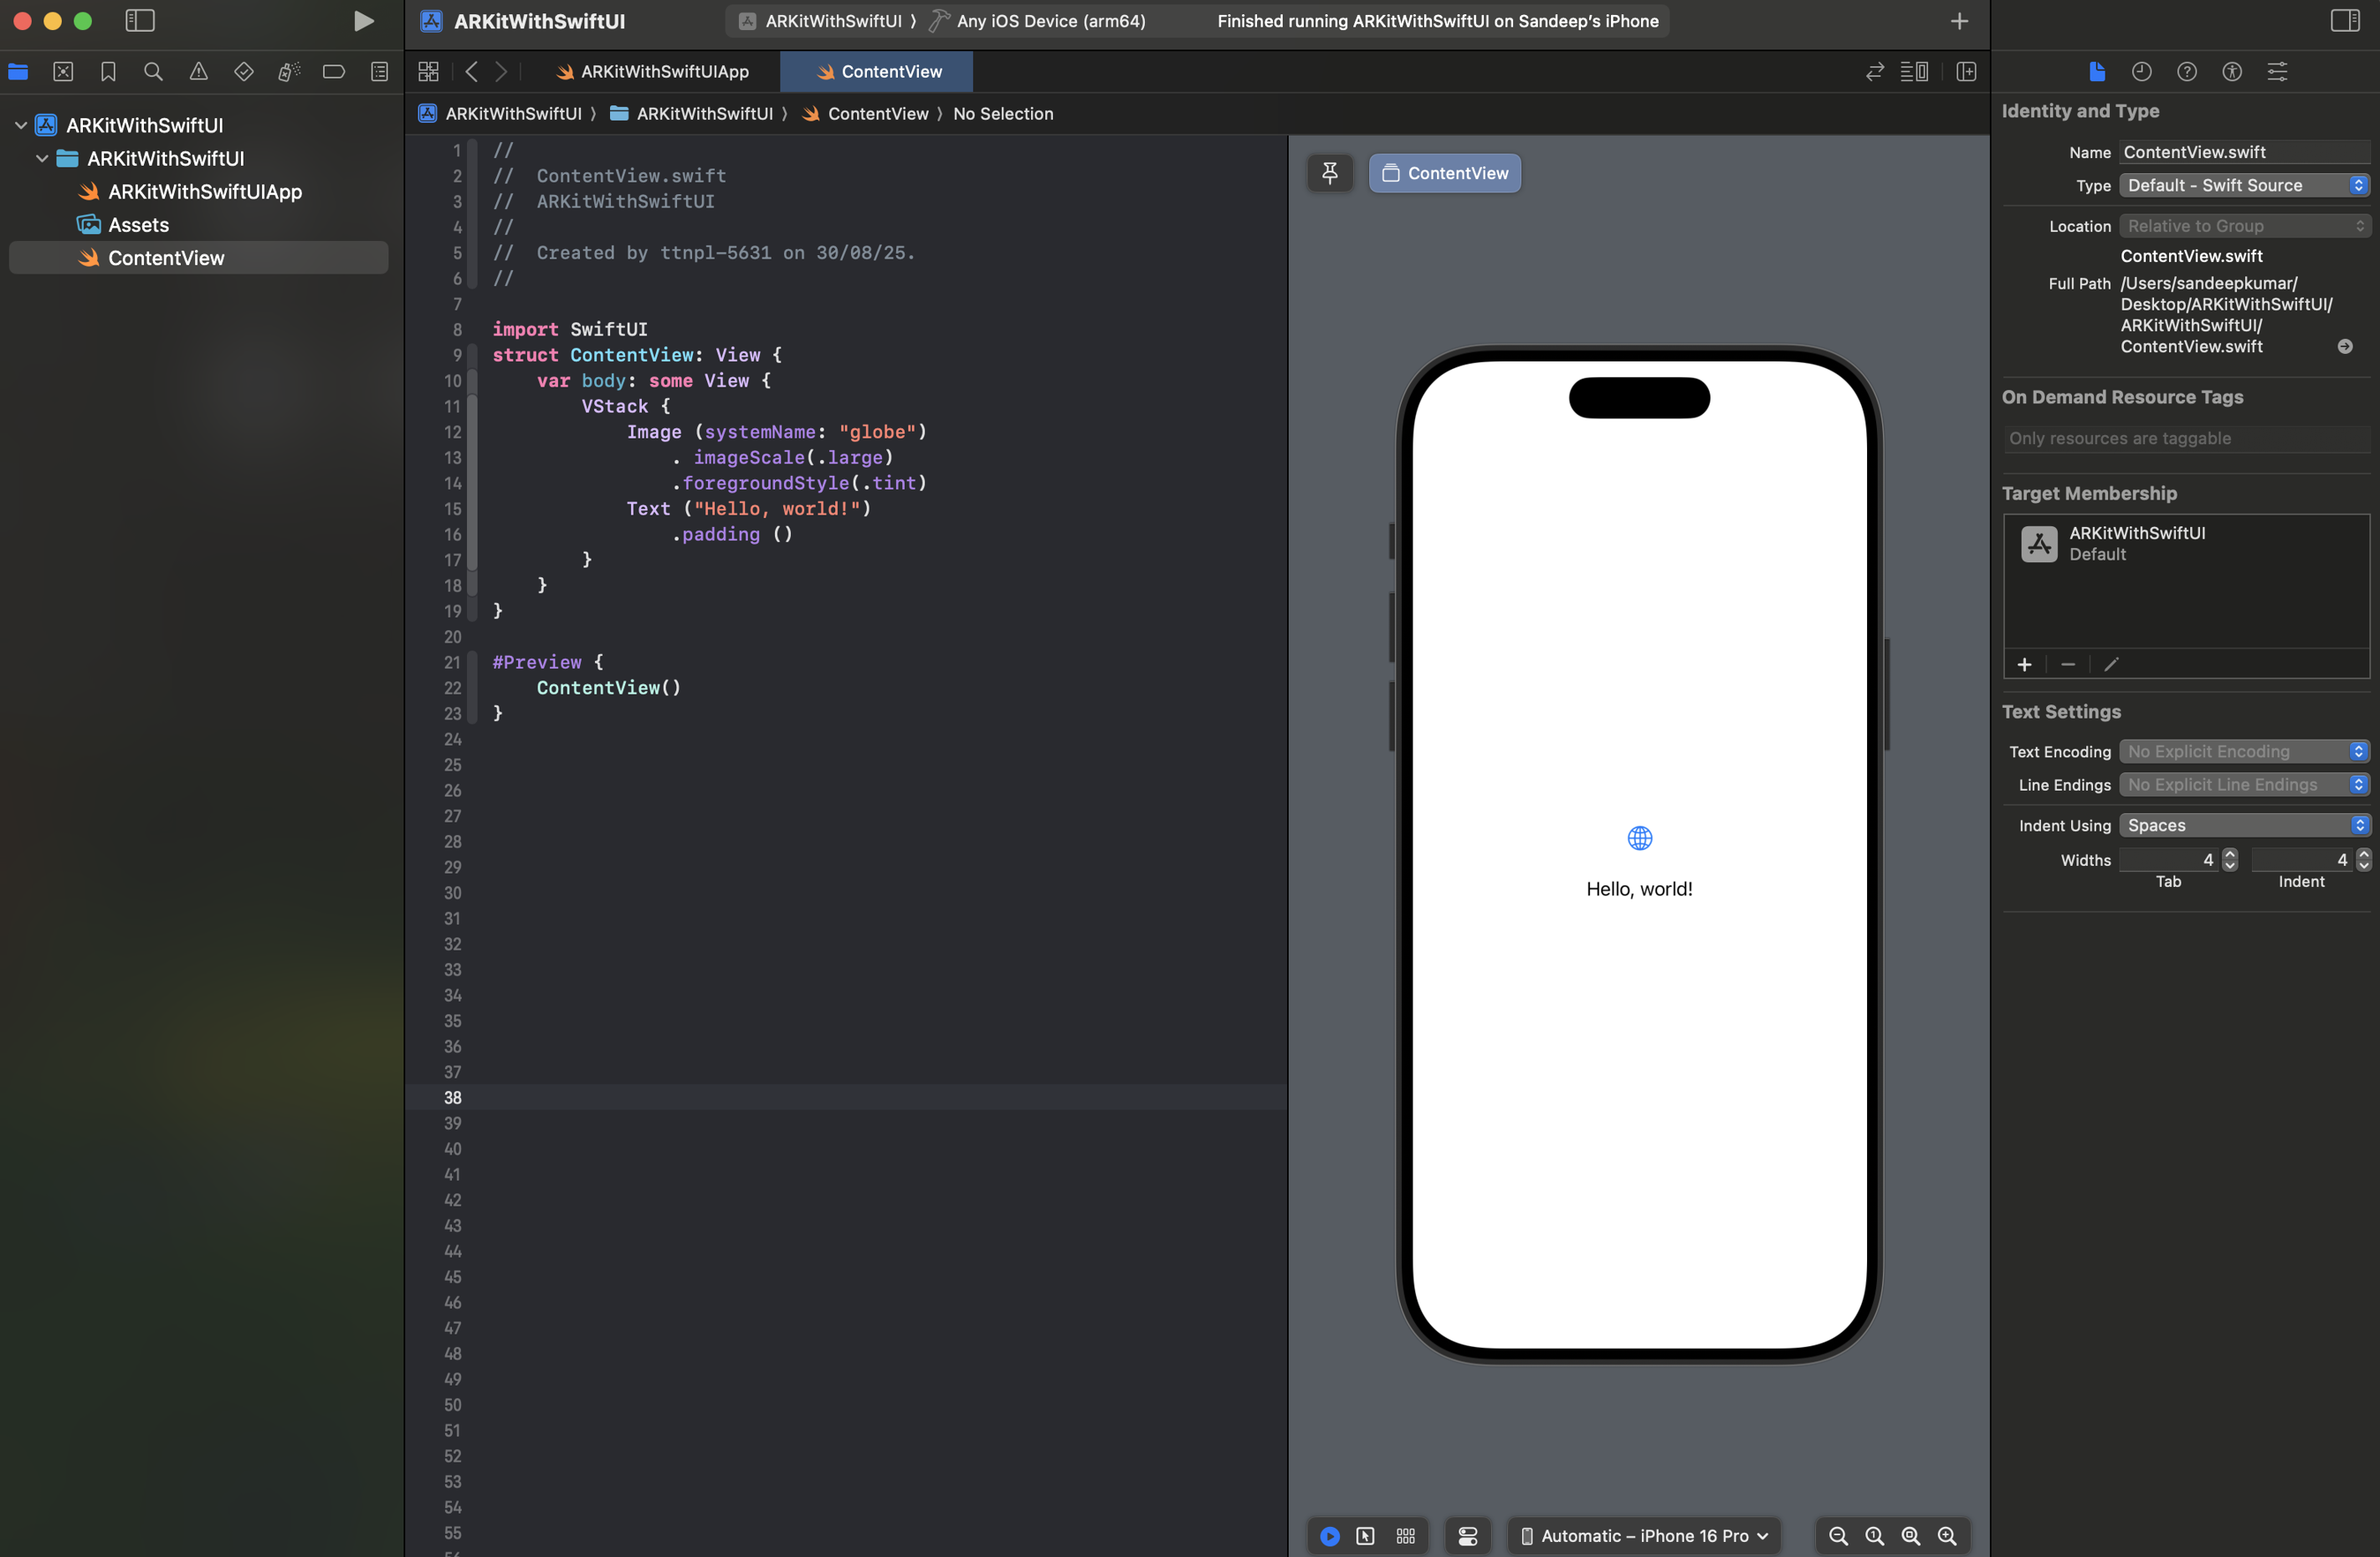
Auto-Generated Code
Once the project is created, Xcode automatically generates some starter code to help you get up and running quickly. Refer to the screenshot below to see the default project structure.
Modifying the Default ContentView
Next, we’ll update the pre-populated code in ContentView.swift to prepare it for ARKit integration. The modified code is shown below:

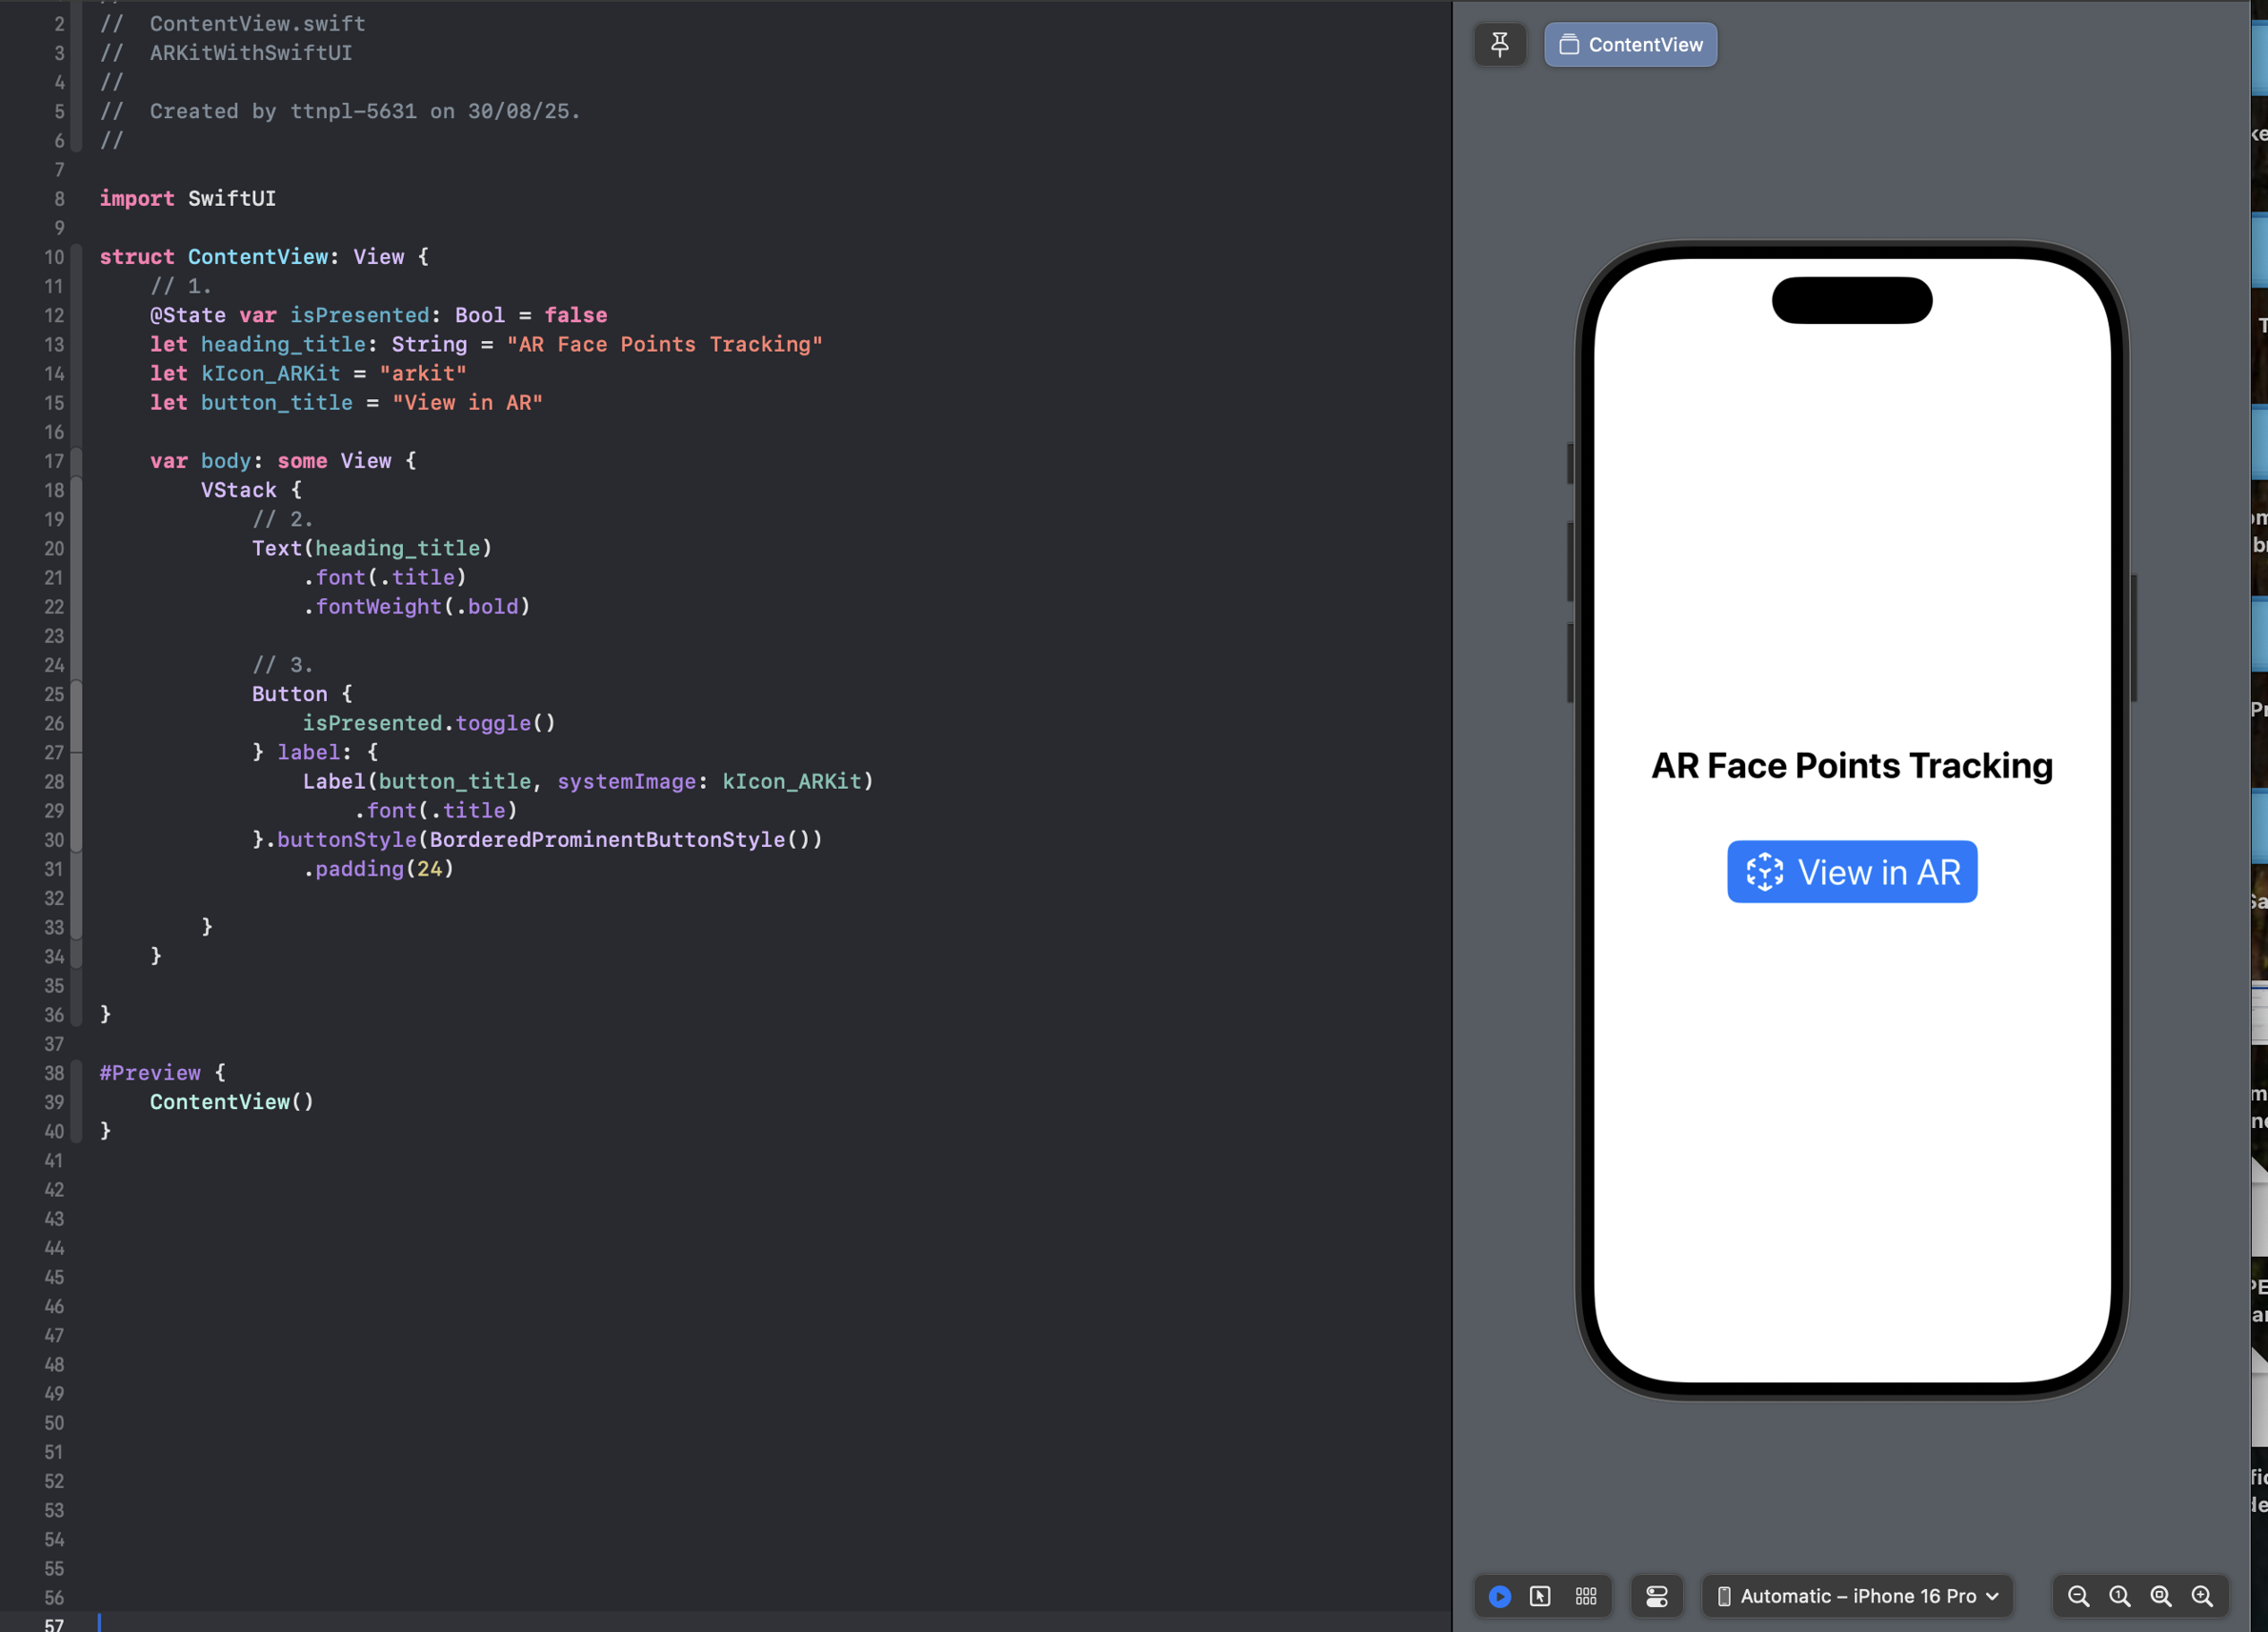
Designing the Landing Page
The first screen of our app is the landing page. We kept it simple:
- A title at the top that says “AR Face Points Tracking”
- A button right below it labeled “View in AR”, which the user can tap to move into the AR experience
Below, you’ll see both the screen layout and the SwiftUI code that creates this design.
Creating the Camera Screen with ARKit
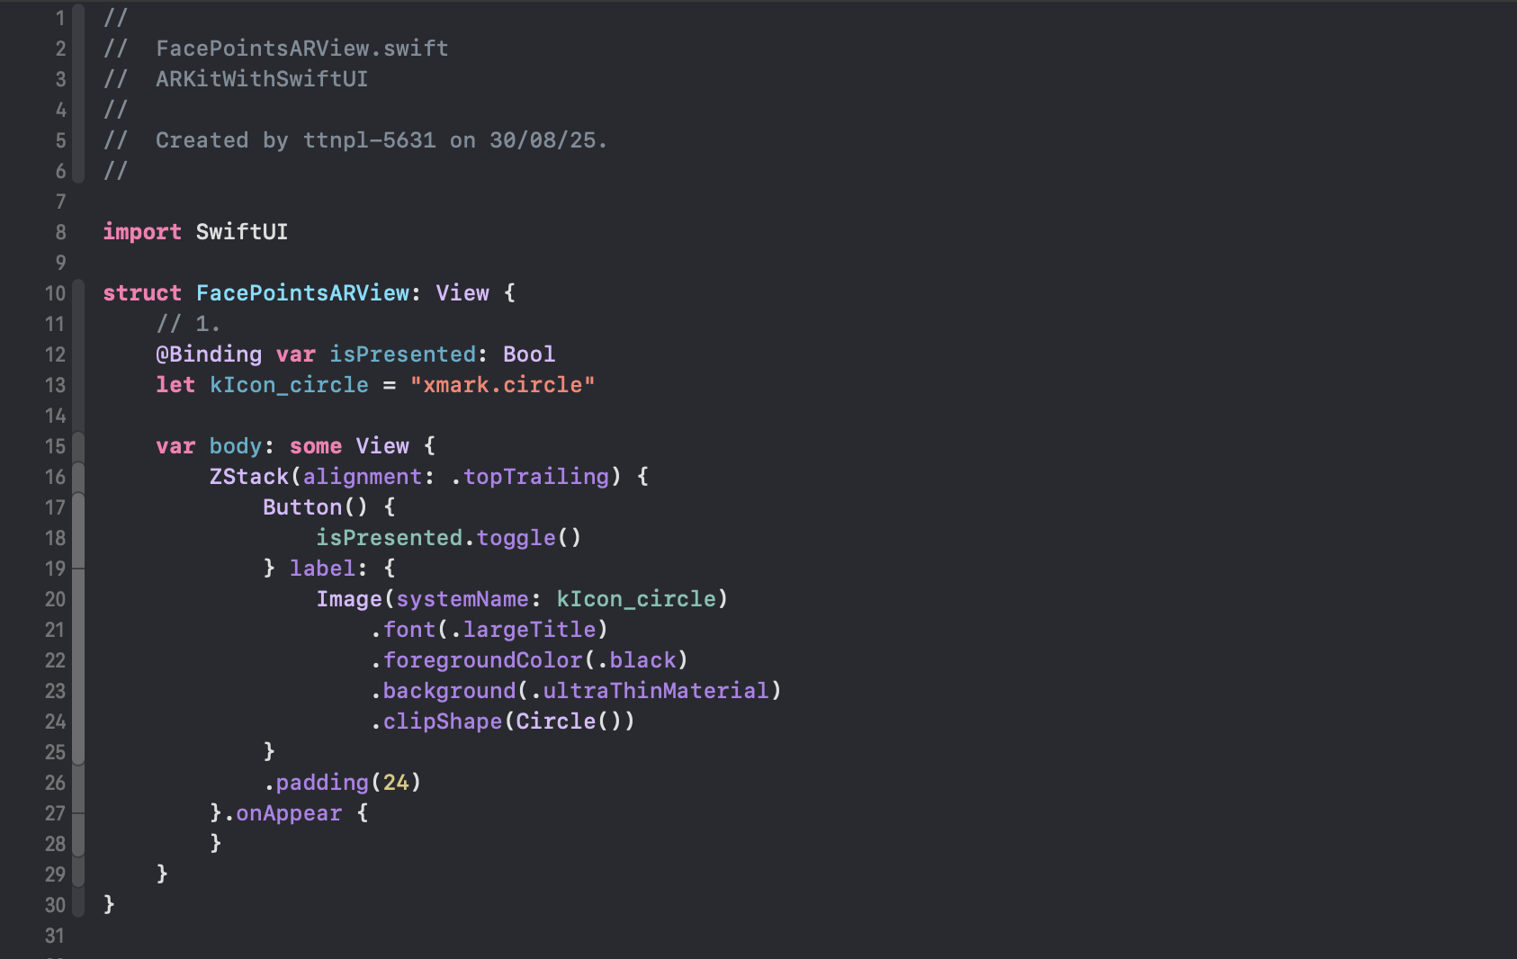
Next, we’ll design the camera screen, where ARKit will be responsible for detecting face points in real time. To achieve this, let’s create a new Swift file named FacePointsARView.swift
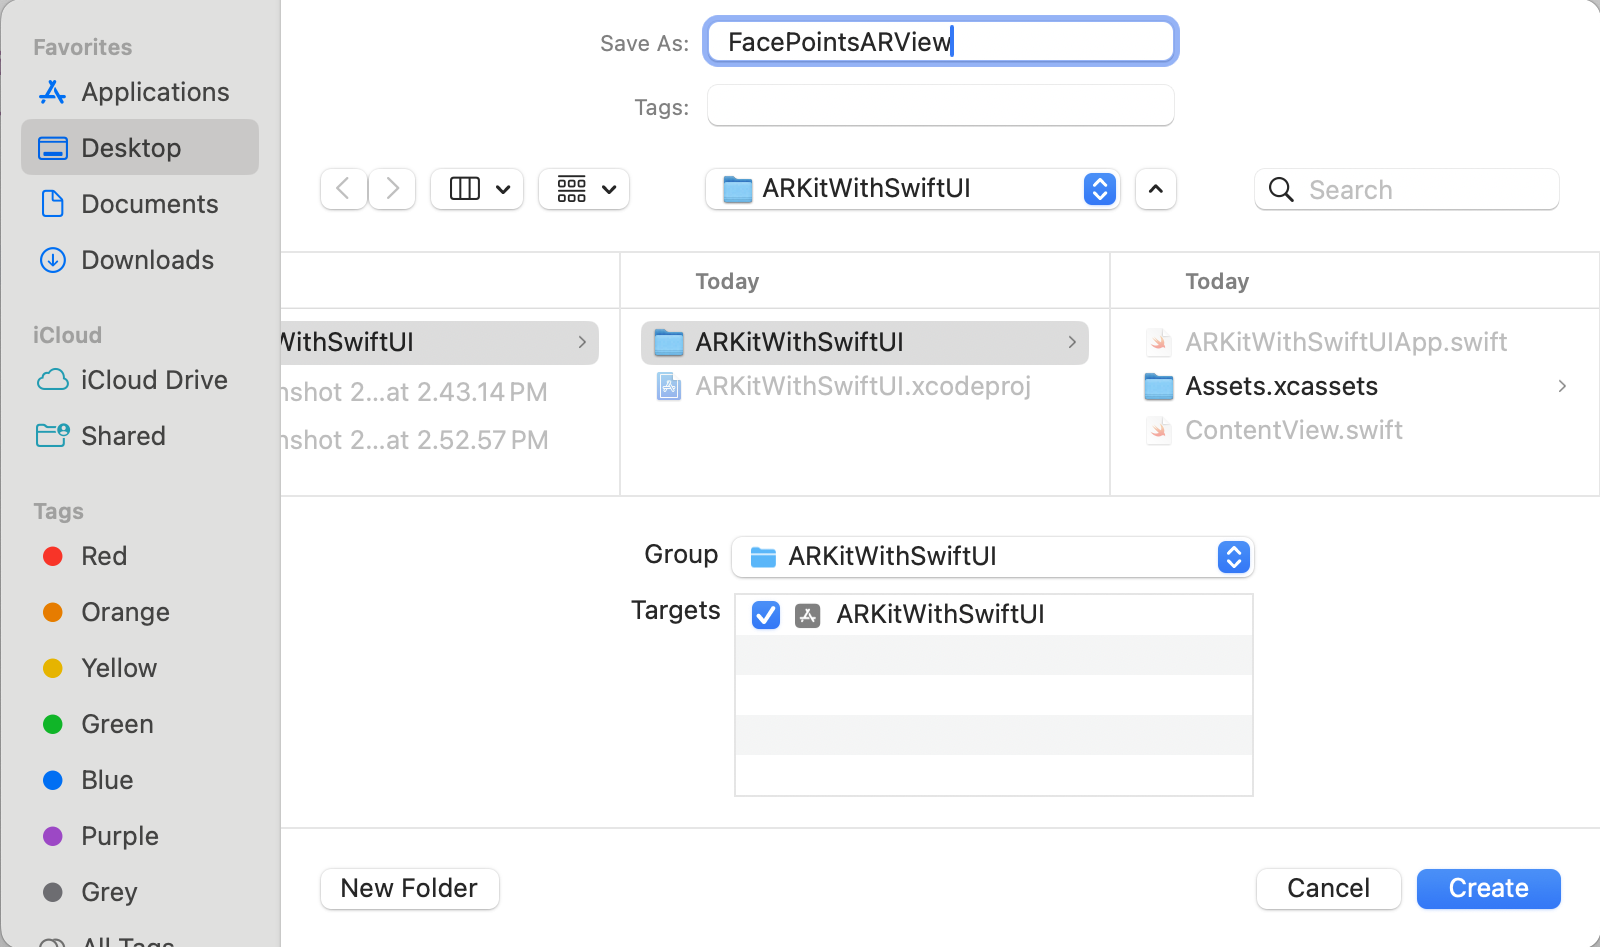
Adding a Dismiss Button
After creating the FacePointsARView.swift file, we’ll add a dismiss button to the screen. This button will be placed at the top-right corner, allowing users to easily close the AR camera view and return to the landing page.
Updating ContentView to Open the Face Points Screen
After creating the Face Points detection screen in SwiftUI, we need to connect it to the app’s main file, ContentView.swift.
This step makes sure that when the user taps the “View in AR” button on the landing page, the app will smoothly navigate to and show the FacePointsARView (the AR screen).

Rendering the Camera View
Now we’ll set up the code to show the camera feed on the screen. To keep things organized, we’ll place this ARKit logic in a separate file.
Create a new Swift file called FacePointsARViewContainer.swift. This file will handle the ARKit camera rendering and link it with SwiftUI for our project.

Face Points Tracking with Coordinator
In this step, we’ve implemented the code to track face points on the camera screen. To handle communication between SwiftUI and ARKit, we created a custom Coordinator class. This class is responsible for:
- Passing data between the SwiftUI view and ARKit methods.
- Rendering and updating the face tracking points inside ARKit’s delegate callbacks.
With that in place, the final step is to load our FacePointsARViewContainer inside the FacePointsARView screen, so the camera with real-time face point tracking is displayed.

Adding Camera Access Permission
Since ARKit relies on the device camera for face tracking, we must request camera access permission in the app’s configuration. To do this, open the Info.plist file and add the following key-value pair:
<key>NSCameraUsageDescription</key>
<string>This app requires camera access to track face points using ARKit.</string>
This ensures the system prompts the user for permission when the app attempts to access the camera. Without it, the AR face tracking feature will not work.

Running the Application
With all the setup complete, it’s time to run the app on a physical iOS device. Since ARKit requires access to the TrueDepth camera, this step cannot be tested on the simulator.
When launched, the app will successfully detect and render face points in real time using ARKit.
📸 Result: Below is the output showing face points being tracked on a physical device:

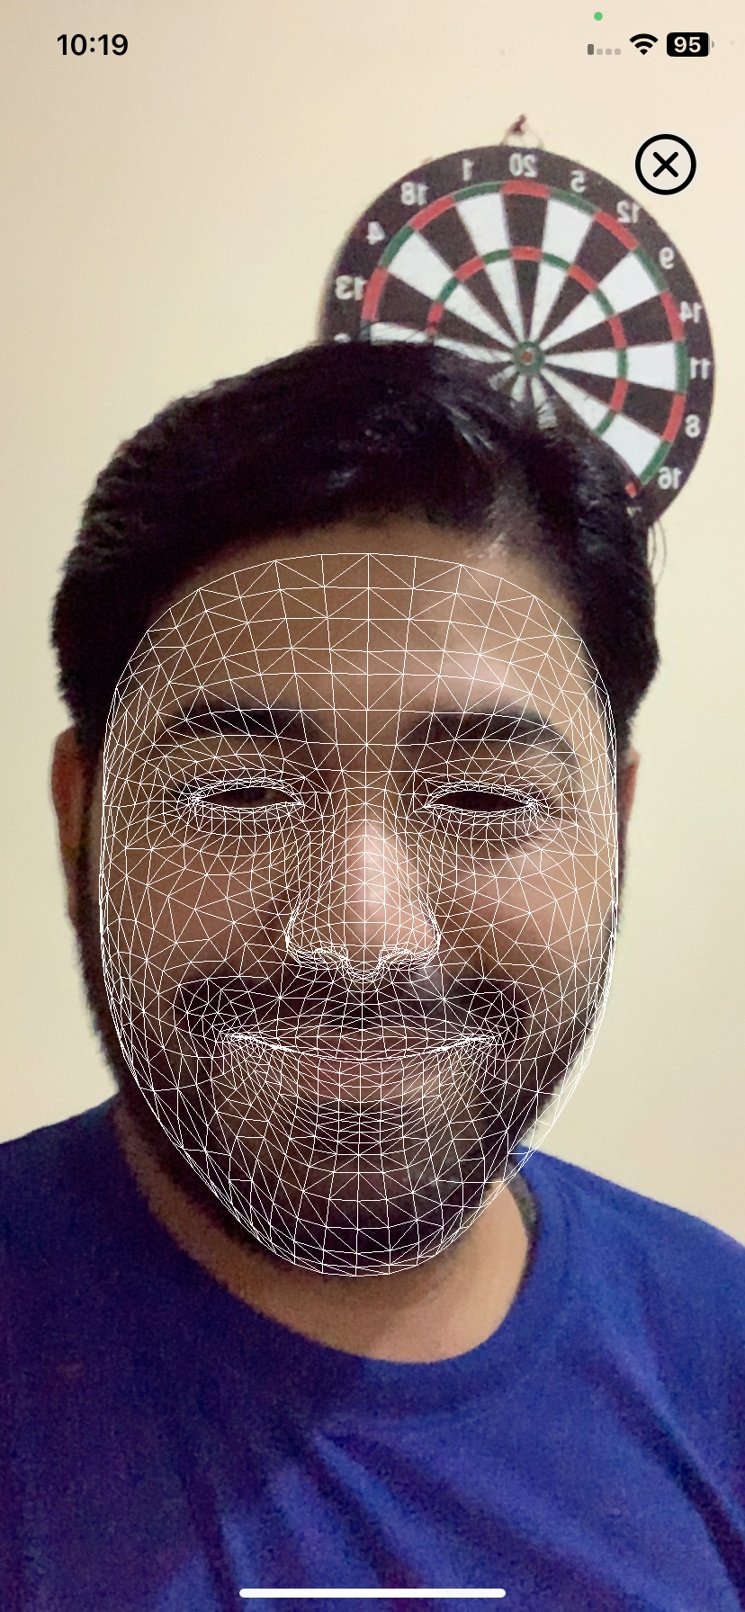
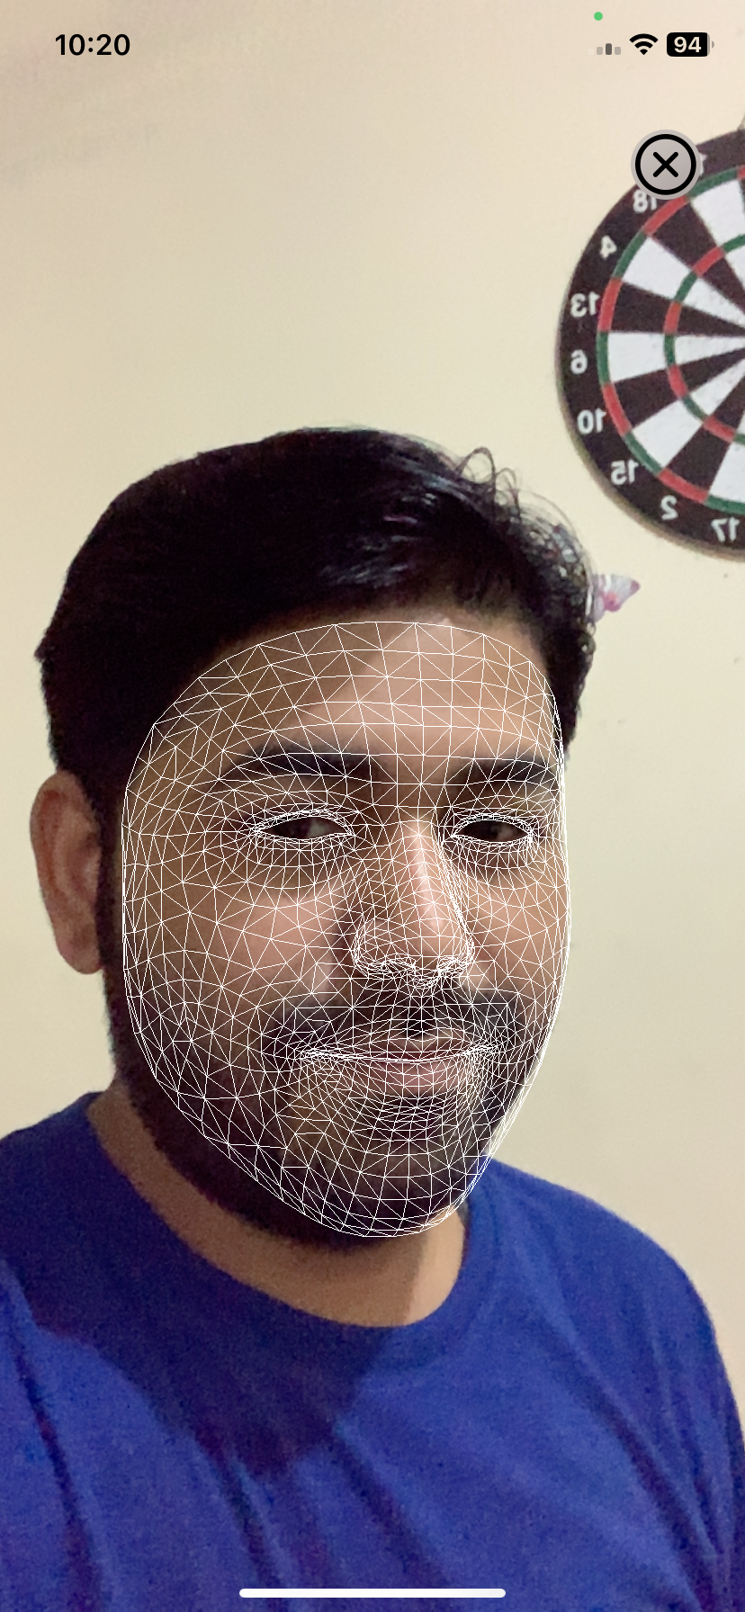
Concluding we have covered in this first part of the series, we explored how to integrate ARKit with SwiftUI by building a sample project that demonstrates face point tracking on a physical device. This foundation sets the stage for more advanced AR experiences.
In the next part of the series,, we’ll dive deeper into additional ARKit features with step-by-step examples to expand your understanding and capabilities. Stay tuned!