Introduction
Swift Data is a powerful tool for managing data in Swift applications, offering a streamlined alternative to Core Data. Designed to simplify data persistence, Swift Data becomes especially valuable when Core Data’s complexity feels like a lot to handle. One of its notable benefits is its simplicity; it provides a more straightforward syntax and is easier to set up than Core Data.
Swift Data is compatible with both UIKit (Storyboard-based) and SwiftUI applications. This flexibility allows us to seamlessly integrate Swift Data into our existing projects, whether we use the traditional UIKit approach with Storyboards or embrace the modern SwiftUI framework.
What we will learn in this blog
- Setting up Swift Data for data persistence in SwiftUI applications
- Performing CRUD operations seamlessly with Swift Data
- Overview of attribute properties, relationships, and predicates
- Handling concurrent tasks and multi-threading for smoother operation in SwiftUI apps
Setup and CRUD Operations
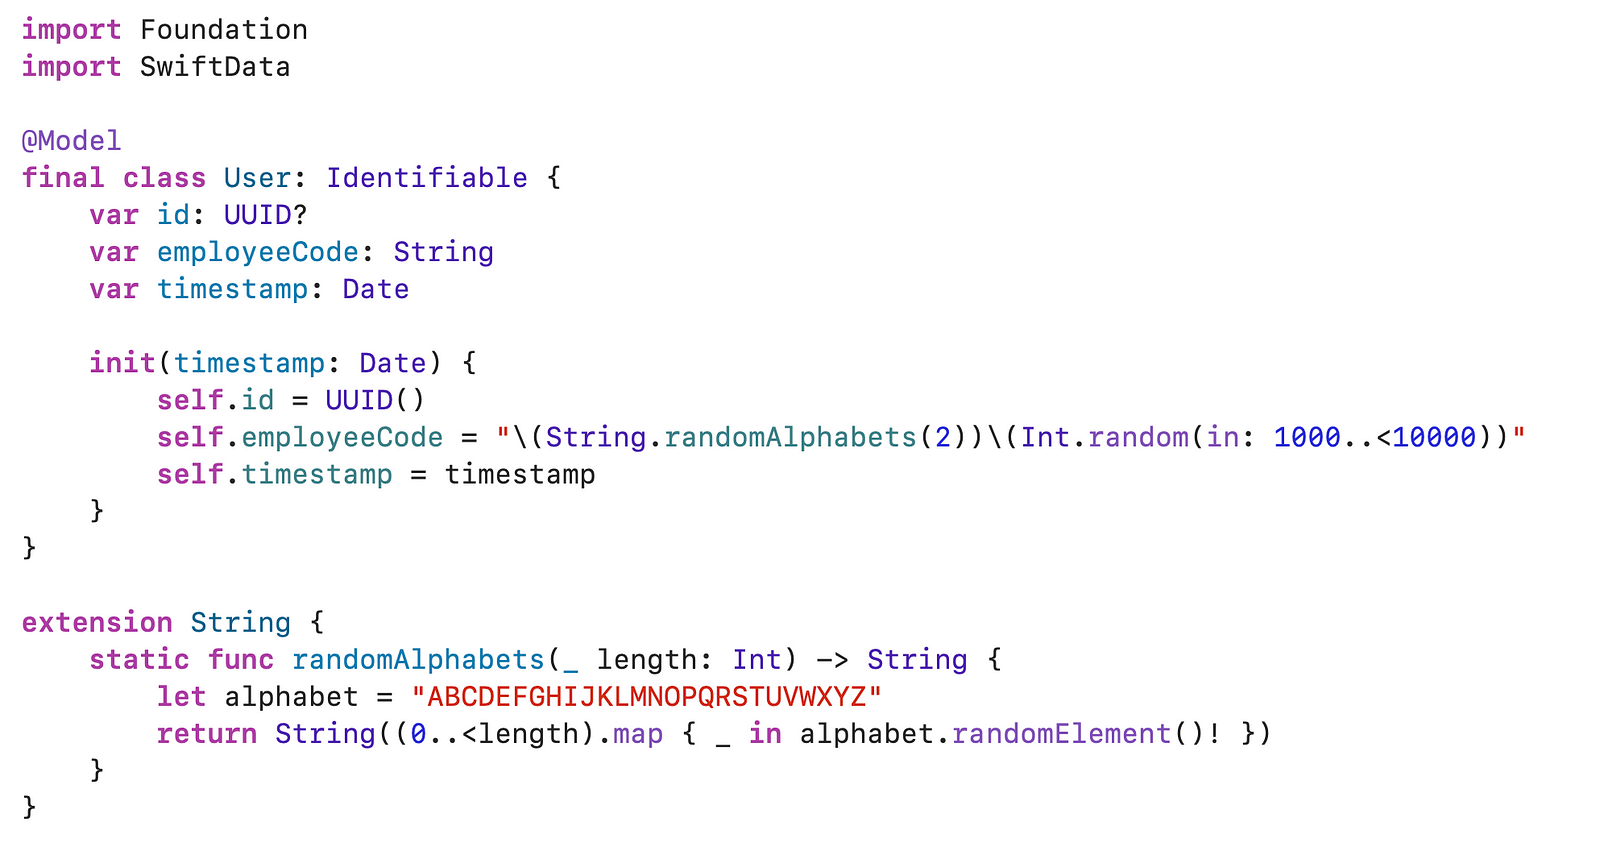
Defining the Model: Let’s define our data model before diving into the setup.
For demonstration purposes, let’s create a model named “User” with two properties: id and employeeCode (a combination of 2 random alphabets and 4 numbers). We’ve used a class for our model since the @Model macro is specifically designed for class conformance.
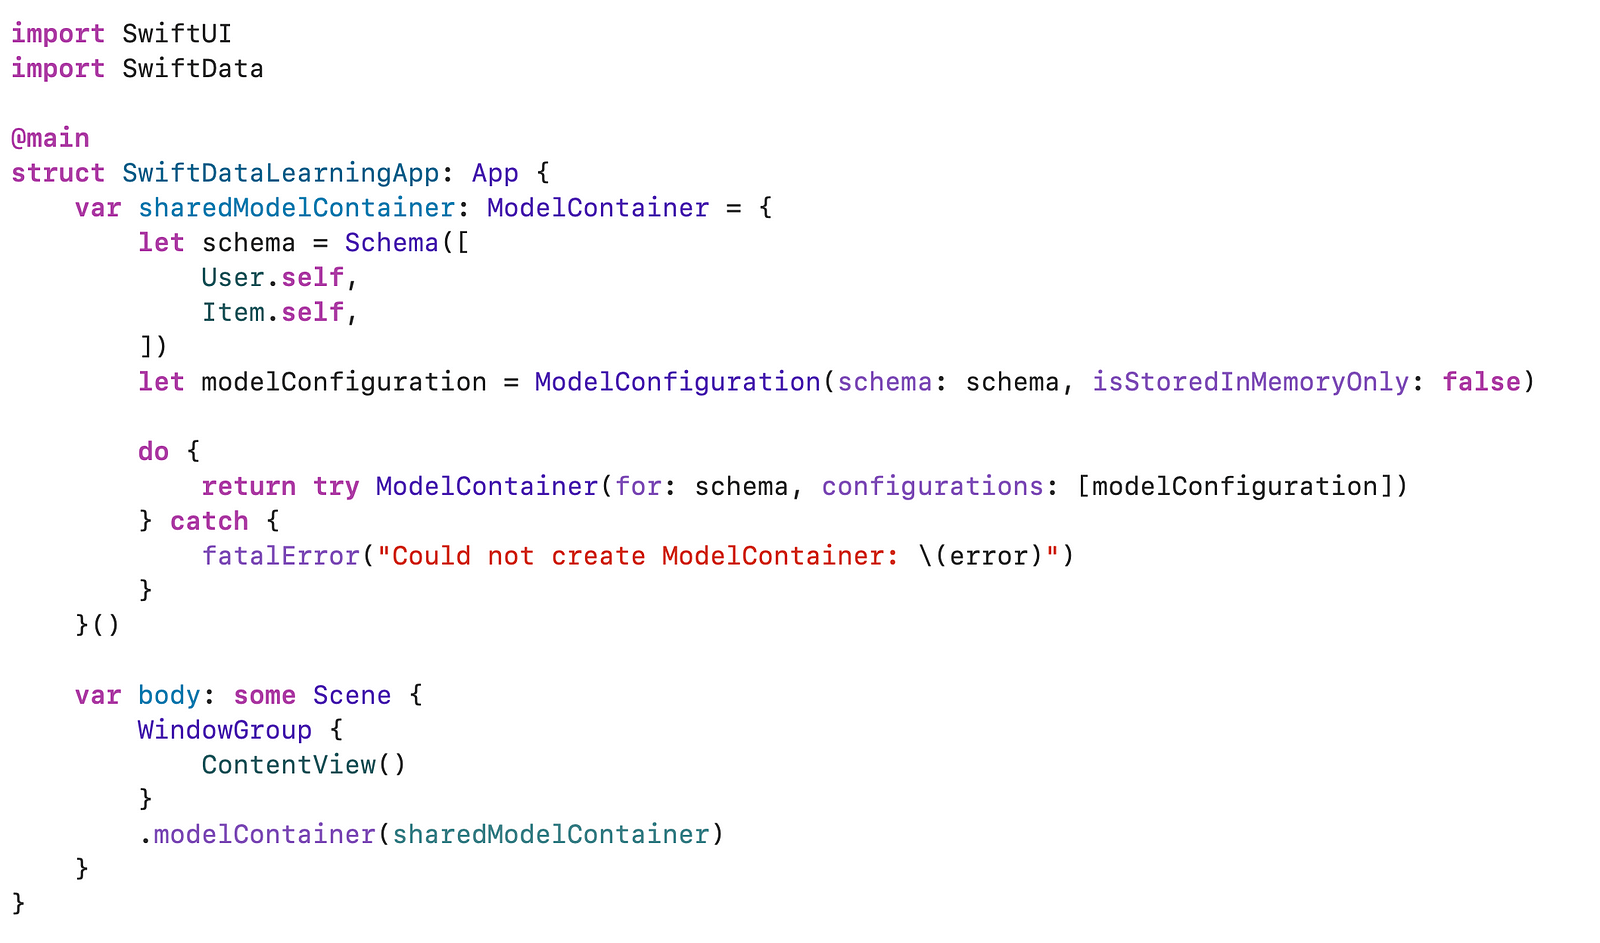
Model Container and Environment Setup: Now, let’s move on to setting up the Model Container — a crucial element for managing our data. The model container acts as the central repository for our data items.
In our sample app, we initialize a ModelContainer by defining a schema containing a single model, ‘User.self’ . This model-centric approach aligns with Swift Data’s simplicity. Model configuration ensures persistent storage, and any errors during setup trigger a fatal error for immediate attention. Additionally, we’ve added ‘Item.self’ to demonstrate how we can incorporate multiple models within the schema, enabling flexibility in our data management approach. Please ignore this for now, it’s added here for demonstration purposes only.
We must introduce an environment object for the data context to complete our Swift Data setup. This will facilitate seamless data interaction within our SwiftUI views.
So, in our ContentView, we initialize our data environment with the following lines —

Here, ‘@Environment(\.modelContext)’ provides access to the SwiftData context within SwiftUI, allowing for convenient data manipulation. The ‘@Query’ property wrapper is utilized to automatically fetch and observe changes to the collection of User entities, enhancing the responsiveness of our view.
The primary functionality displays a list of users, each represented by a NavigationLink. The user details, including the employee code and creation timestamp, are displayed within a structured ‘VStack.’
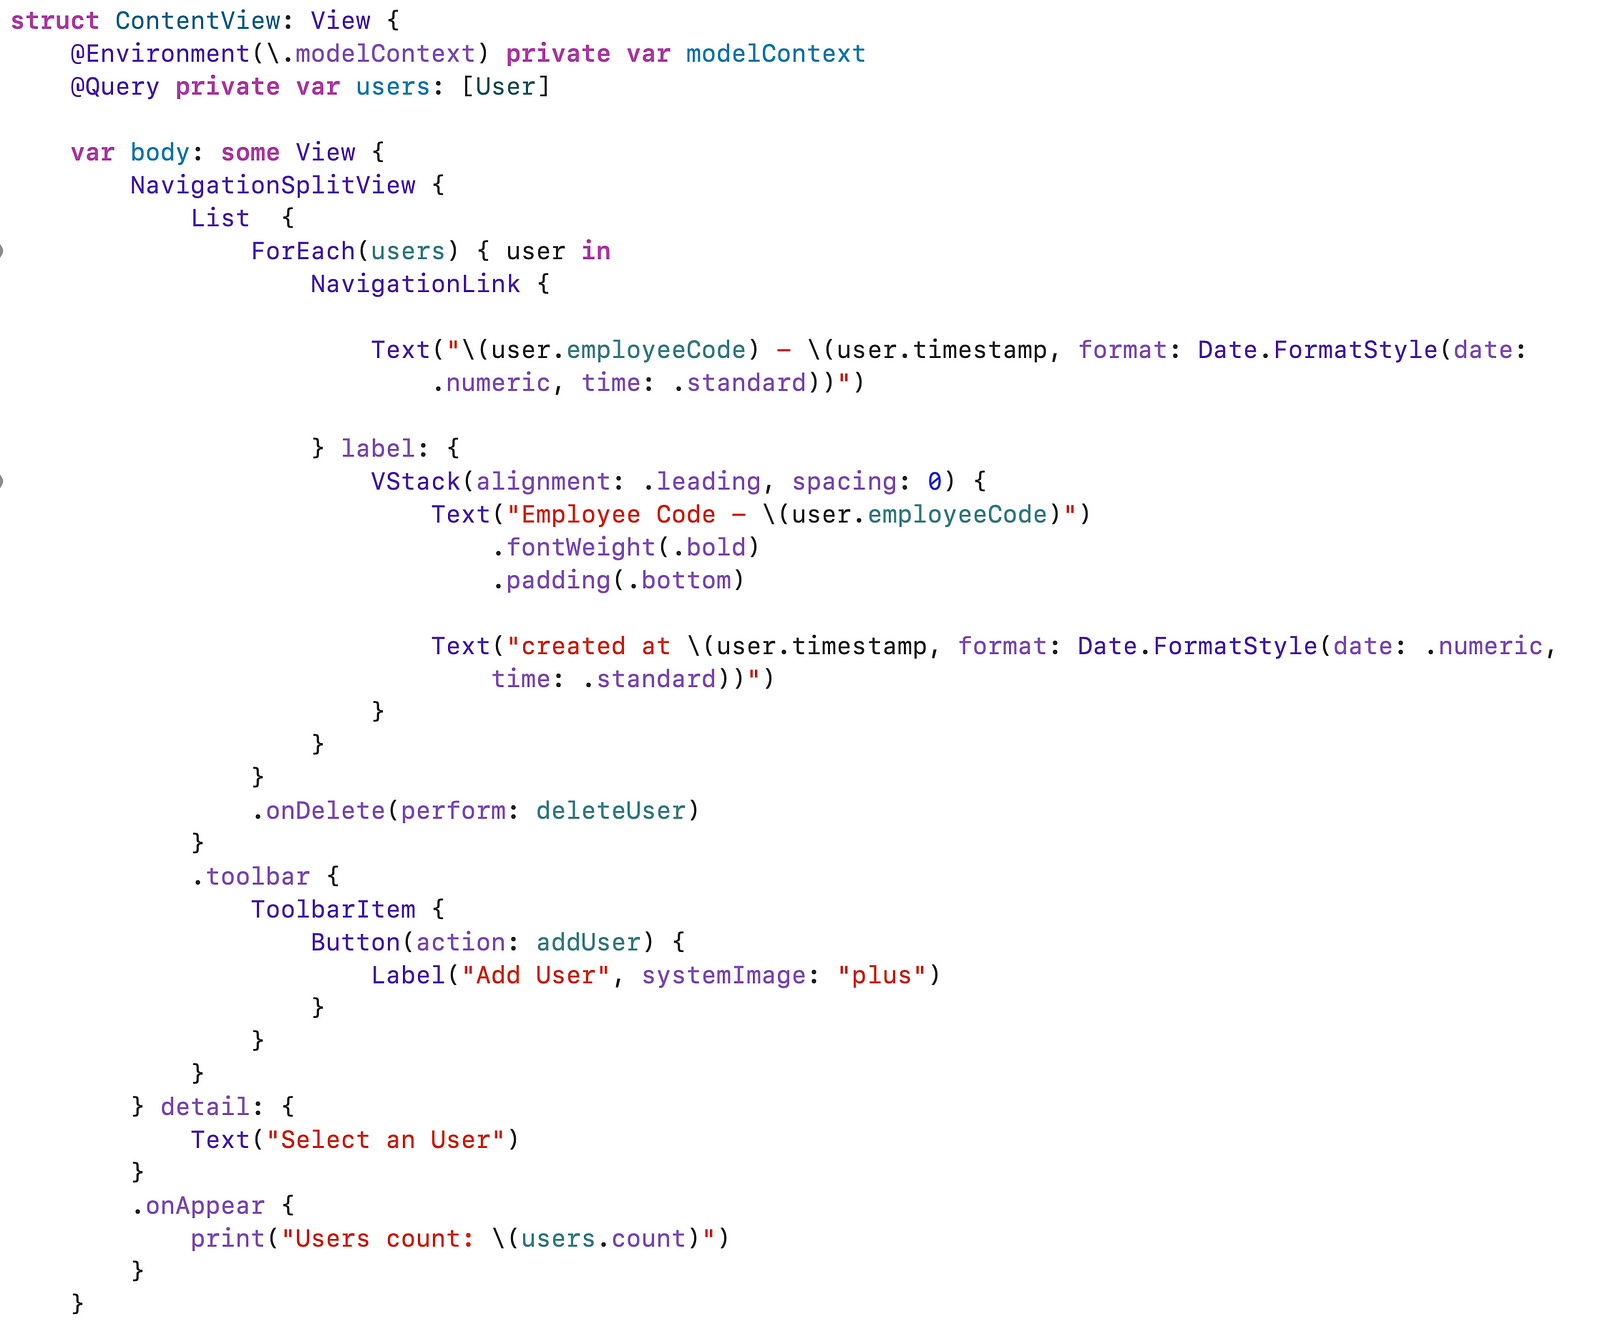
The onDelete modifier enables users to delete entries, invoking the ‘deleteUser’ function.
Adding a new user is achieved through the ‘addUser’ function. This function uses the ‘modelContext’ to insert a new User instance with a timestamp.

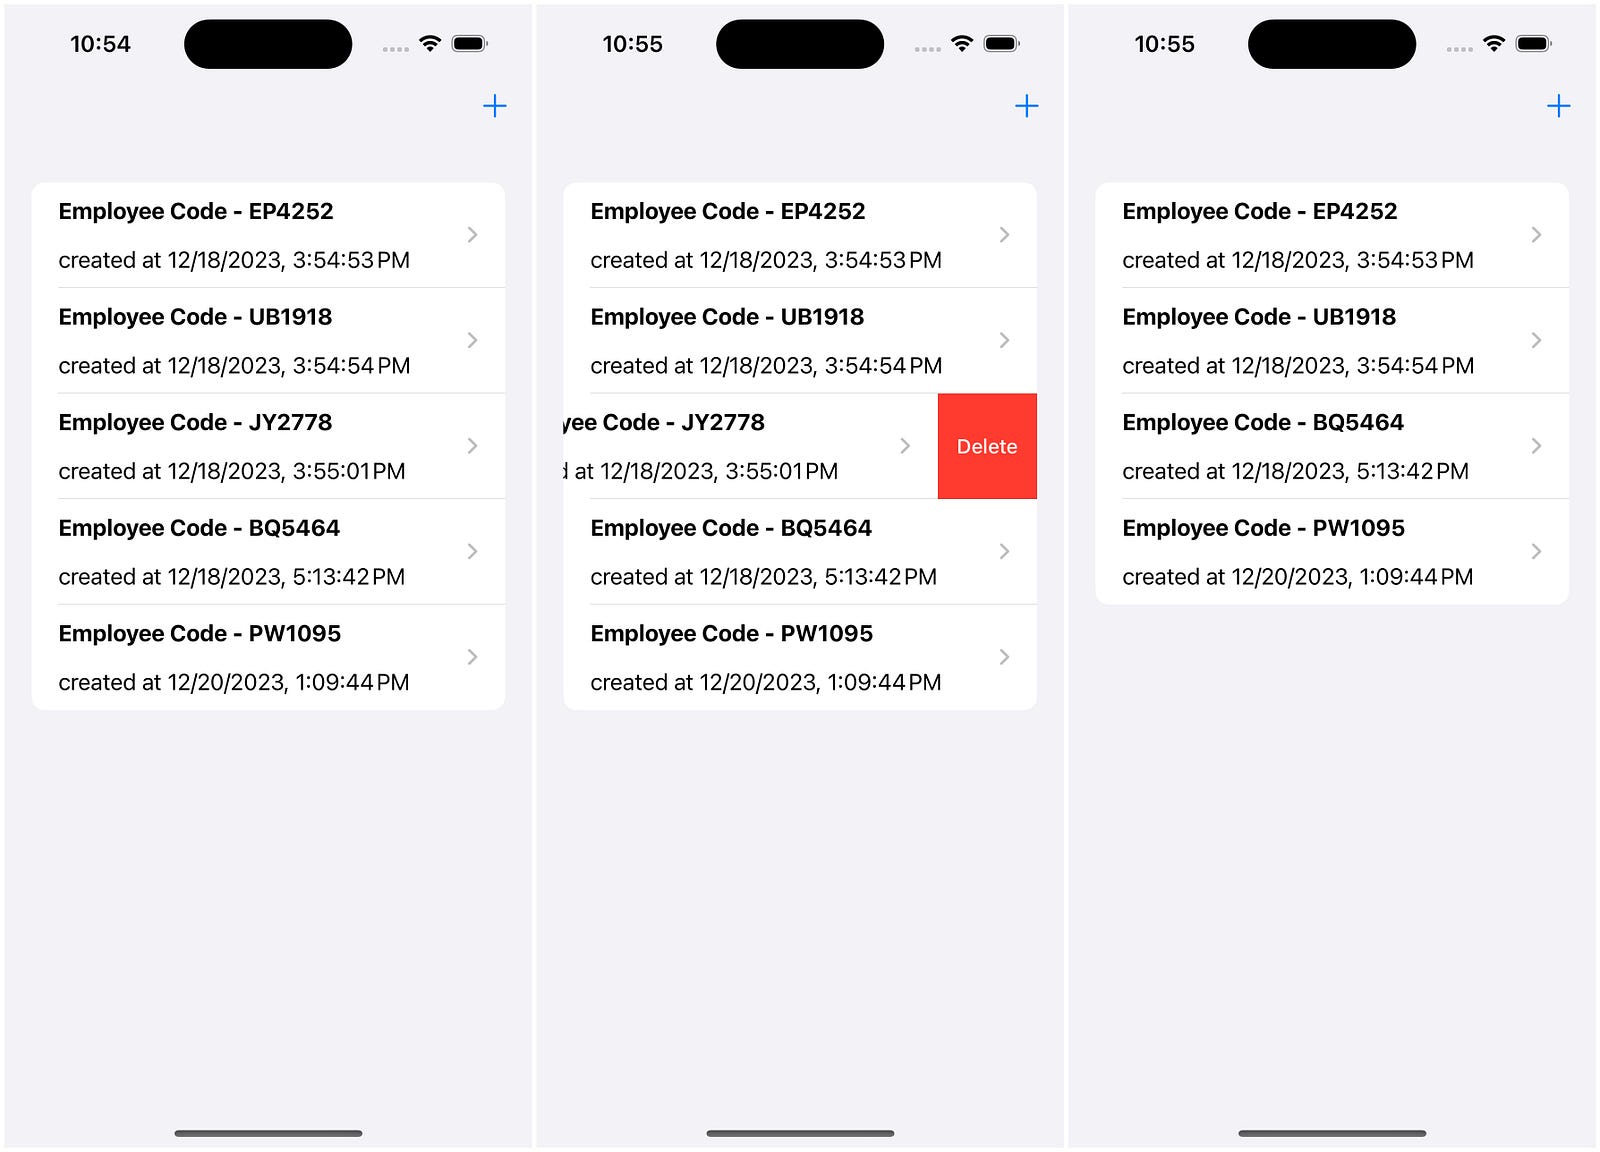
In summary, this code shows a simple but effective way to use SwiftUI. Users can easily add or remove entries by tapping the “+” button. When we tap it, a new row appears with a unique employee code and the current time.
When we run this code, we’ll see how well SwiftData handles creating, retrieving, updating, and deleting (CRUD) operations. Users can smoothly add or remove data, and when they restart the app, it automatically shows the latest information, making the app feel dynamic and responsive.
Defining Attributes and Relationships: Now we understand that SwiftData lets us stick to using Swift throughout the process. We’ll create our models using Swift code only, and with just one command, they become strong objects that work smoothly with SwiftData. This way, we don’t have to use CoreData’s user interface for the data model and then use the Swift class we made for the model.
For example, we can also establish a relationship between two objects or specify them to be unique with the @Attributeproperty,
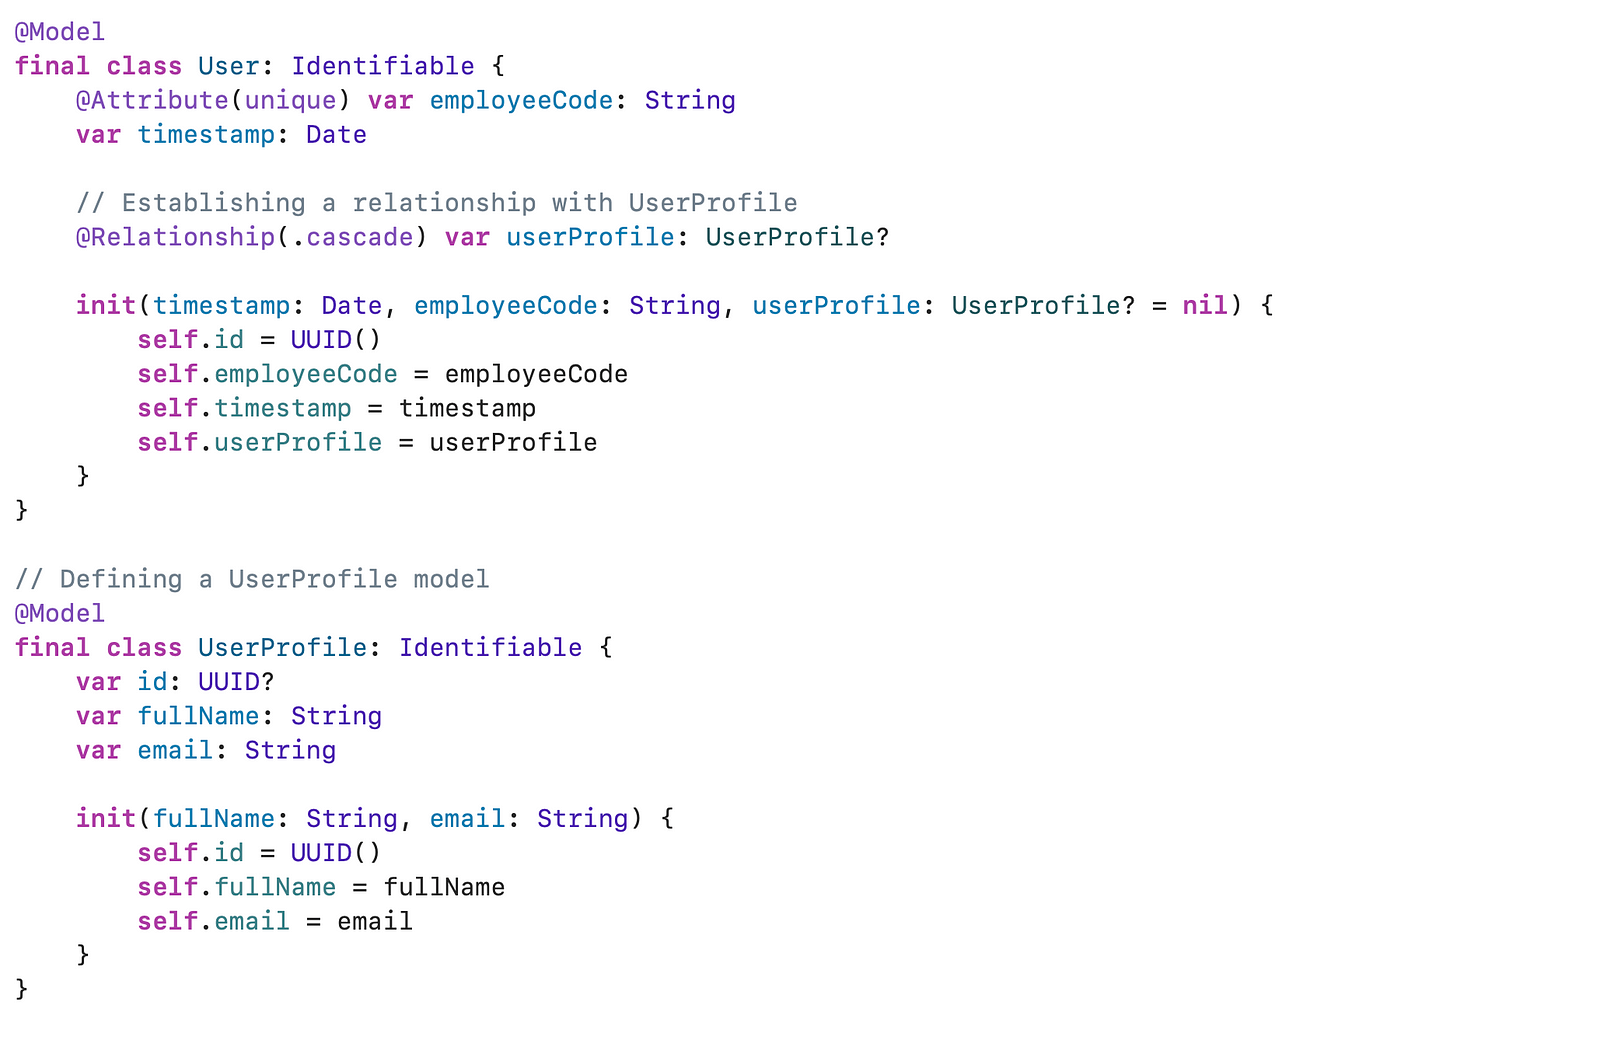
Here, @Attribute(unique) ensures that each user has a unique employee code, preventing duplicates. @Relationship(.cascade) attribute indicates a relationship between entities. The .cascade option typically means that changes made to one side of the relationship (in this case, the User object) will be automatically reflected on the other side (the associated UserProfile object). For example, the associated UserProfile might also be deleted if we delete a User.
Understanding Predicates: If we talk about #Predicate, it provides a concise and expressive way to define filtering conditions for model objects. It enables the creation of dynamic and complex queries, enhancing the flexibility of data retrieval.
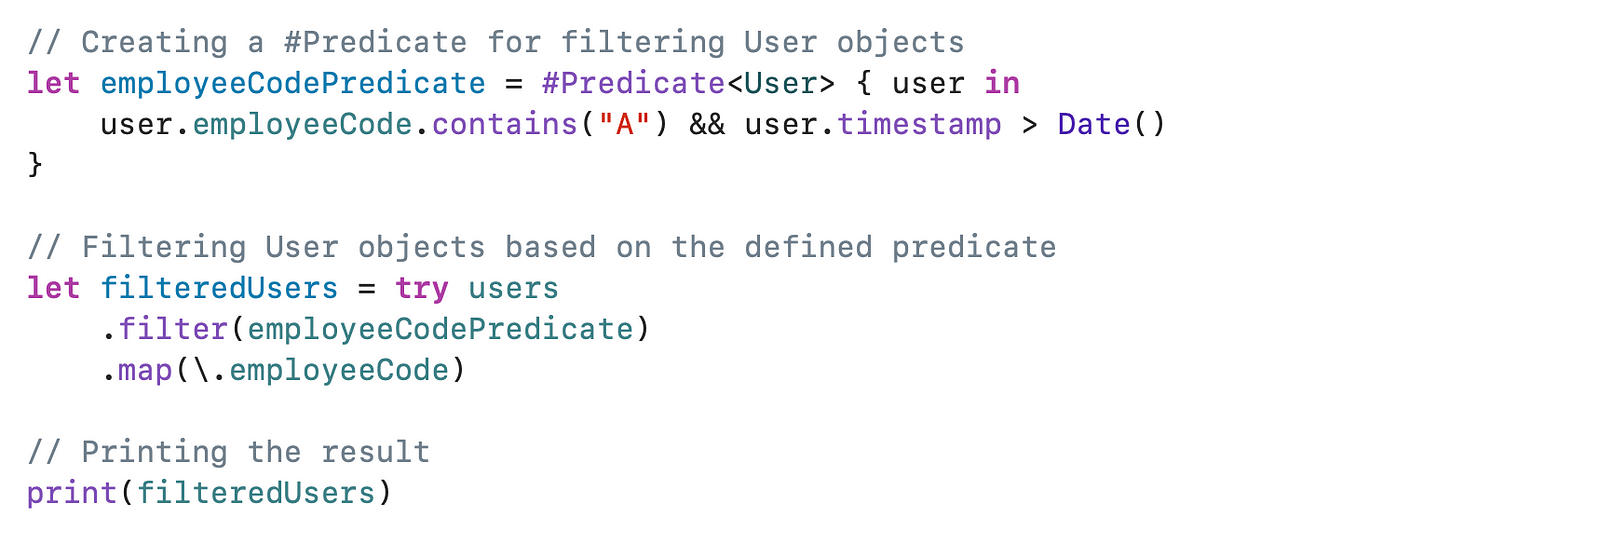
In this example, it filters users whose employee codes contain “A” and have a timestamp greater than the current date. fileteredUsers array is then obtained by applying the defined predicate to the collection of users.
Concurrency and Multi-threading
To keep our app running smoothly, especially when handling lots of data, we need to be smart about managing tasks happening simultaneously, like saving data or fetching information. Swift Data helps us do this with concurrency and multi-threading.
Managing Tasks in the Background: When we have big tasks like processing data or fetching a lot of information, we don’t want to stop the app from doing other things. We can do these tasks in the background so the app stays responsive. It’s like having someone else do the work while we focus on something else.
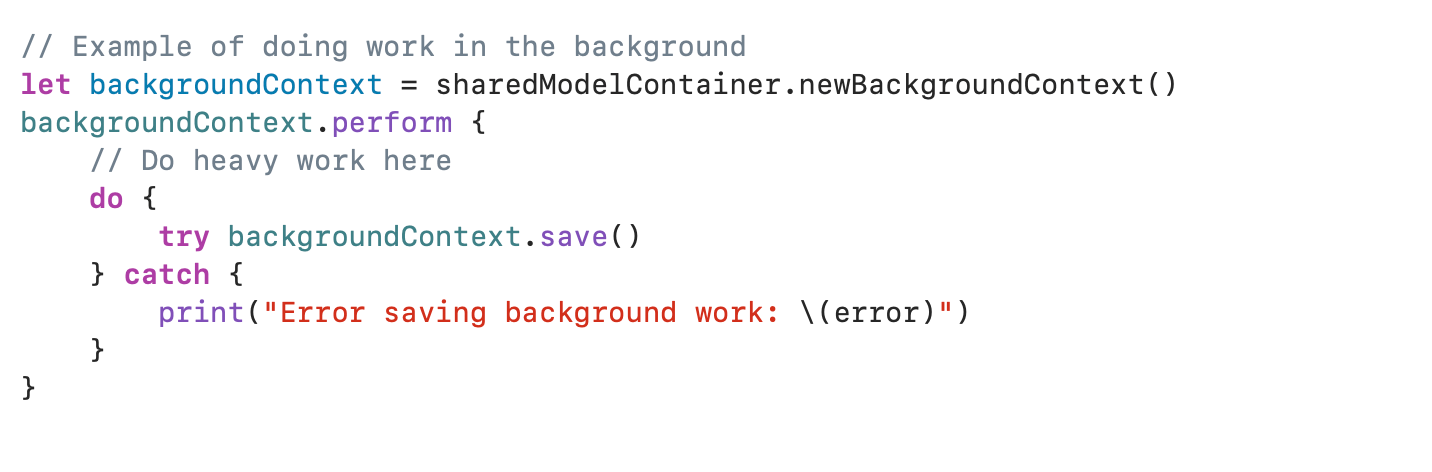
In this example, we use ‘.perform()’ on a context specifically created for background tasks. This allows us to perform heavy work asynchronously, ensuring that our app remains responsive and doesn’t get blocked by resource-intensive operations.
Keeping Things Safe Across Threads: When different parts of the app are doing things simultaneously, we need to ensure they don’t mess each other up. We use special techniques to ensure everything stays organized and safe, like ensuring only one thing can change data at a time.
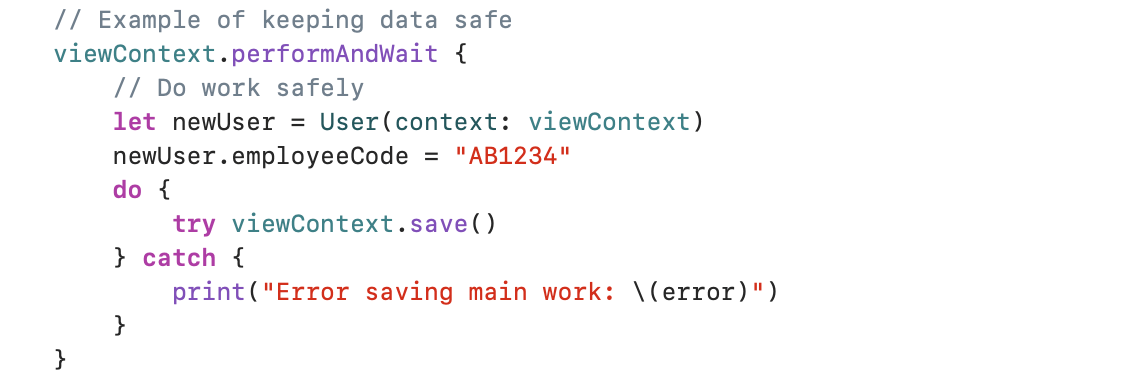
Here, ‘performAndWait’ ensures that our changes happen in the right order and don’t clash with other changes happening simultaneously. This keeps our data safe and prevents conflicts.
Dealing with Changes from Different Places: Sometimes, different parts of the app change the same thing at once. We need to make sure these changes don’t cause problems like losing data. So, we have ways to handle these situations carefully to keep everything running smoothly.
By using these simple tricks for concurrency and multi-threading in Swift Data, our SwiftUI apps can stay fast and responsive, giving users a great experience.
Conclusion
In wrapping up, Swift Data opens the door to a simpler and more flexible iOS development experience. Keep digging into its features, discover new ways to refine data with ease, and leverage its simplicity to craft dynamic and responsive apps.
Keep coding and unlocking the full potential of SwiftData. Check out our other blog posts for more insights.