
Automating Drupal Workflows with ECA (Event-Condition-Action)
Automation plays a crucial role in modern websites by reducing manual work and improving efficiency. In Drupal 7, automation was primarily handled by the Rules module, which allowed site builders to define event-based actions. However, with the transition to Drupal 8 and its new Symfony-based architecture, the Rules module faced technical challenges and could not fully adapt to the new system.
To address this gap, the ECA (Event–Condition–Action) module was introduced in Drupal 8 and later versions. ECA provides a powerful, flexible, and no-code visual interface for creating automated workflows. It allows site builders and developers to define triggers (events), evaluate conditions, and execute actions without writing custom code. This makes automation more accessible, maintainable, and aligned with Drupal’s modern architecture.
What is ECA?
ECA stands for Event, Condition, and Action. It is an automation tool in Drupal that helps you create workflows easily without coding.
- Event: Something that happens on the website, like a user logging in or creating a page.
- Condition: A check to decide whether the action should run, such as checking the user role or content type.
- Action: What should happen next, like sending an email, showing a message, or updating content.
In simple words, ECA lets you say: “When this happens, and if this is true, then do this.”
ECA modellers
ECA provides multiple workflow modellers, allowing users to design automation visually. The available modellers include:
- BPMN.iO (recommended modeller): A browser-based BPMN workflow designer built into Drupal’s admin interface, allowing users to easily create automation processes using a simple drag-and-drop system.
- Camunda modeller: A standalone desktop tool for designing BPMN workflows outside Drupal, which can later be imported into the system—ideal for building complex processes or working offline.
- ECA classic modeller: A simple form-based modeller built on Drupal’s Form API, designed for users who prefer setting up workflows through structured configuration rather than visual diagrams.
Step-by-Step Implementation of ECA
The Drupal ECA module enables automation by triggering workflows based on user activities. This guide explains how to create a basic ECA workflow using the BPMN.iO modeller, where the system will automatically show a thank-you message whenever a new article is published.
1. Navigate to the ECA Module
- The installation process for the ECA (Event–Condition–Action) and BPMN module is the same as installing any standard Drupal module. You can download them from Drupal.org and enable them through the admin interface or using Drush.
- ECA – https://www.drupal.org/project/eca
- BPMN.iO – https://www.drupal.org/project/bpmn_io
Please note that both modules are mandatory and must be installed and enabled for proper functionality.
- Go to your Drupal admin panel.
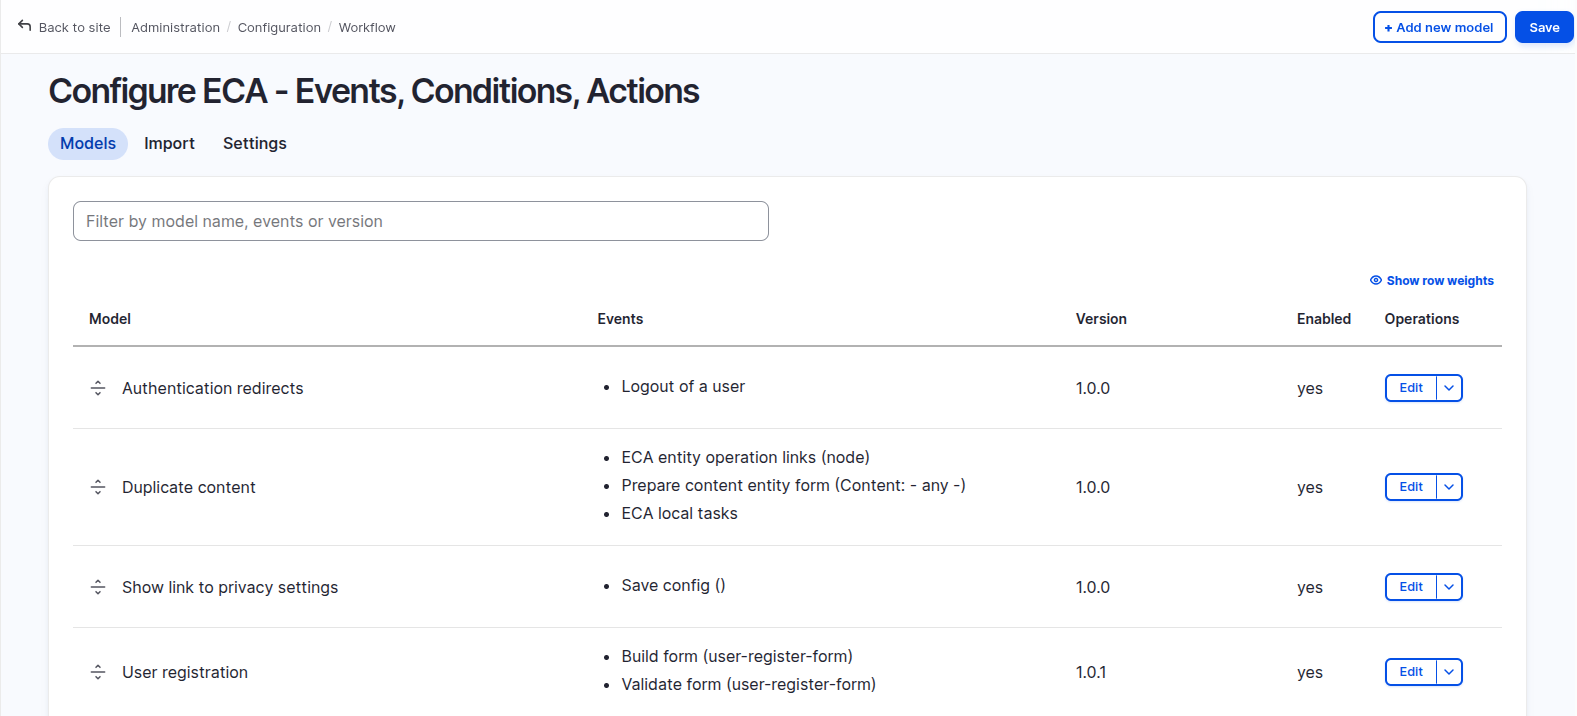
- Click on Configuration, then select Workflows, and choose ECA.
- The page will display a list of all existing ECA models.
- Click on “+Add new model” to start creating a new workflow.
2. Exploring the ECA interface
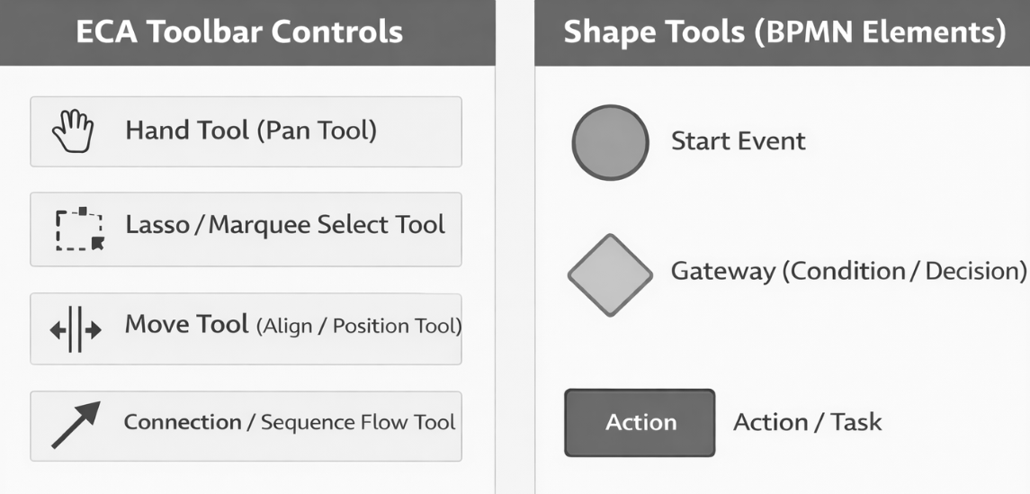
When you open the ECA modeller, you will notice the following key components:
- A visual workflow editor based on the BPMN.iO modeller, where you design your automation using diagrams.
- Different symbols representing workflow elements:
- Event (Start Event) – Shown as a circle, marking where the workflow begins.
- Condition (Gateway) – Shown as a diamond, used to check specific criteria before proceeding.
- Action (Task) – Shown as a rounded rectangle, representing what the system should do.
- Sequence Flow – Arrows that connect events, conditions, and actions in a logical order.
- A settings panel on the right side of the screen, where you configure details for each event, condition, or action.
Note: Sequence flows may include conditions, but they can also be used without any conditions.
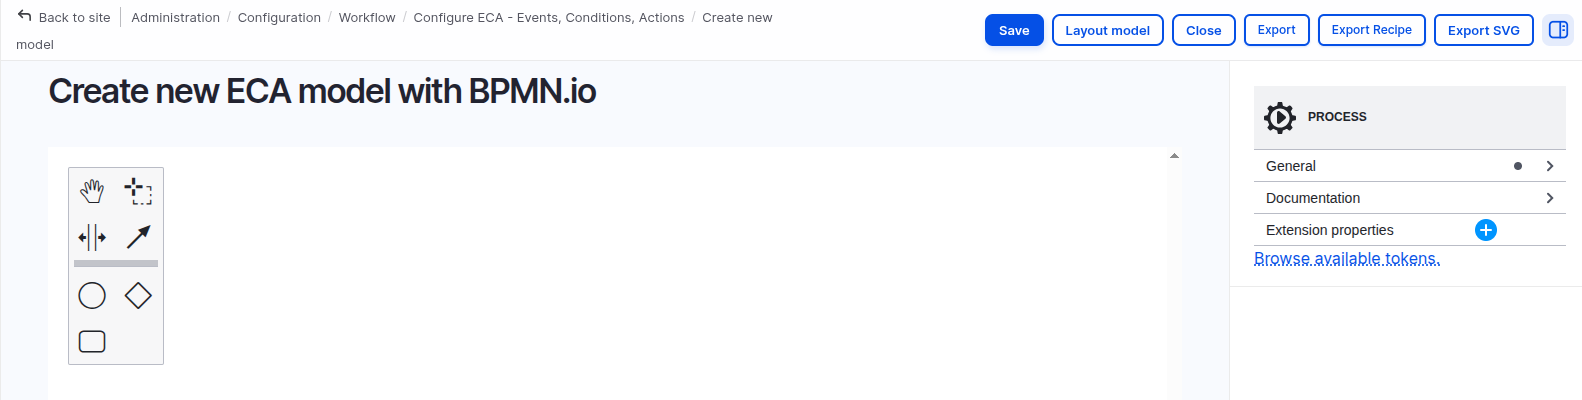
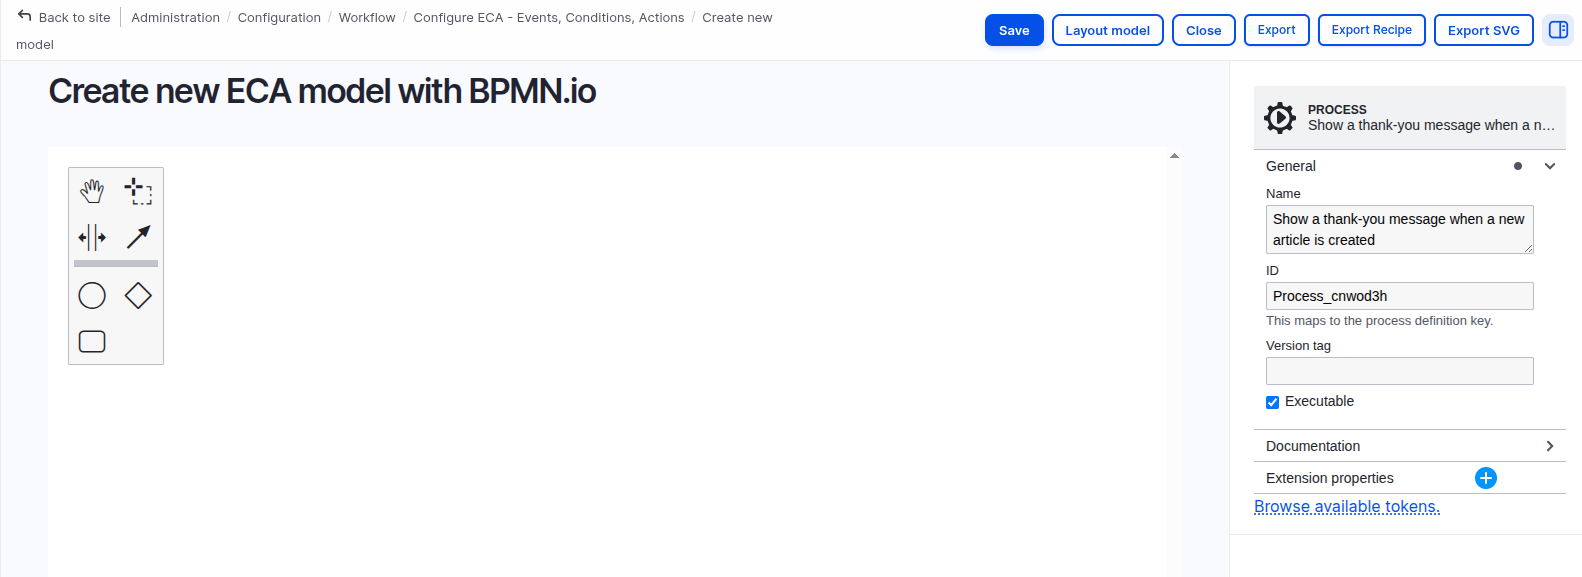
3. Give your model a name
- Click on the property panel on the right side of the screen.
- In the Name field, type a clear and meaningful title for your model.
- Example: “Show a thank-you message when a new article is created.”
4. Add and configure an event
- Place a Start Event (circle) on the workflow canvas by dragging it from the toolbar.
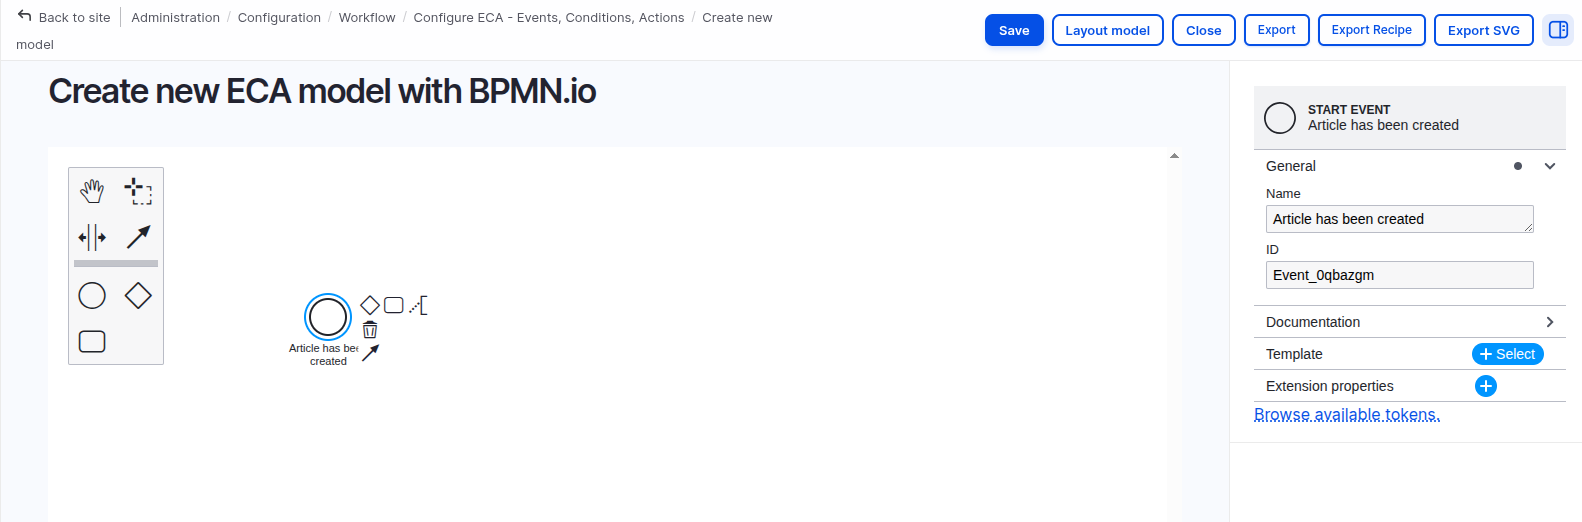
- Select the circle and enter the title “Article has been created” in the property panel.
- Click the “+ Select” button next to the Template field.
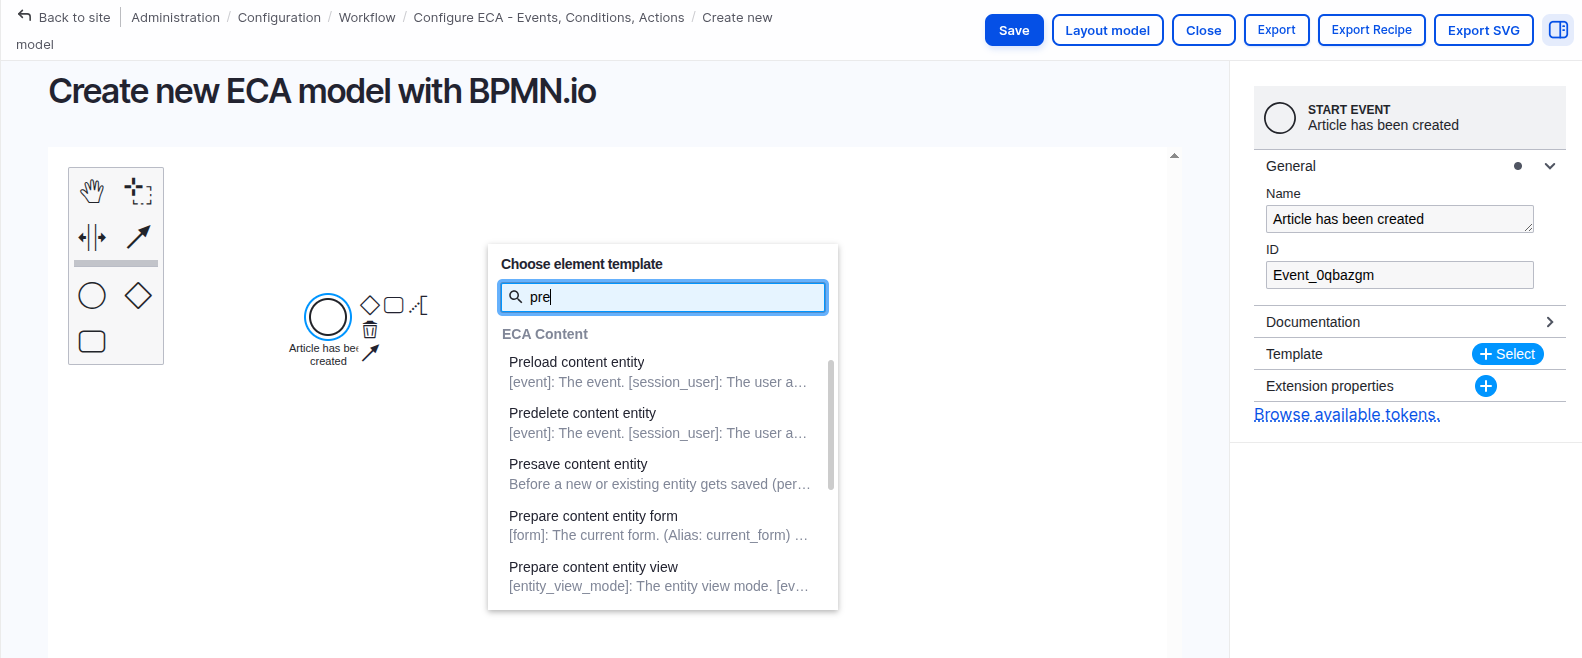
- From the list of available templates, select “Insert content entity (After a new entity has been saved).”
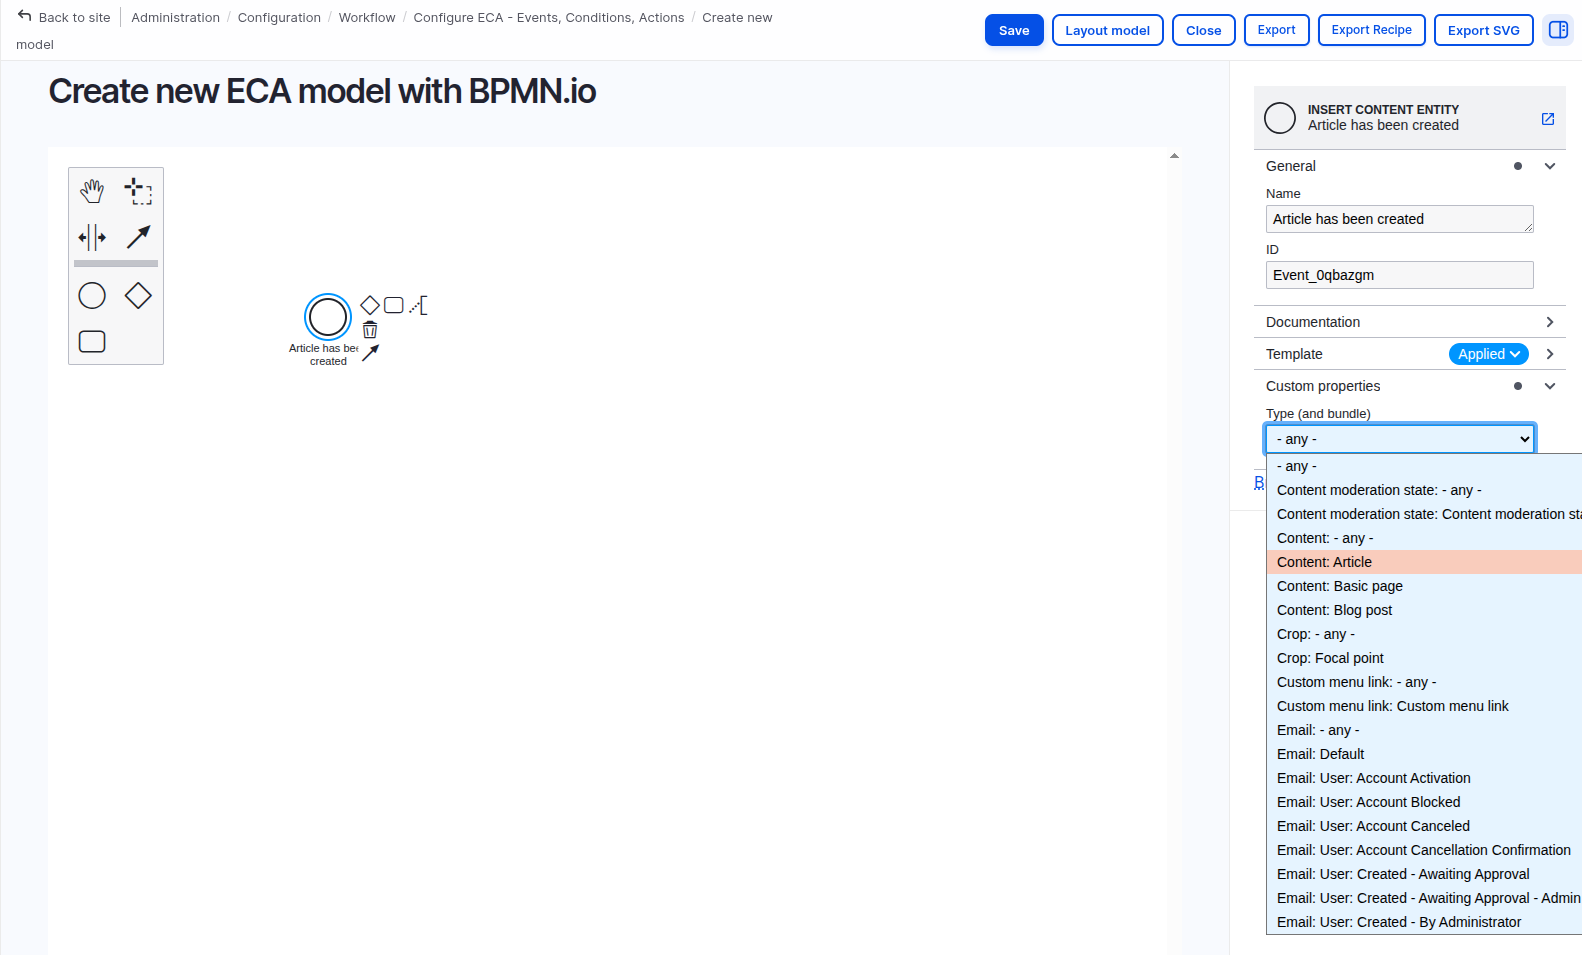
- In the settings panel, specify that this event should only apply to the Article content type.
Step 5: Add and configure an action
- Click on the task (small rectangle) that is linked to your event.
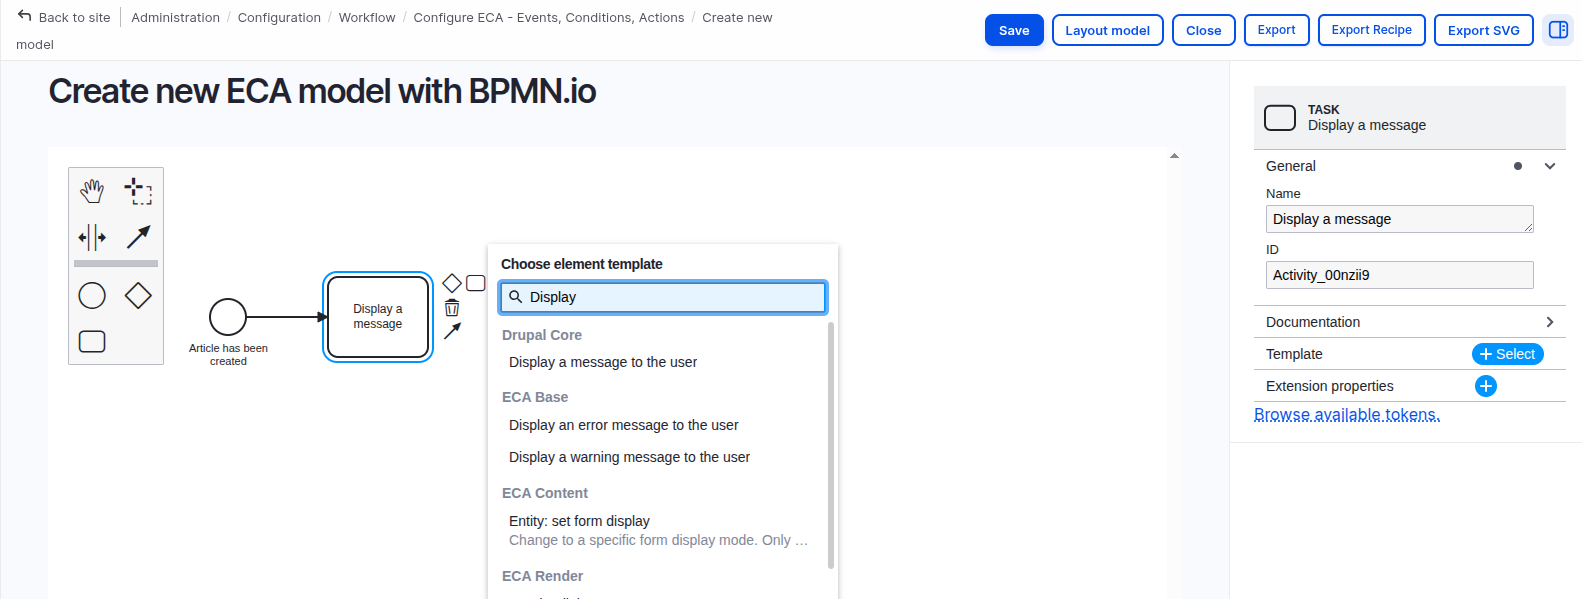
- In the property panel, give it the name “Display a message.”
- Click “+ Select” next to Template and pick “Display a message to the user.”
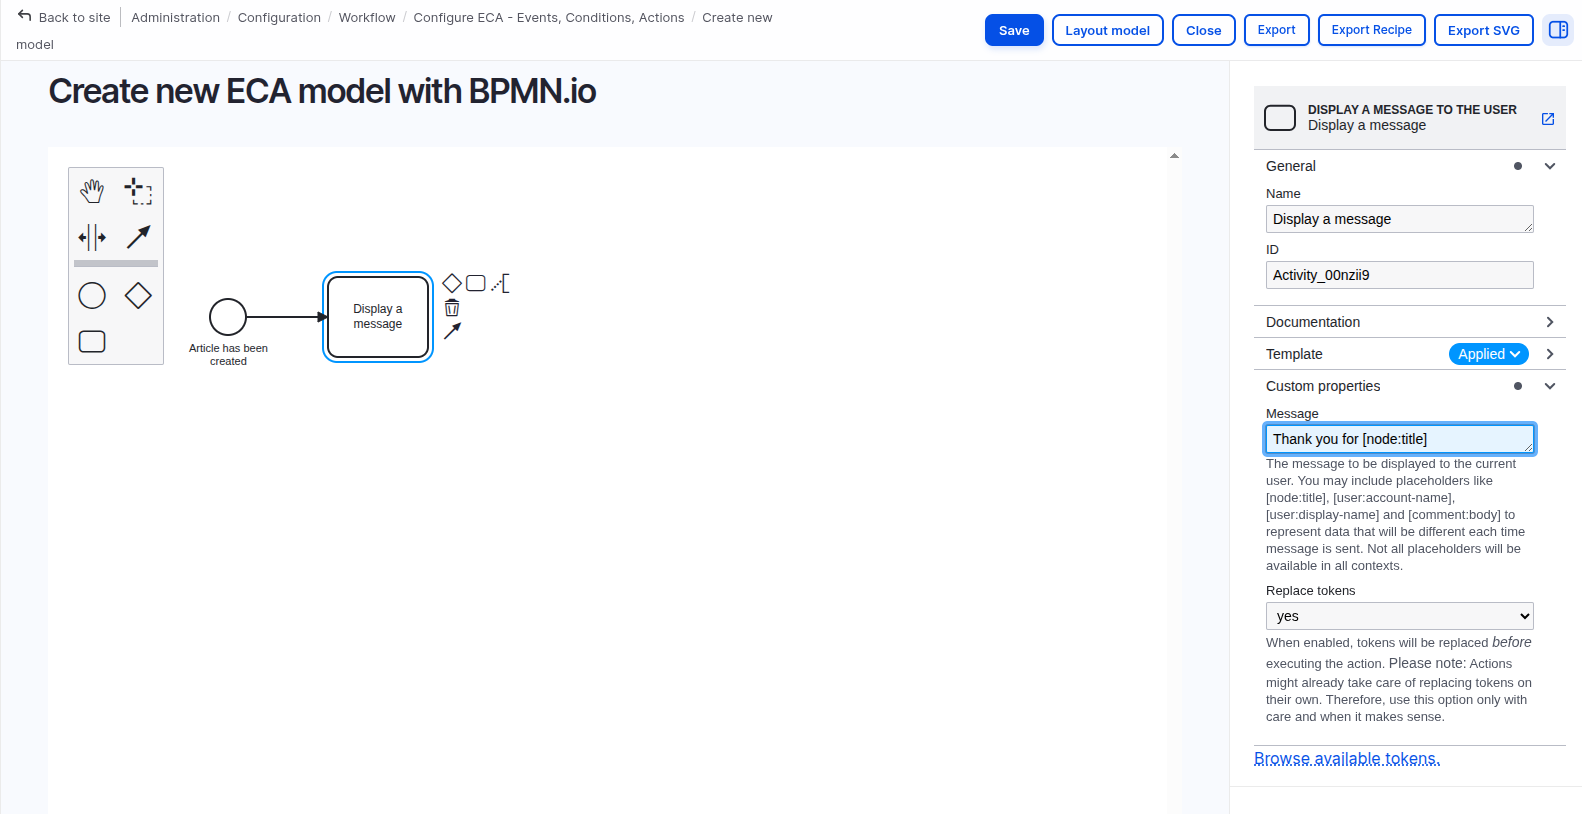
- Under Custom properties, type your message: “Thank you for [node:title]”
- Because you are using a token, set Replace tokens = Yes so that the article title appears dynamically.
Step 6: Add and configure a condition
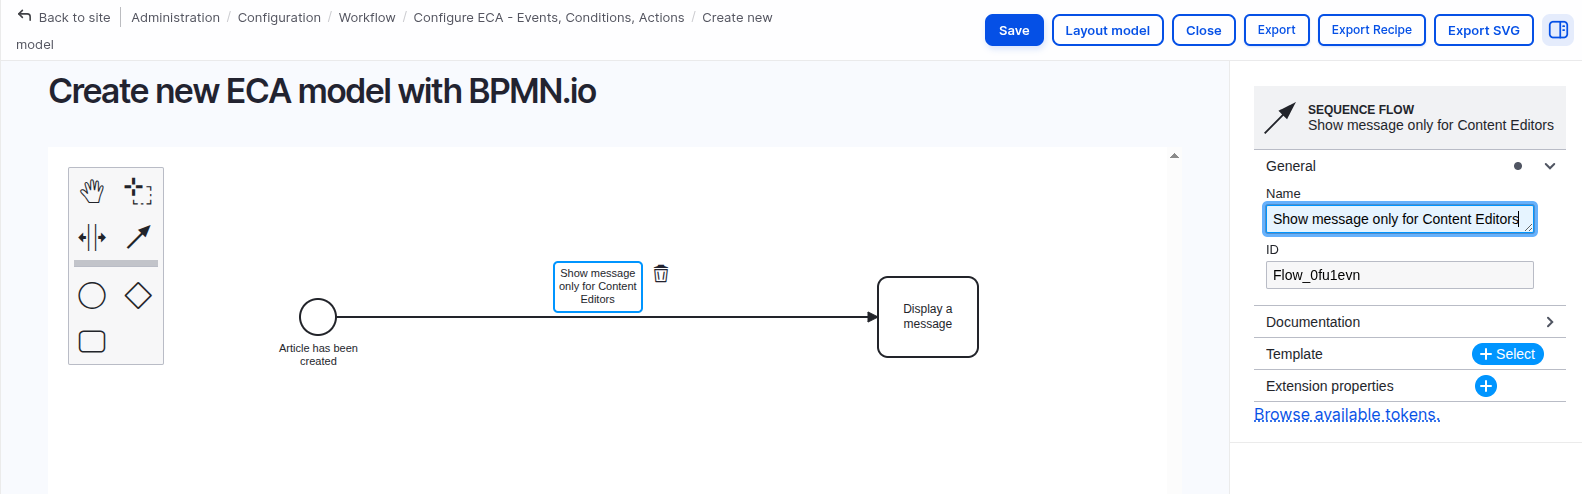
- Click on the arrow (sequence flow) that connects the event to the action.
- In the property panel, enter the name “Show message only for Content Editors.”
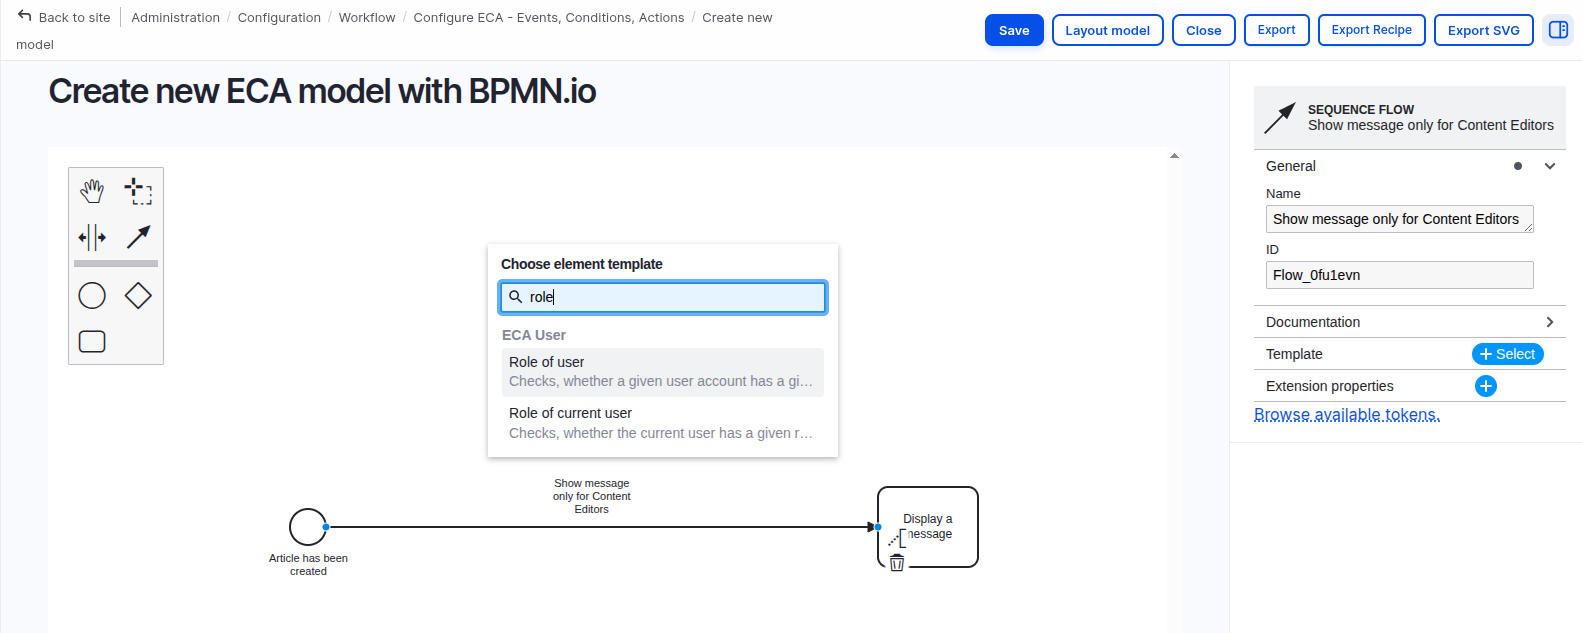
- Click “+ Select” next to Template and choose “Role of the current user.”
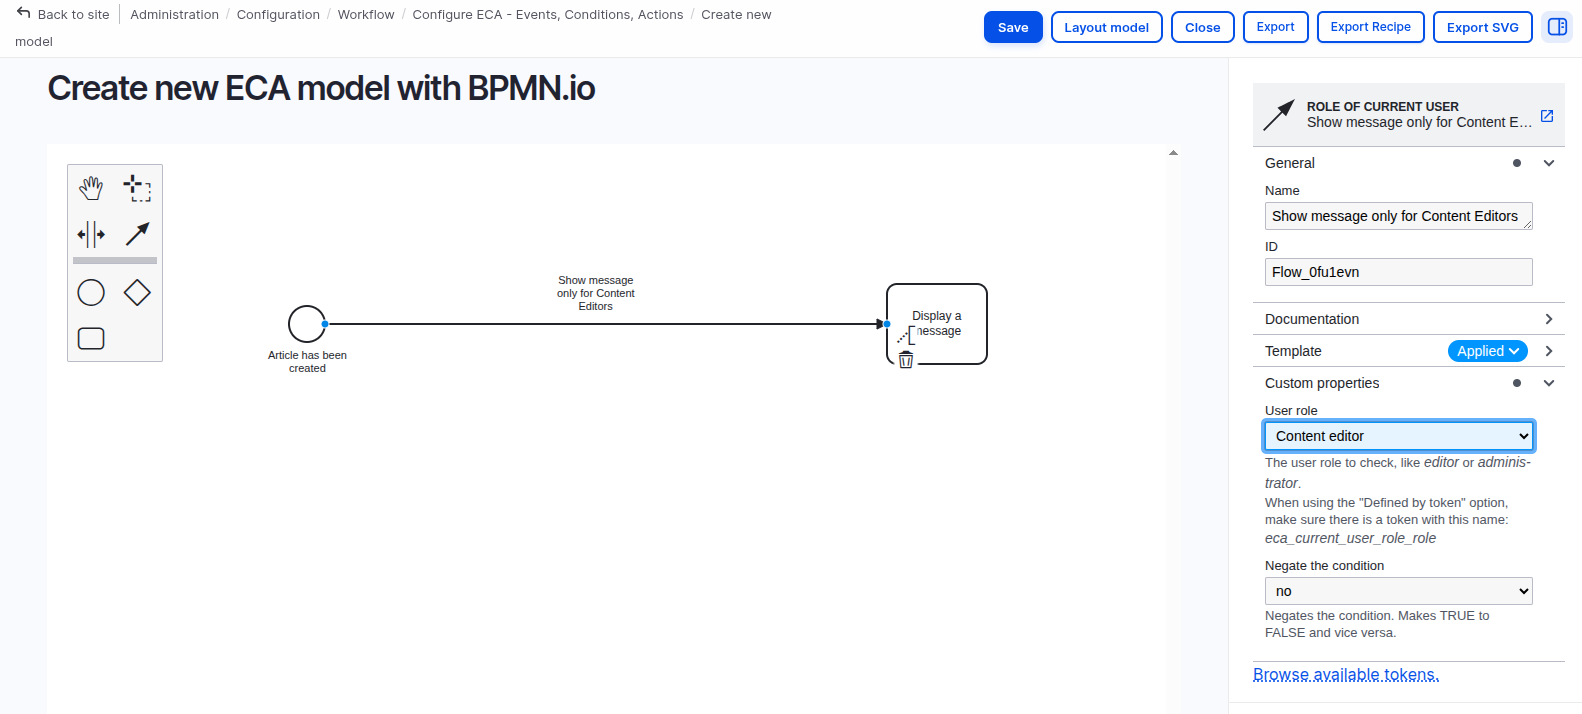
- From the role options in the settings panel, select “Content Editor”. This makes sure the message is shown only to users who have this role.
Step 7: Save and verify the workflow
- Click the Save button to finalize and store your ECA model.
- Go to Content → Add content → Article and create a new article.
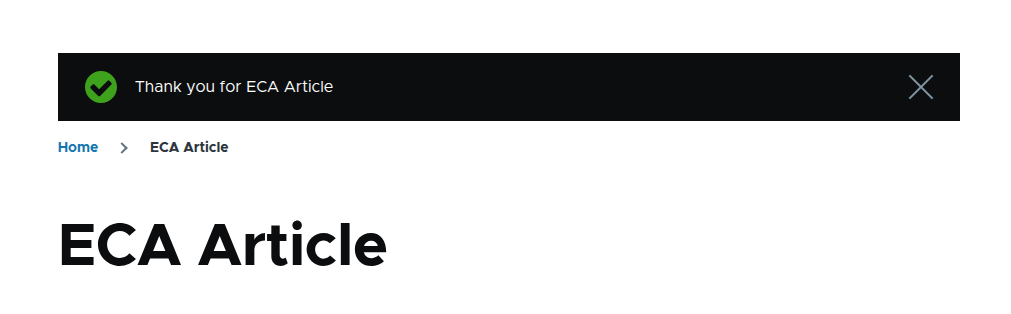
- After you save the article, you should see a message on the screen: “Thank you for [node:title]”.
This basic example shows how ECA can be used to automate actions in Drupal. You can enhance this workflow later by adding additional conditions, actions, or logic to make it more advanced.
Conclusion
The ECA module in Drupal, together with BPMN.io, is transforming automation from simple visual workflows into smarter, AI-driven processes. Site builders can now design no-code workflows that integrate AI tools like GPT to automatically generate content summaries, enhance metadata, and detect potential moderation concerns in real time.
With adoption on more than 20,000 websites, BPMN.io-based ECA workflows are becoming increasingly popular. For further learning, you can explore the ECA Guide, Drupal.org Project Page, and BPMN.io resources.
