What is Migration?
Migration is an Extract, Transform, Load (ETL) process. Inside Drupal Migrate API, the extract phase is called source, the transform phase is called process, and the load phase is called destination.
Before Understanding how to do custom migration, it is important to understand why to perform the custom migration. So there are two main reasons for doing it :
To transfer content from Non-Drupal site to Drupal Site : If we have to move the content from non-Drupal database to Drupal database without the help of any API or without writing a series of SQL queries that copies the content from any non-Drupal database to Drupal database. So to avoid writing custom queries for insert,update,delete we use custom migration.
Transfer Custom Data from old database to new database: When we have to transfer data for taxonomies or any reference fields or something which have not migrated in our normal migration process.
Lets now understand how to perform it. In this example I am going to migrate data from custom table “commerce_order” to Drupal Site. The prerequisite contrib modules are Migrate Plus, Migrate Tools, Migrate.
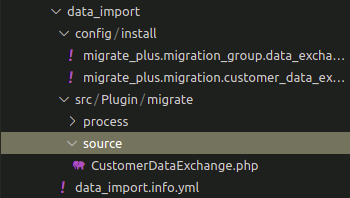
A. Folder structure that should be needed is as follows:-
A.1) module_name -> config -> install -> [migrate_plus.migration_group.data_exchange.yml ] and [ migrate_plus.migration.customer_data_exchange.yml ]
A.2) module_name -> src -> Plugin -> migrate -> source -> CustomerDataExchange.php
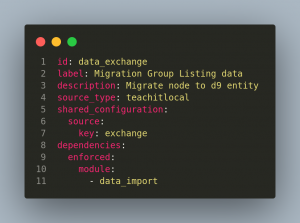
B) Understand how to make migration group? – /var/www/html/projectName/subFolder/web/modules/custom/data_import/config/install/migrate_plus.migration_group.data_exchange.yml
Point to remember – Inside shared configuration the key name should match with the key you are going to provide inside settings.php .
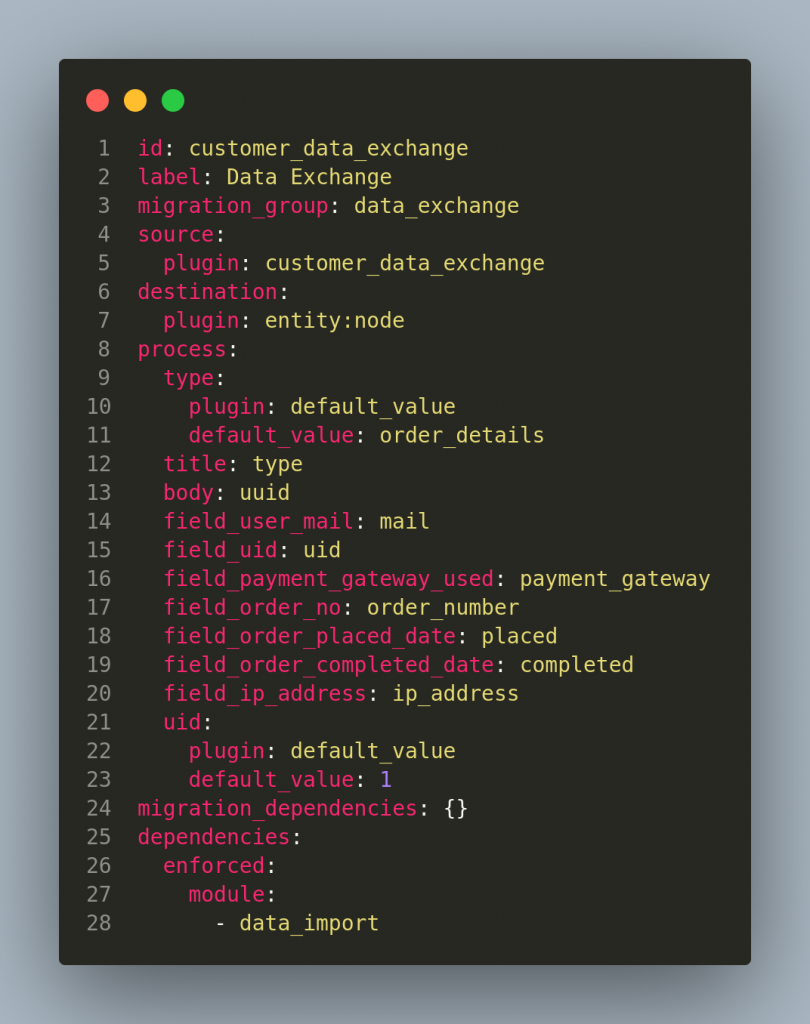
C) How to make migrate_plus.migration.[name].yml file? /var/www/html/projectName/subFolder/web/modules/custom/data_import/config/install/migrate_plus.migration.customer_data_exchange.yml
Points to remember –
a) Migration_group key has id of the file (migrate_plus.migration_group.data_exchange.yml),
b) Destination plugin changes according to scenarios; in this example, it is entity:node.
c) Inside the process key, we have to map values that are going to be set inside drupal from the source.
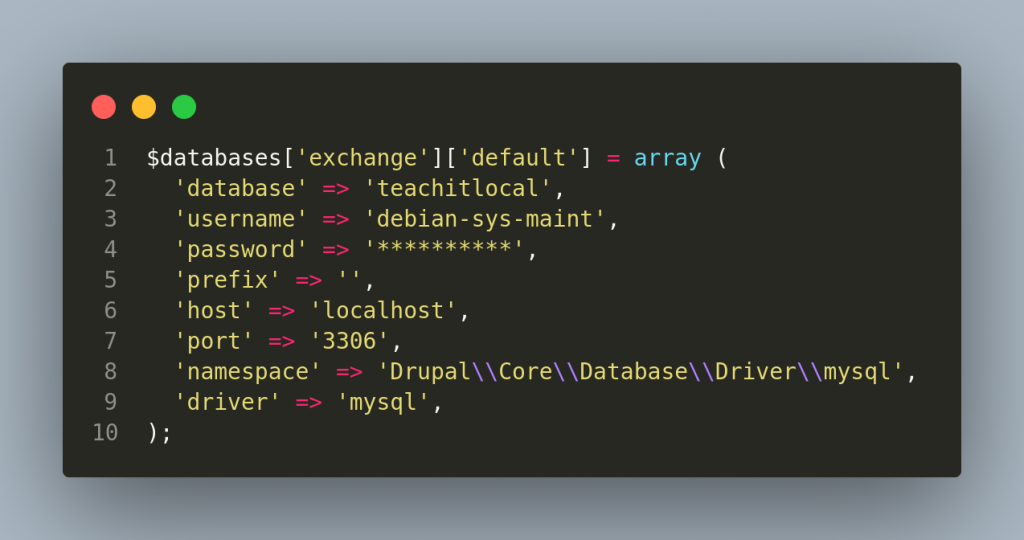
D) Settings.php
In this file you should make a new entry for source database, in this example source database is ‘teachitlocal’.
E) How to process queries during migration?
Make a class file as /var/www/html/migration/my_site_name_dir/web/modules/custom/data_import/src/Plugin/migrate/source/CustomerDataExchange.php
In function query(), You can write any query which you want to render in the database to fetch all the required data; basically, select query is going to be fired here. You can also use join queries to fetch data from multiple tables.
[php]

public function query() {

$query = $this->select('commerce_order', 'co');
$query->fields(‘co’, [‘order_id’, ‘type’, ‘uuid’, ‘mail’, ‘uid’, ‘payment_gateway’, ‘order_number’, ‘placed’, ‘completed’, ‘ip_address’]);
return $query;
}
[/php]
Function getIds() is used for providing the unique column from the database by which Drupal store records for each migration and could not processed same field if it once get migrated.In our case order_id is the primary key of our table.
[php]

public function getIds() {

return [

'order_id'=> [

'type'=>'integer',

'alias'=>'co',

],];}
[/php]

Function prepareRow(Row $row) is used for preprocessing data before mapping it with destination.
[php]

public function prepareRow(Row $row) {

$row->setSourceProperty('mail', trim($row->getSourceProperty('mail')));

$row->setSourceProperty('price', str_replace('$', ''", $row->getSourceProperty('field_price')));

}

[/php]
Admin steps to run Migration =>
1) Install a custom module
2) Visit the link by changing the domain “http://local.d9.com/admin/structure/migrate” you will find the migration group listed here.
3) Visit the link to check migration status “http://local.d9.com/admin/structure/migrate/manage/data_exchange/migrations” and you will find a total count that should be migrated and count of imported, unprocessed data.
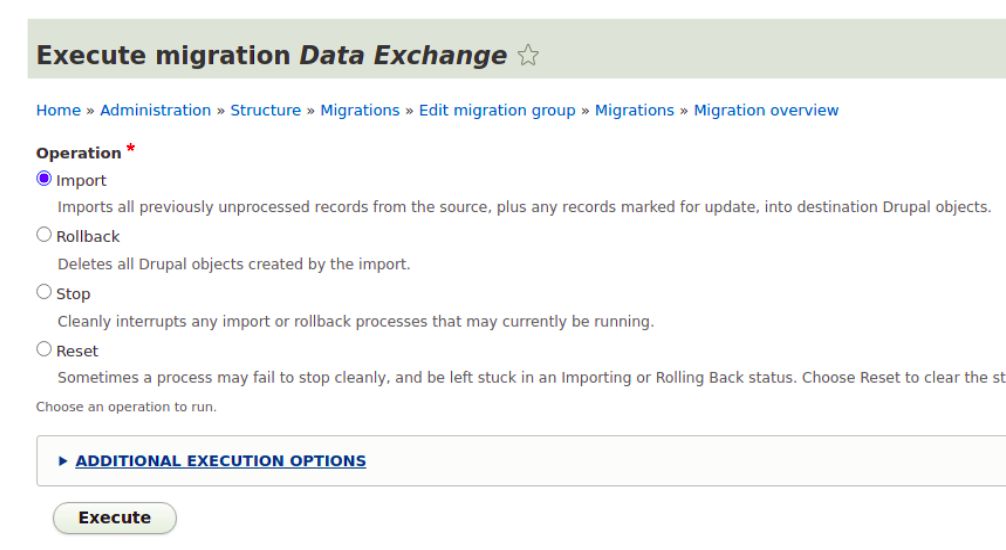
4) For executing the process of migration, just select import and then execute the process as shown in the screenshot.
For migrating passwords in Drupal, you can refer to our other blog:
Password Migration in Drupal 9 from Drupal 7, WordPress, and Custom CMS
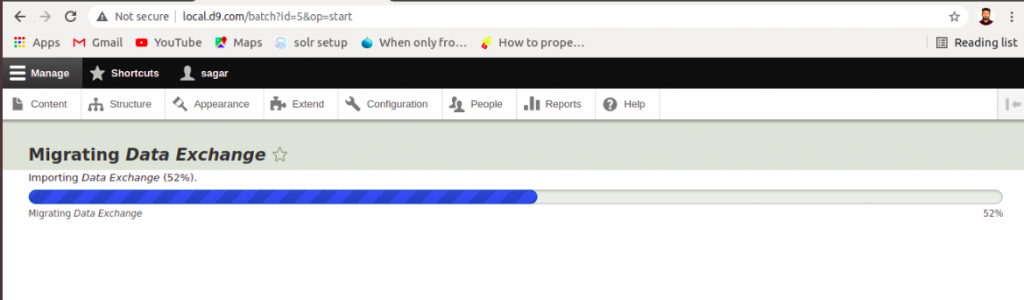
5) Migration process is in progress
After completion, you will receive a message like this

6) Drupal stores mapping of migration inside table migrate_map_[id]
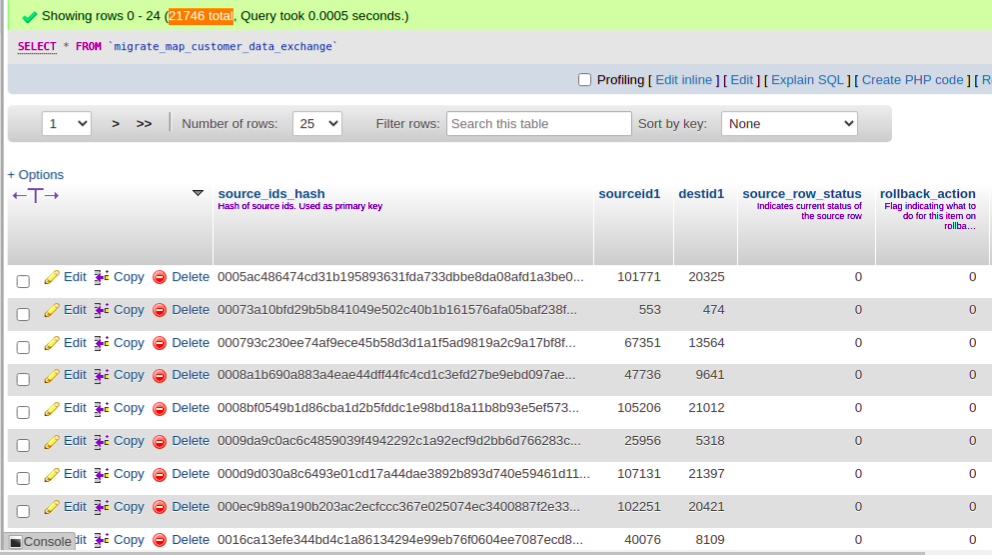
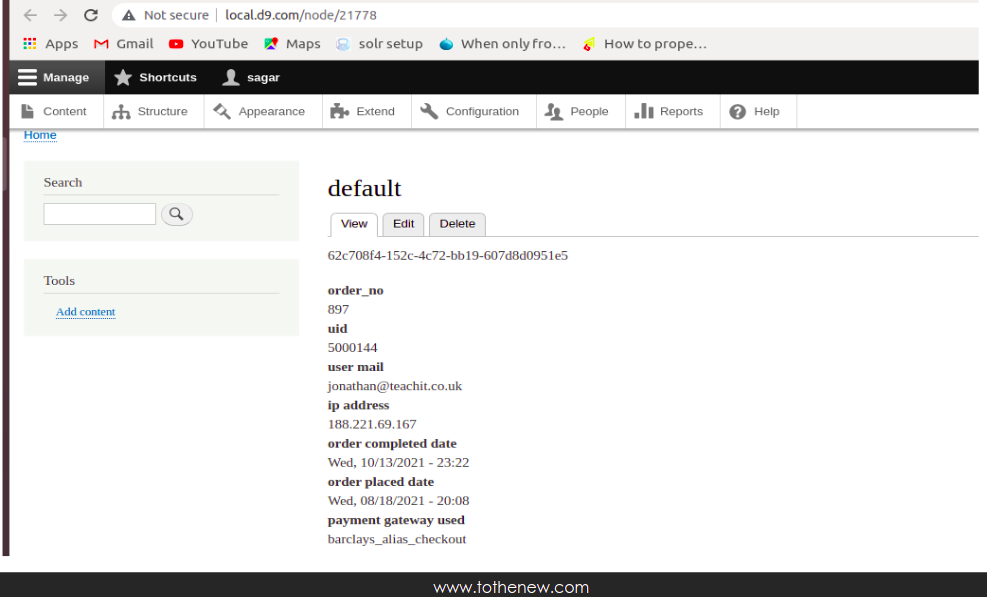
7) One of node migrated from 21746
8) You can also rollback migration process with the help of rollback operation.
Conclusion:: Custom data has been migrated from custom table [non-drupal environment] to Drupal Site. In this example I have migrated nodes data to Drupal site.