
How To Implement a Translation Connector in AEM?
The purpose of a Translation Connector in any Content Management System (CMS) is to automate content transmission between CMS and Translation Service Providers making it quicker and cost-effective. Such integration is required when there is a need to maintain multiple languages in CMS. Similarly, for projects in Adobe Experience Manager (AEM) that involves website localization and multilingual SEO management, translation connectors implementation becomes a mandate.
Translation Connectors are simply used to provide an interface between AEM and Translation Management System (TMS), where TMS is nothing but programs which support complex translation tasks.

Once the content is selected in AEM which needs to be translated, it can be pushed further to TMS.
After this, TMS does the actual translations by either using machine translation using APIs or by sending it across to different Language Service Providers (LSP).
After the required translation is performed the content is then returned to AEM where it can be approved or rejected. Since the states of the translation projects are easily visible on AEM project console, the authors can also monitor the progress of source files which were sent for translation.
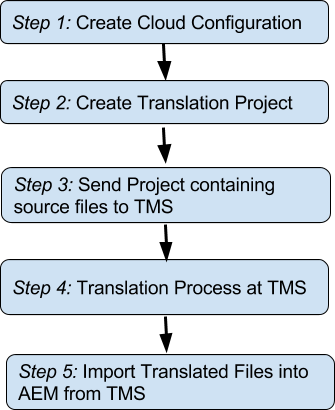
Follow these basic steps to implement a connector with AEM
To explain these steps in details, I would be referring to AEM 6.2’s Translation Bootstrap Framework.
Step 1: Create Cloud Configuration
The first and the foremost step is to establish a connection between AEM and TMS. This can be done in AEM through multiple ways but the best way is to make use of Cloud Configurations. This provides content managers’ the flexibility to add configuration details or any other related information themselves to connect to TMS.
Once Bootstrap framework build is deployed, under Cloud Services Configurations you can create a configuration using the following template.
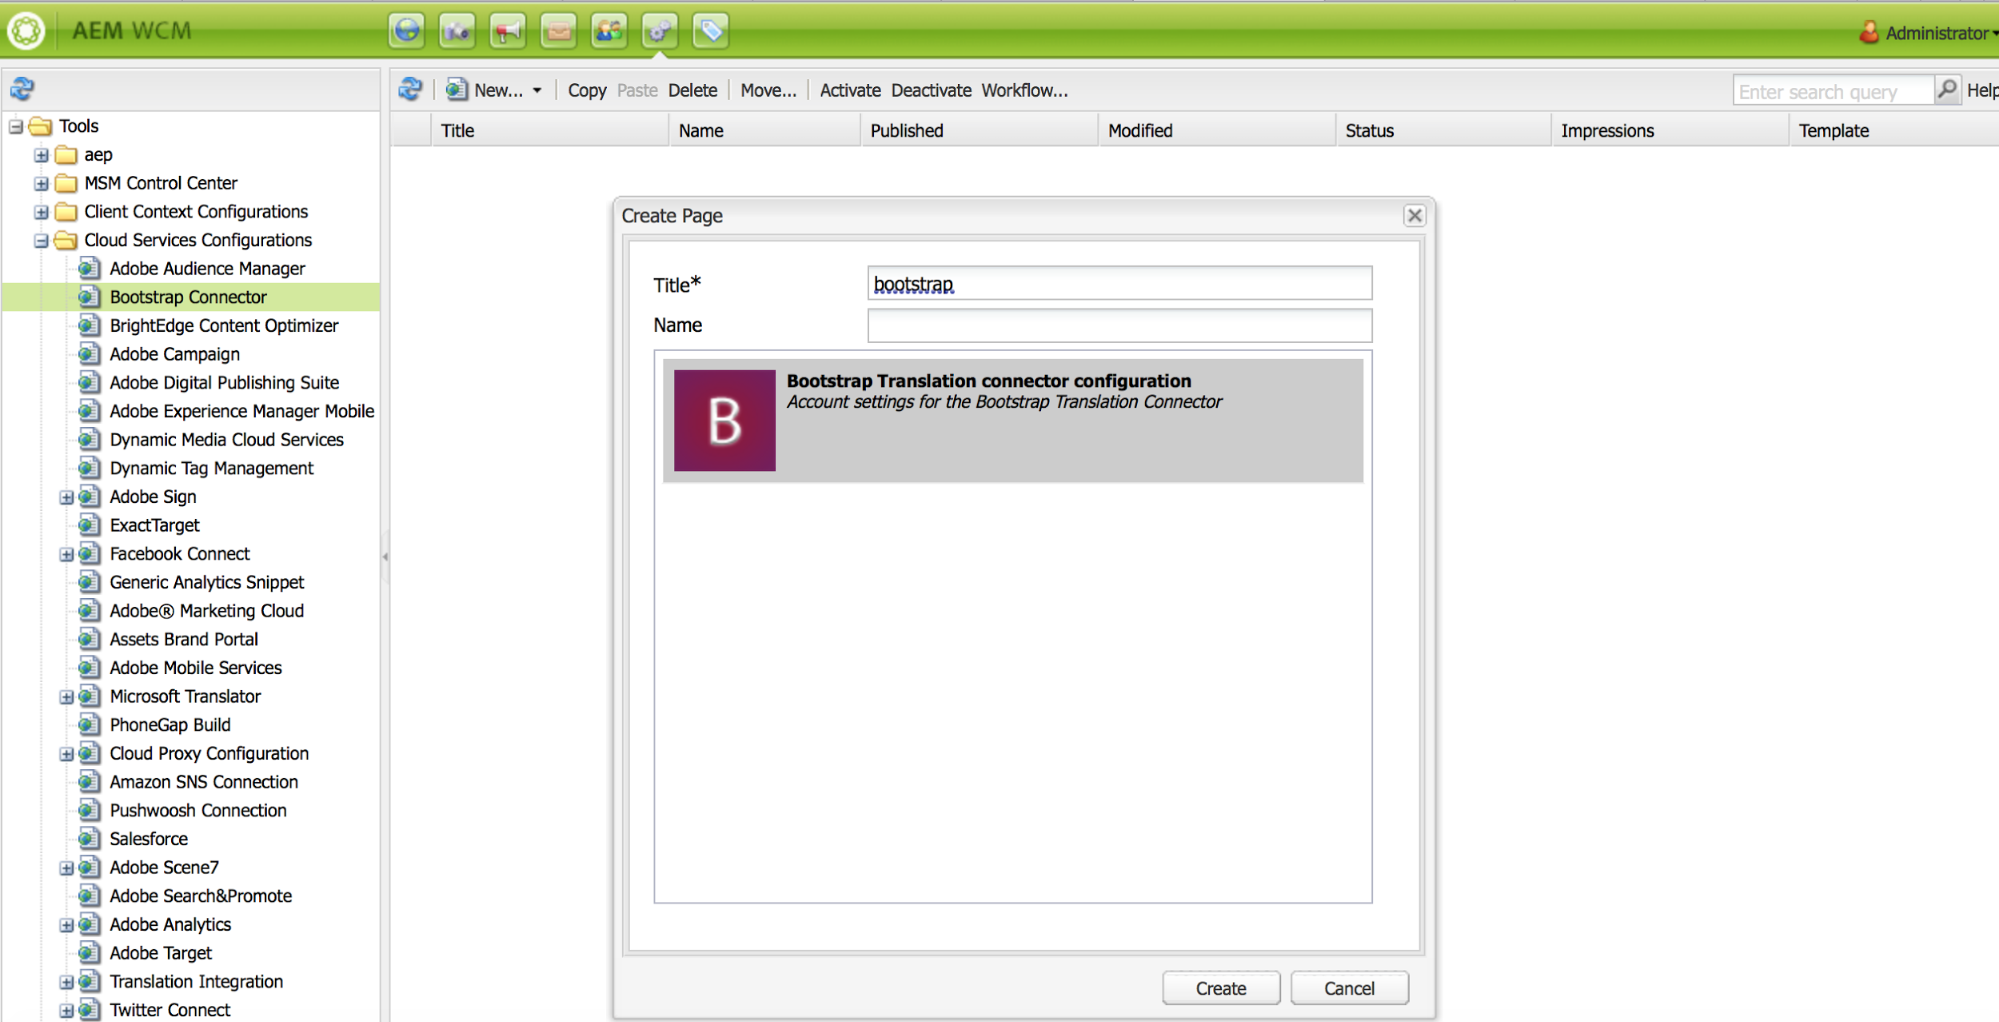
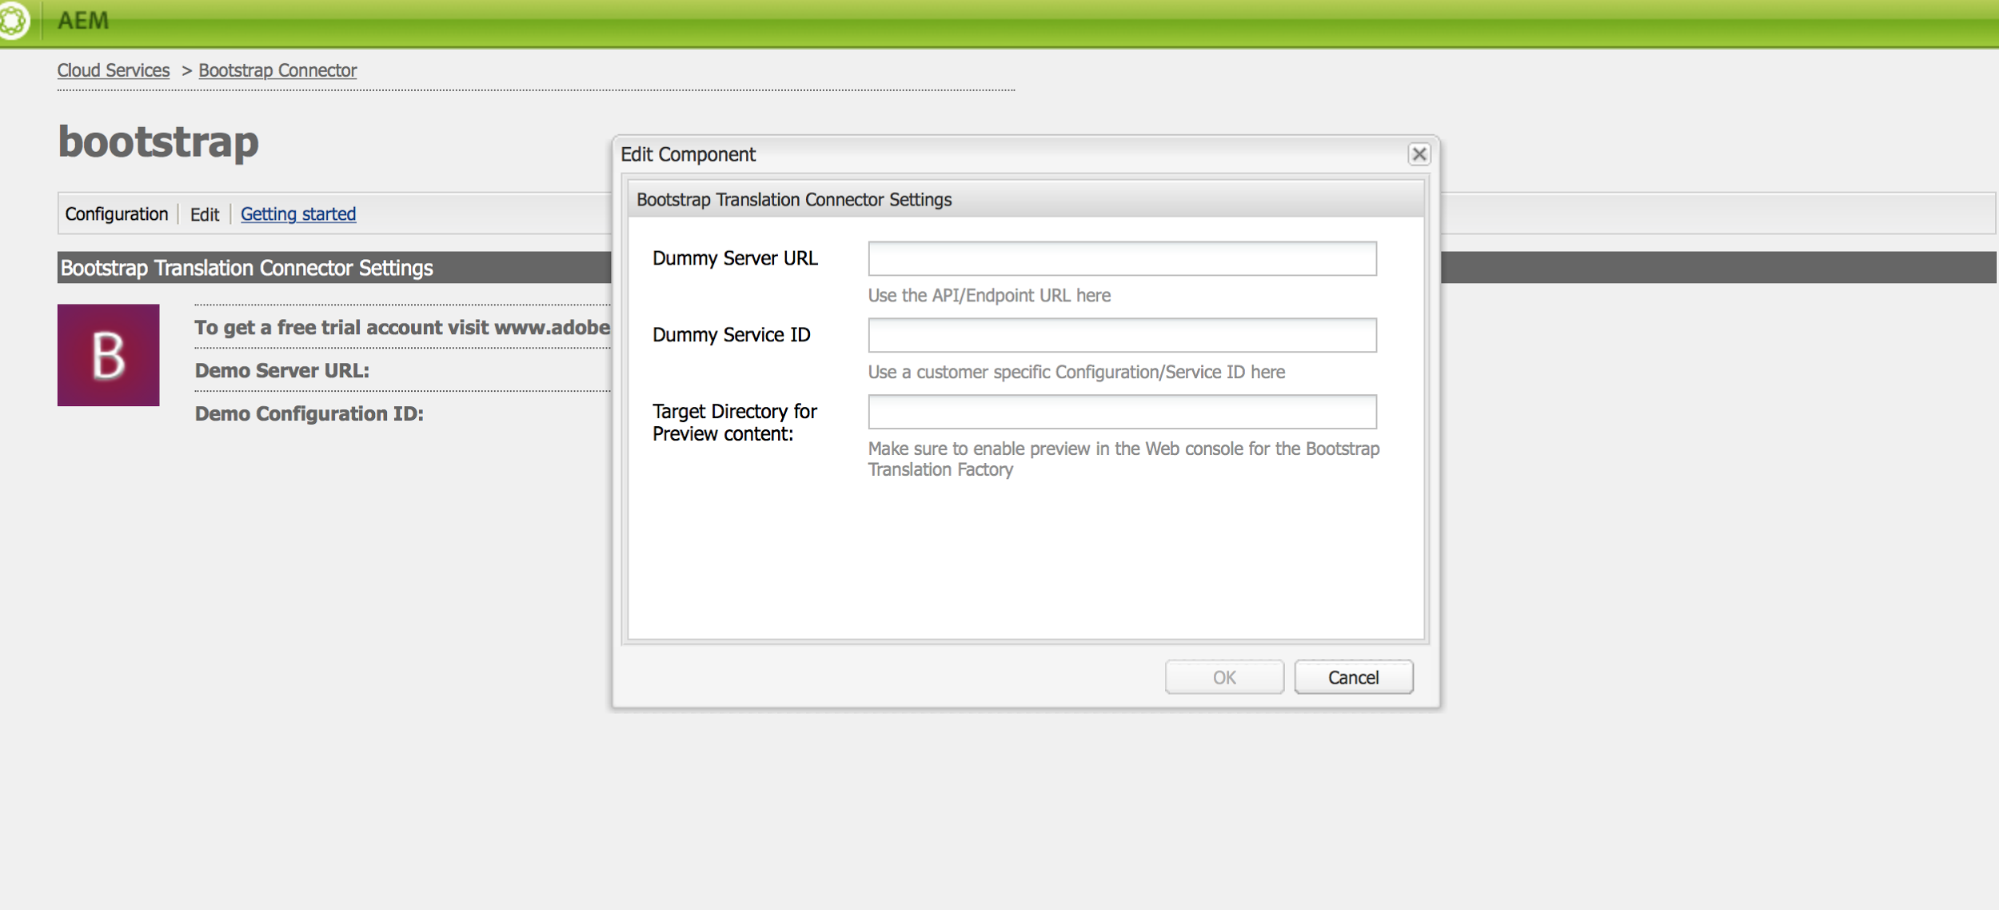
The dialog needs to be created which should contain properties required to connect to TMS. This can be designed as per the requirement.
Step 2: Create Translation Project
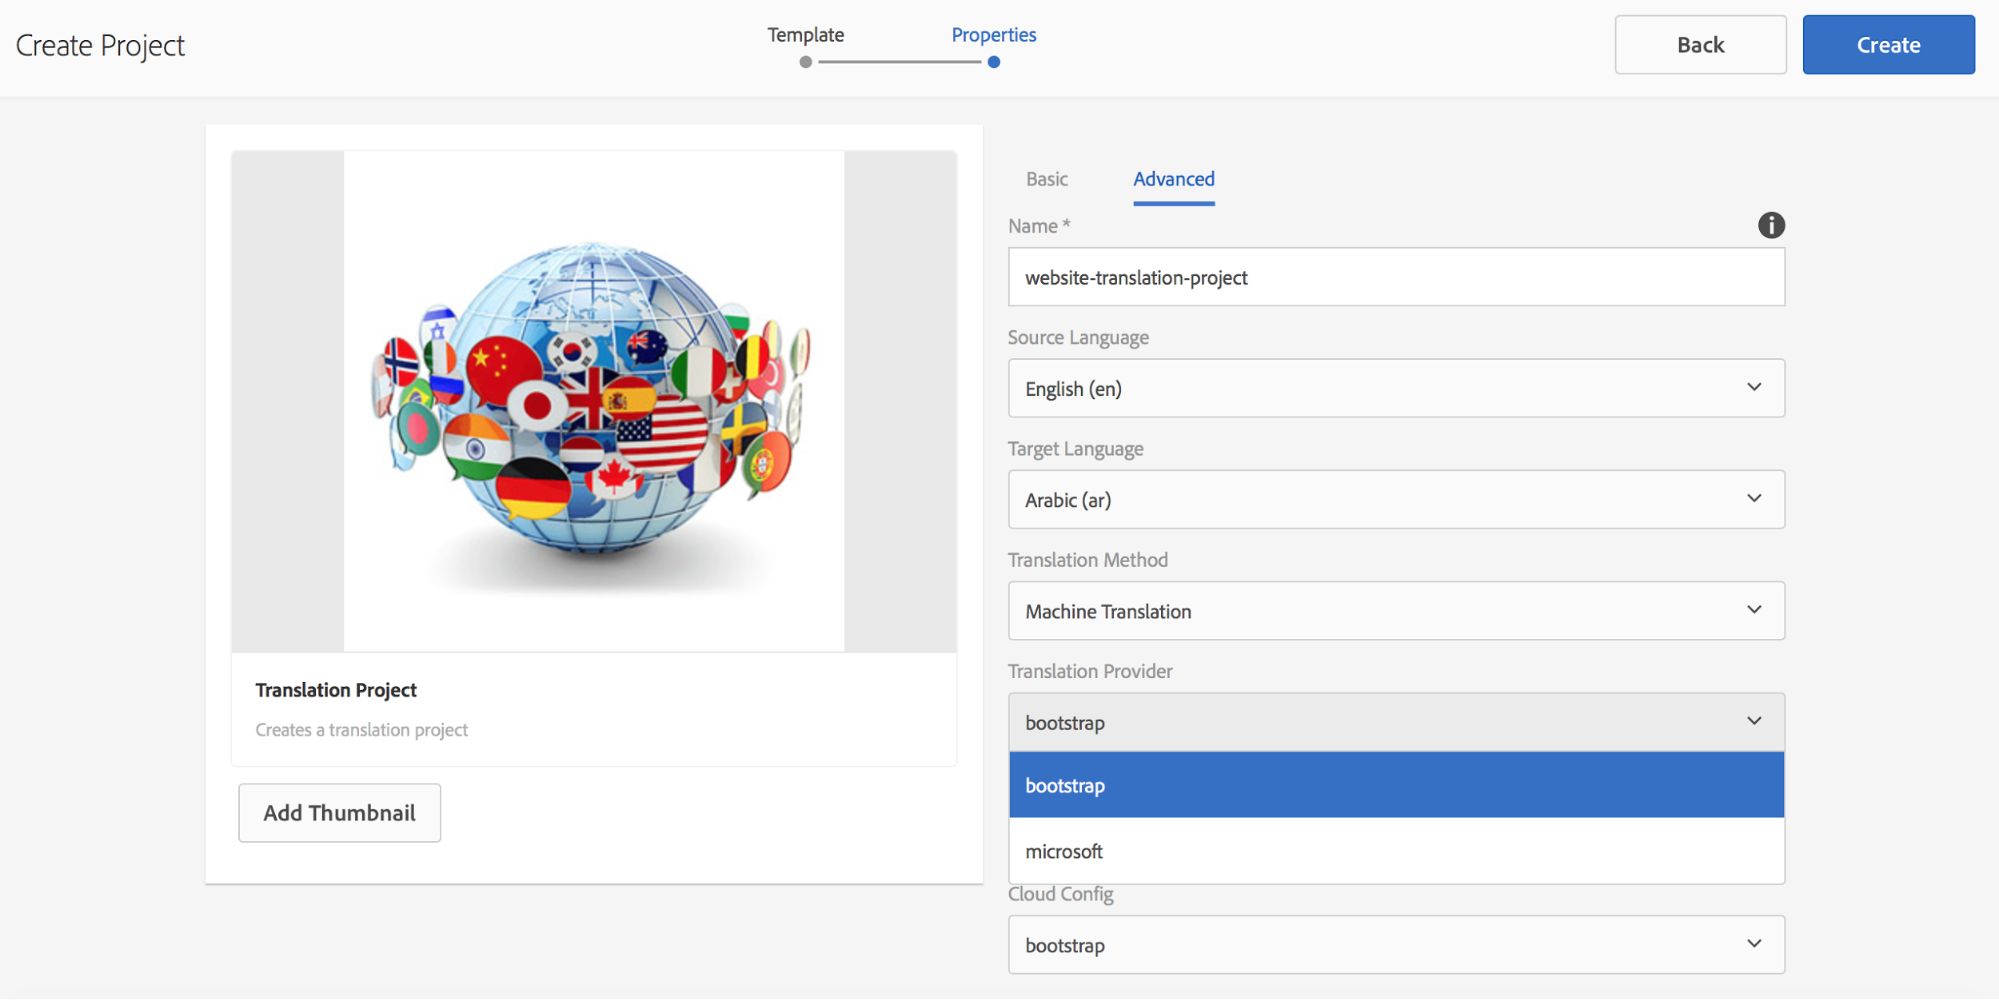
Project Creation Wizard provides basic properties which are required to create a Translation Project. The project contains options to add details about source and target languages, human/machine translations and configurations to translate the project.
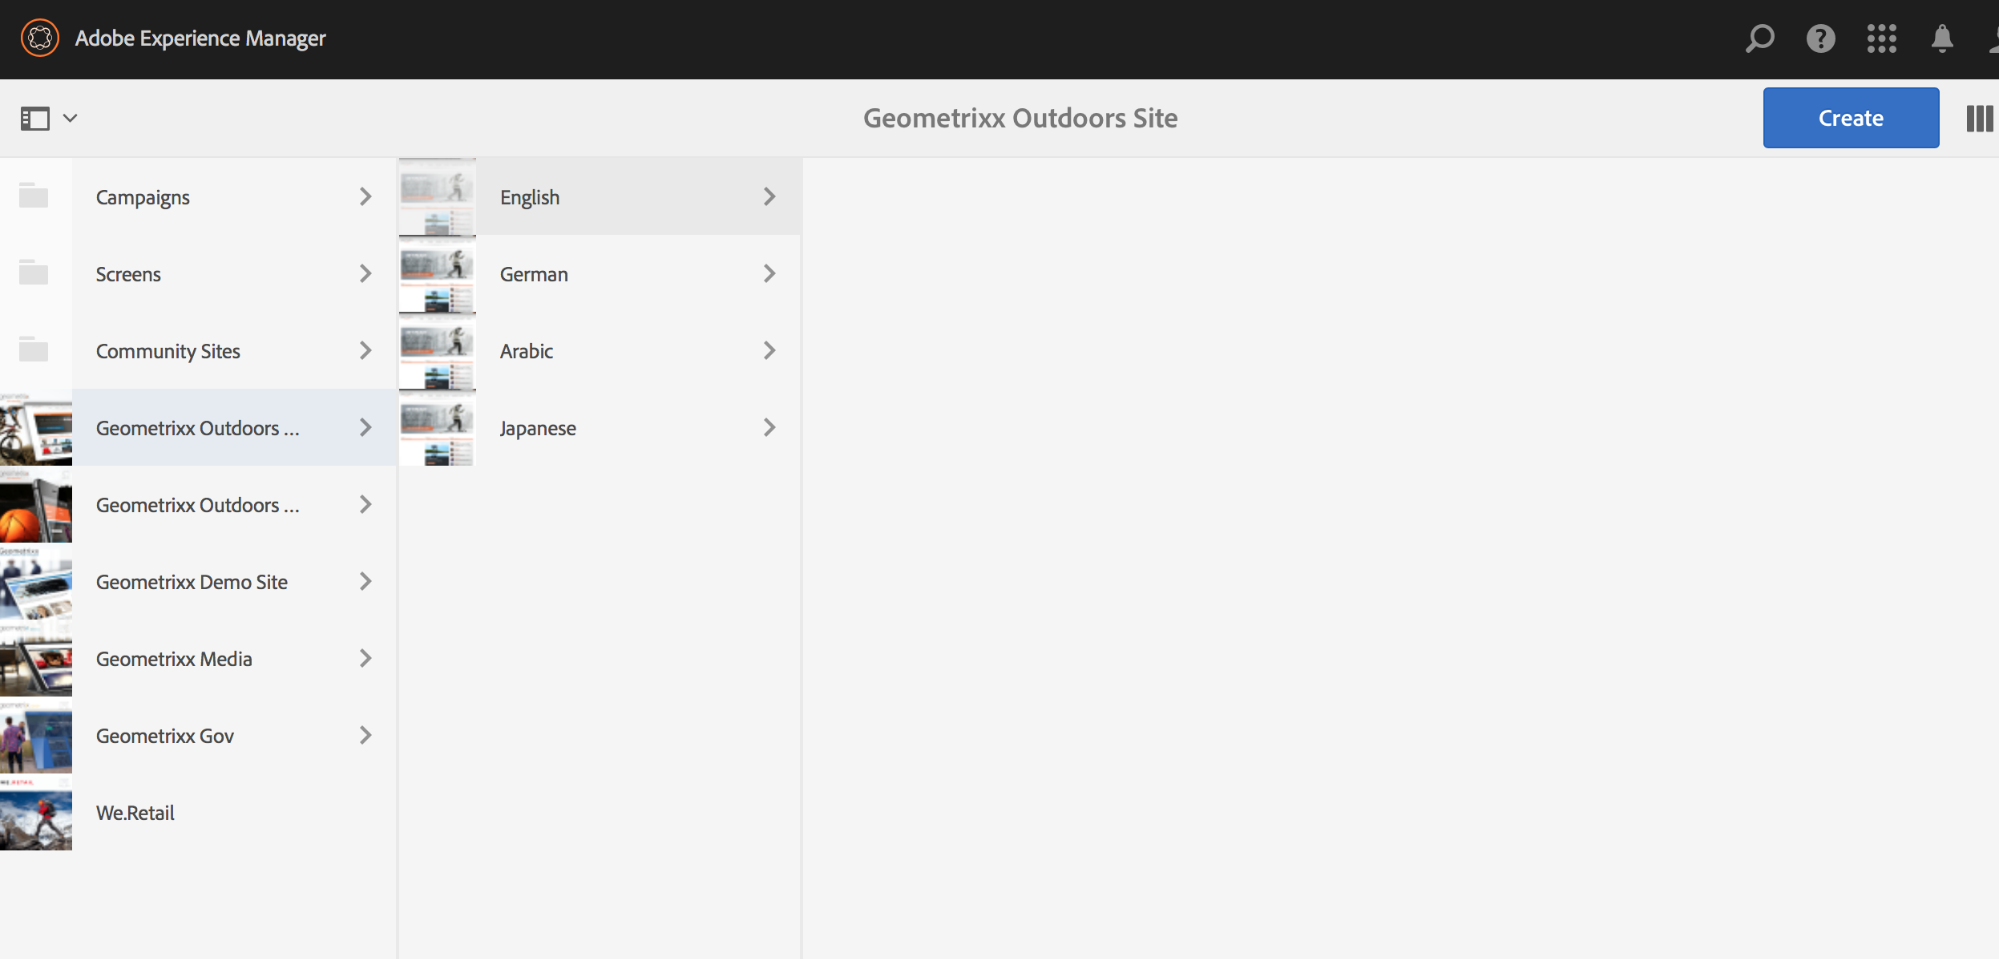
The source files can be added to the project by either using the ‘Add translation’ widget or by using ‘References’ feature under ‘Sites’. This is further explained in detail here.
Using project creation wizard, one can go to “Create Projects” and “Select Translation Project”.
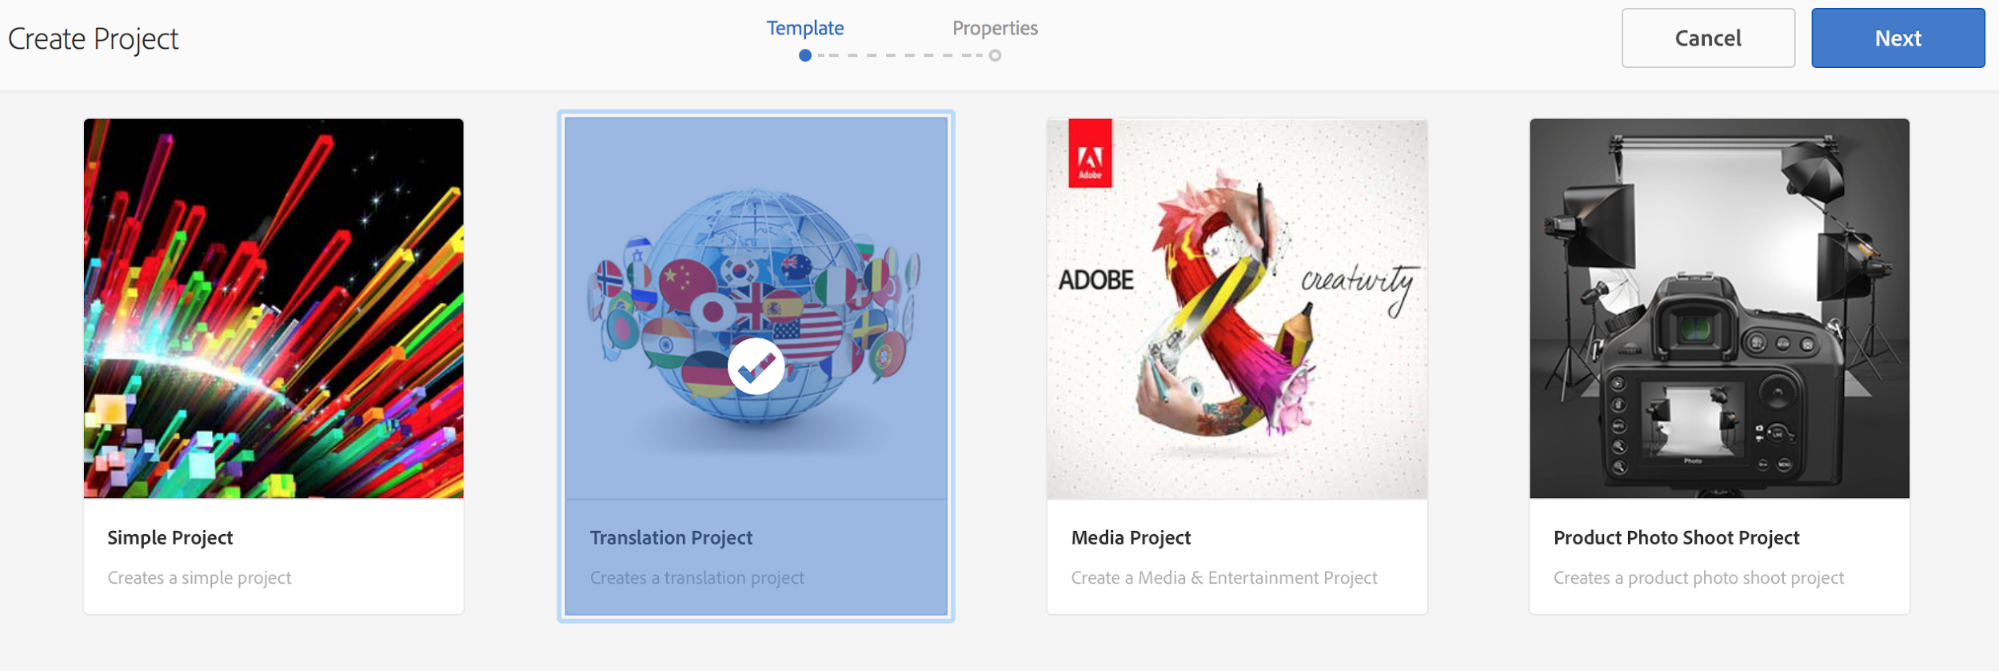
Advanced Properties should contain custom “Translation Provider” and respective “Cloud Configuration”.
Step 3: Send Project Containing Source Files to TMS
The content in AEM which requires translation can be added in the project. AEM 6.2 provides options to add pages, assets, assets metadata, tags, tags metadata and i18n dictionaries.
Using custom solution or AEM translation APIs, AEM pages are required to be converted to TMS acceptable format, which is generally XLIFF.

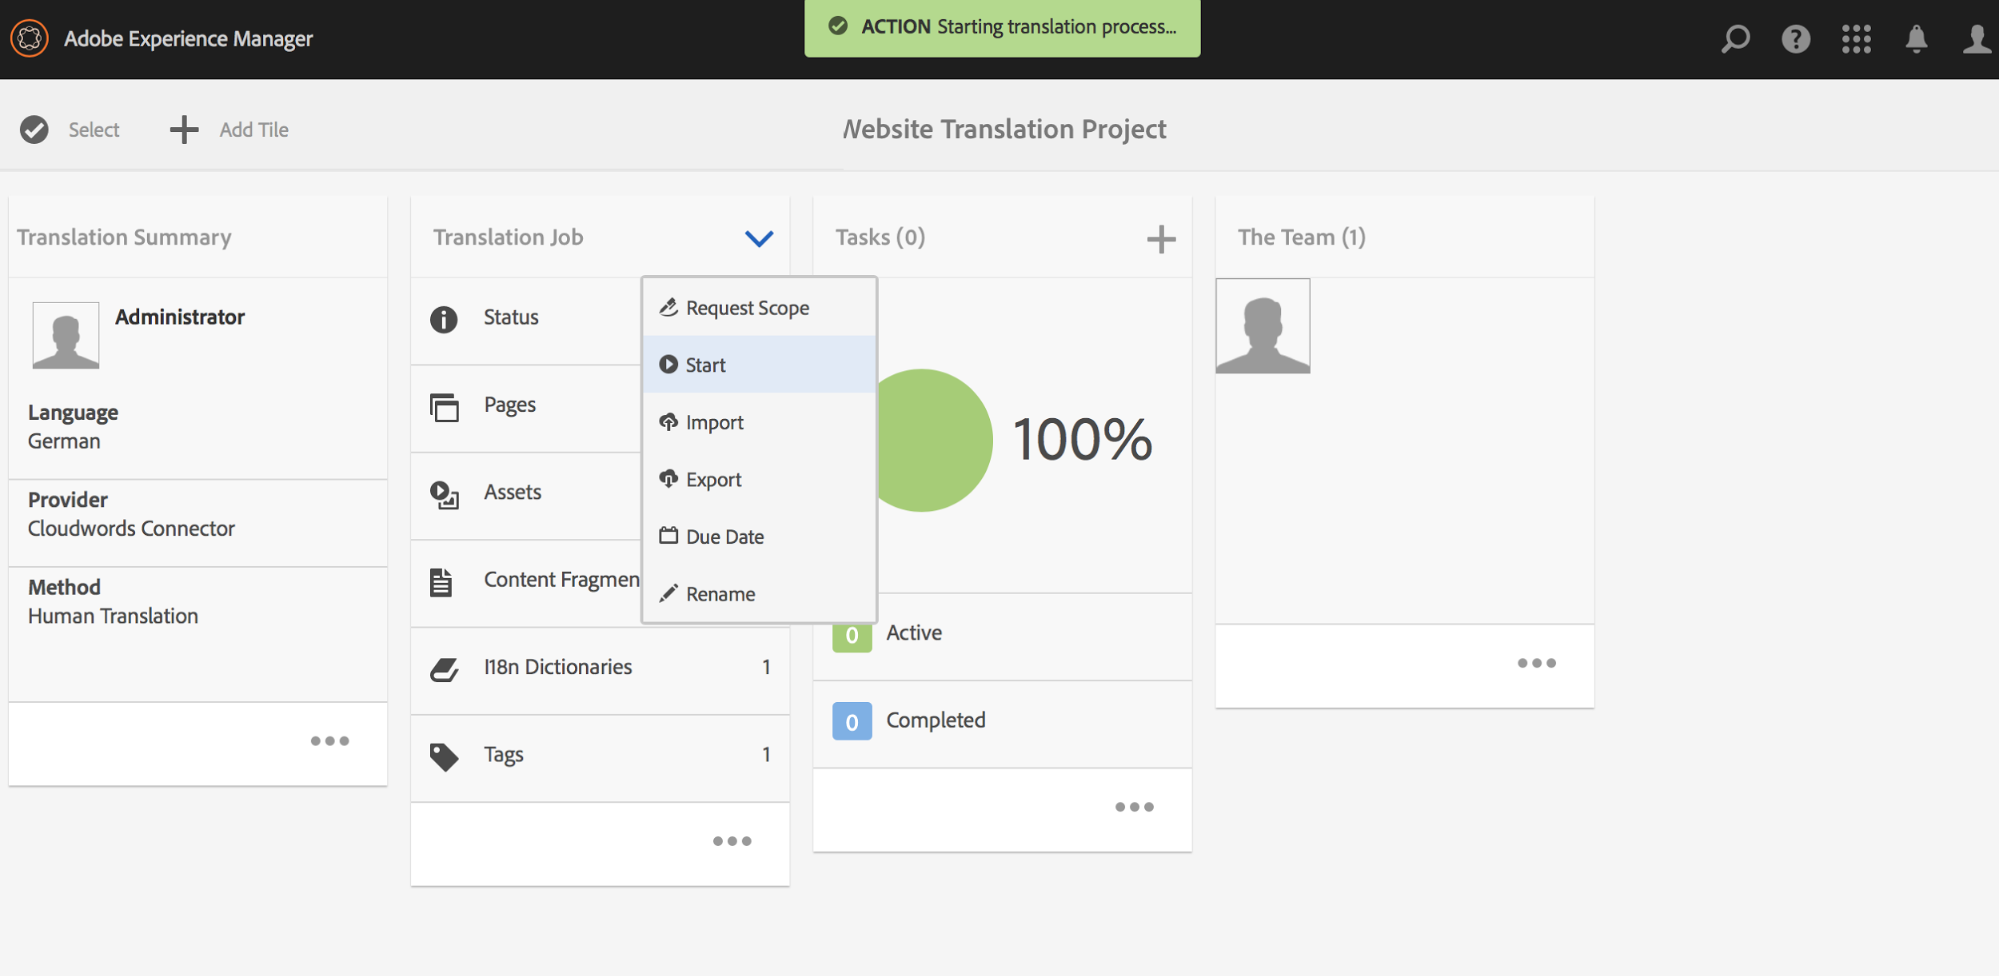
 Once the files are added, the project can be started and sent for translation.
Step 4: Translation Process at TMS
Every TMS follow workflows to manage translations. Based on the required translation such as human or machine translations, the source files are either sent to different LSP or are translated using APIs. The source files may require conversion into a specific format which is acceptable by TMS. Once the files are successfully translated and reviewed, they are imported back into AEM.
Step 5: Import Translated Files from TMS
The translated files are then imported from TMS into AEM. AEM’s polling functionality can be used or even a custom scheduler can be implemented to identify whether the project status has been changed at TMS and the translation files are ready to be imported.
The translated XLIFF file from TMS either needs to be converted to AEM recognizable format like XML or can be imported into jcr:content node structure.
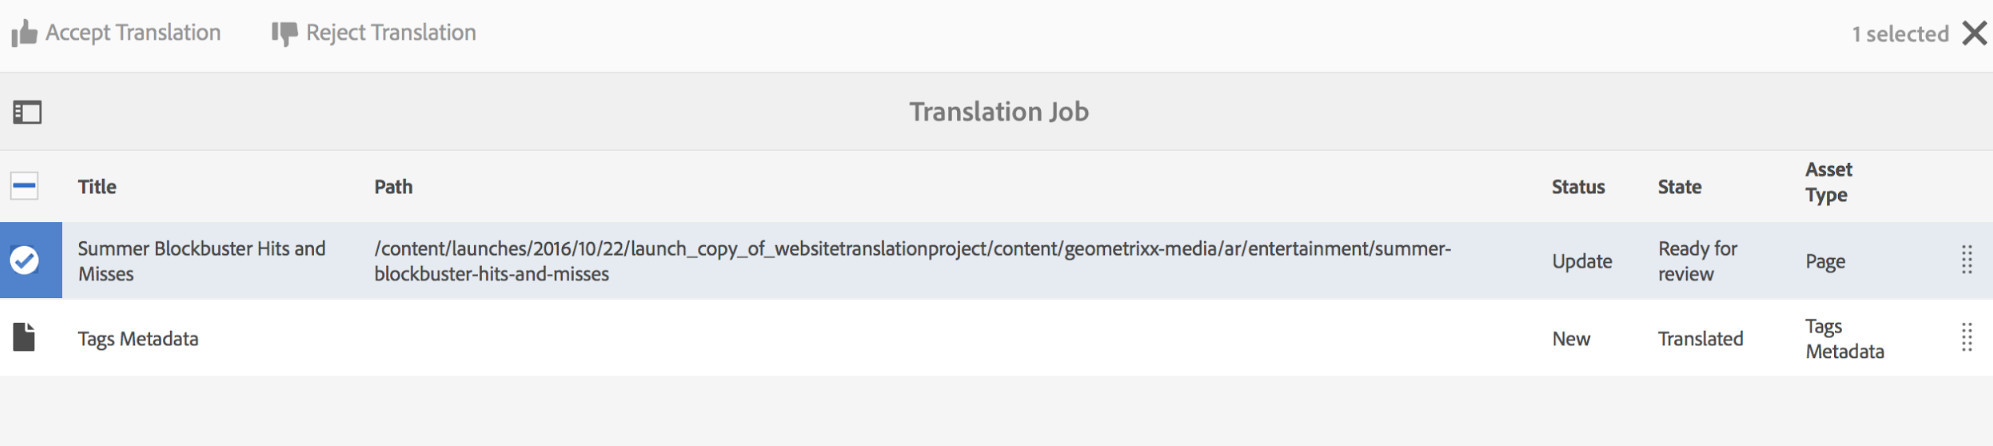
With AEM 6.2, the translations can be accepted or rejected once the import to AEM is successful.
The translated page looks like this after successful import and can be published.


Hi Could you please tell how to do testing for multilingual pages like above. How to know whether we have correct content on this page.
When sending files to TMS server, where is the process of converting web files to xliff completed, The Connector or TMS server? And when the translation file is imported back to AEM, where is the process of converting the xliff file to an AEM Recognized Format completed?
Thank you very much!
Best Regards,
bradley
Hi Dipti Narang,
Greeting!
I am glad to see your article about Bootstrap translation in AEM. I followed your guide to redo again, I found bootstrap connector can’t be found in Translation Provider, however I can see your screen indicate the bootstrap connector can be displayed in Translation Provider when you try to create a Translation project. I am using Bootstrap connector for AEM 6.3, do you have any suggestion for my problem?
Willing to get your response back quickly. Thank you so much!