
How to move WordPress Website from Local to Live Server
Do you believe the time has come to launch your website into the world? You can make your local site live without hesitation if you thoroughly inspect it.
It is beneficial to build a website on a local server to speed up development. It also saves you the effort of disrupting your site while debugging. You may test your site for improvements and optimize your process. When satisfied with the website’s layout, you can publish it to the live server. It is actually pretty easy, despite its intimidating appearance. This section will cover “How to Move WordPress Websites from Localhost to Live Server.”
- Export local WordPress database
- Upload WordPress files to the live server
- Create a database and user on the server
- Import database into the live server
- Change the site URL
- Update the database details
- Fix Images and broken links
To export the database, navigate to http://localhost/phpmyadmin, select your database, and click the export button from the top menu bar to export the database.
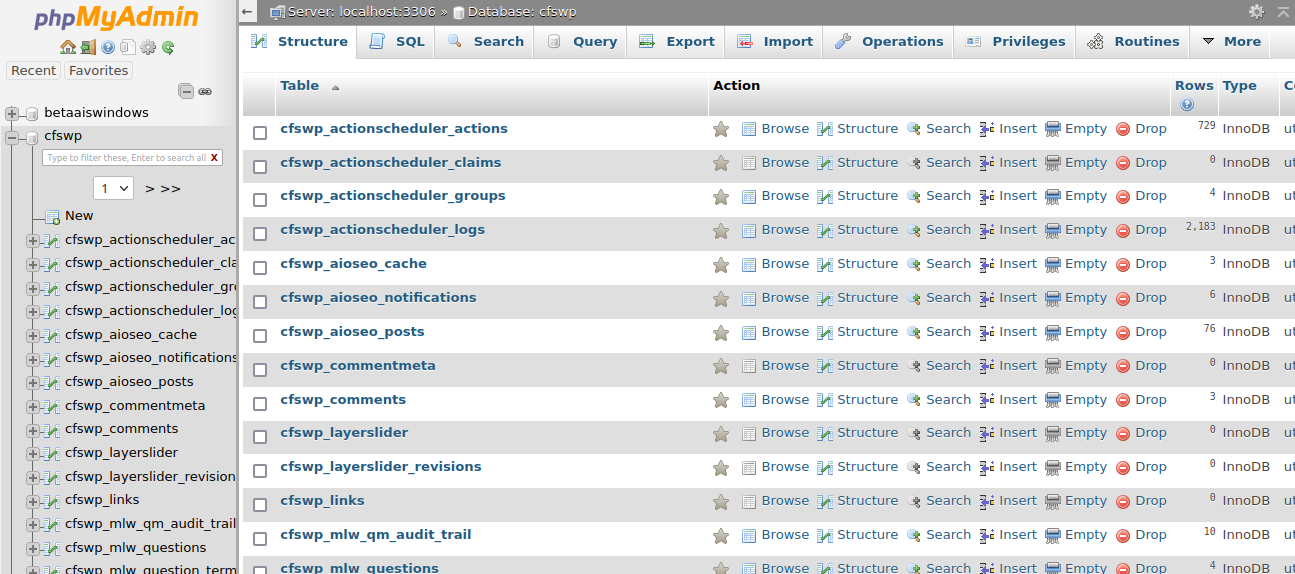
Click the Go button to download the database.
To move your WordPress files, open Cpanel, click File Manager, browse the live server’s directory, and then upload the files into the directory.
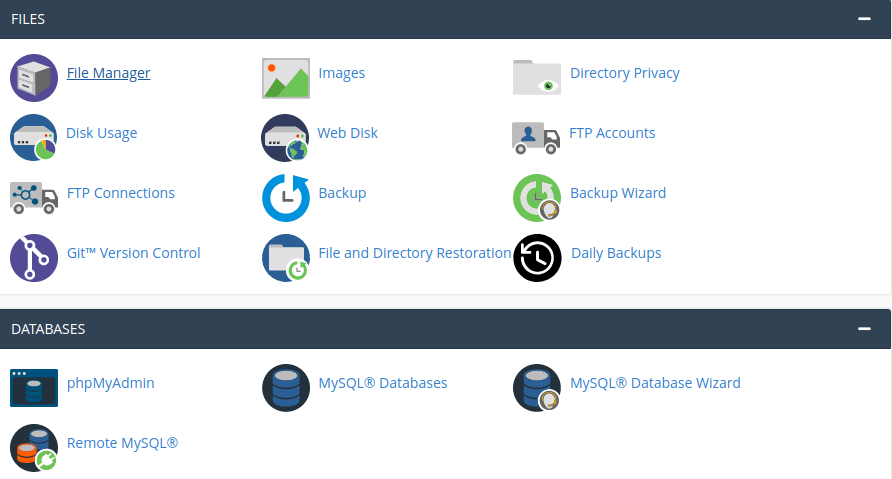
To create a database on the server, click on Mysql Database, enter the database name, and click the create database button.

After creating the database, navigate to the Mysql User section. Create a user and add the user to the database.
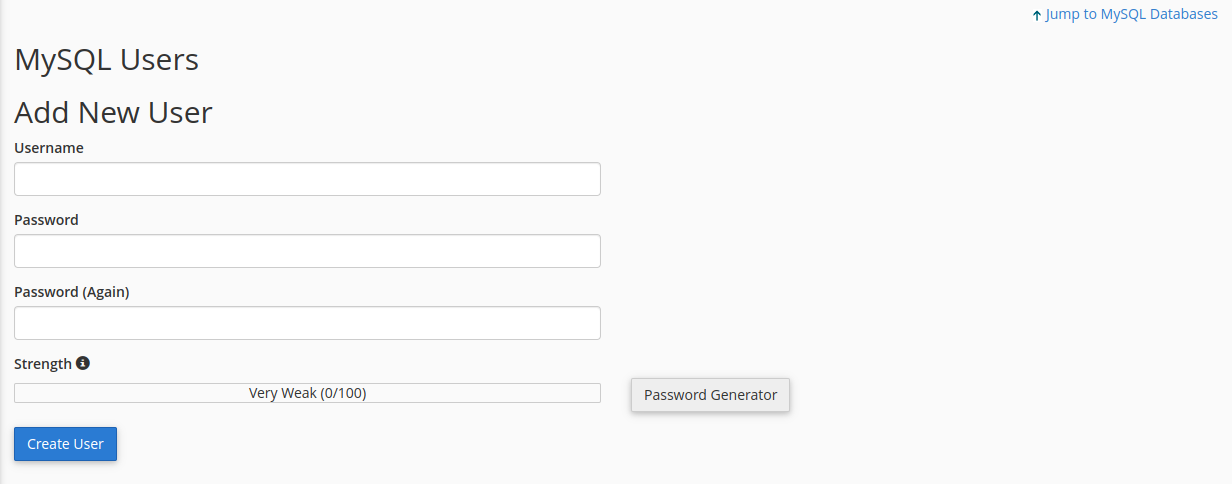
After adding the user into the database, grant all privileges to the user.
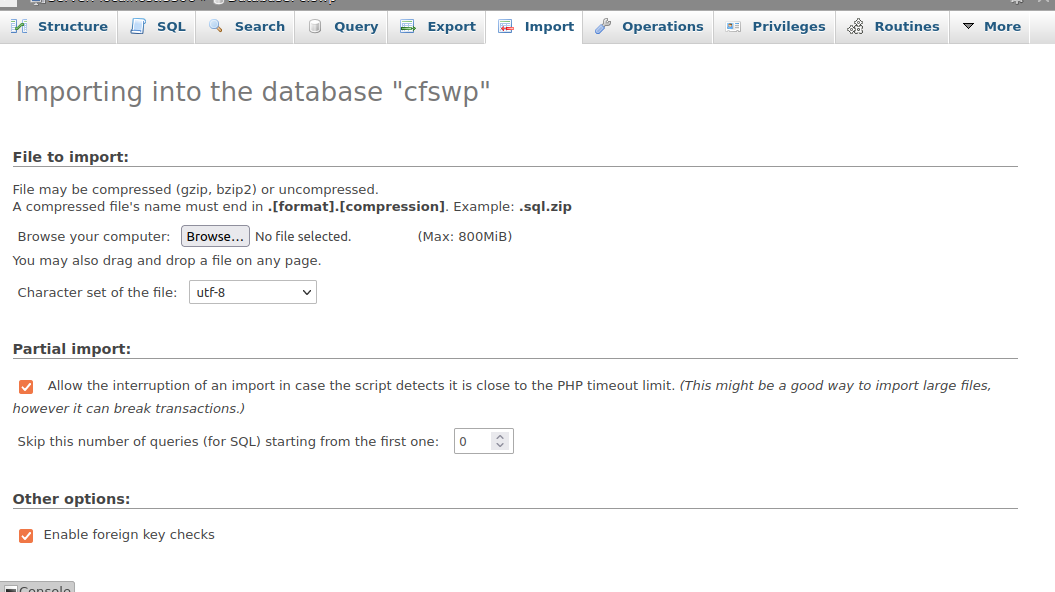
Navigate to the database section and click phpMyAdmin. Now, you can see your database in phpMyAdmin. Go to the Import page by clicking the Import Tab on the top bar menu. Next, click on Browse button to choose the database file created in step 1.
Now, you need to change the site URL in your database so that it will connect with your live WordPress site.
Click on the wp_options table in your database and change the site URL and home value into the option_value column.

After importing the database, it’s time to update the database details in the wp-config.php file located on the root server.
Open the wp-config.php file and update the below information.
define(‘DB_NAME’, ‘your_database_name’);

define(‘DB_USER’, ‘your_database_user’);

define(‘DB_PASSWORD’, ‘your_database_password’);

define(‘DB_HOST’, ‘localhost’);
Change the database name, user, password and Host. After that, save the wp-config.php file.
Now your website is live, and login into WordPress. Go to Settings → Permalinks, choose your preferred URL structure and save it to ensure all post links are working correctly.
Whenever you move from a local server to a live site, it is evident that you get broken links and missing images. To fix this, go to phpMyAdmin, click on your database, and press SQL from the top menu.
Run the below query to fix the broken links.
UPDATE wp_posts SET guid = replace(guid, 'http://www.oldurl','http://www.newurl');

UPDATE wp_posts SET post_content = replace(post_content, 'http://www.oldurl', 'http://www.newurl');

UPDATE wp_postmeta SET meta_value = replace(meta_value,'http://www.oldurl','http://www.newurl');
That is it ! You have successfully migrated your site to the live server.
