
How to Upgrade Existing Code Base to Latest AEM Version?
Adobe Experience Manager (AEM) is an Enterprise Web Content Management System which is used in high impact environments hosting voluminous pages and serving many users.It also involves integration with custom applications and customization of existing AEM features. Because of these complexities, the upgradations of AEM from one version to another one needs to be properly planned and executed. The reason to upgrade a stable system and deal its complexities and issues involved with it can be quite debatable. Nonetheless, one of the last things anyone would like is to have an unsupported site which could run into any issue, plus to be always using a legacy version of AEM whereas the world is going gaga over new features provided by the latest version. So upgrading AEM is a basic requirement. Though Adobe documentation covers how to upgrade, but making the code compatible with the latest version is not discussed and is often ignored.
Recently I was involved in planning and execution of an existing AEM 6.0 code base to AEM 6.2. The critical step was to make the code base ready to be deployed to an AEM 6.2 instance. So through a couple of blogs, I want to focus on how to do the code base upgrade and what challenges are encountered during this process.
Here are the steps which I followed:
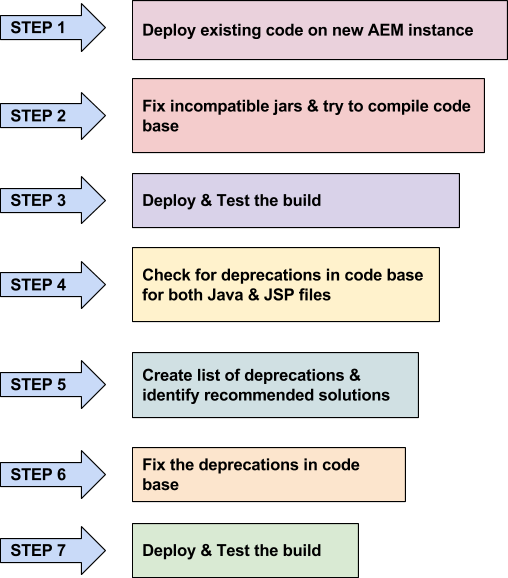
The approach taken in a nutshell is ‘try to make the code compilable on the upgraded version, test the functionalities and then fix the deprecations.’ Here is a quick explanation of these steps, including the tips which worked for me in executing it.
STEP 1: Deploy the existing code on new AEM instance
The first step would be to build and deploy the existing code base for older AEM version to new AEM version. For example, if we use MAVEN as a build tool then we can run the command ‘mvn clean install -PautoInstallPackage’ on the code base on the latest AEM version instance to deploy the code. If the build shows errors related to jars, which are incompatible then Step 2 would be required.
STEP 2: Fix Incompatible Jars & Try to Compile Codebase
We need the dependencies update in pom.xml to make the code compatible with the upgrade. First of all, check for the latest version in Adobe’s Maven Repository and validate if the required version is present or not. However, sometimes it would be required to get the version used in AEM installer (primarily because Adobe’s repository doesn’t get updated frequently).
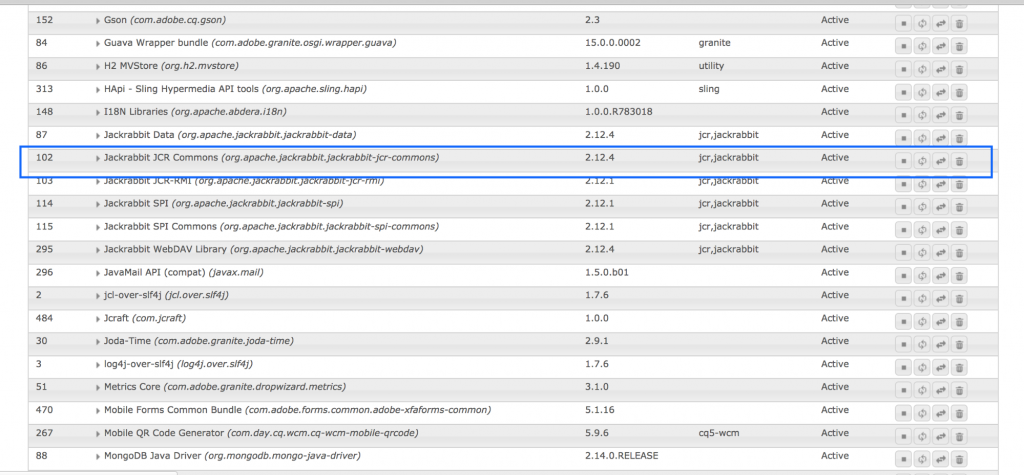
So the trick is to retrieve it from AEM’s OSGI console. Go to OSGI bundles (http://<host>:<port>/system/console/bundles) and search for the dependency name (say Jackrabbit JCR Commons). Click on the dependency and make a note of the bundle id, i.e. the first column (let’s say it is 102).
Now go to the crx-repository on the file system …./crx-quickstart->launchpad->felix->bundle-<id> (bundle-102)
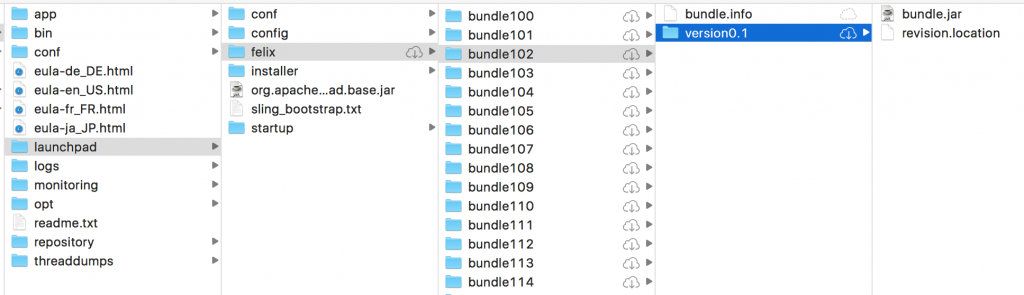
If there is a need to validate whether it is the same bundle, then one can check the bundle.info file present under same folder (bundle-102).
So the bundle.jar can be used and referenced as an external jar dependency.
STEP 3: Deploy & Test the build
This step ensures that the application runs and the functionalities work properly after successful build and deployment.
STEP 4: Check for deprecations in code base for both Java & JSP files
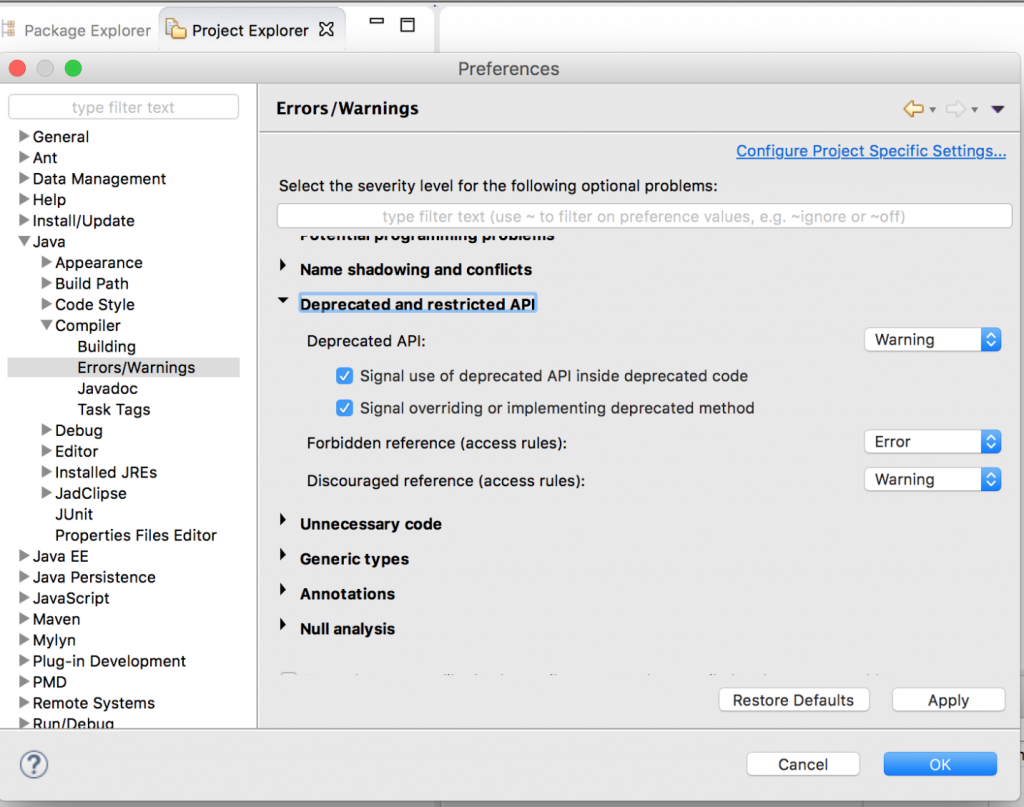
This step is required to fix the code which is deprecated after the upgrade. Having such a coding does not raise any issue as the product upgrade is backwards compatible. However, it is always recommended to remove the deprecations in the code base. To identify these deprecations, I used Eclipse compiler settings to generate errors for any usage of Deprecated API.
Go to ‘Preferences -> Java -> Compiler -> Errors/Warnings -> Deprecated and restricted API section’ and set the level to ERROR (can be warning too, I just felt that identifying errors would be a bit easy to manage). After this change, code base will recompile, and each use of deprecated method or API would show up as an error/warning in the ‘Problems’ view.
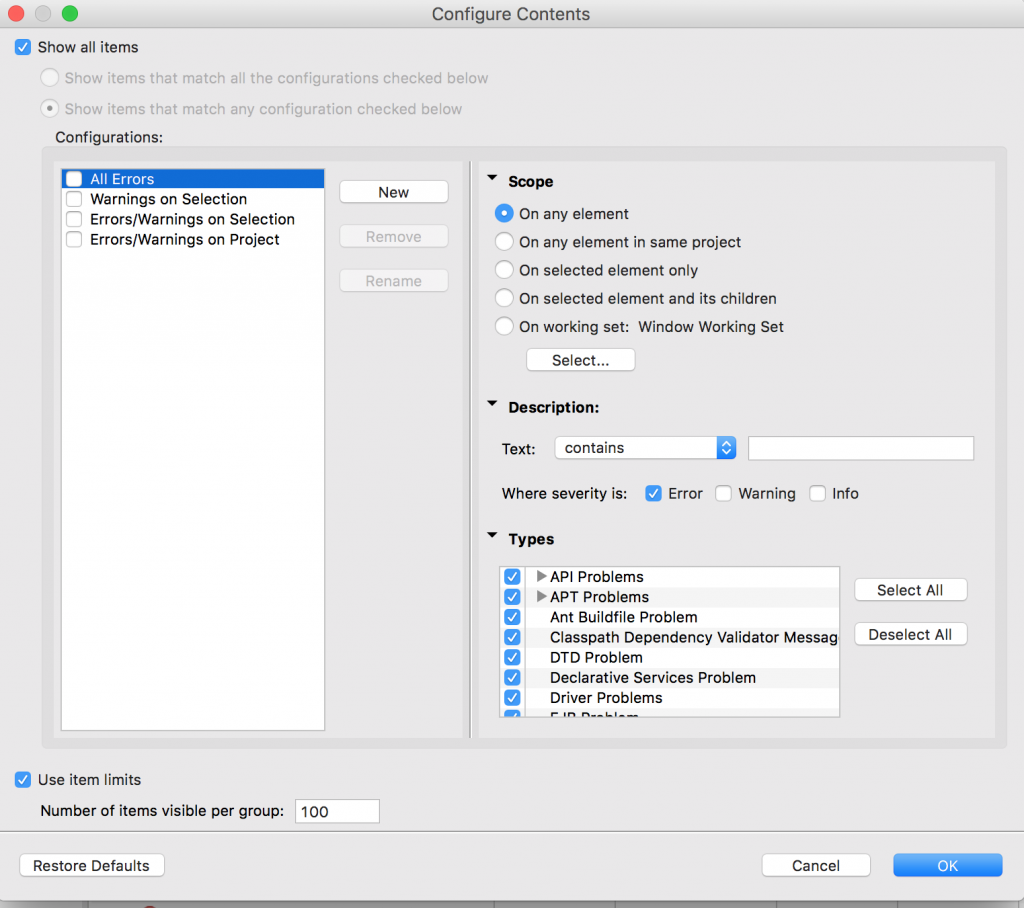
Now, if there is a requirement to copy the entire error list from Eclipse, go to Problems view, click on the View Menu (the triangle icon) and change the number of visible items under Preferences. (by default, it is 100). Even type of problems can be filtered under Configure Contents to restrict this list.
STEP 5: Create List of Deprecations & Provide Recommended Solution
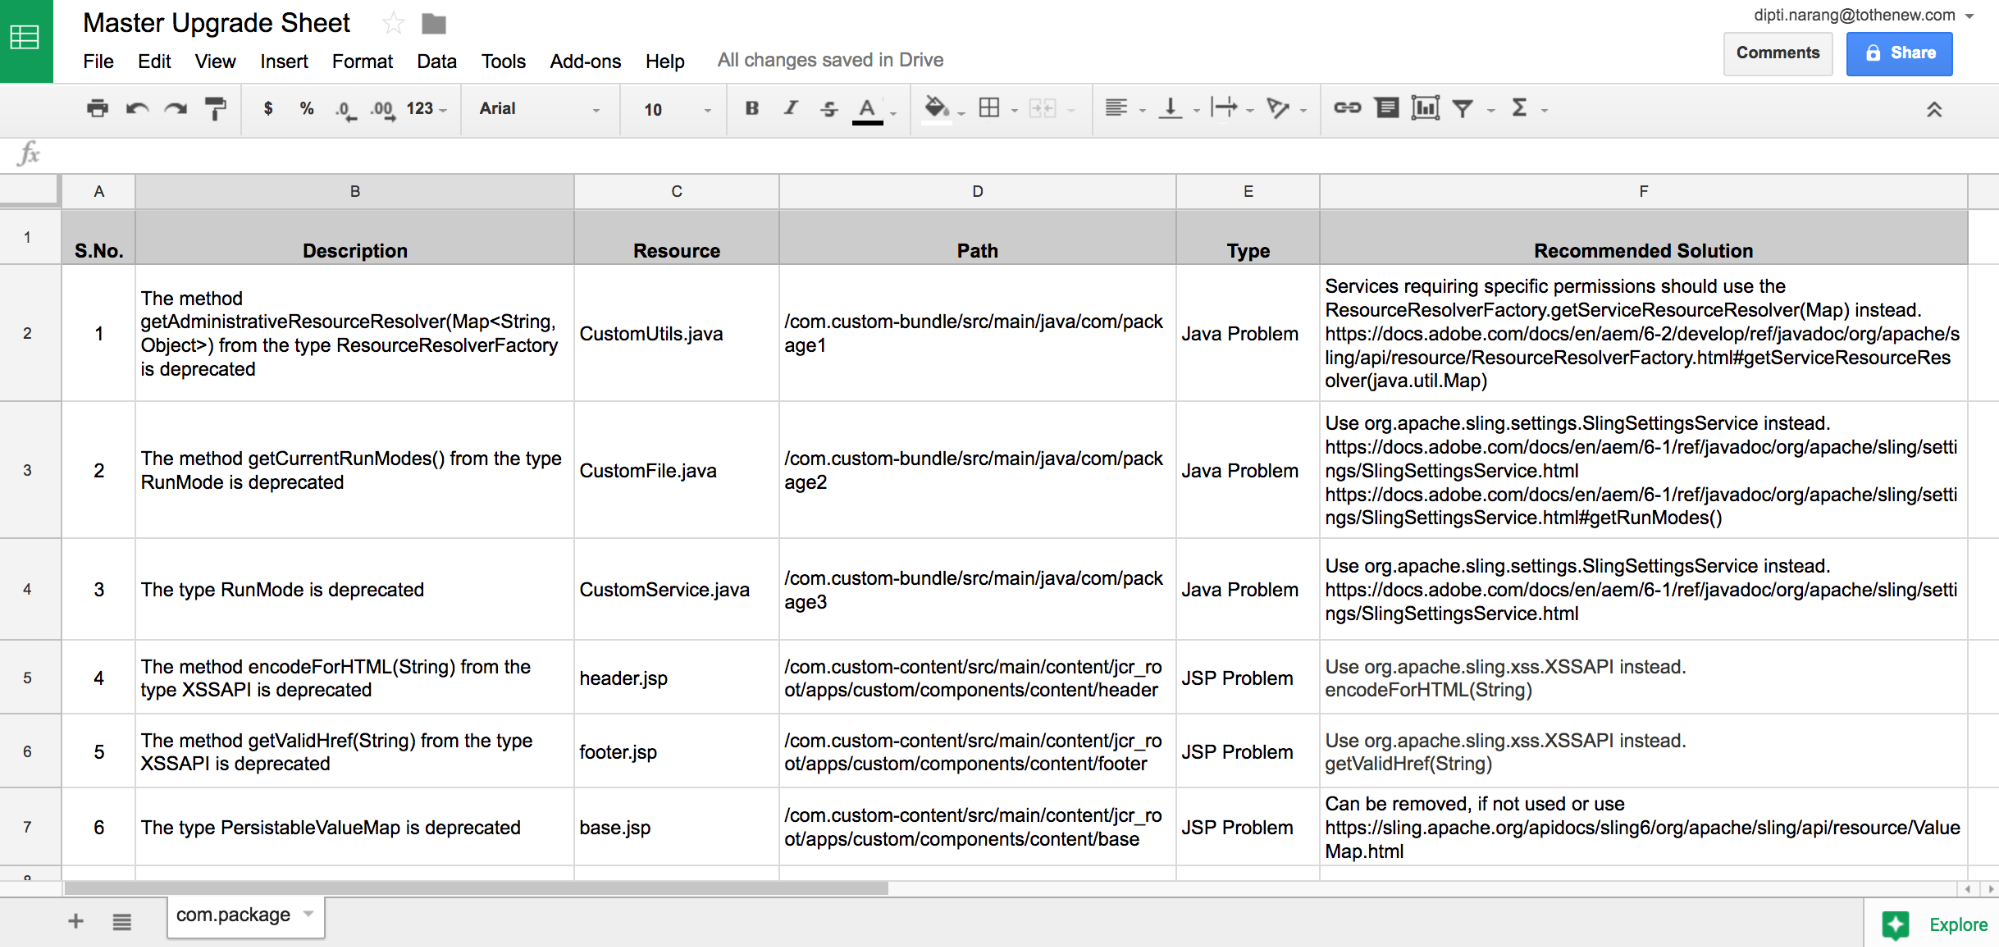
To keep a better track of all the deprecations and fixes, I have created a Master Sheet which consists of deprecations and suggested solutions. It helped me with work distribution among multiple developers working on the same code base.
I copied the errors from Eclipse’s Problems console into .xls, sorted them by unique depreciations and provided recommended solutions for each and every deprecation, taking Adobe’s documentation as reference.
I referred to the following AEM documentation links:
https://docs.adobe.com/docs/en/aem/6-2/develop/ref/javadoc/deprecated-list.html#package
https://docs.adobe.com/docs/en/aem/6-2/develop/ref/diff-previous/changes.html
https://docs.adobe.com/docs/en/aem/6-2/release-notes/deprecated-removed-features.html
Respective links are available for other AEM versions too.
STEP 6: Fix the Deprecations in Codebase
The approach followed was to fix the unique deprecations first. Usually, if it works in one functionality, then it should work in other use cases too. Mostly the repairs recommended by Adobe work but there can be scenarios where they fail. So either one needs to figure out a workaround or keep the deprecated code in place, until the identification of a new recommendation.
STEP 7: Deploy & Test the Build
This step is simply to ensure that after successful build and deployment, the application is running and the functionalities are working fine. As stated above, it is highly possible that the recommended fixes by Adobe wouldn’t work for all the use cases implemented in any custom application. So a thorough testing of depreciation fixes is required.
What’s missing?
This blog doesn’t cover another critical step of how to make the code compatible with the front end, where let’s say, AEM’s out of the box (OOTB) Javascript(js) are overlaid and customized. In my project, we did not do this in the first upgrade release, primarily because of less time in hand. If time isn’t a constraint, then a quick comparison of overlaid js with latest AEM’s OOTB js should also be made.
In my next blog, I would cover the most common deprecations fixed in an upgrade from AEM 6.0 to 6.2, along with the use cases where the recommended depreciation fixes did not work.


Nice one Dipti, thanks for sharing
Nice blog. Practical and very useful. Thanks!