In this episode of the CIF Add-on blog post series, we will cover the setup of AEM (Adobe Experience Manager) and CIF Add-on installation along with configuration. We are also going to set up the AEM Venia project.
So far, we have completed the Adobe Commerce and Venia store setup in the local environment, and if you haven’t done yet, check our previous post here on the same.
Prerequisite
To start with the setup, we will need to install some dependencies and download a few files,
- Install NPM, NodeJS, Java SDK 11
- Download AEM as a Cloud Service SDK: The latest SDK can be downloaded from Adobe’s Software Distribution. The file to download will be in the following format AEM SDK v********.
- Download CIF Add-on Package: The latest CIF Add-on package too is available to download on Adobe’s Software Distribution. The file will be in the following format AEM CIF Add-On v*****.
- Clone AEM CIF Venia Project: The Venia project can be cloned from Adobe’s official GitHub repo.
Now that we have all that we need to set up the instances, we can begin with the Author instance first, followed by the Publish instance, then the code deployment, and finally, the CIF add-on configuration.
AEM Setup
Setting up the Author Instance
1. Place the AEM as a Cloud Service SDK jar file into a folder; let us call it aem-author.
2. Before starting the instance, we must unpack the jar first to incorporate the CIF Add-on package. To do so, use the following command:
(Note that we have renamed the AEM SDK v******** jar file to aem-author-p4502.jar.)
java -jar aem-author-p4502.jar -unpack
Once completed, it should create the crx-quickstart folder.
3. Unzip the CIF Add-on package (the AEM CIF Add-On v***** file) contents, and copy the cif-cloud-ready-feature-pkg-******-cq-commerce-addon-authorfar.far file and paste it into a new directory named install within the crx-quickstart directory.
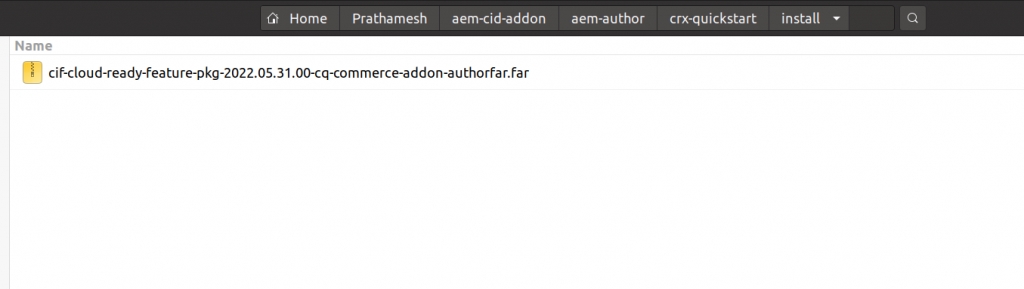
CIF Add-on file location
4. With this, we complete the add-on installation. Now let’s start the instance and verify whether the changes work fine. Starting the instance with the start script file under the crx-quickstart/bin directory will do just fine.
Note: After running the script, it will not show any output. Check on the link http://localhost:<port>/system/console/bundles and wait until all bundles transition into Active state.
5. Navigate to the AEM dashboard once all the bundles are in the Active state. A new tab called Commerce should appear, certifying the successful installation of the CIF Add-on.
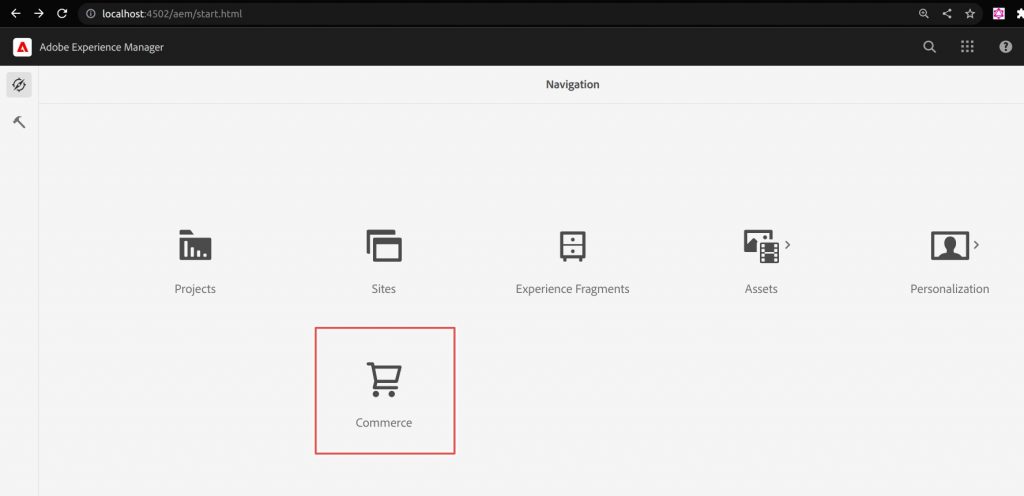 Commerce Tab
Setting up the Publish Instance
Similar to the author instance, the Publish instance setup can be done following the same steps. The only variable part is the file names, so the author becomes published, and the 4502 port becomes 4503. Like for example aem-publish–p4503.jar and cif-cloud-ready-feature-pkg-******-cq-commerce-addon-publishfar.far
Venia Code Deployment
The AEM instances are ready for deployment. The Venia project can be deployed using the following command.
mvn clean install -PautoInstallSinglePackage,classic
CIF Add-on Configuration
In the first blog of this series, we learned that Adobe Commerce has a GraphQL layer. To consume the commerce data, a GraphQL Client needs to be configured. To do so, navigate to the configuration manager, and look out for the “GraphqlClientImpl~venia” configuration. And update the following 2 properties GraphQL Service URL and Allow HTTP communication as shown below; the rest of the other properties will remain the same.
Prior to that, we need to set up a proxy server using the below command to avoid the CORS error in the future. The same proxy URL can be configured in the GraphQL Service URL property.
npx local-cors-proxy --proxyUrl http://localhost --port 3000 --proxyPartial ""
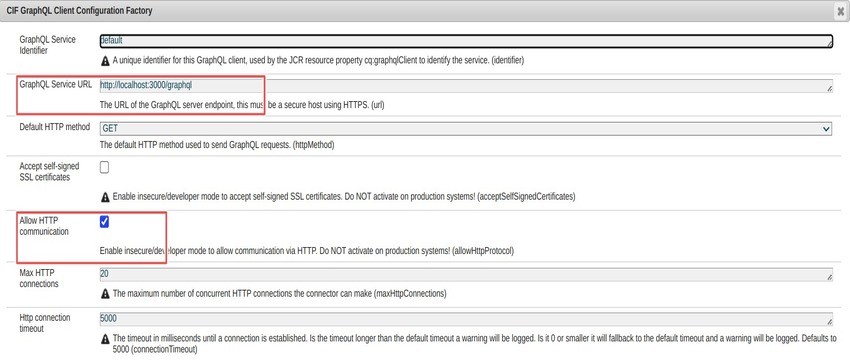
GraphQL Client Configuration
You can use the GraphQL client now; just adjust the CIF configuration based on the details of your Magento store. In order to reach this configuration, go to AEM Tools and select Cloud Services, then click on CIF configuration.
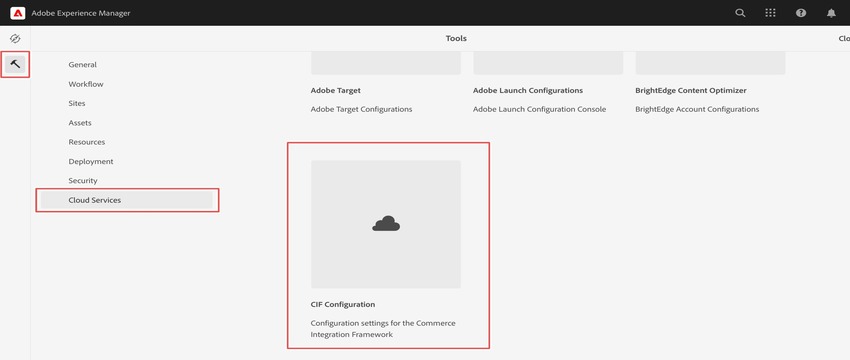
CIF Configuration
After accessing the CIF configuration window, select Venia and then Commerce to access additional options. Finally, choose properties from the top bar.
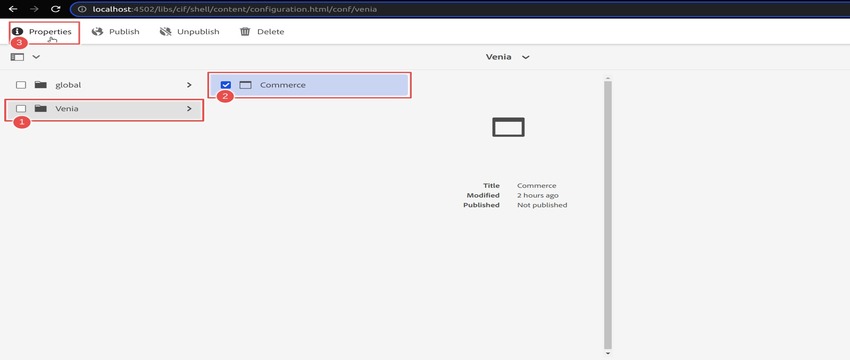 Venia Configuration
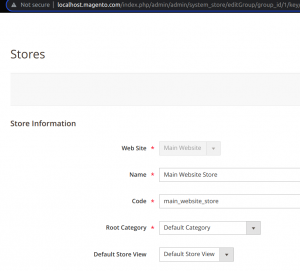
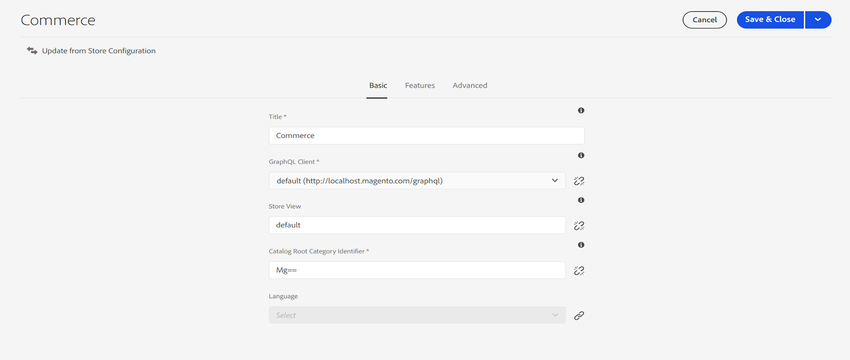 Magento Store Information
To check out the categories and products from the Magento Venia store, return to the Commerce tab on the AEM dashboard, and click on Venia card.
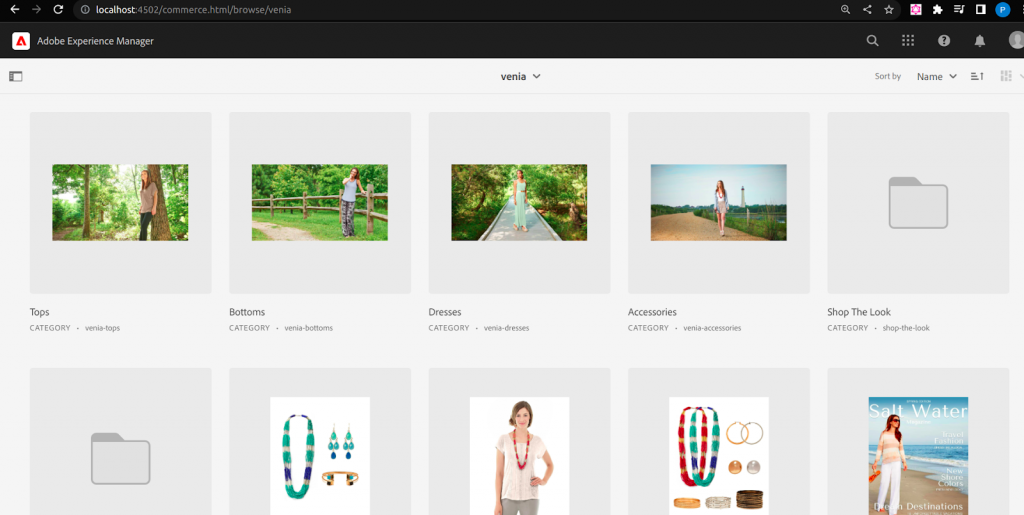
The final appearance of the Venia site.

This completes the configuration of the CIF Add-on.
Conclusion
In this series of blogs, we saw the architecture and features of Adobe’s CIF Add-on in detail. Further, to explore the practical implementation of the add-on, we set up the Adobe Commerce engine. And finally, installed and configured the CIF add-on on our local AEM instances.
With these blogs in your arsenal, you should now be able to integrate Adobe Commerce with the AEM seamlessly.
Stay tuned for our blogs on various other topics.