Today will teach you how to import content into Drupal from a Comma-Separated Values (CSV) file. The most recent version of the Migrate Source CSV module will be used. We’ll demonstrate how to set the source plugin up to read files. We’ll also go through a brand-new function that lets you set the file location using stream wrappers.You can go to https://www.tothenew.com/blog/drupal-data-migration-with-migrate-api/ to gain a basic grasp of Migration API. Let’s get going.
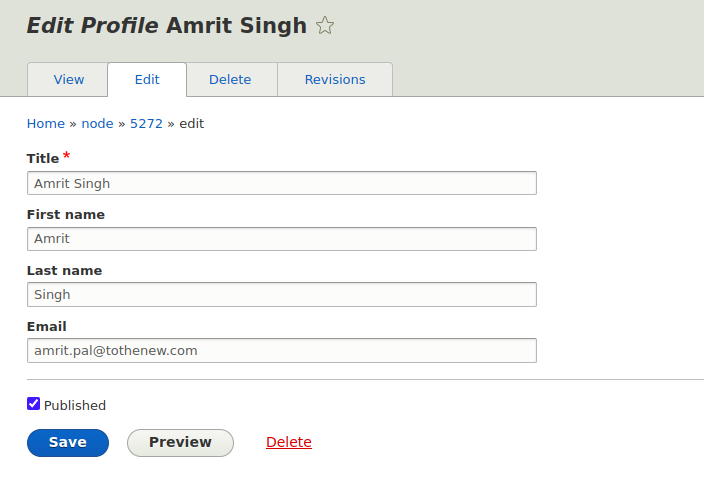
I’ve created a content type called profile for this example, and it contains three fields: first name, last name, and email.
First, Create a custom module called csv_migration
csv_migration.info.yml file
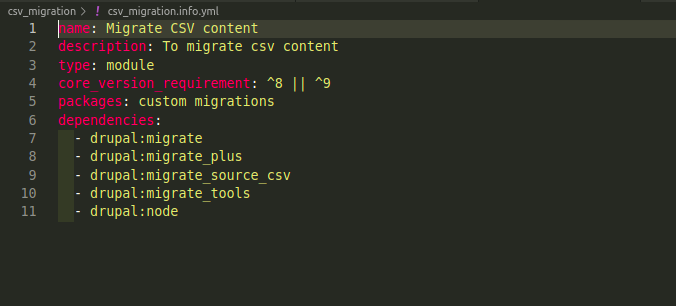
The modules listed in the dependencies should be installed first. Core module migrates and Contrib modules migrate_plus, migrate_file, migrate_tools.
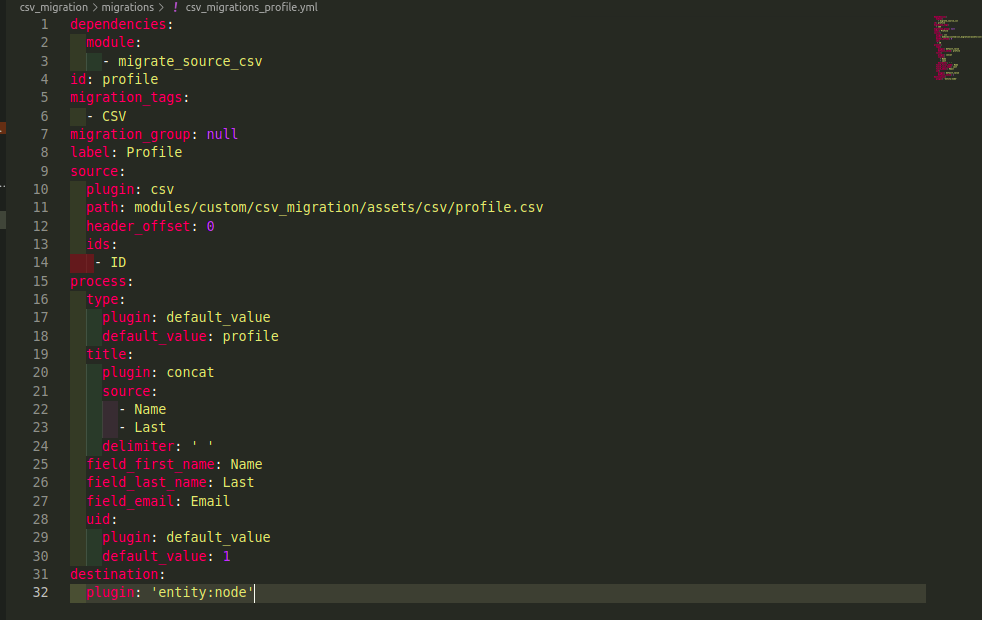
Now, our csv_migrations_profile.yml will go into the migrations folder
Code
Only those crucial components of the CSV migration will be covered today.
We are going to read from CSV files, which is the main difference.
Understanding the source is crucial to any migration project. What characters to use as delimiters, enclosures, and escape characters should all be taken into account while migrating CSV data. For the time being, let’s focus on the CSV file below, whose first row acts as the column headers:
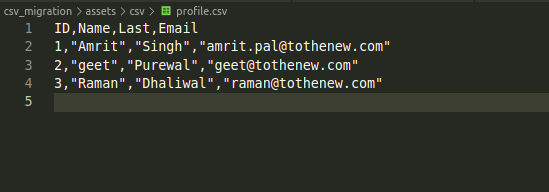
This file will be used in the node migration. The four columns will be used as follows:
- `ID` is the unique identifier for each record in this CSV file.
- `Name` is the First name of a person. This will be used as the node title with combination with Last.
- `Last` is the Last name of a person. This will be used as the node title with combination with Name.
- `Email` is email id of the person.

The plugin’s name is “csv.” After that, specify the ‘path’ to the actual file. The path here is positioned in relation to Drupal’s root. The last step is to specify an array of column names called “ids” that will be used to identify each record uniquely. The ‘ID’ column fulfills that function, as already mentioned. The column names from the CSV file do not all need to be specified. These will be made readily available by the plugin. The CSV source plugin can be set up in this manner in the simplest way.
Location of CSV files
- There are three ways to specify the CSV file location when configuring the ‘path’ configuration.
- Use a path that is relative to the Drupal root. A slash (/) shouldn’t be used to begin the path.
- This strategy is what this demo employs. ‘modules/custom/my_module/csv_files/example.csv’, for instance.
- Use an absolute path that points to the file system location where the CSV is stored. Start the path with a slash (/). ‘/var/www/drupal/modules/custom/my_module/csv_files/example.csv’, for instance.
- Put a stream wrapper to use. The module’s 8.x-3.x branch first included this capability. They are inaccessible to earlier versions.
You have a variety of options for specifying the location of the CSV file when using stream wrappers. For example:
Files that are kept in Drupal’s private, public, and temporary file systems. This makes use of features that are already built into Drupal. ‘public://csv_files/example.csv,’ as an example.
Profiles, modules, and theme-specific files. To use this feature, you can either utilise the System stream wrapper module or apply this core change. ‘module://my_module/csv_files/example.csv,’ for instance.
Distant servers’ files, including RSS feeds.
To obtain this capability, utilise the Remote stream wrapper module. ‘https://tothenew.com/csv-files/example.csv,’ for instance.
CSV source plugin configuration
The source code for the CSV source plugin contains excellent documentation regarding the configuration selections. They are included here for quick reference:
- ‘path’ is necessary. It includes the location of the CSV file. The 8.x-3.x branch introduces support for stream wrappers.
- `ids` is required. Each record is uniquely identified by an array of present column names.
- `header_offset` is optional. The name of each record’s field and the record index to be used as the CSV header. Because the index is zero-based, it defaults to zero (‘0’). If there is no header row in a CSV file, the value should be set to “null.”
- `fields` is optional. It has a hierarchical array of names and labels that can replace a header row. If it is set, it will replace the column names found from “header_offset.”
- `delimiter` is optional. It contains one character used as column delimiter. It defaults to a comma (,). For example, if your file uses tabs as delimiter, you set this configuration to `\t`.
- `enclosure` is optional. It contains one character used to enclose the column values. Defaults to double quotation marks (“).
- `escape` is optional. It has one character in the column values that is used for character escaping. Backslashes (/) are used by default.
Running the migration
Let’s use Drush to execute the migrations using the Migrate Run commands.
drush mim profile or drush migrate:import profile
If the command is run successfully, you should see it in the terminal. With that, migration is successfully completed.
[notice] Processed 3 items (3 created, 0 updated, 0 failed, 0 ignored) – done with ‘profile’
Follow TO THE NEW on social media for more updates.