A virtual private cloud is a virtual network that is logically isolated from other virtual networks in the AWS cloud. One can launch AWS resources in a virtual network that you define and customize it accordingly at the time of vpc creation. Basically, VPC is a virtual network that resembles a network in your own data center, with the benefits of using the scalable infrastructure of AWS.
We will be going through a series of blogs dedicated to Amazon VPC each demonstrating a scenario of VPC. Many a times we need a cloud space to launch web applications that is publicly accessible and scalable too. And this is what scenario 1 accomplishes.
Here we will be focusing more on implementation part, hence you must have some basic understanding of subnets, internet gateways, NAT, security groups, Elastic IP before starting implementation.
Scenario 1 : VPC with a Public Subnet Only
The configuration for this scenario includes a VPC with a single public subnet, and an Internet gateway to enable communication over the Internet. It is recommended to run a single-tier, public-facing web application, such as a blog or a simple website.
Lets implement scenario 1 using the VPC wizard:
1. Create a vpc with single public subnet.
- Login to AWS Management console.
- Go to VPC dashboard.
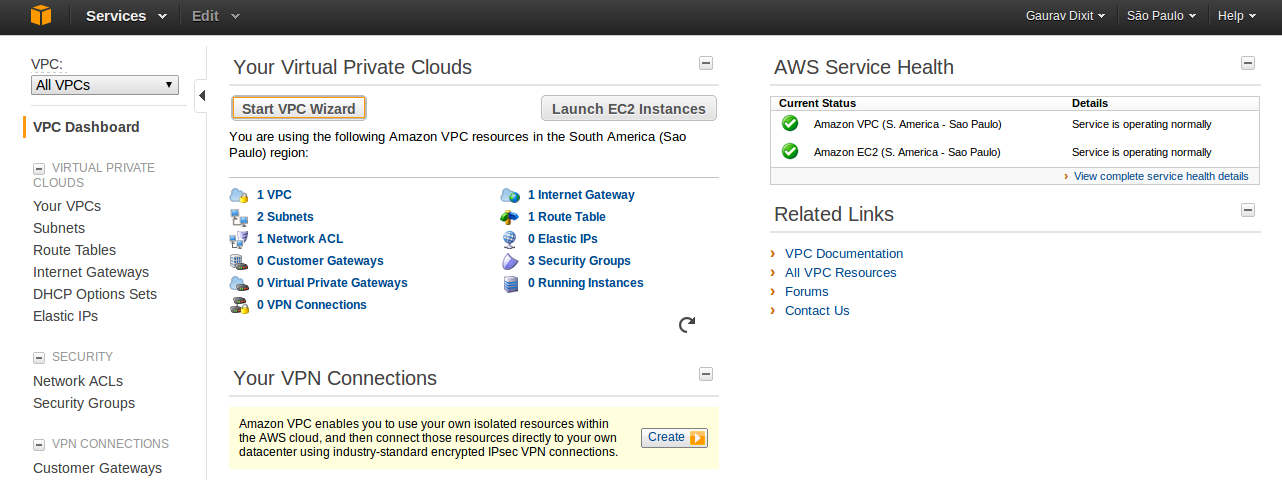
- Click on Start VPC Wizard button.
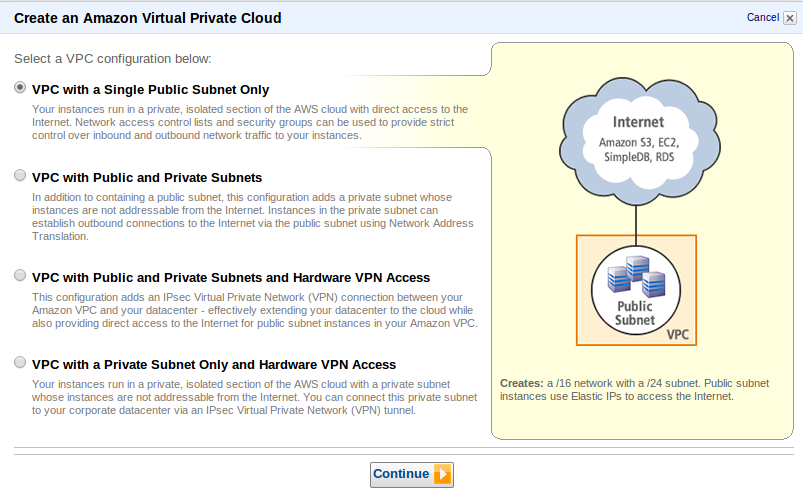
- Select a VPC configuration. Here we selected VPC with a Single Subnet Only as per our scenario 1.
- Click Continue.
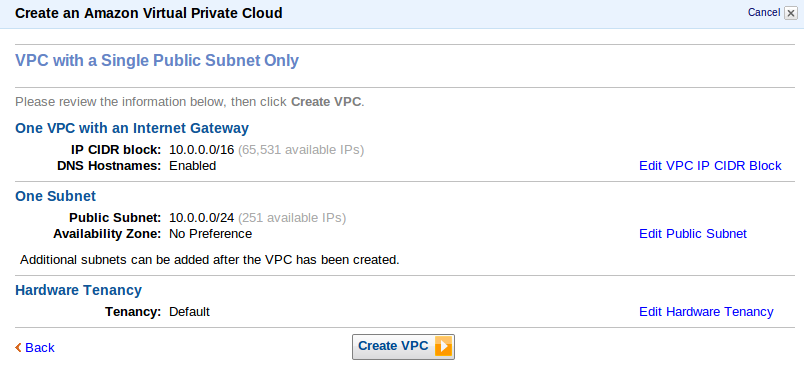
- Now, put in the information about to create a VPC plus its subnets, gateways and the Hardware tendency.Inside VPC with Internet Gateway,IP CIDR block lets you decide number of private IP that will be available for you inside your VPC. We left everything Default here.
- Click Create VPC.
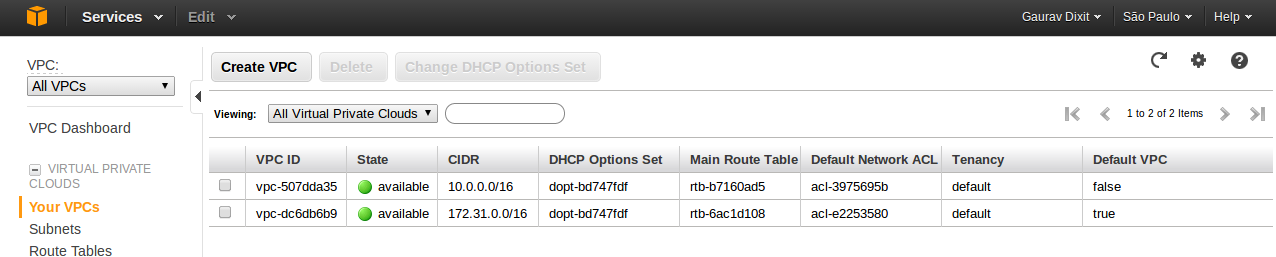
- Your custom( non default) VPC ( VPC ID: vpc-507dda35) will be visible on your VPC panel with value of Default VPC set to False.
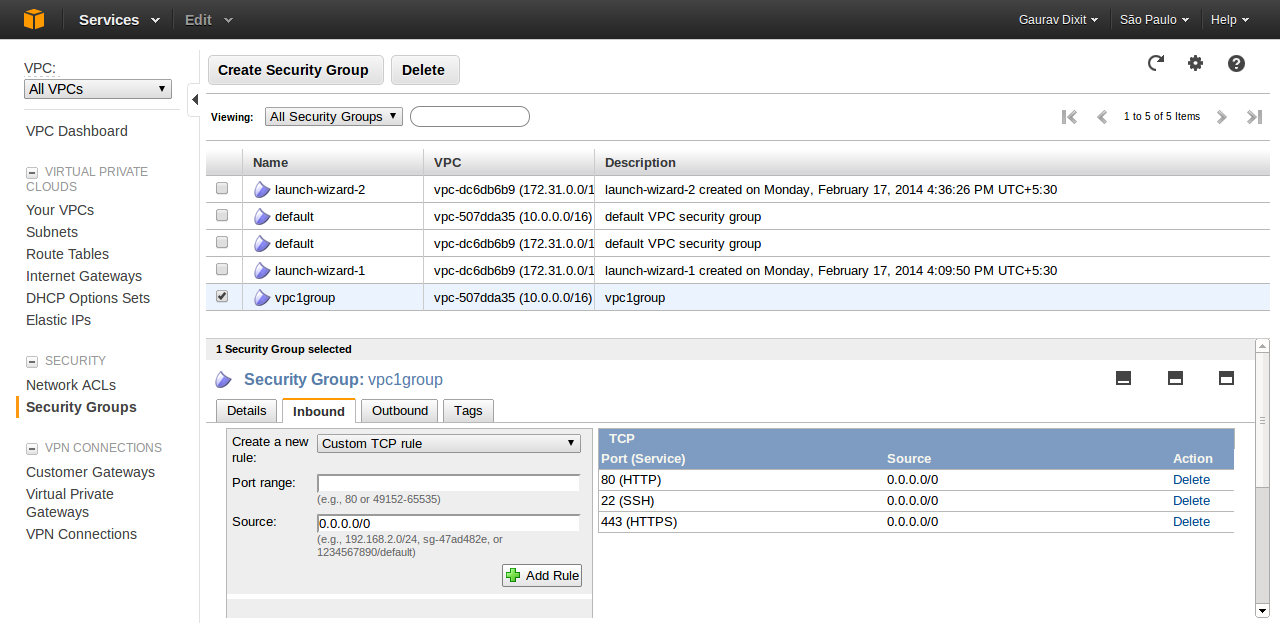
2. Now, create a VPC security group to control inbound and outbound traffic.
- Click on Security Groups (VPC).
- Click on Create Security Group button.
- Fill in the information(Name, Description) and select the VPC ID with which this security group is associated. And click Yes,Create.
- Now add security policies to the group( here vpc1group).
# Note that VPC automatically comes with a default security group. Each EC2 instance that you launch in your VPC is automatically associated with the default security group if you don’t specify a different security group when you launch the instance.
#Another nice detail is that VPC allows you to switch security groups on-the-fly for running instances.
3. Launch an EC2 Instance within VPC.
- Go to EC2 dashboard.
- Click launch Instance.
- Choose a desired AMI. Here we have chosen a community AMI. Click Next.
- Choose Instance Type and click Next.
- Now fill in the information regarding configuration of Instance. For Network, choose your non-default VPC just created.
- Select the checkbox of Public IP to assign a public IP to your Instance. ( An Instance launched in a VPC doesn’t have Public IP by default). Otherwise you can also attach an Elastic IP to your Instance after launch.
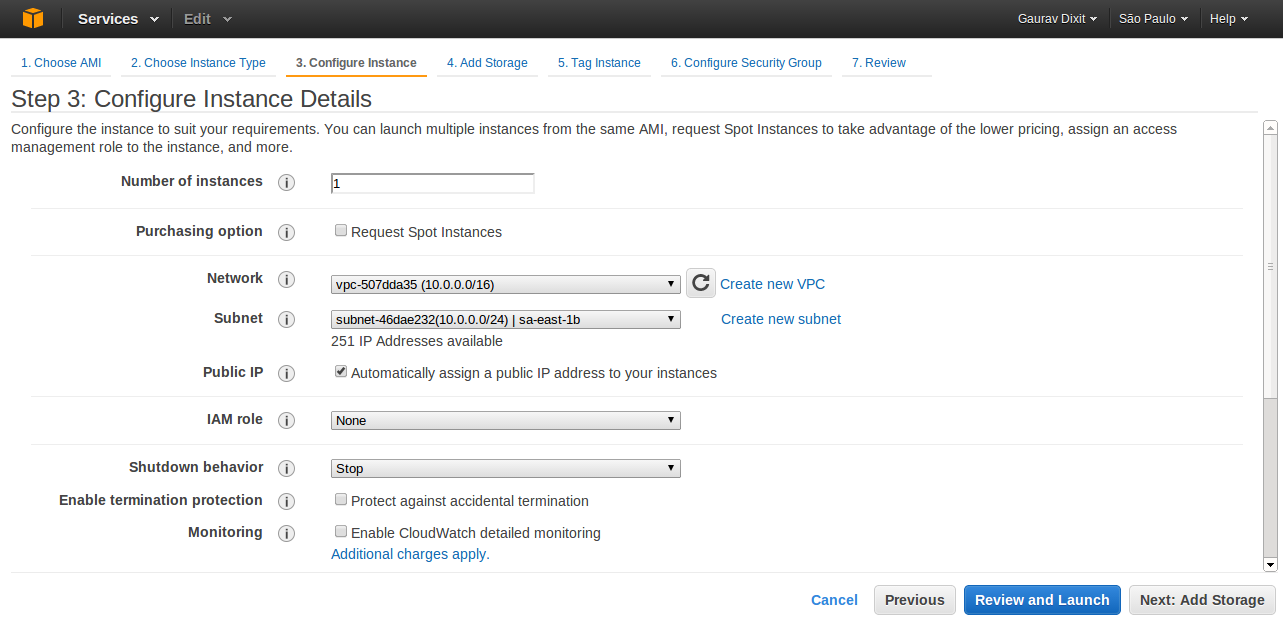
- Click next to Add storage as per requirement of application.
- Click next and fill in some tag values to identify instance.
- Click next and select the security group just created four your non-default VPC.
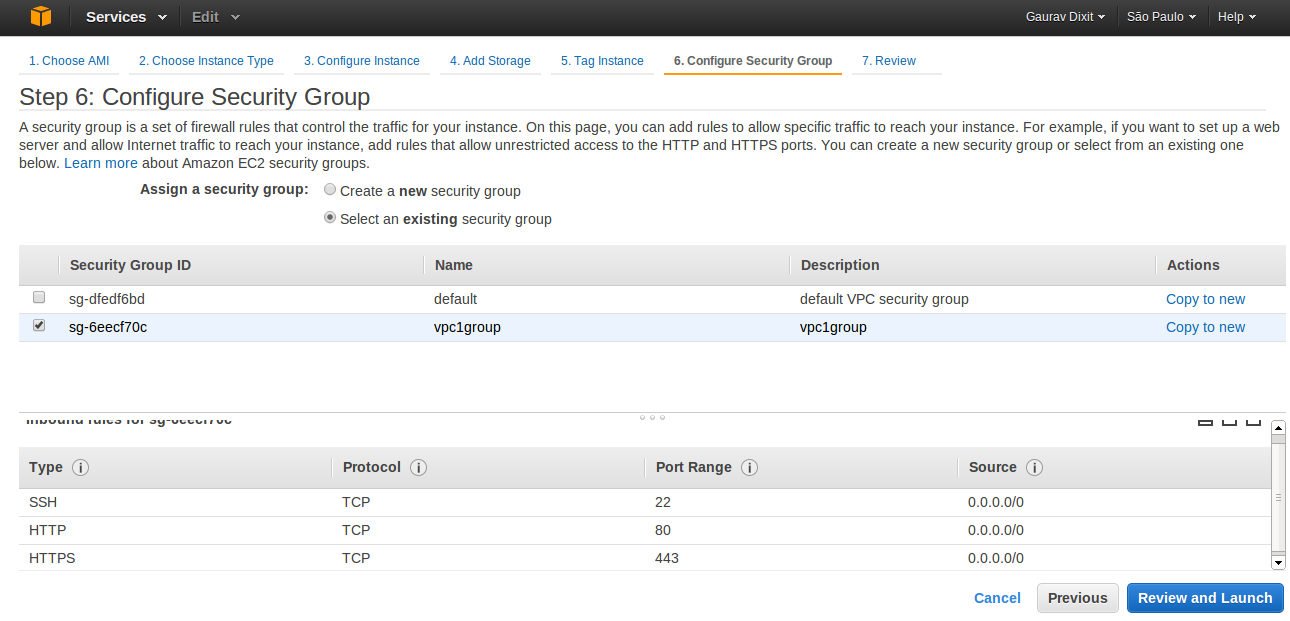
- Click Review and Launch to launch your Instance inside your non-default VPC.
Now this Instance can be accessed over the network ( as per configuration, you can restrict access ).
Three more scenarios are yet to be covered which i shall be covering in my next blogs. So , much more to come. Stay on !!