Introduction
A virtual host refers to the practice of hosting multiple domain names on a single server or multiple servers. It allows a single physical server to serve multiple websites, each with its own domain name and content. Virtual hosting is commonly used in web hosting environments to efficiently utilize server resources and accommodate multiple websites on a single server.
Step 1: Install Apache Web Server on your local machine
Install Apache Web Server on your local machine If you haven’t already, install the Apache web server on
your Ubuntu server:
Step 1:
       sudo apt update
       sudo apt install apache2
       sudo ufw allow 'Apache'
       sudo ufw enable
When you have your server’s IP address, enter it into your browser’s address bar:
http://your_server_ip or http://localhost
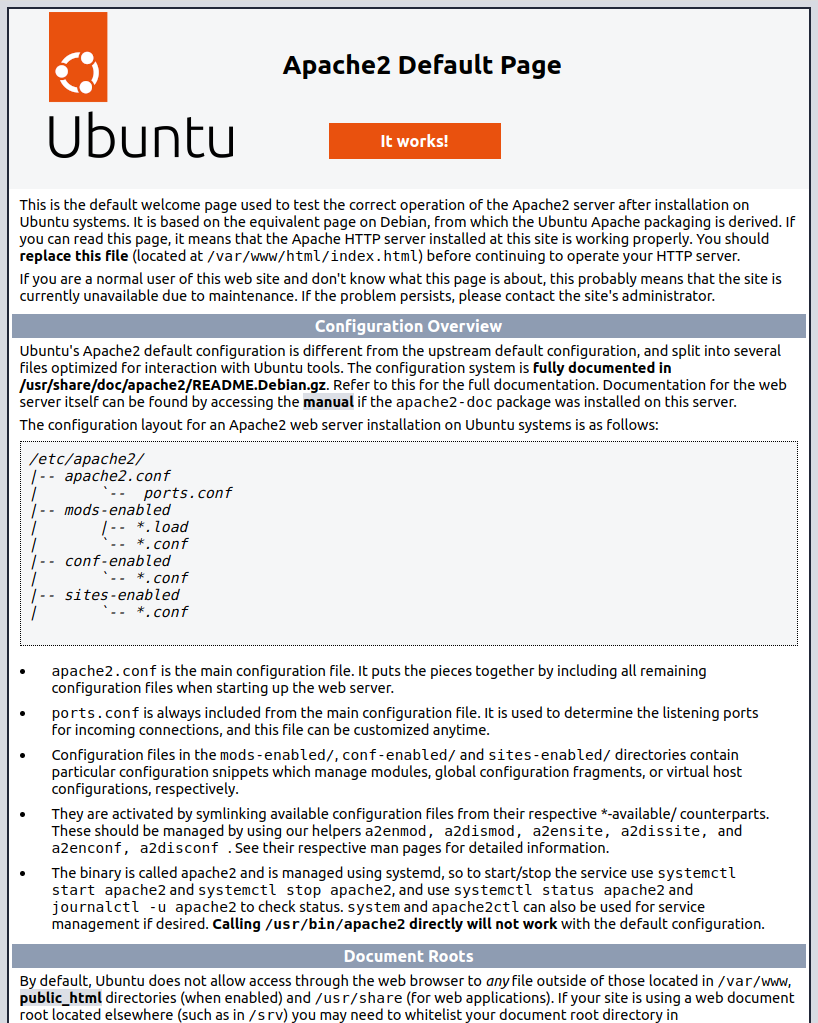
You will see the default Ubuntu 22.04 Apache web page as in the following:
Step 2: Configure Virtual Host
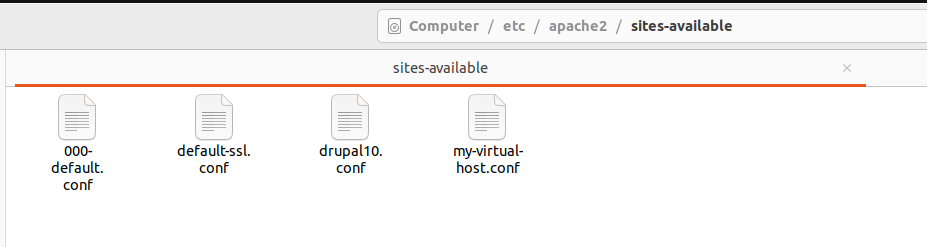
Copy localhost configuration file and paste it on same place then make it a new virtual host configuration
file for your domain using a text editor like VSCODE
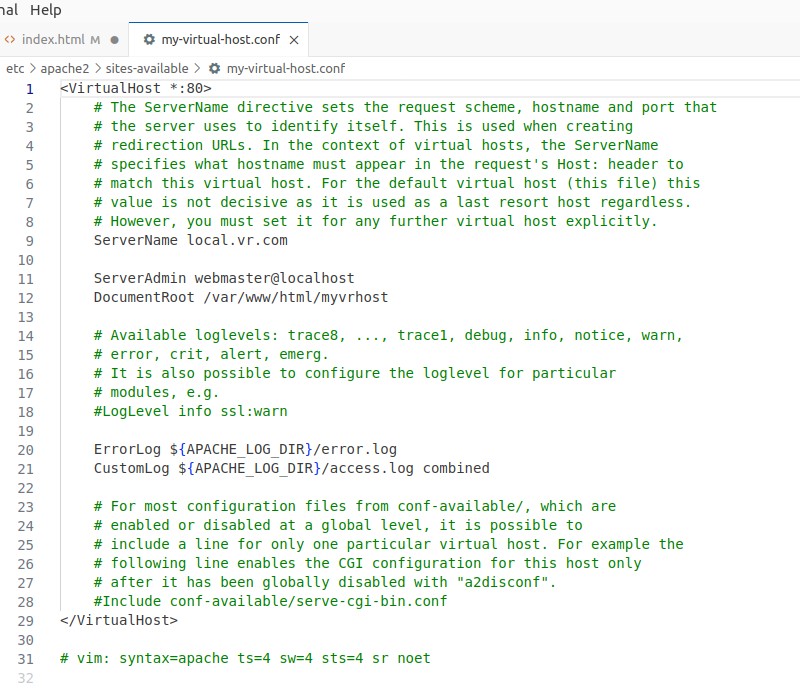
<VirtualHost *:80>

# The ServerName directive sets the request scheme, hostname and port that

# the server uses to identify itself. This is used when creating

# redirection URLs. In the context of virtual hosts, the ServerName

# specifies what hostname must appear in the request's Host: header to

# match this virtual host. For the default virtual host (this file) this

# value is not decisive as it is used as a last resort host regardless.

# However, you must set it for any further virtual host explicitly.

ServerName local.vr.com

ServerAdmin webmaster@localhost

DocumentRoot /var/www/html/myvrhost

# Available loglevels: trace8, ..., trace1, debug, info, notice, warn,

# error, crit, alert, emerg.

# It is also possible to configure the loglevel for particular

# modules, e.g.

#LogLevel info ssl:warn

ErrorLog ${APACHE_LOG_DIR}/error.log

CustomLog ${APACHE_LOG_DIR}/access.log combined

# For most configuration files from conf-available/, which are

# enabled or disabled at a global level, it is possible to

# include a line for only one particular virtual host. For example the

# following line enables the CGI configuration for this host only

# after it has been globally disabled with "a2disconf".

#Include conf-available/serve-cgi-bin.conf

</VirtualHost>

# vim: syntax=apache ts=4 sw=4 sts=4 sr noet
Step 3: Enable the Virtual Host
            sudo a2ensite my-virtual-host.conf
            sudo systemctl restart apache2
Step 4: Configure Hosts File
Open Termianl Crl+Alt+T and run the below command to pen host file
sudo code /etc/hosts
Add a line like this, replacing your_server_ip with the actual IP address and local.vr.com with your domain.
Step 5: Create Directory Structure
For each virtual host, create a directory structure to hold the website’s files.
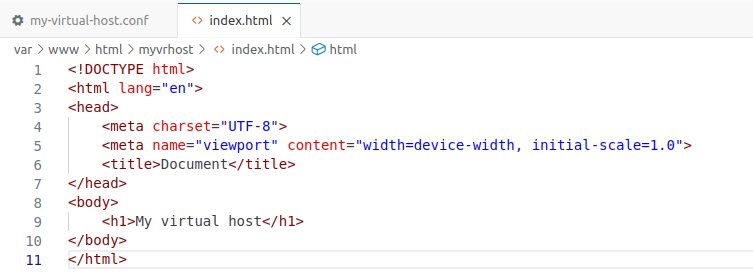
/var/ww/html/myvrhost/index.html

<!DOCTYPE html>

<html lang="en">

<head>

<metacharset="UTF-8">

<metaname="viewport"content="width=device-width, initial-scale=1.0">

<title>Document</title>

</head>

<body>

<h1>My virtual host</h1>

</body>

</html>
Step 6: Verify the Virtual Host
Open a web browser and enter your domain (e.g. http://local.vr.com). You should see your website served by the newly configured virtual host.
Conclusion
This article begins with an introduction to virtual hosts, covering the fundamentals. It then explores various methods of configuring hosts.
Check out our other blog posts for more insights. If you still have any questions, comment and join the discussion.