
Introduction
Customizing your Azure AD sign-in pages, visible when users sign in to your organization’s tenant-specific apps, such as https://outlook.com/tothenew.com, https://passwordreset.microsoftonline.com/?whr=tothenew.com (where tothenew.com should be replaced by the domain used by your tenant/organization) has now become more feasible using the Azure AD Custom Branding option. We will configure the same and see how it works.
Scenario
Logos, images, taglines and phrases, and other information presented to users help ensure consistency and reduce confusion by clearly indicating that ‘this is a legitimate service/notification from my company.’ Thus, Azure AD provides a feature known as Custom Branding to incorporate branding aspects into your application.
Solution Approach
Azure AD provides limited but great options to customize the branding for an organization. The identity and user platform allow us to configure user experience based on organization standards and policies.
Prerequisites
- Access to Azure Account having Azure AD 365/Premium 1/Premium 2 license.
- Global Admin Access to set up the Custom Branding Page.
- Custom Branding Page Details and Logos.
Solution
Creating an Enterprise Application:
To integrate with Azure Active Directory, you will need an App Registration or Enterprise Application created in Azure. For options like single sign-on and custom policies, we are using Enterprise Application. You can also use App Registration as per your application preferences.
Step 1: Go to Enterprise Application
Step 2: Choose from the options for our application, here we are developing our application.
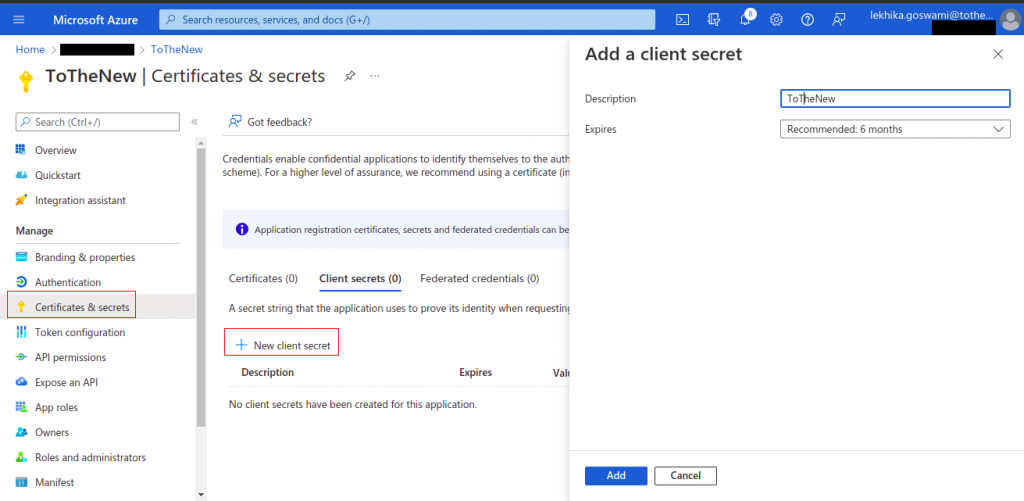
Step 3: For our application to support the authentication, we need to add the Client Secret and Application ID to the code.
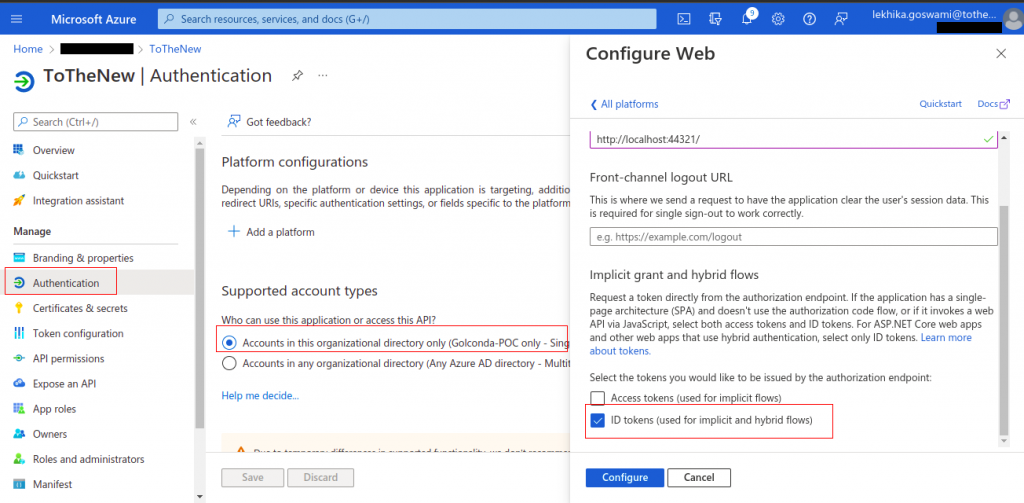
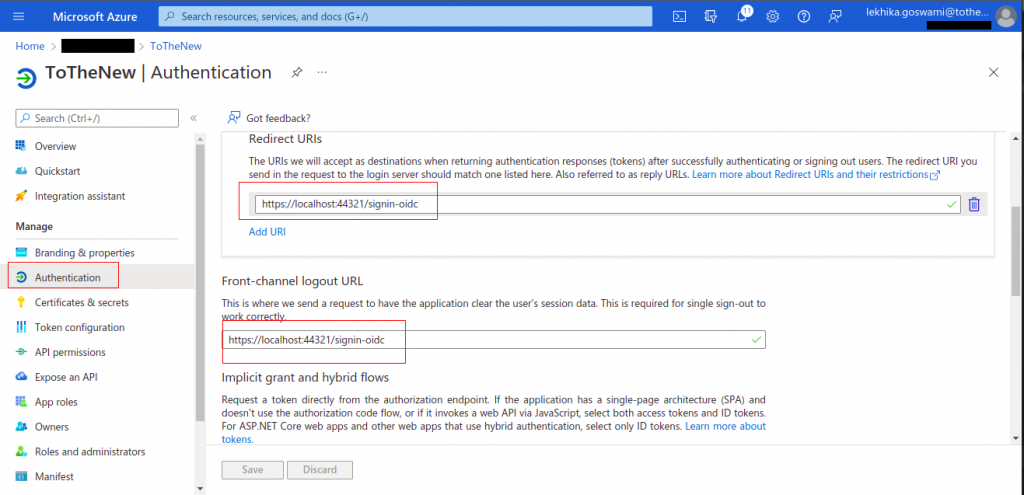
Step 4: Once we have hosted our application, we can add a redirect URI of the application to which the users will redirect for sign-in.
We can choose from multi-tenant or single-tenant access for the application.
Here we are selecting the single-tenant option as we wish our application to be used only by our tenant users.
Once this is done, users can authenticate to our application. Now let’s configure the branding options for our application.
Customize Branding:
Let’s configure the branding options for our application.
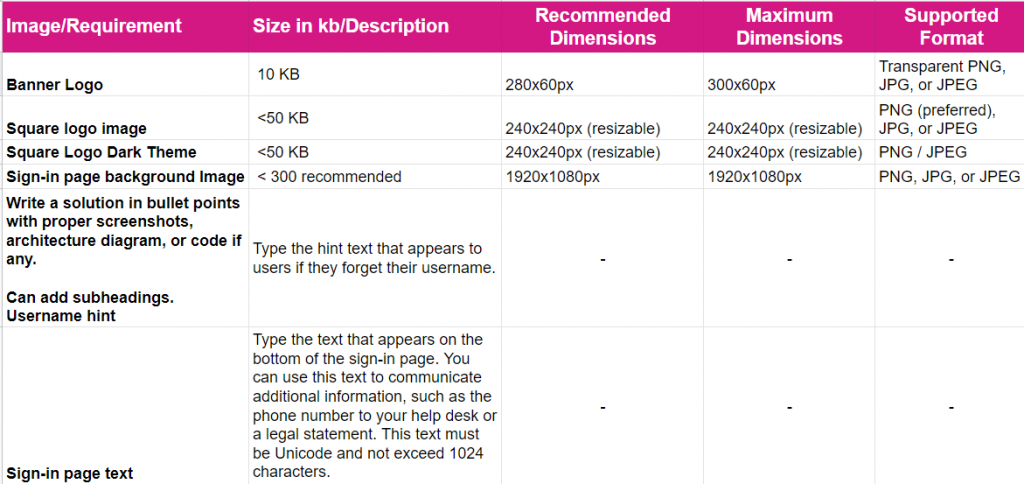
Before moving ahead, confirm that the images (logo, background, square background) you wish to display on the sign-in page are the correct sizes and dimensions. If you don’t take care of this, you will waste your time uploading images, and then ultimately you may find that branding changes are not done. Here are certain specifications −
Steps:
Step 1 − Go to the directory you want to work with.
Step 2 − Click on the ‘Configure’ tab from the top menu.
Step 3 − Click the ‘Customize Branding’ button. The following pop-up will appear.
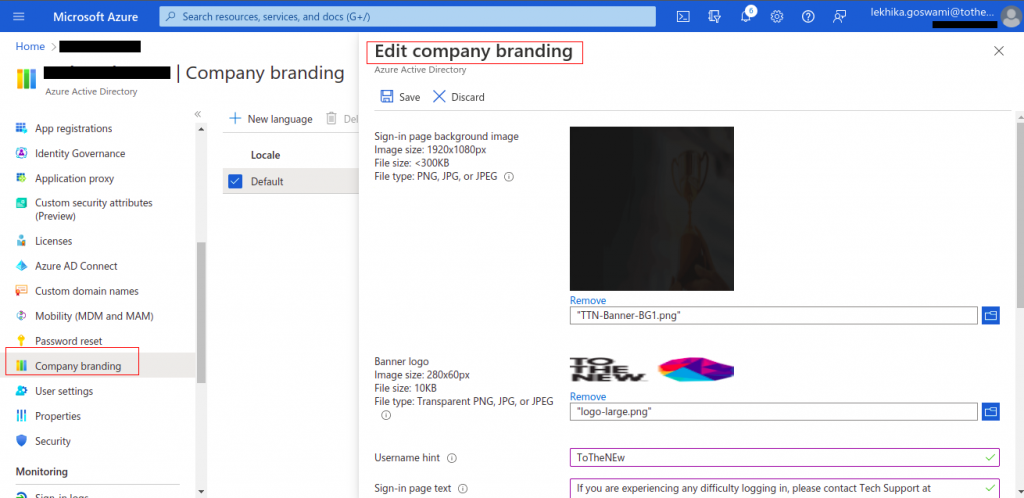
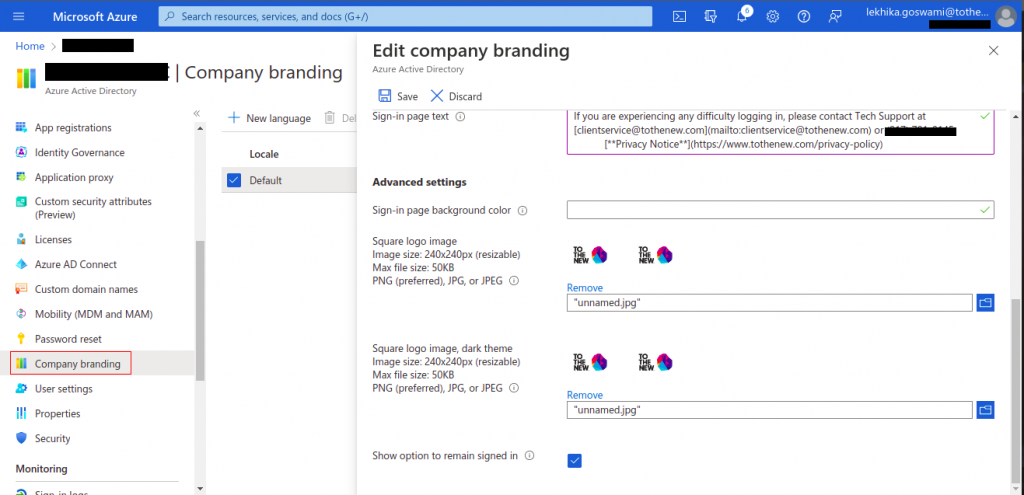
Step 4 − Enter the details and upload the images.
Step 5 − Click Next and enter the other details.
After you are done, look for the notifications at the bottom of the window to ensure that changes are accepted. A notification in the red outline shows that it wasn’t successful in a previous attempt and threw an error. If the changes are not accepted and an error occurs, click the ‘Details’ button to find the cause. Usually, this occurs when the size and dimension of images to be uploaded are not correct.
Custom Links to test the branding:
- https://account.activedirectory.windowsazure.com/proofup.aspx?whr=<domain on which your application is hosted>
- login.microsoftonline.com/?whr=<domain on which your application is hosted>
example:
- https://account.activedirectory.windowsazure.com/proofup.aspx?whr=ToTheNew.com
- login.microsoftonline.com/?whr=ToTheNew.com
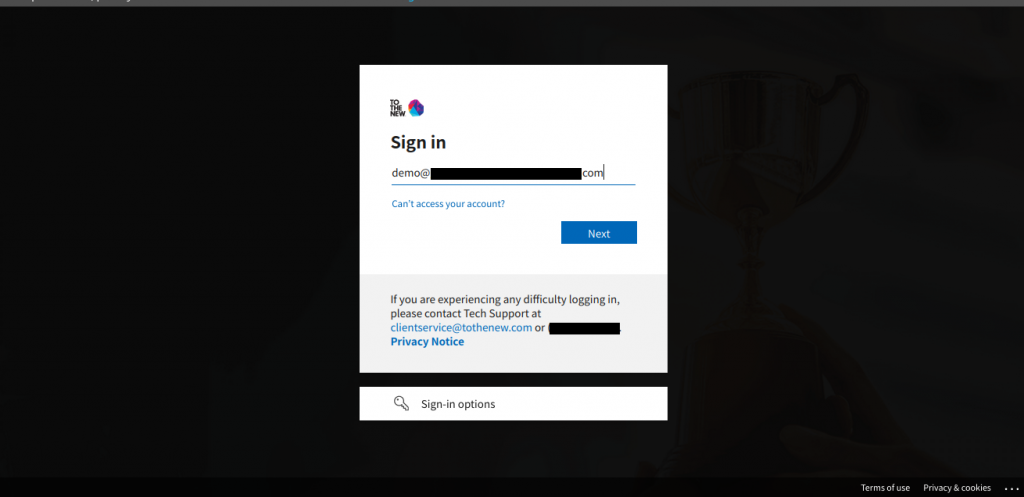
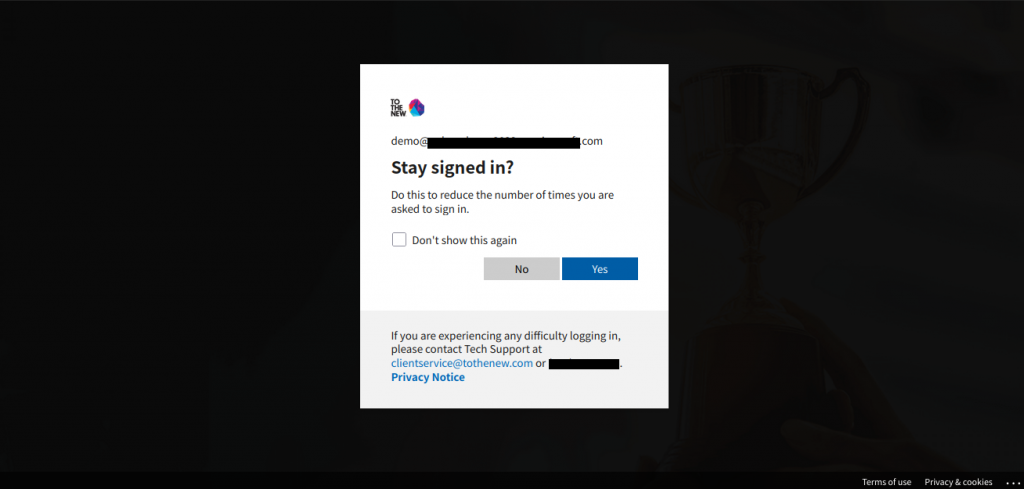
Login with Customized Sign-in Page
When you sign in to your organization’s application, you will see your logo, big illustration image, and sign-in text on that page. For example, let’s sign in to Office 365 using the organization’s account.
Things to Consider
- The domain name should be active.
- It might take up to an hour for changes to appear on the sign-in page.
- To test, choose an ‘in-private’ session of internet explorer (or a corresponding session in another browser where cookies don’t affect your browsing).
Conclusion
This capability helps employees know that they are interacting with specific company resources when performing security actions such as signing in, accessing applications, and changing their passwords. An organization can add the company logo and color schemes to the Sign-in and Access Panel pages, as well as localized versions of the logo for different languages and locales.
References and Links
- https://docs.microsoft.com/en-us/azure/active-directory/fundamentals/customize-branding
- https://www.esecurityplanet.com/products/single-sign-on-solutions/
- https://techcommunity.microsoft.com/t5/core-infrastructure-and-security/the-adventure-continues-custom-branding-in-azure-ad-and-other/ba-p/763690
- https://docs.microsoft.com/en-us/azure/active-directory/authentication/concept-mfa-howitworks
- https://docs.microsoft.com/en-us/azure/active-directory/authentication/concept-authentication-phone-options